
Installing DFU-util
Installing dfu-util
The Particle CLI no longer uses dfu-util to flash devices in DFU mode (blinking yellow) and it is no longer necessary to install it.


This guide explains how to install dfu-util, the utility for programming the flash memory on Particle devices like the Core, Photon, P1 (with USB) and Electron over USB.
It can be used to program both Device OS and application firmware, and save and restore configurations.
Activating DFU mode (blinking yellow)
In order to use dfu-util, your Particle device must be in DFU mode (blinking yellow).
Hold down RESET and MODE/SETUP, release RESET and continue to hold down SETUP while the main status LED blinks magenta until it blinks yellow, then release.
If your device is in a particularly odd and confused state, sometimes you may need to unplug the power, hold down the SETUP/MODE button, and then plug in USB power. Release SETUP/MODE when blinking yellow.
Installation - Windows
The easiest way to install dfu-util under Windows is to use the Particle CLI installer, which installs it automatically.
Seriously, use the installer if you can.
The following instructions will be helpful if you want to install it manually, or you are having trouble getting it to work.
You must download Zadig installer from the Zadig web site.
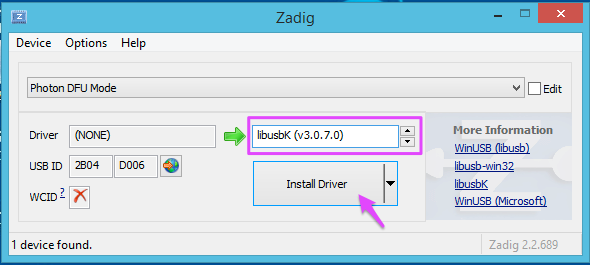
Put the Particle device in DFU mode (blinking yellow) as described above. Then run the Zadig_2.2.exe file (or whatever version you downloaded). The following window should be displayed.
In the item that's highlighted, select libusbK using the tiny arrows. Then click the Install Driver button. For more information about libusbK, see their wiki.
If you're installing for an Electron, note that the Zadig installer will still say Photon DFU Mode. This is normal. You can tell it's actually an Electron because the highlighted box will be D00A for an Electron.
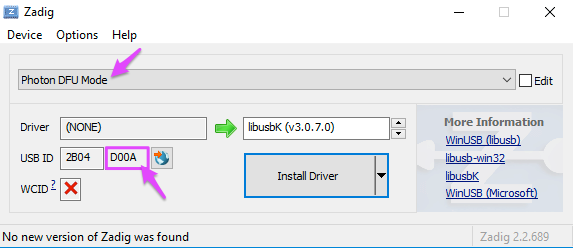
Some common values are:
- D000: Core
- D006: Photon
- D008: P1
- D00A: Electron
Also, you will have to run Zadig for each type of device. In other words, if you have both a Photon and and Electron, you'll need to run it once in DFU mode for each.
Next is installing the actual dfu-util software. If you are unsure of whether you have 32-bit or 64-bit windows, this Microsoft knowledge base article on how to tell whether you have a 32-bit or 64-bit Windows installation may be helpful.
Windows 32-bit
For 32-bit Windows, you will need to download three files from:
http://dfu-util.sourceforge.net/releases/dfu-util-0.8-binaries/win32-mingw32/

You must download:
- dfu-prefix.exe
- dfu-suffix.exe
- dfu-util-static.exe
You do not need to download the other two files.
Windows 64-bit
Download the dfu-util-0.9-win64.zip file from the dfu-util release site.
You will only need these files from it:
- dfu-prefix.exe
- dfu-suffix.exe
- dfu-util-static.exe
Moving the dfu-util files to their own directory
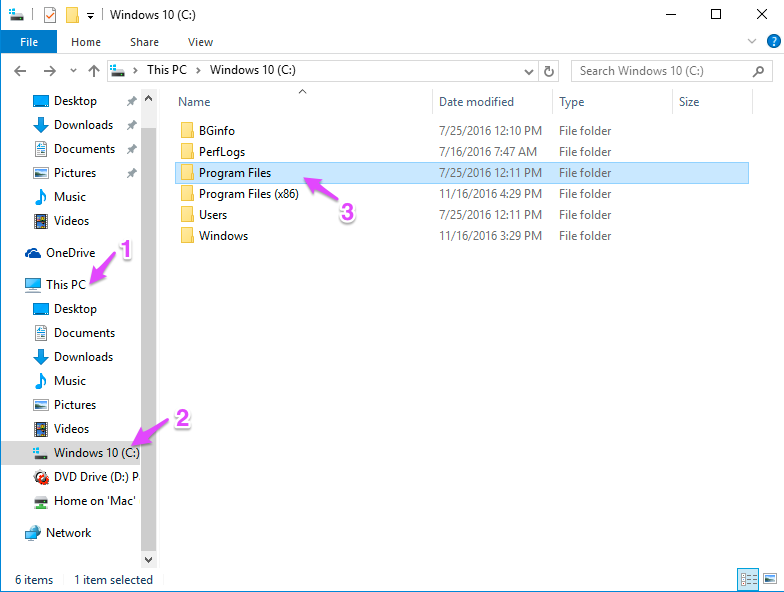
You first need to create a place to save your dfu-util installation. I like to put the files in C:\Program Files\dfu-util. In the Windows File Explorer:
- Select This PC
- Select your C: drive, called Windows 10 (C:) in this example, but your may be different.
- Double click Program Files
Right click on the right side of the window, select New then Folder.
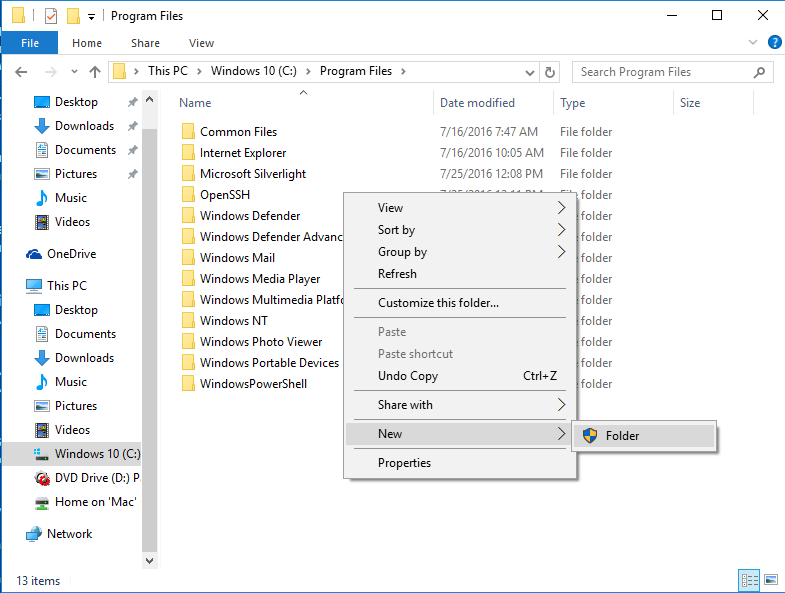
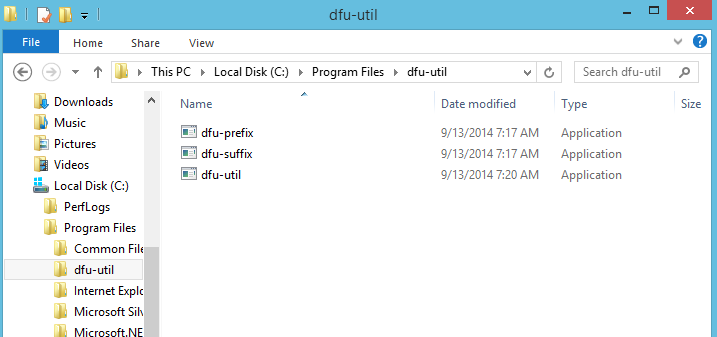
Name the new folder dfu-util. Then moved the files you downloaded into this directory.
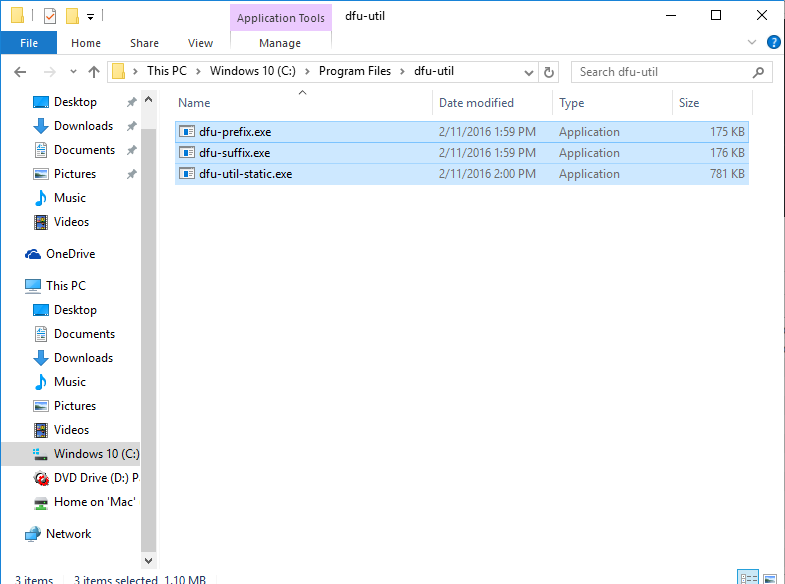
Rename the dfu-util-static.exe file to just dfu-util.exe.
Depending on your settings, the .exe part may not display. In Windows 8, for example, it looks like this:
Editing the path - Windows 10
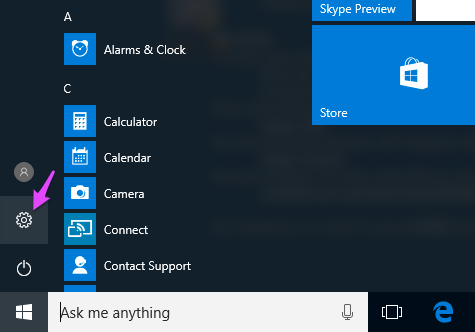
Click on the Windows Start menu, then the Settings (gear icon).
In the Windows 10 Settings window, type environment into the box at the top and select Edit the system environment variables.

Click the Environment Variables button at the bottom of the page.
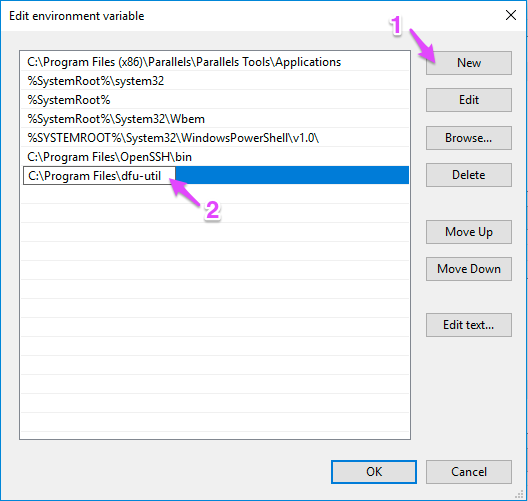
In the Environment Variables window, select Path in the bottom list (System variables) and click Edit.

In the Edit environment variable window, click New then enter a new row in the table, C:\Program Files\dfu-util.
After editing the system path environment variable you'll need to restart the computer.
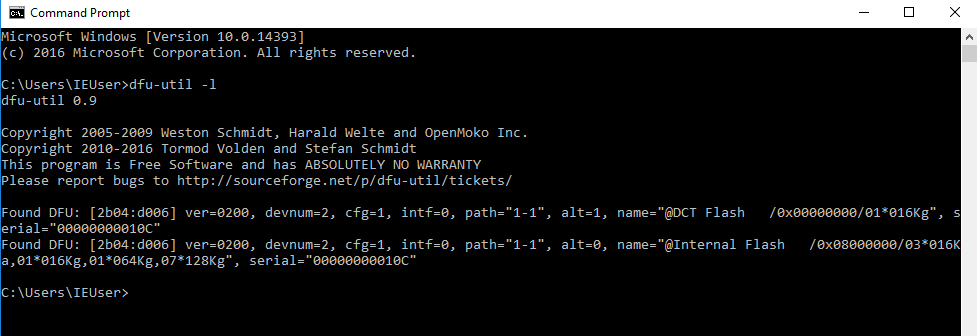
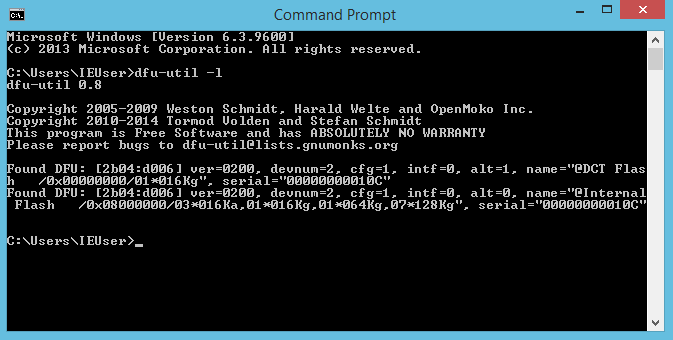
To test it, open a command prompt window and enter the command:
dfu-util -l
The result should look something like this:
Editing the path - Windows 7 and 8
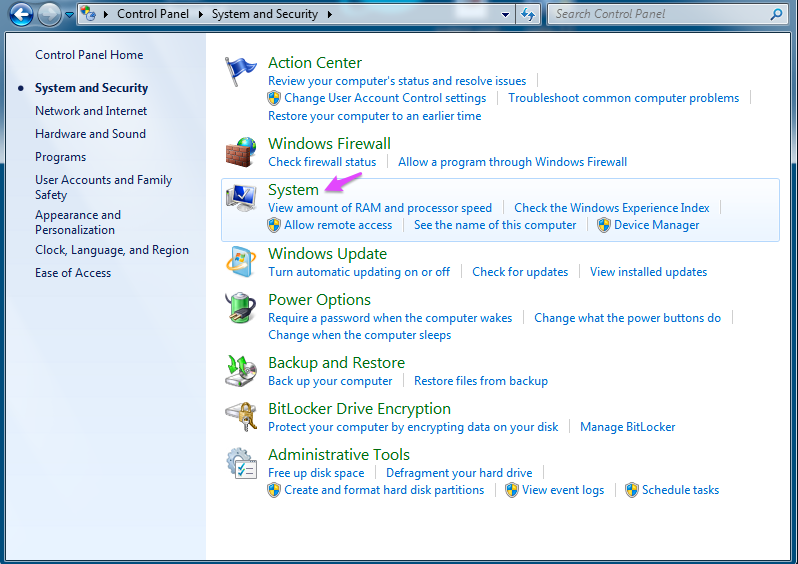
You need to open the Control Panel.
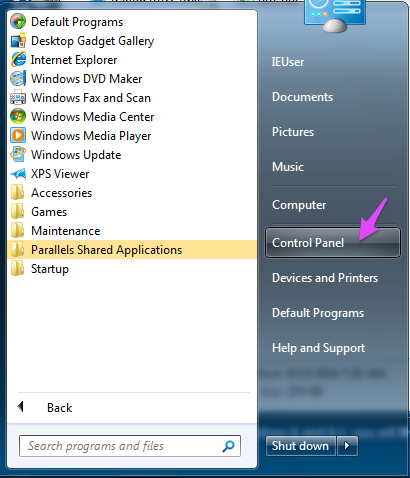
And then click on System and Security.
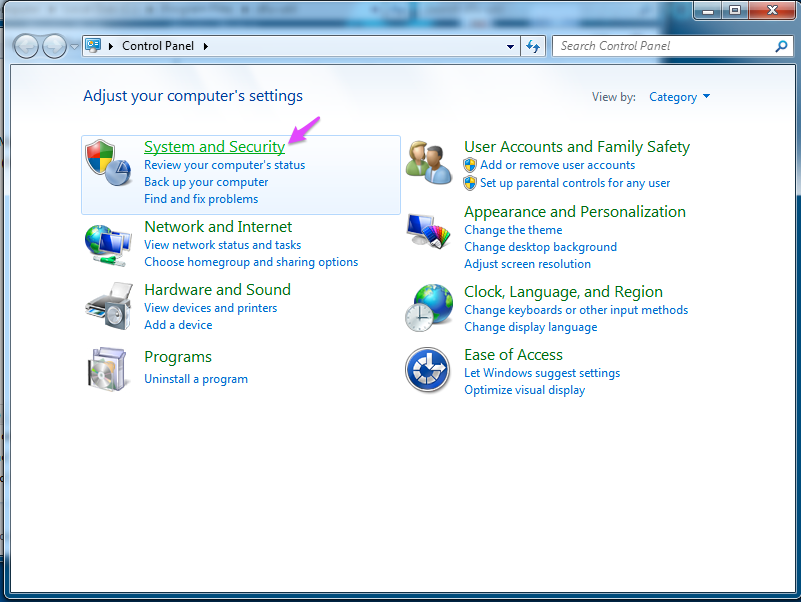
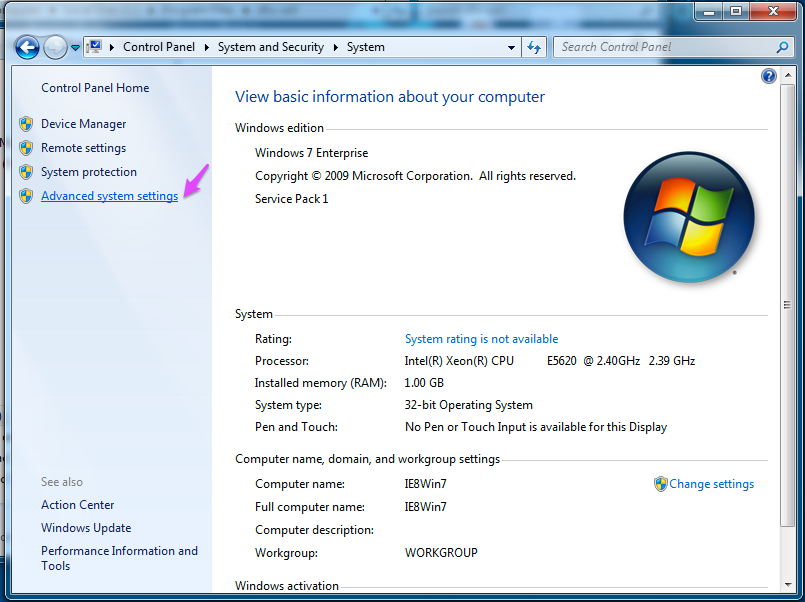
Then click System.
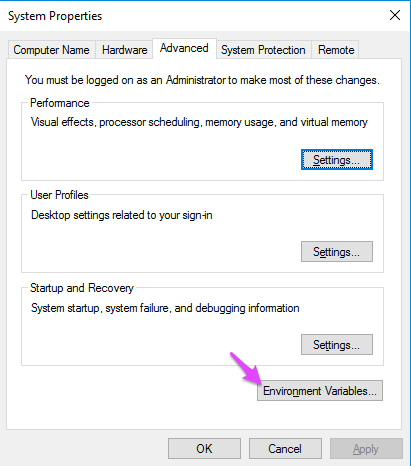
Then click on the Advanced System Settings link on the left side of the window.
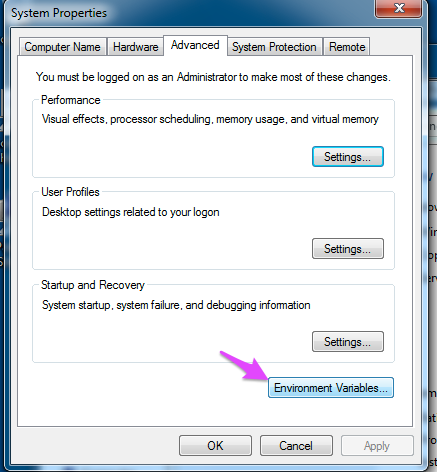
Then click on Environment Variables...
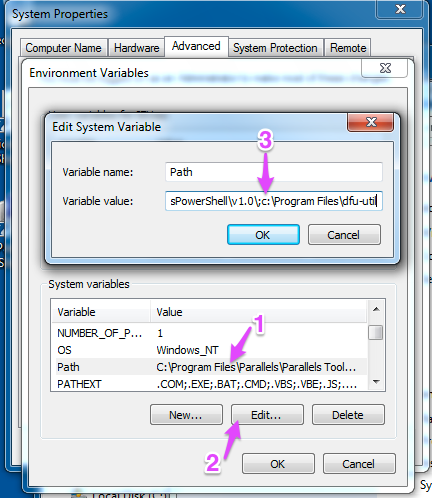
Click on Path in the bottom list (System variables) and click Edit.
Finally, position the cursor at the end of the box and add to the end:
;C:\Program Files\dfu-util
There must be a semicolon separating the new item from the previous last item, and then the path to the directory we just created.
After editing the system path environment variable you'll need to restart the computer or log out and log back in.
To test it, open a command prompt window and enter the command:
dfu-util -l
It should look something like this:
Windows - Debugging drivers
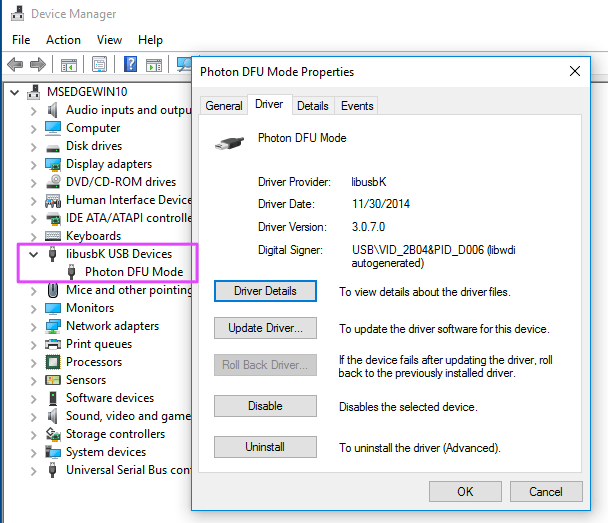
There are two separate device drivers in Windows, depending on whether the Particle device is in DFU or regular operating mode (or listening mode).
When in DFU mode, the Device Manager looks like this: (Note that it says Photon DFU Mode for all device types, including Electrons; this is normal.)
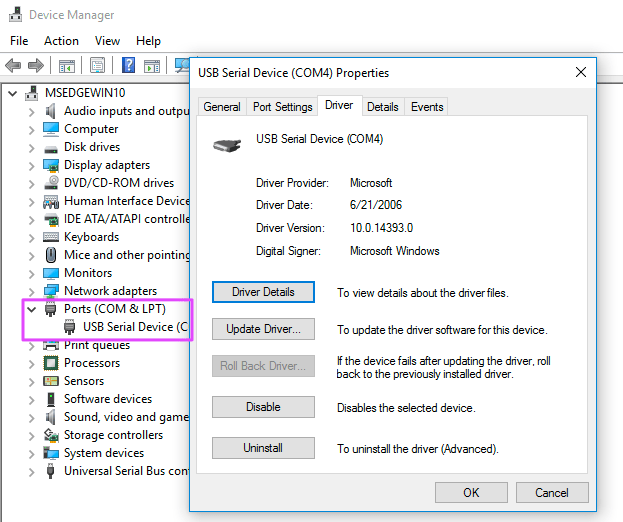
And when in normal operating mode or listening mode (blinking blue), the Device Manager looks like this:
Installation - Mac
Mac - Using homebrew
If you have homebrew installed, it's as simple as running:
brew install dfu-util
The Mac OS CLI Installer tries to install dfu-util if you have homebrew installed.
If you have neither homebrew nor MacPorts installed, I recommend installing homebrew as the easiest way to install dfu-util. Just follow the instructions on the homebrew site to install it first.
One thing about homebrew: it is designed to run without requiring superuser privileges (su). If you get a permission denied error, it's probably because your installation has incorrect permissions. You should stop and fix that first, because all sorts of strange things will continue to happen until you fix it. This community forum post has more details on how to fix permission problems with homebrew.
Mac - Using MacPorts
If you use MacPorts you can install it using:
port install libusb dfu-util
Installation - Linux
Most Linux installations have packages for dfu-util already.
If you have Ubuntu, the Linux CLI Installer will try to install dfu-util through apt-get.
Here are the manual install commands for some popular distributions.
Ubuntu and Debian:
sudo apt-get install dfu-util
Fedora:
sudo yum install dfu-util
Arch:
sudo pacman -Sy dfu-util
You will also want to add a udev rule. This allows dfu-util to work without requiring sudo, which is convenient, and also necessary when using certain CLI and local build commands.
Download the 50-particle.rules file, then copy it to /etc/udev/rules.d.
sudo cp 50-particle.rules /etc/udev/rules.d/
You need to unplug and replug your device after this.
Using dfu-util
A good command to test dfu-util is the -l (list) command. For a Photon, it returns something like this:
$ dfu-util -l
dfu-util 0.9

Copyright 2005-2009 Weston Schmidt, Harald Welte and OpenMoko Inc.
Copyright 2010-2016 Tormod Volden and Stefan Schmidt
This program is Free Software and has ABSOLUTELY NO WARRANTY
Please report bugs to http://sourceforge.net/p/dfu-util/tickets/

Deducing device DFU version from functional descriptor length
Found DFU: [2b04:d006] ver=0200, devnum=18, cfg=1, intf=0, path="253-1.1.6", alt=1, name="@DCT Flash   /0x00000000/01*016Kg", serial="00000000010C"
Found DFU: [2b04:d006] ver=0200, devnum=18, cfg=1, intf=0, path="253-1.1.6", alt=0, name="@Internal Flash   /0x08000000/03*016Ka,01*016Kg,01*064Kg,07*128Kg", serial="00000000010C"
And for an Electron:
$ dfu-util -l
dfu-util 0.9

Copyright 2005-2009 Weston Schmidt, Harald Welte and OpenMoko Inc.
Copyright 2010-2016 Tormod Volden and Stefan Schmidt
This program is Free Software and has ABSOLUTELY NO WARRANTY
Please report bugs to http://sourceforge.net/p/dfu-util/tickets/

Deducing device DFU version from functional descriptor length
Found DFU: [2b04:d00a] ver=0200, devnum=18, cfg=1, intf=0, path="253-1.1.6", alt=1, name="@DCT Flash   /0x00000000/01*016Kg", serial="00000000010C"
Found DFU: [2b04:d00a] ver=0200, devnum=18, cfg=1, intf=0, path="253-1.1.6", alt=0, name="@Internal Flash   /0x08000000/03*016Ka,01*016Kg,01*064Kg,07*128Kg", serial="00000000010C"
They're nearly identical but you can tell by their USB IDs:
- [2b04:d000] Core
- [2b04:d006] Photon
- [2b04:d008] P1
- [2b04:d00a] Electron
Updating Device OS versions with dfu-util
Normally it's easier to use the Particle CLI, which calls dfu-util to do the actual work. For example, for the Photon you might use:
particle flash --usb system-part1-0.5.3-photon.bin
particle flash --usb system-part2-0.5.3-photon.bin
This internally will use dfu-util with options like:
dfu-util -d 2b04:d006 -a 0 -s 0x08020000 -D system-part1-0.4.9-photon.bin
dfu-util -d 2b04:d006 -a 0 -s 0x08060000:leave -D system-part2-0.4.9-photon.bin
Note the addresses are different for the Electron; you should refer to the release notesto find the addresses to use for your device and Device OS version.
You will often see this warning in the output from dfu-util. It's normal:
dfu-util: Invalid DFU suffix signature
dfu-util: A valid DFU suffix will be required in a future dfu-util release!!!
Saving and restoring device private keys
Saving your device private and public keys is useful if you're going to completely erase the configuration. If you don't do this, new keys can be generated but you'll need to update the cloud using particle keys doctor.
Saving keys. Replace d006 with the appropriate value, such as d00a for an Electron:
dfu-util -d 2b04:d006 -a 1 -s 34:1600 -U keys.bin
Restoring keys:
dfu-util -d 2b04:d006 -a 1 -s 34 -D keys.bin