
Lab 3 - Working with BLE
This page is no longer maintained and is provided for historical reference only
| Project Goal | Learn how to use BLE features on Gen3 devices. |
|---|---|
| What you’ll learn | How to configure BLE for broadcasting device data; Using WebBLE to connect to and consume data from Particle devices. |
| Tools you’ll need | An Argon, the Particle Mobile App, A Grove Shield, A Grove Chainable LED |
| Time needed to complete | 30 minutes |
In this lab, we'll explore using BLE to advertise data from your device. Specifically, we'll use BLE to advertise the uptime, Wi-Fi signal strength, and free memory on your device, which we'll then read from a browser using Web BLE and Chrome.
Did you come prepared?
Make sure you have completed all the prerequisites before advancing beyond this point.
Using Bluetooth with Particle devices
Let's explore using Bluetooth with Particle Devices.
- To use Bluetooth with a third generation Particle device, you'll need to be running Device OS version 1.3.0 or greater. To set this in Workbench, open the command palette (keyboard shortcut: SHIFT + CMD/CTRL + P), select the
Configure Project for Deviceoption, and select versiondeviceOS@1.3.0or newer. - Next, you'll want to install a new library to help with getting power and battery info from your device. Open the command palette, select the
Install Librarycommand and enterDiagnosticsHelperRKinto the textbox. Hit enter and the library will be installed. - At the top of your project, add an include for the DiagnosticsHelper library.
#include "DiagnosticsHelperRK.h" - Now, let's turn on threading in the app, using the
SYSTEM_THREADcommand below. This opt-in change will allow your user firmware and Device OS to run on separate threads, which can speed things up when you're doing cloud publishes and local operations like Bluetooth. Note: be sure to place the following line near the top of your program, outside of thesetupandloopfunctions.#ifndef SYSTEM_VERSION_v620 SYSTEM_THREAD(ENABLED); // System thread defaults to on in 6.2.0 and later and this line is not required #endif - Next, add some global variables to handle timing for updating the device state values outside of the
setupandloopfunctions.const unsigned long UPDATE_INTERVAL = 2000; unsigned long lastUpdate = 0; Now, add a UUID for the service, and three characteristic objects to represent uptime, signal strength, and free memory.
The service UUID is arbitrary and you should change it from the default below using a UUID generator like the one here.
Keep track of the UUID you create here because you'll need it in the next section as well. The Service UUIDs should remain unchanged.// Private battery and power service UUID const BleUuid serviceUuid("5c1b9a0d-b5be-4a40-8f7a-66b36d0a5176"); // CHANGE ME BleCharacteristic uptimeCharacteristic("uptime", BleCharacteristicProperty::NOTIFY, BleUuid("fdcf4a3f-3fed-4ed2-84e6-04bbb9ae04d4"), serviceUuid); BleCharacteristic signalStrengthCharacteristic("strength", BleCharacteristicProperty::NOTIFY, BleUuid("cc97c20c-5822-4800-ade5-1f661d2133ee"), serviceUuid); BleCharacteristic freeMemoryCharacteristic("freeMemory", BleCharacteristicProperty::NOTIFY, BleUuid("d2b26bf3-9792-42fc-9e8a-41f6107df04c"), serviceUuid);Next, create a function to configure and setup BLE advertising from your device. This snippet will add the three characteristics you defined above, as well as the service UUID you specified, and will advertise itself as a connectable device.
void configureBLE() { BLE.addCharacteristic(uptimeCharacteristic); BLE.addCharacteristic(signalStrengthCharacteristic); BLE.addCharacteristic(freeMemoryCharacteristic); BleAdvertisingData advData; // Advertise our private service only advData.appendServiceUUID(serviceUuid); // Continuously advertise when not connected BLE.advertise(&advData); }- At the end of your
setupfunction, call the function you just created.configureBLE();
Refactoring out the blocking delay
Next, let's modify the loop function. You'll start by refactoring our firmware to remove the delay in the loop. While the delay approach is common when getting started with creating embedded applications, it's a blocking operation. This means that any calls you make to the device during a delay may timeout before being received.
One common way to write periodic code without using delay is to use the built-in millis() function and keep track of the elapsed time between the last time you performed an operation (like a temp check) and the wait time between operations.
- First, let's add some global variables to hold the last check time and an interval. Add the following to the top of your project, outside of the
setupandloop.const unsigned long UPDATE_INTERVAL = 2000; unsigned long lastUpdate = 0; - Now, in the
loop, add a local variable to hold the current time elapsed. Themillis()function returns the number of milliseconds that have elapsed since your device began running the current program.unsigned long currentMillis = millis(); Next, remove the
delayat the end of your loop function. Then, wrap the rest of the code with an if statement to see if theUPDATE_INTERVALtime has elapsed.
Make sure you also update thelastUpdatevariable to the currentmillistime or thisifstatement will never evaluate totrueafter the first time it runs.if (currentMillis - lastUpdate >= UPDATE_INTERVAL) { lastUpdate = millis(); /* rest of Loop code here */ }Your
loopshould now look like this:void loop() { unsigned long currentMillis = millis(); if (currentMillis - lastUpdate >= UPDATE_INTERVAL) { lastUpdate = millis(); temp = (int)dht.getTempFarenheit(); humidity = (int)dht.getHumidity(); Serial.printlnf("Temp: %f", temp); Serial.printlnf("Humidity: %f", humidity); double lightAnalogVal = analogRead(A0); currentLightLevel = map(lightAnalogVal, 0.0, 4095.0, 0.0, 100.0); if (currentLightLevel > 50) { Particle.publish("light-meter/level", String(currentLightLevel), PRIVATE); } } }Now, let's add our BLE logic to the
loop, after thecurrentLightLevelif statement. In this code, you'll check to see if another device (a peripheral) is connected to our Argon.
If so, you'll use the diagnostics library to get the device uptime, signal strength, and free memory, and set those values to our characteristics, so the connected client can read them.if (BLE.connected()) { uint8_t uptime = (uint8_t)DiagnosticsHelper::getValue(DIAG_ID_SYSTEM_UPTIME); uptimeCharacteristic.setValue(uptime); uint8_t signalStrength = (uint8_t)(DiagnosticsHelper::getValue(DIAG_ID_NETWORK_SIGNAL_STRENGTH) >> 8); signalStrengthCharacteristic.setValue(signalStrength); int32_t usedRAM = DiagnosticsHelper::getValue(DIAG_ID_SYSTEM_USED_RAM); int32_t totalRAM = DiagnosticsHelper::getValue(DIAG_ID_SYSTEM_TOTAL_RAM); int32_t freeMem = (totalRAM - usedRAM); freeMemoryCharacteristic.setValue(freeMem); }- And that's all you need on the Argon side. Flash the latest firmware to your device and move on to the next step!
Viewing Bluetooth data with Web BLE on Chrome
There are a number of methods by which you can connect to your BLE-powered Argon.
For example, you could use a mobile app (like Bluefruit from Adafruit), or another Particle 3rd Gen device. Or, you could use a browser that supports Web BLE, like Chrome, which you will do in this section.
NOTE:
At the time this lab ws created, Chrome is the only desktop browser that supports Web BLE, so you'll need to have that browser installed to continue.
- Clone the demo web app for this project to your machine using a terminal window
$ git clone https://github.com/bsatrom/particle-web-ble - Open the project in your editor of choice, and modify the following snippet in the
src/scripts/ble.jsfile to match the Service UUID you specified in your Argon code above.
This code scans for available devices that match a specific UUID, so if you changed it, you should only see your device when running the app.const device = await navigator.bluetooth.requestDevice({ filters: [{ services: ['5c1b9a0d-b5be-4a40-8f7a-66b36d0a5176'] }] // CHANGE ME }); - In a terminal window, run
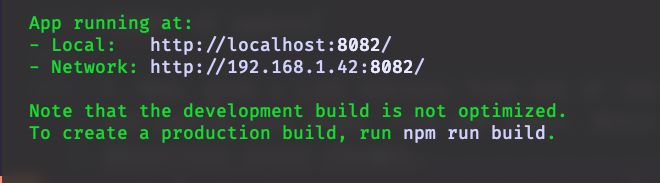
npm run serveto build and run the web app locally. Once the build completes, open a new browser tab or window with the URL specified in the terminal window.
- Click on the
Scanbutton. A pop-up will appear as Chrome scans for devices. Once your device appears, click on it and click thePairbutton.
In the local app, the screen will update as the connection is made and data is retrieved from the device. As new data is reported to the app from the device, these values will change automatically!
Now that you've explored the ins and outs of Particle, let's go beyond the Particle ecosystem and explore some of the ways that you can integrate with other 3rd party services, and backhaul your data into other cloud services.