
Session 3 - Connecting the Particle device cloud to Azure
This page is no longer maintained and is provided for historical reference only
| Project Goal | Connect your project to Azure and "backhaul" sensor data to the cloud. |
|---|---|
| What you’ll learn | Piping sensor data into the Azure IoT Hub. |
| Tools you’ll need | Particle Dev (Desktop IDE), a Particle Photon and Maker Kit |
| Time needed to complete | 15 minutes |
Setting up an Azure IoT Hub instance
Sign up for an Azure Account, or sign in if you already have one.
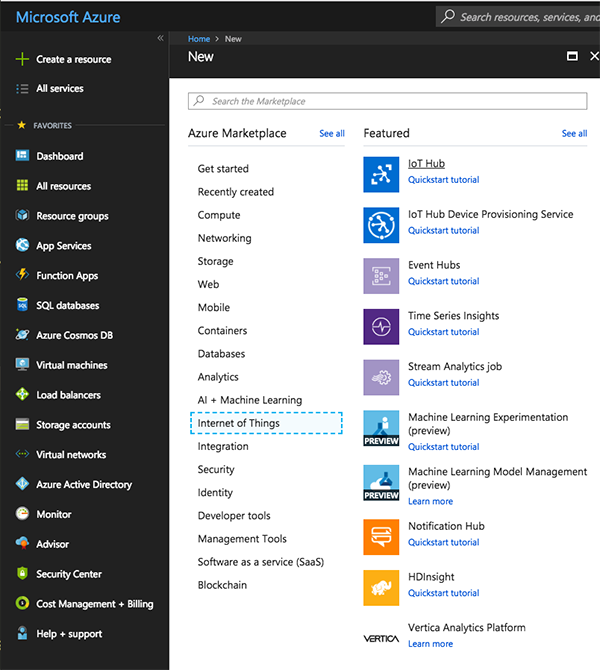
In the dashboard, click "Create a resource." Click "Internet of Things," then "IoT Hub" at the top of the list.
Create a new resource group named
workshop-groupand give the hub a name. The name must be unique across all of Azure, but you'll receive a notification if the name you selected is not unique.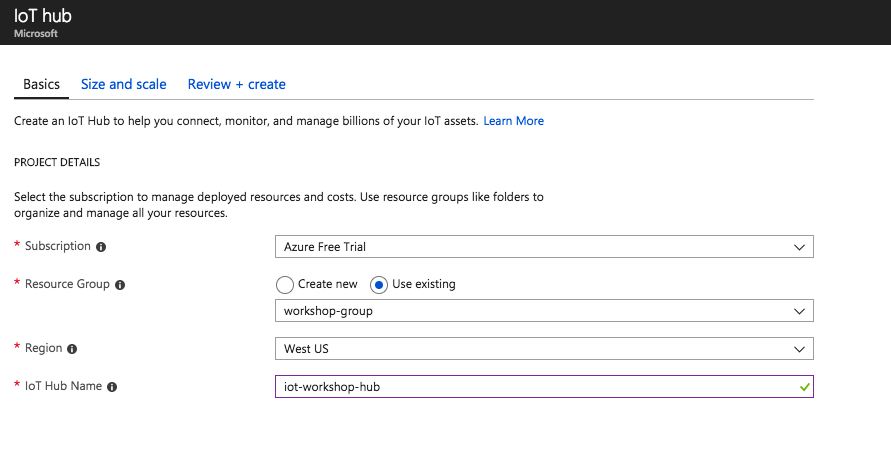
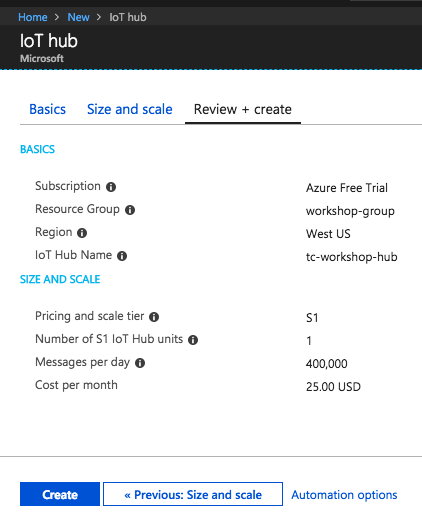
Click "Review + create".

Click "Create".
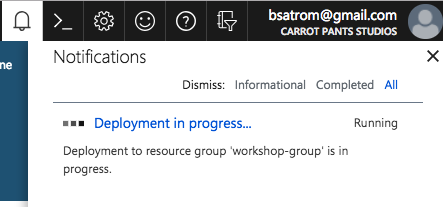
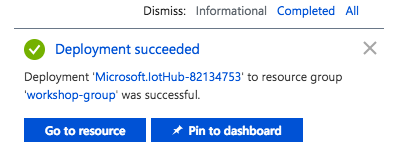
You'll get a notification that your IoT Hub is being deployed, which may take a few minutes. Once done, pin the hub to your dashboard.
Click "Go to resource" to open the hub.
Click "Shared access policies". We'll create a policy to allow the Particle Device Cloud to stream events into the hub.
Give the policy the name
workshop-policy, select all four permissions, then click "Create."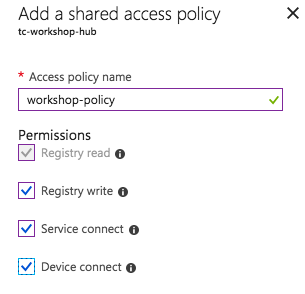
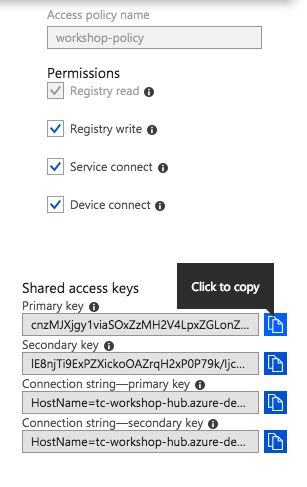
Open the policy you just created and copy the "Primary key."
Now we can complete setting up this integration from the Particle Console.
Setting up the Particle integration
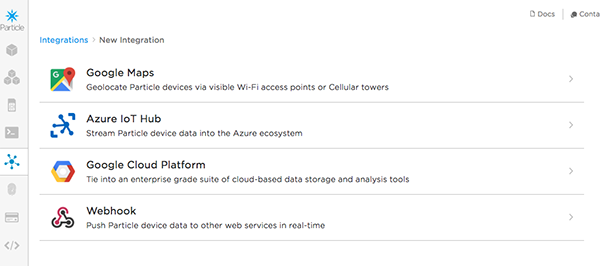
Navigate to console.particle.io and click the "Integrations" menu item.
Click "New Integration."

Choose "Azure IoT Hub."
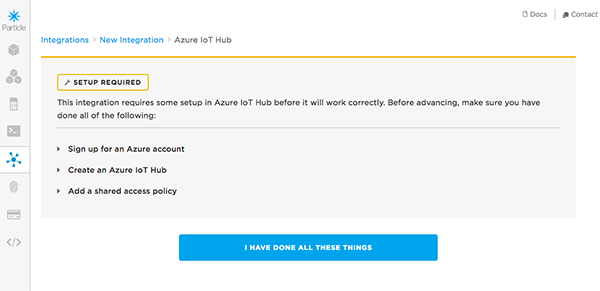
You'll see a "Setup required" notice. We've already done all the things needed here, so you can click on "I have done all these things."
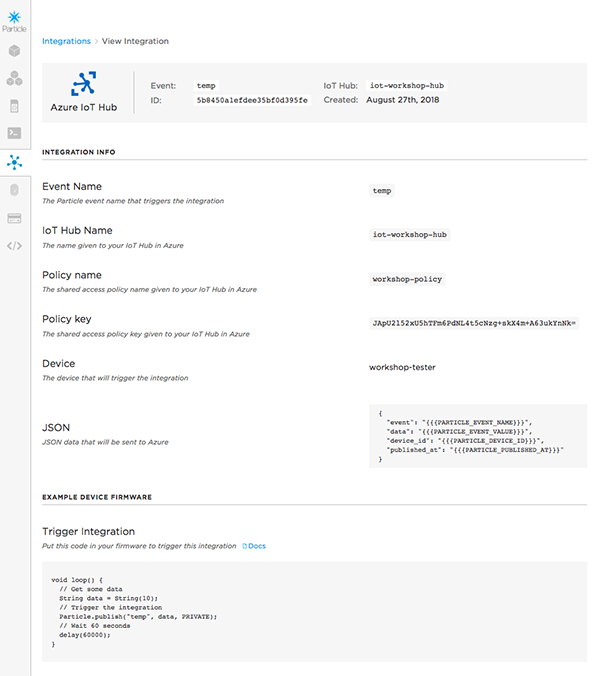
Now we need to add an event we cant to capture, and some of the details from our event hub. For the event name, use
temp, which is the name of the publish event we set-up in the last module. The "IoT Hub Name" should be the unique name you used earlier. The "Shared Policy Name" will beworkshop-policyand the "Shared Policy Key" is the primary key you copied in step #10. In the Device dropdown, select the name of your Photon.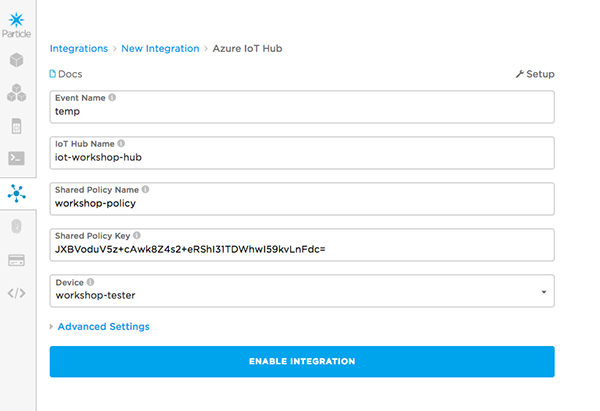
Save your integration and you'll be taken to the "View Integration" page.
Since we've already added the
tempevent, after a few seconds, we should be able to confirm that the integration works. Refresh the integration page and scroll down to theLogssection. You should see one or more entries in the list.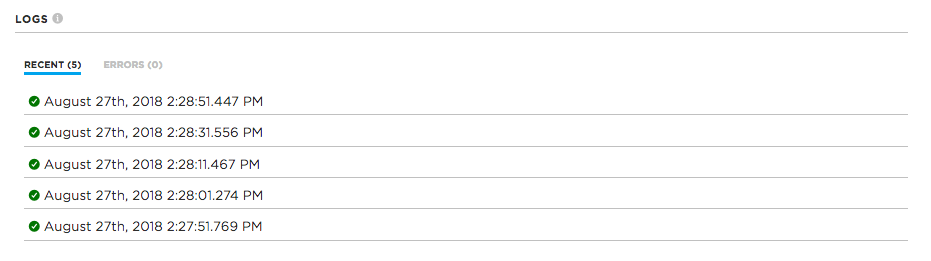
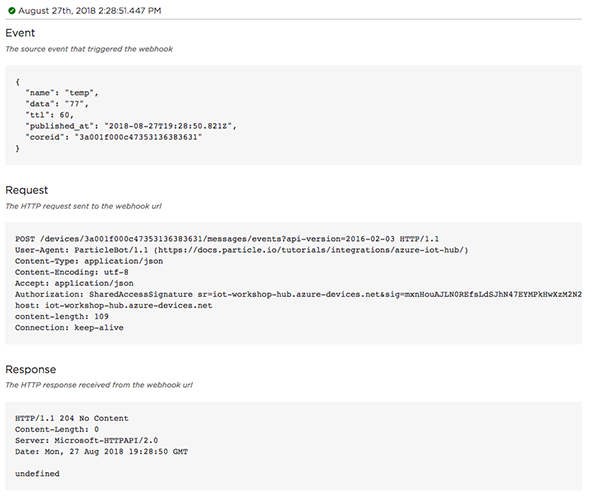
Click on one of the logs to view the request, in detail.
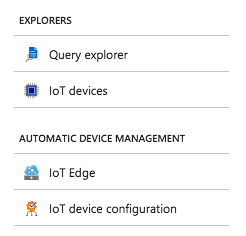
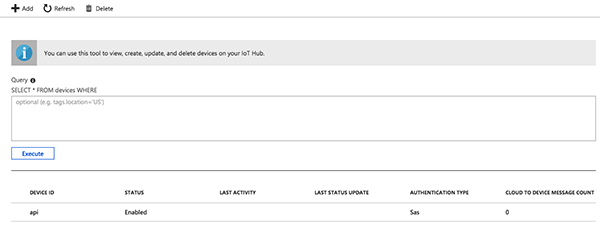
To verify that your integration worked, go back to your Azure IoT Hub and click on the "IoT Devices" menu item. If you see a single device in the list with the ID "api" you're good to go.
Viewing IoT hub events
With the event set up, everything should be piping into the Azure IoT hub. We can verify using the iothub-explorer command line utility.
Install the iothub-explorer using the instructions here.
Navigate to your IoT Hub in the azure portal, and return to your shared access policy,
workshop-policy. Copy the Connection string. You'll need this to authenticate with the iothub-explorer.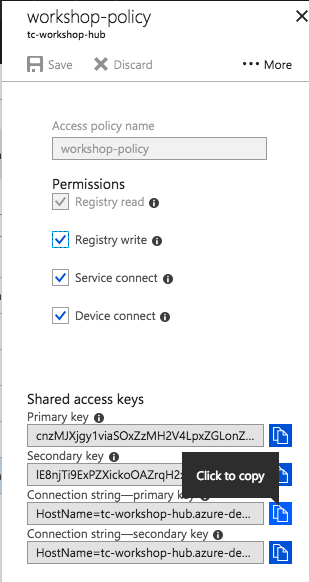
Open a terminal window and type in the following command, replacing the
<device-id>with the ID of your Photon and pasting the Shared access policy connection string in place of<connection-string>after login. Make sure to leave the quotation marks in place.iothub-explorer monitor-events <device-id> --login "<connection-string>"If you've authenticated correctly, you'll see the message "Monitoring events from device
<device-id>..."
Navigate back to the Particle console for your device and call the
readSensorsfunction a few more times. After a moment, you should see events streaming into the Azure IoT Hub!
Once you're streaming device data into the Azure IoT Hub, you can pipe the data into Azure table storage, set-up streaming analytics to transform the data, create Azure Web Apps, reports with Power BI, use Azure Machine Learning, and more!