
Github actions (CI/CD)
Background
What can you do?
- Compile firmware binaries automatically when committing code to Github.
- Automatically flash test devices with firmware.
- Run automated tests.
- Upload firmware binaries to your product.
All of these steps are optional, and can also be combined with custom actions or actions from the GitHub Actions marketplace, so there are few limits to what you can do.
This is powered by GitHub Actions, which are available in all Github plans, including the free plan.
About CI/CD
Continuous Integration and Continuous Deployment (CI/CD) are crucial practices in modern software development that facilitate faster and more reliable product delivery. They offer numerous benefits that are highly valued by developers:
- Improved code quality: CI/CD practices encourage developers to write clean, modular code that is easy to maintain and understand. Automated testing, as part of CI, detects bugs and other issues early in the development process, ensuring that the code base remains stable and reliable.
- Faster release cycles: CI/CD automates the process of building, testing, and deploying software, allowing developers to push updates and new features to production more quickly. This results in a more efficient development process and faster time-to-market for new products and features.
- Reduced risk: By continuously integrating and deploying code, developers can identify and fix issues as soon as they arise, reducing the risk of major problems down the line. This also enables the team to respond quickly to security vulnerabilities and other critical concerns.
- Better collaboration: CI/CD practices encourage cross-functional collaboration, as they require teams to work together to create, test, and deploy code. This fosters better communication, shared responsibility, and faster problem-solving.
- Increased transparency: CI/CD pipelines provide clear visibility into the status of code changes and deployments, allowing stakeholders to monitor progress and make informed decisions.
- Scalability: CI/CD pipelines can be easily scaled to accommodate growing teams and codebases, ensuring that the development process remains smooth and efficient as the organization expands.
CI/CD for Particle firmware development
There are two types of functions in managing firmware development and deployment:
Pull Request (PR) pipeline: This pipeline is triggered when a developer creates a pull request for their changes. The pipeline performs the following tasks:
Building: It compiles the firmware with the proposed changes, ensuring that the code changes do not introduce build errors.
Testing: The pipeline runs a suite of automated tests to validate that the new changes do not break existing functionality or introduce new issues.
Installation (optional): In some cases, the pipeline may also install the firmware onto a device to check that it functions correctly in a real-world environment. This step can be crucial in catching hardware-specific issues that might not be apparent during the build or testing phases.
Landing pipeline: This pipeline is triggered when a pull request is merged into the main branch. It performs the following tasks:
Building: It compiles the firmware with the merged changes, ensuring that the main branch remains in a buildable state.
Versioning: The pipeline automatically increments the firmware version number, creating a new official version of the firmware that reflects the latest changes.
Uploading to Particle platform: The new firmware version is uploaded to the Particle platform as an over-the-air (OTA) update. This allows devices to be updated with the latest firmware without the need for manual intervention if desired, deployed to a subset of devices, or manually released to devices individually.
Actions can also be triggered when a release is tagged in Github.
Setup
You will typically need the following:
- Particle account.
- Device for testing. Recommended, but not required.
- A product in the console, and be a team member of that product. A product is optional in some scenarios.
For Github:
- A repository, which can be public or private.
- Access to Github actions. It's available in free and personal accounts, but organization accounts could have it disabled.
Obtain an access token
We recommend using an access token for your product that has limited capabilities using the API Users feature. The API users tool allows you to easily create an access token.
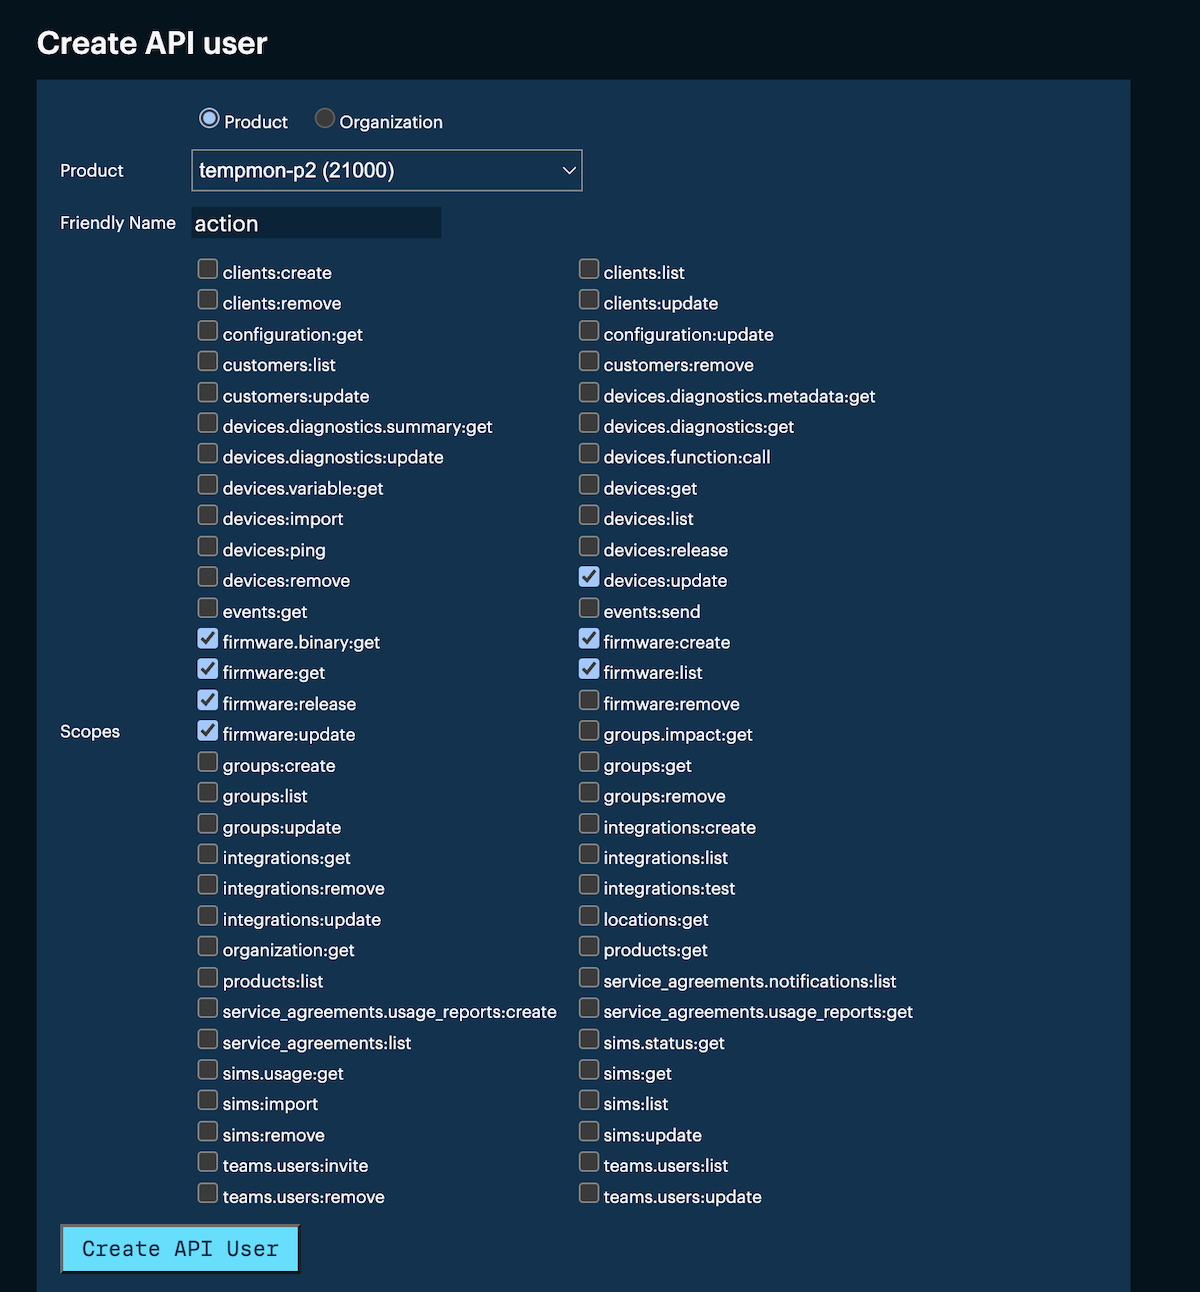
| Purpose | Required scope |
|---|---|
| Compile | (no scope required) |
| Flash firmware to a device | devices:update |
| Upload product firmware | firmware:create |
Make sure you save the token in a secure location as you won't be able to download it again after you leave this page. Likewise, since it grants access to your account you should keep it secure and never commit it to a public source repository.
If you are using the flash device action you will need to user a regular user access token, not a product API user token. Because the flash device action currently uses the non-product device flashing endpoint it cannot use a product-specific API user, and thus must have an access token for your account.
Add to Github secrets
Github secrets allows you to securely pass things like access tokens even from public repositories. You can find them in your repository in Settings - Security - Secrets and variables - Actions.
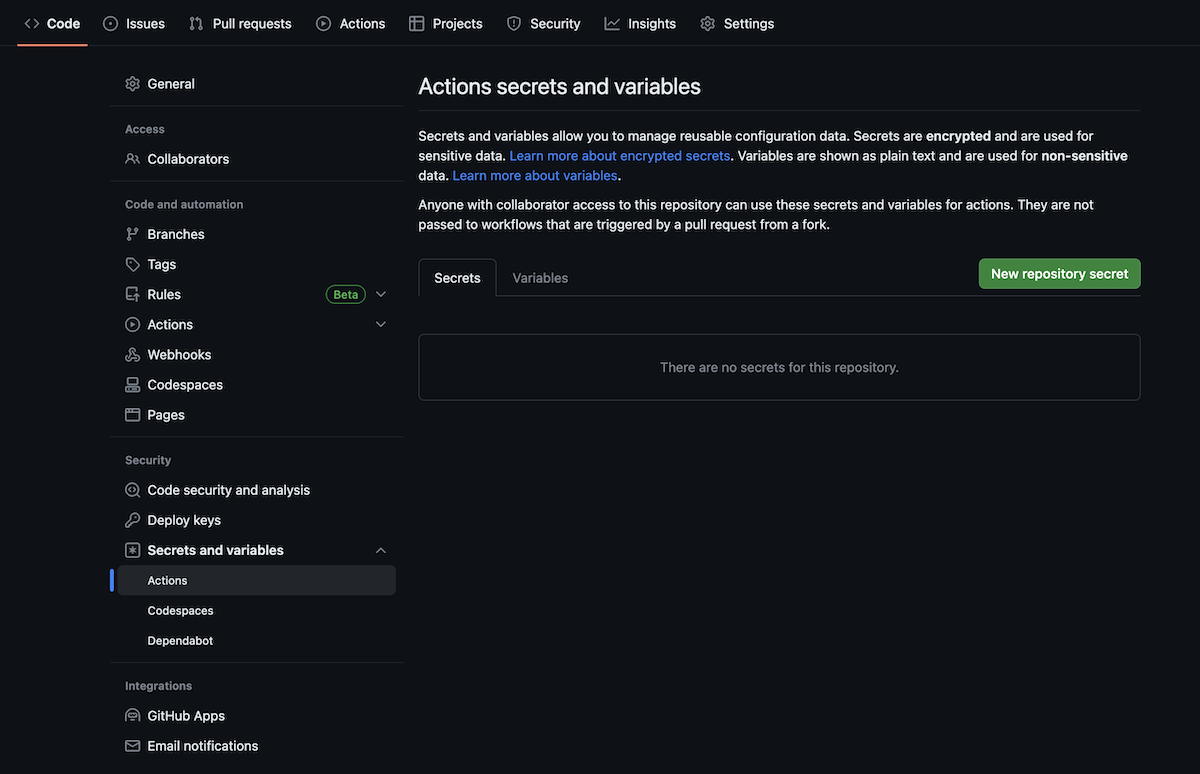
You should save the access token you created in the previous step as PARTICLE_ACCESS_TOKEN.
Examples
Compile action
The compile action can be used to create firmware binaries from source code pushed to Github. This also serves to validate that code committed to Github can be compiled successfully, and a compile error will show up on your Github repository page, and an email will typically be generated as well.
You Github action uses a runner, a virtual machine that runs the workflow. This can either be a Github hosted runner, or a self-hosted runner. Even in the free Github plan, 2000 minutes of Github-hosted runner per month are available to run your actions. A simple project build may run in under 30 seconds, so that's a lot of builds!
If you are using the Github hosted runner, you don't need to configure anything else in your account; it's enabled by default.
If you are using a self-hosted runner, follow the Github instructions for self-hosted runners.
For compiling code, you can either do the build in the Github runner itself, using the Particle buildpack, or build using the Particle cloud compilers. Using the Particle cloud compiler may make sense for free plan runners as it will take an additional 30 to 60 seconds to set up and run the buildpack used to compile the code within the runner.
When using the Particle cloud compiler, a Particle access token is required, typically stored in Github secrets. Your compile.yaml file only includes the secret name, not the actual access token, so you can use this securely even on public repositories. Additionally, a API user who has few other privileges can be used to minimize the danger even if your account secret is exposed.
To set up a compile action, create a .github directory at the top of your repository. In that, create a workflows directory.
This example uses this file, .github/workflows/compile.yaml. The filename does not need to be compile but it does need to be a .yaml file.
Be careful when copying and editing the file as leading spaces are very significant in yaml files!
This action is triggered on a Github push.
on: push
This step is almost always required and checks out the version of the code that was just pushed. You don't need a separate access token for this.
      - name: Checkout code
        uses: actions/checkout@v3
This calls the Particle compile action. This specifies that the action is in the particle-iot Github in the compile-action repository. You can view the source there, and there are also additional README and instruction files there. The @v1 indicates the latest v1.x version.
      - name: Compile application
        id: compile
        uses: particle-iot/compile-action@v1
The options are specified here.
particle-platform-nameis the platform such asboron,bsom,b5som,p2, etc.device-os-versionallowed values include:default,latest,latest-lts, or a semver version number such as4.x,^5.3.0,1.4.4.particle-access-tokenis specified when using the Particle cloud compiler to compile your binary. It can be an API user token, and all valid API user tokens can compile, a specific scope does not need to be added. If omitted, the build will be done using the Particle buildpack within the runner itself.
        with:
          particle-platform-name: 'boron'
          device-os-version: 'latest-lts'
          particle-access-token: ${{ secrets.PARTICLE_ACCESS_TOKEN }}
The upload artifact saves the built binary. This can be downloaded from the Github actions page in your repository.
      - name: Upload artifact
        uses: actions/upload-artifact@v3
        with:
          name: firmware-artifact
          path: ${{ steps.compile.outputs.firmware-path }}
Once you've written your .yaml file:
- Commit and push the
compile.ymlfile to your repository. - The GitHub Actions workflow will automatically start compiling your firmware upon each push to the repository.
- Once the compile job is completed, the compiled binary will be uploaded as an artifact in the GitHub Actions run. You can download it from the Artifacts section of the completed workflow run.
Flash action
While being able to compile the firmware is a good start, you will typically want to test it on an actual device. This can be automated with Github actions as well.
- It should be added to your product
- It should use Mark as Development so it can be flashed with custom code before release
- It must be claimed to your account even if you normally use unclaimed product devices in your product
- Your access token must be a user-level access token, not an API user.
For better security, you may want to create a new Particle user only for testing devices and claim the devices to that account and use an access token for that account, however that user will still need to be a team member for your product.
Make sure you update the device-id field with the Device ID (24-character hex) of your testing device.
      - name: Flash device
        uses: particle-iot/flash-device-action@v1
        with:
          particle-access-token: ${{ secrets.PARTICLE_ACCESS_TOKEN }}
          device-id: 'a3d9e2b1c6f7481234567890'
          firmware-path: ${{ steps.compile.outputs.firmware-path }}
You can find additional instructions in the flash-device-action repository.
Automatic versioning
Product firmware requires the version to be embedded in the firmware in the main .cpp. For example:
PRODUCT_VERSION(1);
Often if you are developing locally before committing to Github you can increment this version as part of your development workflow.
However, there is also an action that can update your source to the latest version number and commit the change to Github for you.
See auto versioning for details.
If you are using a .ino file as your main project source file you will need to use manual versioning or convert it to a .cpp file, which typically only requires a few minor changes. See ino file preprocessor for more information.
Upload to product
Using Github actions can significantly simply your product firmware build workflow. Typically you will develop locally, and when you're ready to create a new product firmware:
Commit the code to Github. This could be to a branch or to main, depending on your build practices.
When you are ready to release, tag the release:
git tag -a v1 -m "Initial version"
git push origin v1
When a release is tagged, the workflow below will automatically:
Compile the source and create a firmware binary artifact. This can be downloaded from Github.
Upload the binary to your product.
The firmware-upload-action contains additional instructions and also provides an example where a Github release can be made in addition to tagging and uploading product firmware.
Most of the parameters are boilerplate, but don't forget to update product-id to be your Product ID, which is a number.
      - name: Upload product firmware to Particle
        uses: particle-iot/firmware-upload-action@v1
        with:
          particle-access-token: ${{ secrets.PARTICLE_ACCESS_TOKEN }}
          firmware-path: ${{ steps.compile.outputs.firmware-path }}
          firmware-version: ${{ steps.compile.outputs.firmware-version }}
          product-id: '12345'
          title: 'Firmware v${{ steps.compile.outputs.firmware-version }}'
          description: '[Firmware v${{ steps.compile.outputs.firmware-version }} GitHub Release](${{ steps.release.outputs.html_url }})'