M8 temperature/humidity tutorial
Introduction
This tutorial illustrates:
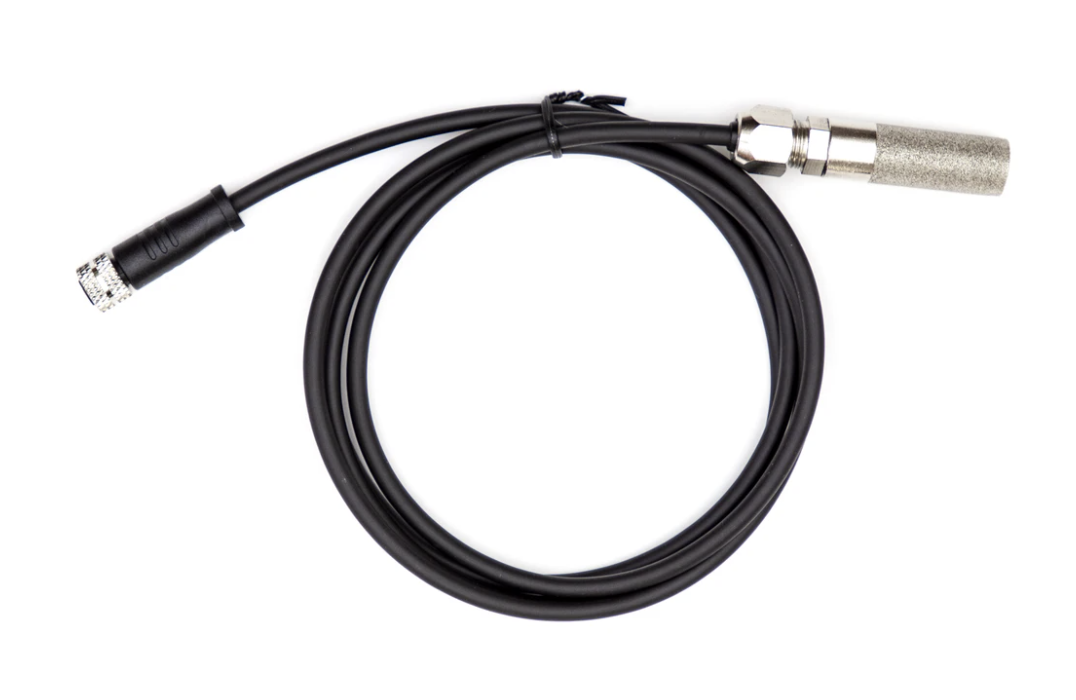
- Using the using the Particle M8 temperature and humidity sensor
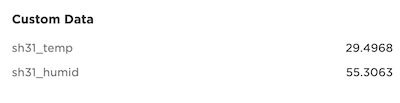
- Adding custom data to your location publishes
The sensor cable features:
- IP 67 waterproof rating
- Durable, weatherproof, metal casing
- ±0.5°C temperature accuracy
- ±2% relative humidity accuracy
- Temperature range -22°C to 80°C
- 120 cm. (47.25 inch) cable
While the Tracker One board contains a precision thermistor, the sensor shown here is good for measuring temperature in locations separate from the Tracker, for example outside, in a refrigeration unit, etc..
The M8 Temperature/Humidity sensor connects to the M8 connector on the outside of the Tracker One enclosure. The Tracker One maintains its IP67 waterproof rating with the M8 connector in use.
The M8 Temperature/Humidity Sensor Datasheet includes additional information about the sensor cable.
Firmware
Getting the Tracker Edge firmware
You can download a complete project for use with Particle Workbench as a zip file here:
Version:
- Extract tracker-temp-hum-cable.zip in your Downloads directory
- Open the tracker-temp-hum-cable folder in Workbench using File - Open...; it is a pre-configured project directory.
- From the Command Palette (Command-Shift-P or Ctrl-Shift-P), use Particle: Configure Project for Device.
- If you are building in the cloud, you can use Particle: Cloud Flash or Particle: Cloud Compile.
- If you are building locally, open a CLI window using Particle: Launch CLI then:
particle library copy
Manually
The Tracker Edge firmware can be downloaded from GitHub:
https://github.com/particle-iot/tracker-edge
You will probably want to use the command line as there are additional commands you need to run after cloning the source:
git clone https://github.com/particle-iot/tracker-edge
cd tracker-edge
git submodule update --init --recursive
- Open Particle Workbench.
- From the command palette, Particle: Import Project.
- Run Particle: Configure Workspace for Device, select version 2.0.1, or later, Tracker, and your device.
- Run Particle: Flash application (local).
Make sure you've used the Mark As Development Device option for your Tracker device in your Tracker product. If you don't mark the device as a development device it will be flashed with the default or locked product firmware version immediately after connecting to the cloud, overwriting the application you just flashed.
Add the sht3x-i2c library
From the command palette in Workbench, Particle: Install Library then enter sht3x-i2c.
The documentation for the library can be found here.
Customize main.cpp
Digging in
Sht3xi2c sensor(Wire3, 0x44);
Note that the M8 I2C interface is Wire3 not Wire as you might be used to on other Particle devices where Wire is on pins D0 and D1. On the Tracker M8 connector, Wire3 is on the same physical pins as Serial1 so you can only use one port or the other.
Tracker::instance().init();

// Register a location callback so we can add temperature and humidity information
// to location publishes
Tracker::instance().location.regLocGenCallback(myLocationGenerationCallback);
In setup() initialize the Tracker firmware and add a callback for when the location publishes occur.
// Turn on 5V output on M8 connector
pinMode(CAN_PWR, OUTPUT);
digitalWrite(CAN_PWR, HIGH);
delay(500);

sensor.begin(CLOCK_SPEED_400KHZ);
sensor.start_periodic();
The on CAN_PWR to power the regulator, level-shifter, and sensor. Then initialize the sensor.
Particle.connect();
Finally connect to the Particle cloud at the end of setup.
Tracker::instance().loop();
Make sure you give the Tracker Edge firmware processor time on every call to loop().
void myLocationGenerationCallback(JSONWriter &writer, LocationPoint &point, const void *context)
{
    double temp, humid;

    int err = sensor.get_reading(&temp, &humid);
    if (err == 0)
    {
        writer.name("sh31_temp").value(temp);
        writer.name("sh31_humid").value(humid);

        Log.info("temp=%.2lf hum=%.2lf", temp, humid);
    }
    else {
        Log.info("no sensor err=%d", err);
    }
}
Finally, when there is a location publish, add the sensor data to it.
Cloud data
In the map view in the console, you should be able to see the additional custom data: