
Tracker current solutions accelerator
This tutorial shows how to measure AC current using the Tracker One and a few external components.
You can download the files associated with this app note as a zip file.
Author: Mariano
Hardware
This Solutions Accelerator uses:
- Tracker One
- M8 cable
- 5V to 3.3V converter (https://www.adafruit.com/product/4683)
- Analog AC current sensor (https://www.dfrobot.com/product-1486.html)
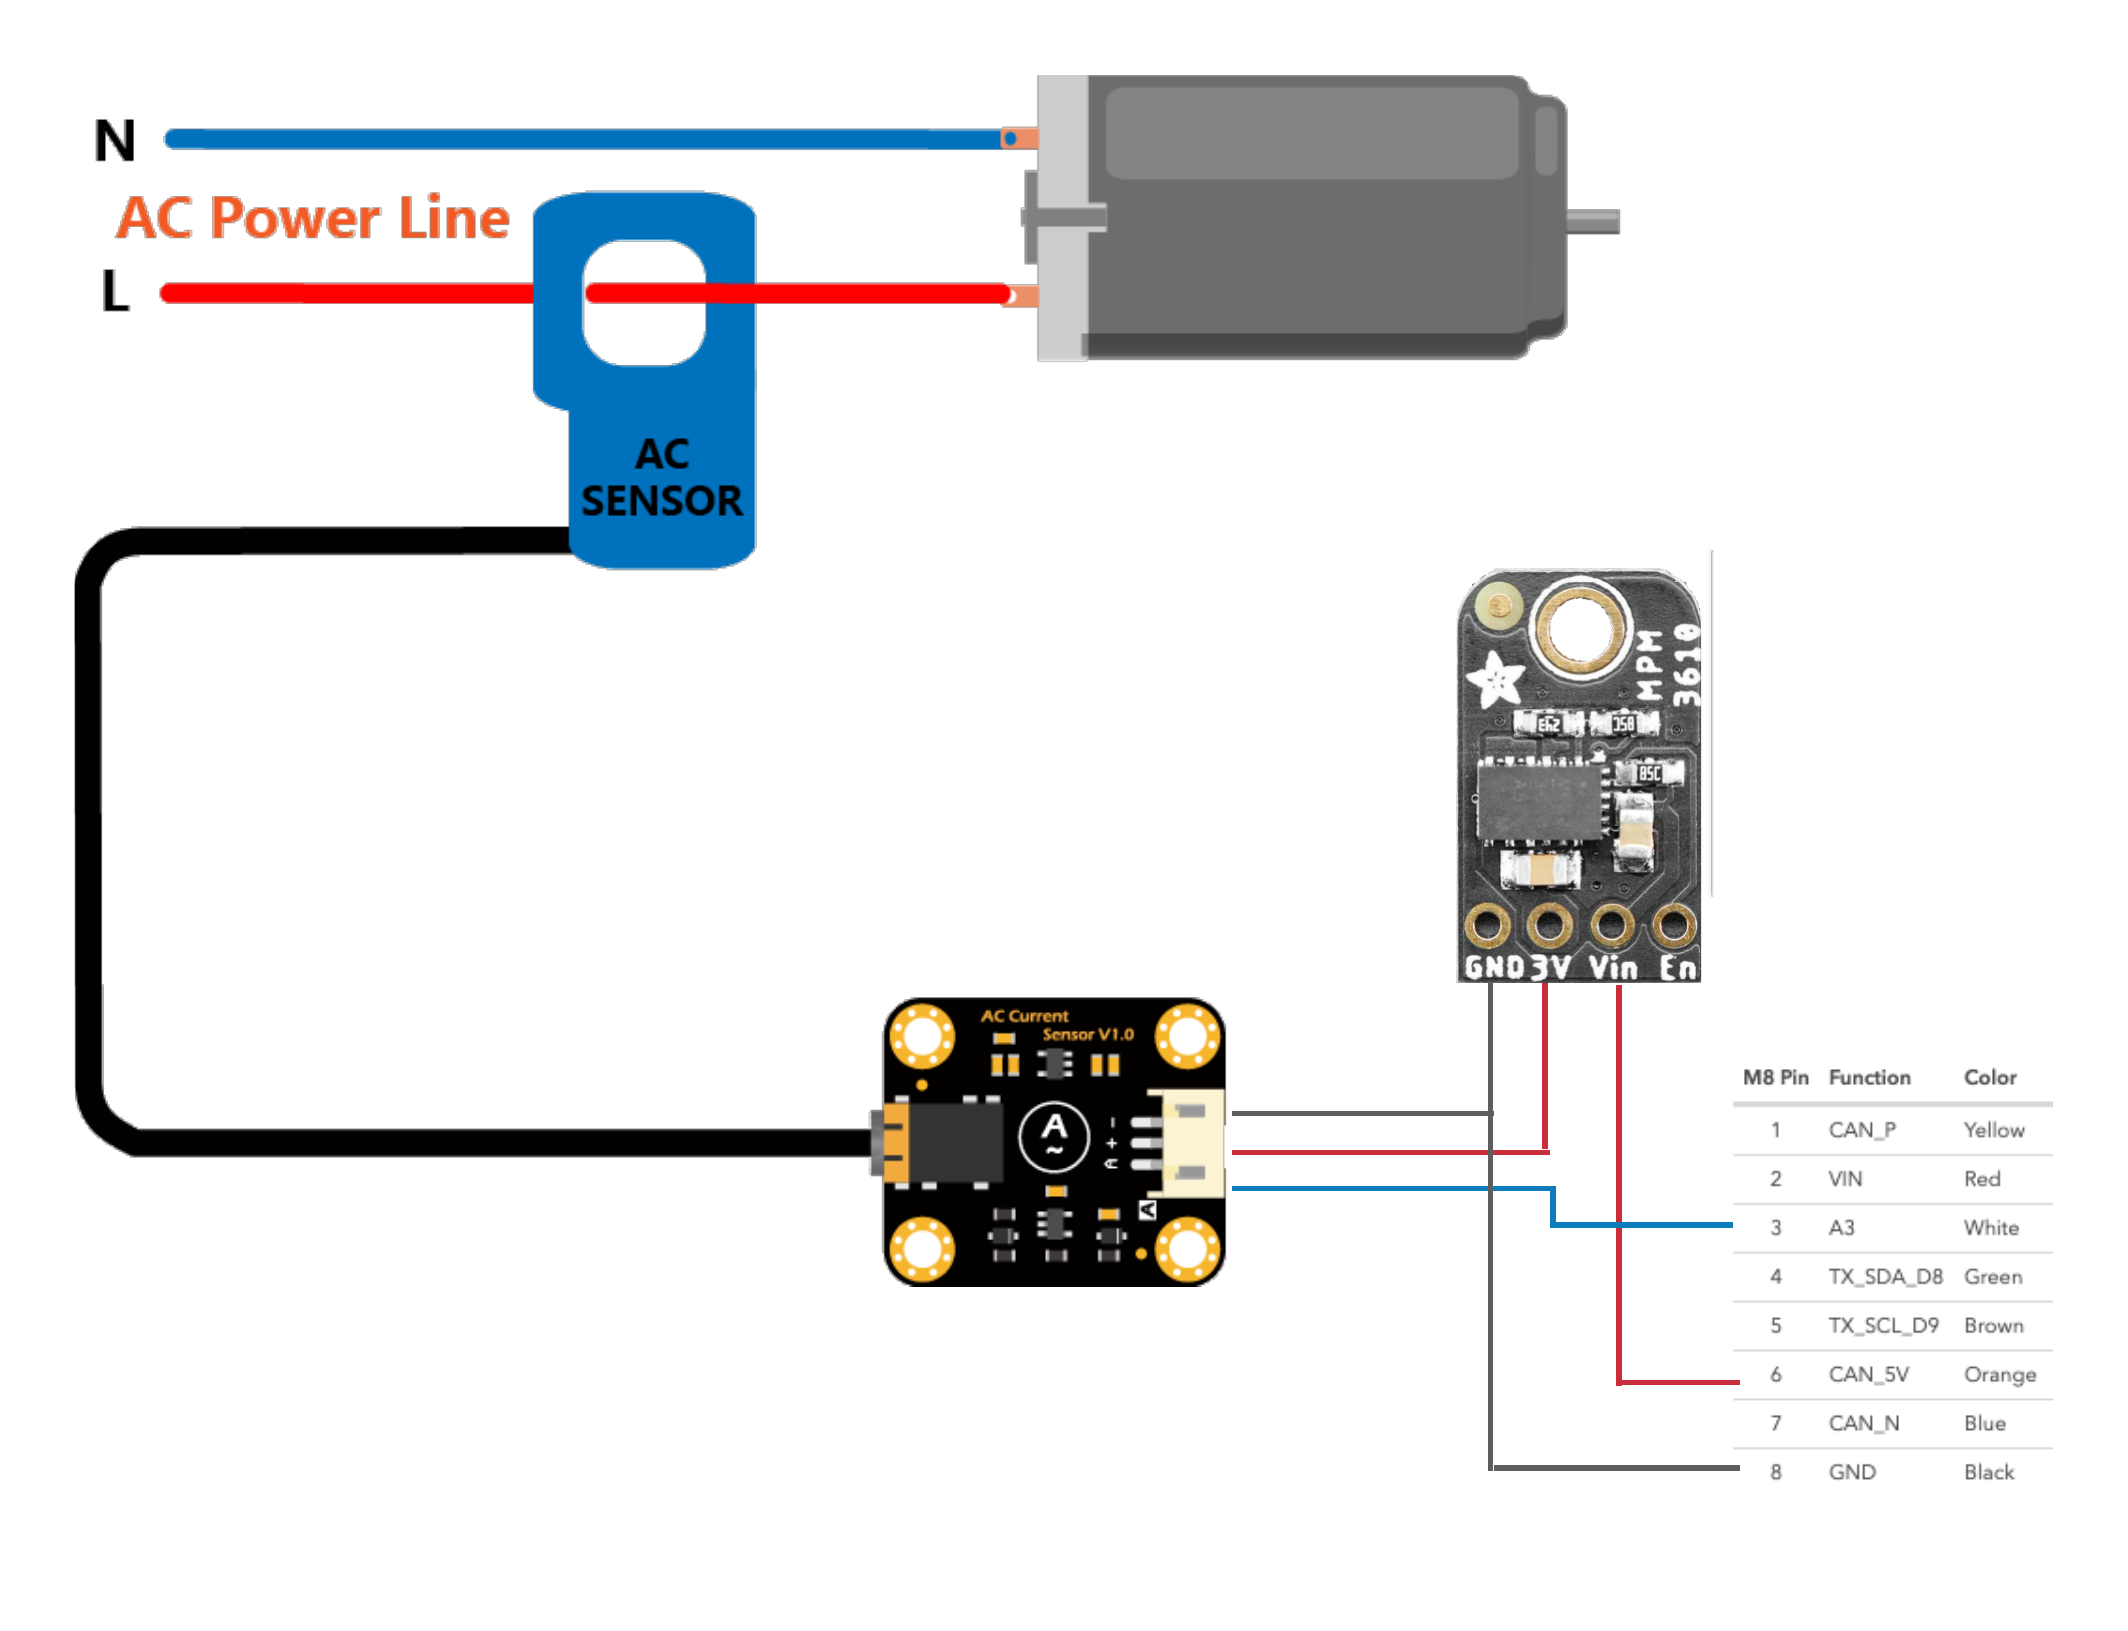
The current sensor boards converts the output of the sensor probe into an analog output. That output is connected to pin 3 of the M8 connector, which is analog input A3 for the Tracker One.
The other two pins are power and ground, which are connected to the DC/DC converter. The DC/DC is necessary since the output power of the Tracker One is 5V, and the input pins for sensing are 3.3V.
Software
The code to translate the analog input into current is found in main.cpp.
First, a callback is defined that is called when the Tracker One will publish a location point. This callback reads the value and uses the formula from the manufacturer (https://wiki.dfrobot.com/Gravity_Analog_AC_Current_Sensor__SKU_SEN0211_#target_3) to arrive at the current. It then inserts it into the location point JSON.
void loc_gen_cb(JSONWriter &writer, LocationPoint &point, const void *context)
{
    writer.name("current").value(readACCurrentValue());
}
The callback is registered with the Tracker Edge software in setup():
Tracker::instance().location.regLocGenCallback(loc_gen_cb);
Once running, the Tracker One will publish the current measured and it will be associated with the location of the device. The current will be displayed on the Particle console map for each Tracker device running this firmware.
Getting the Tracker Edge firmware
You can download a complete project for use with Particle Workbench as a zip file here:
Version:
- Extract tracker-an026.zip in your Downloads directory
- Open the tracker-an026 folder in Workbench using File - Open...; it is a pre-configured project directory.
- From the Command Palette (Command-Shift-P or Ctrl-Shift-P), use Particle: Configure Project for Device.
particle library copy
Manually
The Tracker Edge firmware can be downloaded from GitHub:
https://github.com/particle-iot/tracker-edge
You will probably want to use the command line as there are additional commands you need to run after cloning the source:
git clone https://github.com/particle-iot/tracker-edge
cd tracker-edge
git checkout origin/release/v8
git submodule update --init --recursive
- Open Particle Workbench.
- From the command palette, Particle: Import Project.
- Run Particle: Configure Workspace for Device, select version 1.5.4-rc.1, 2.0.0-rc.3, or later, Tracker, and your device.
- Run Particle: Flash application (local).
Make sure you've used the Mark As Development Device option for your Tracker device in your Tracker product. If you don't mark the device as a development device it will be flashed with the default or locked product firmware version immediately after connecting to the cloud, overwriting the application you just flashed.
The source - current solutions accelerator