
Qubitro
Qubitro has no-code source integration support for Particle Cloud. You can learn more about Particle integrations here.
Creating the Integration
To get the required credentials, choose a project from the list on Qubitro Portal, then, click on the New source button and click on Particle in the list.
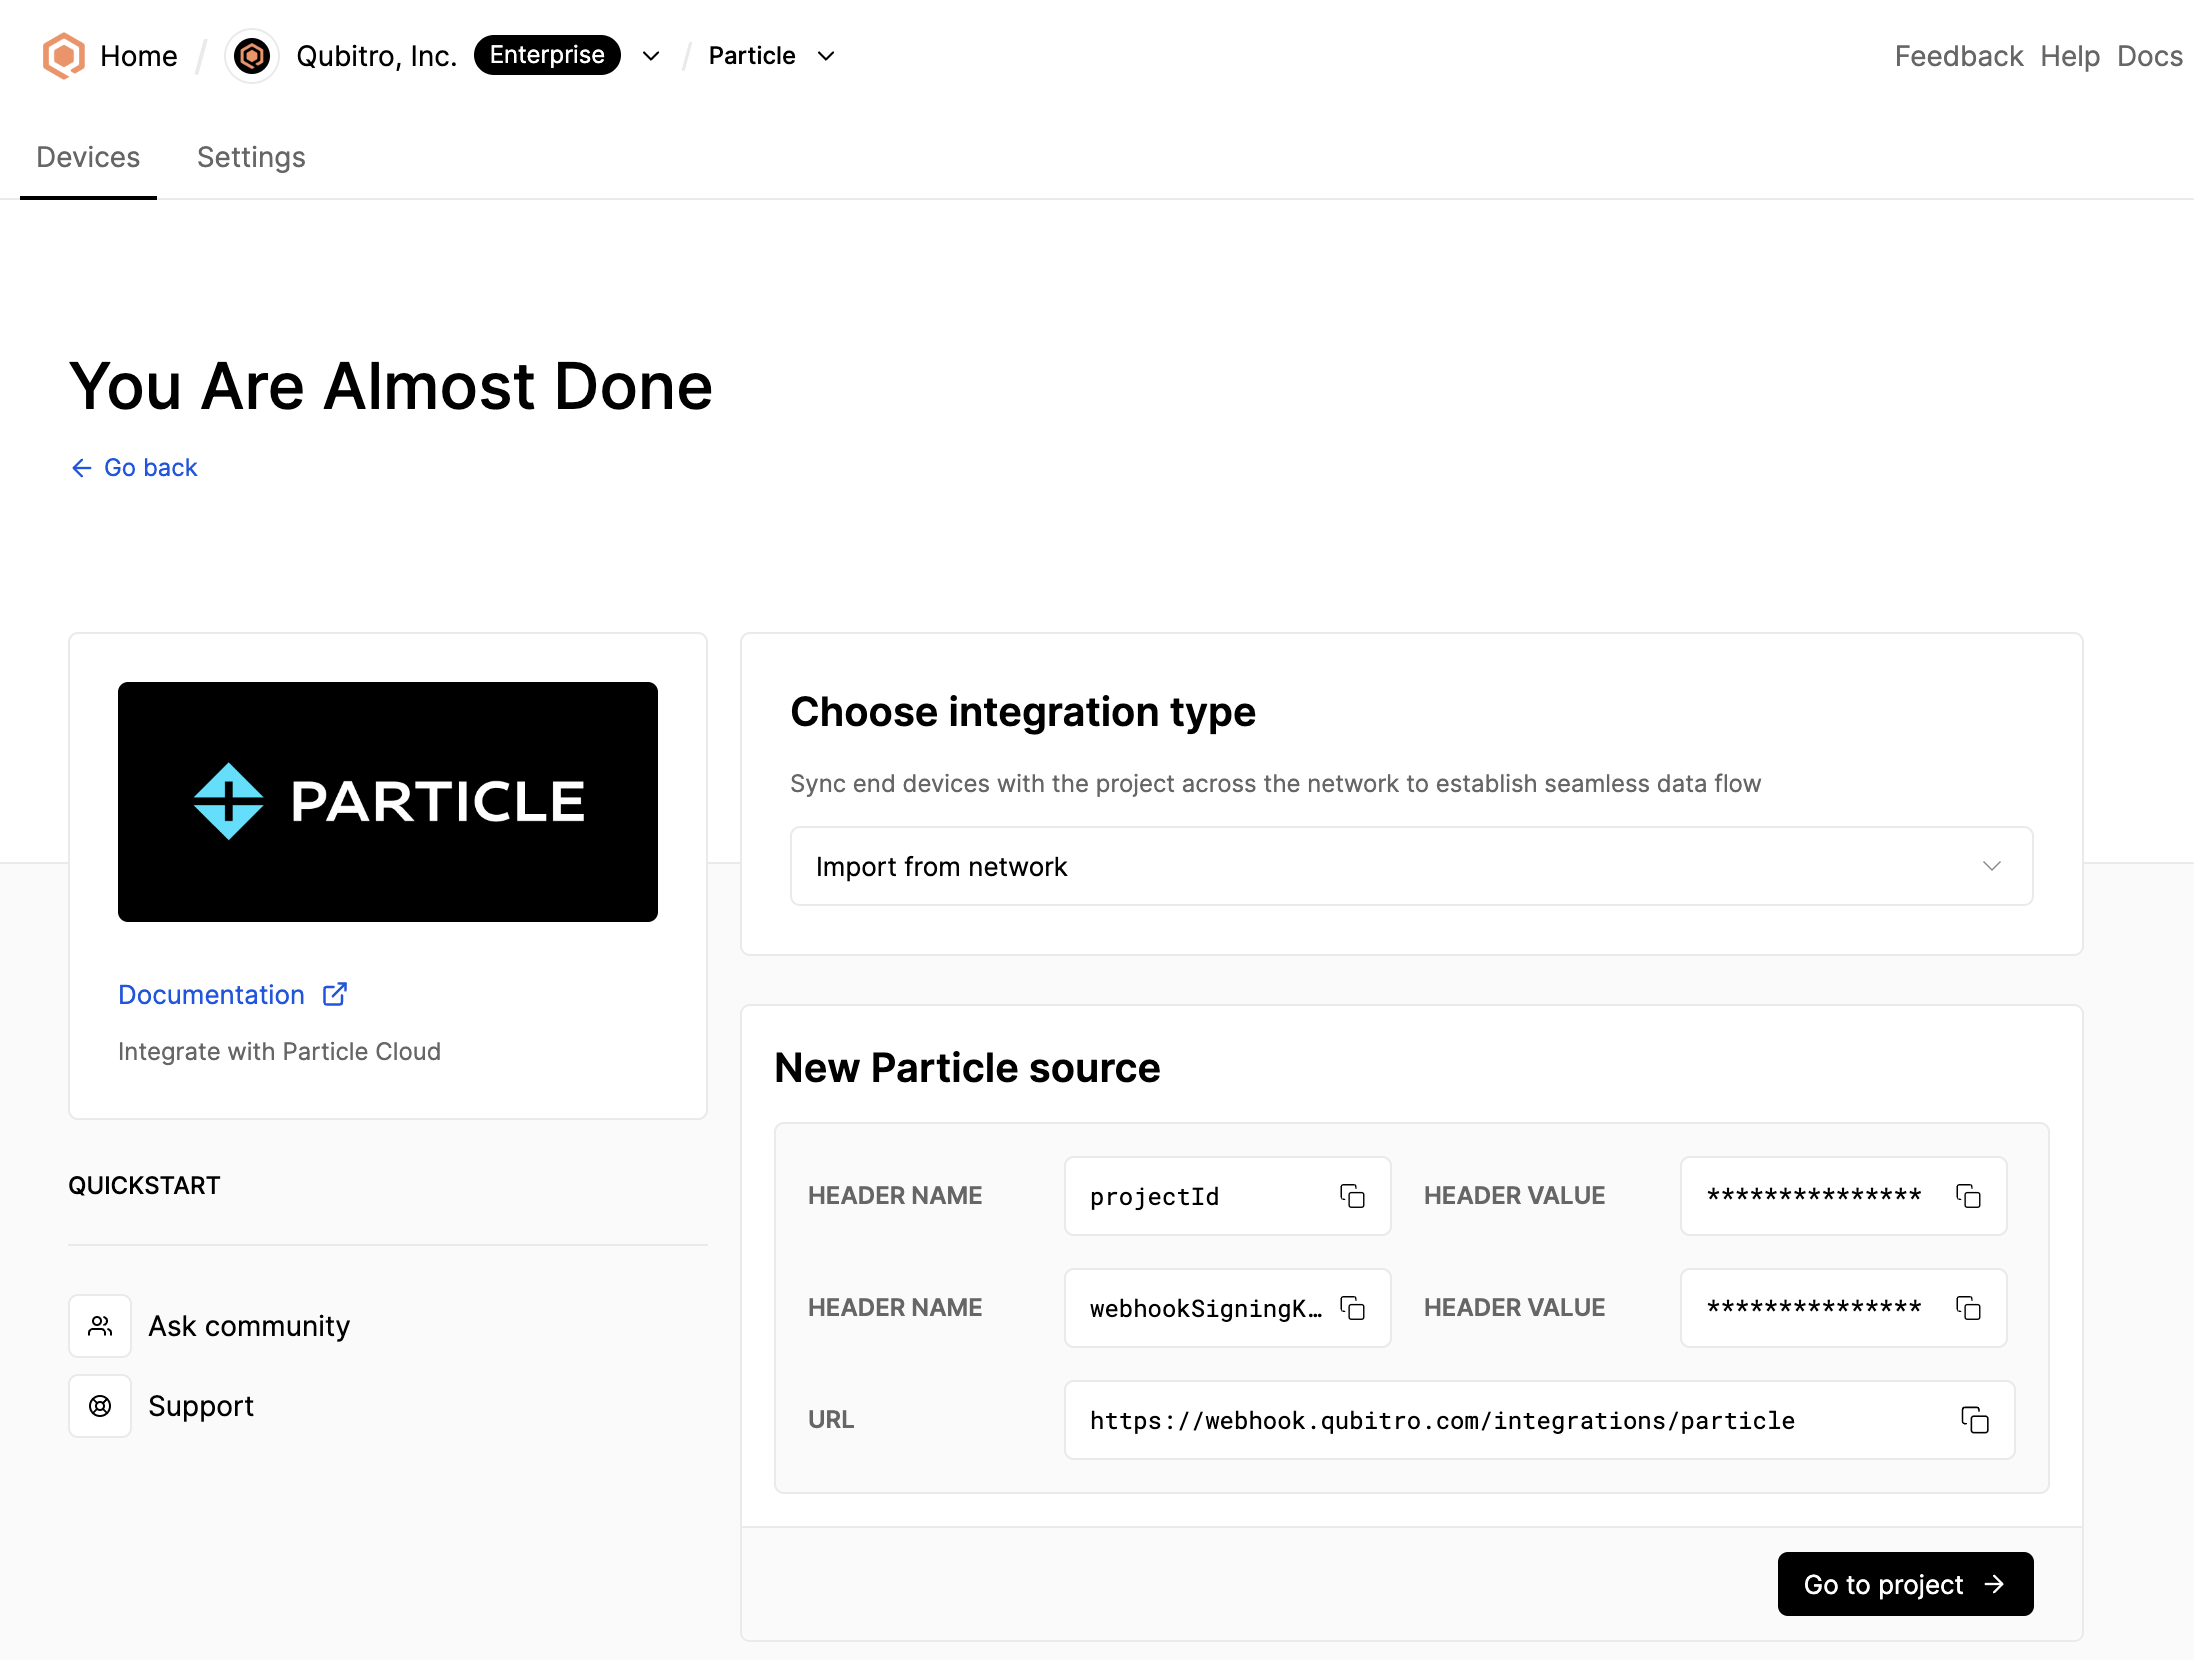
Keep this page open and navigate to the Particle Console to configure the integration.
Configure Integration on Particle Console
Click on Integrations from the left navigation menu, then click on + ADD NEW INTEGRATION button located top-right on the console and choose the Webhook option.
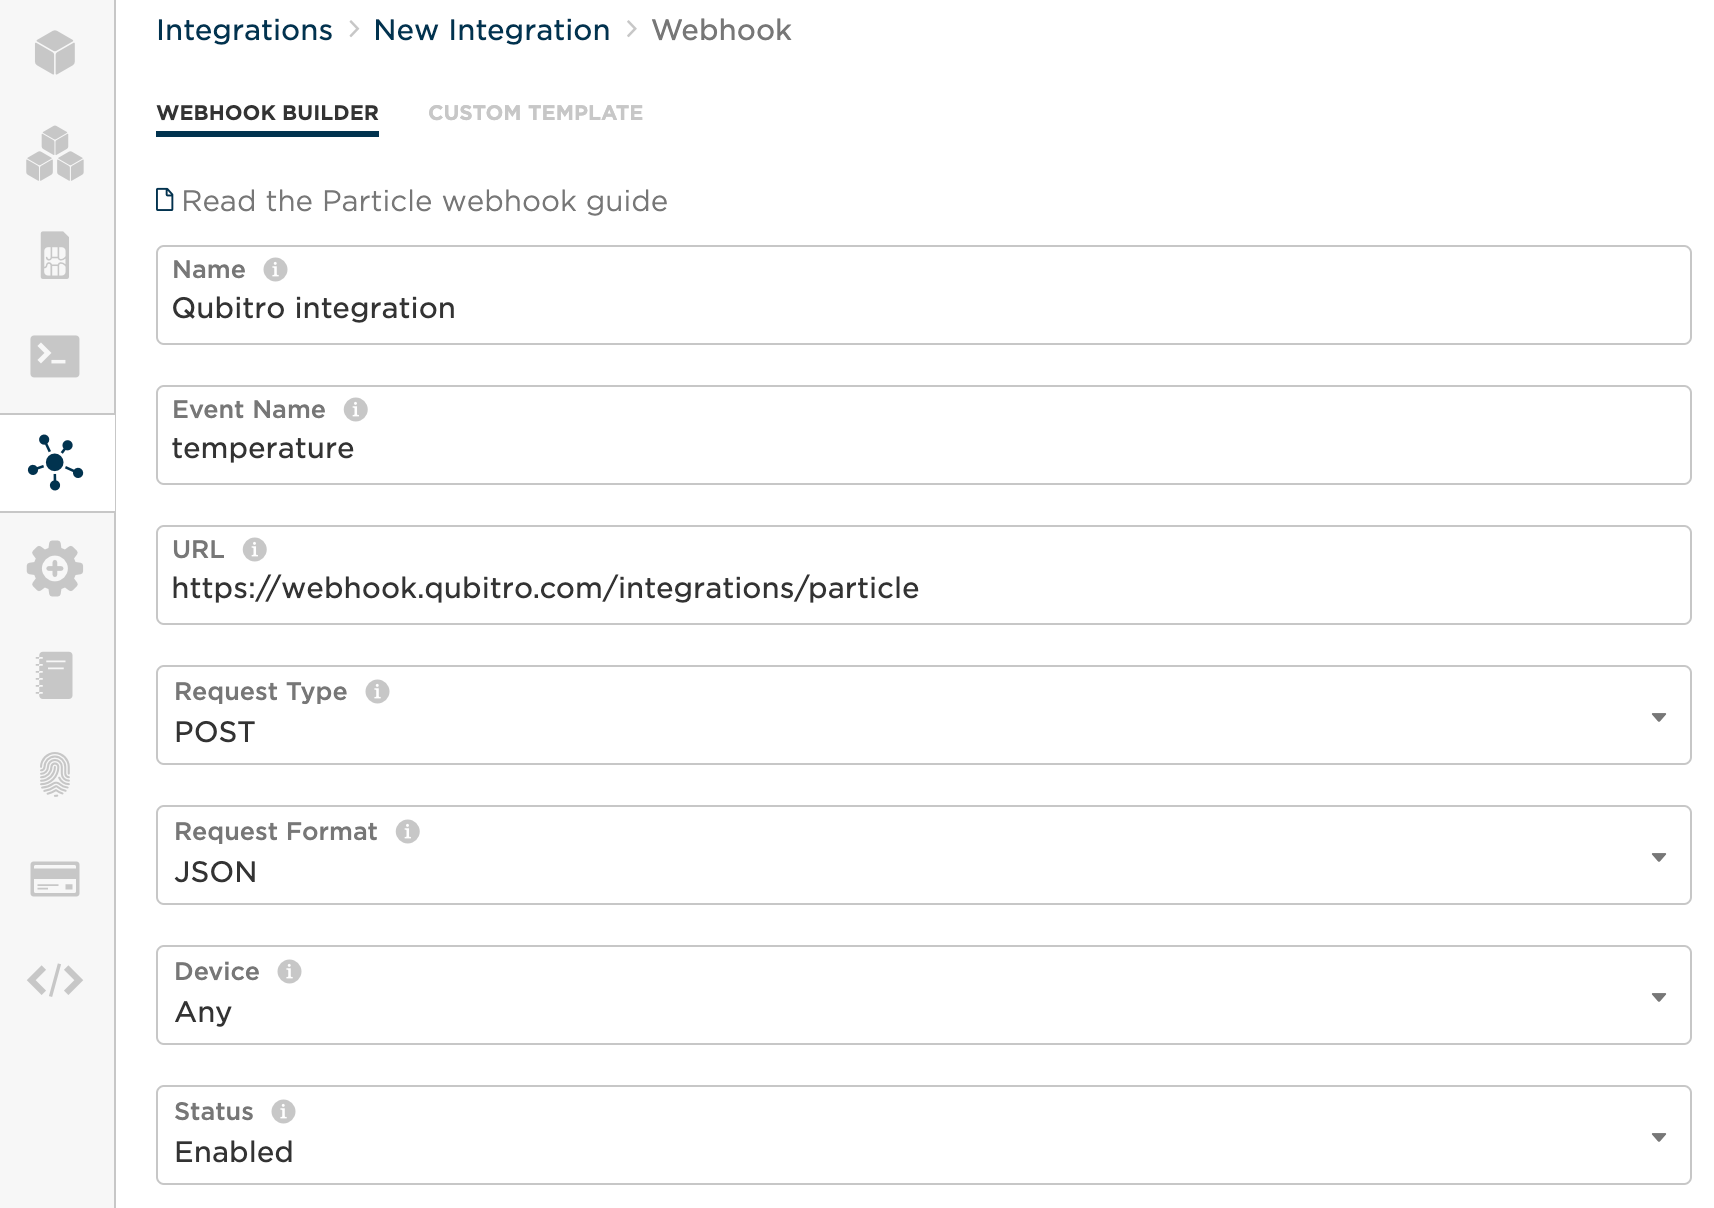
- Step (1) URL and Request Format
Paste the URL and choose JSON for the Request Format options.
🔵 Tip: Set the Device option to Any to enable automatic syncing of all devices with Qubitro.
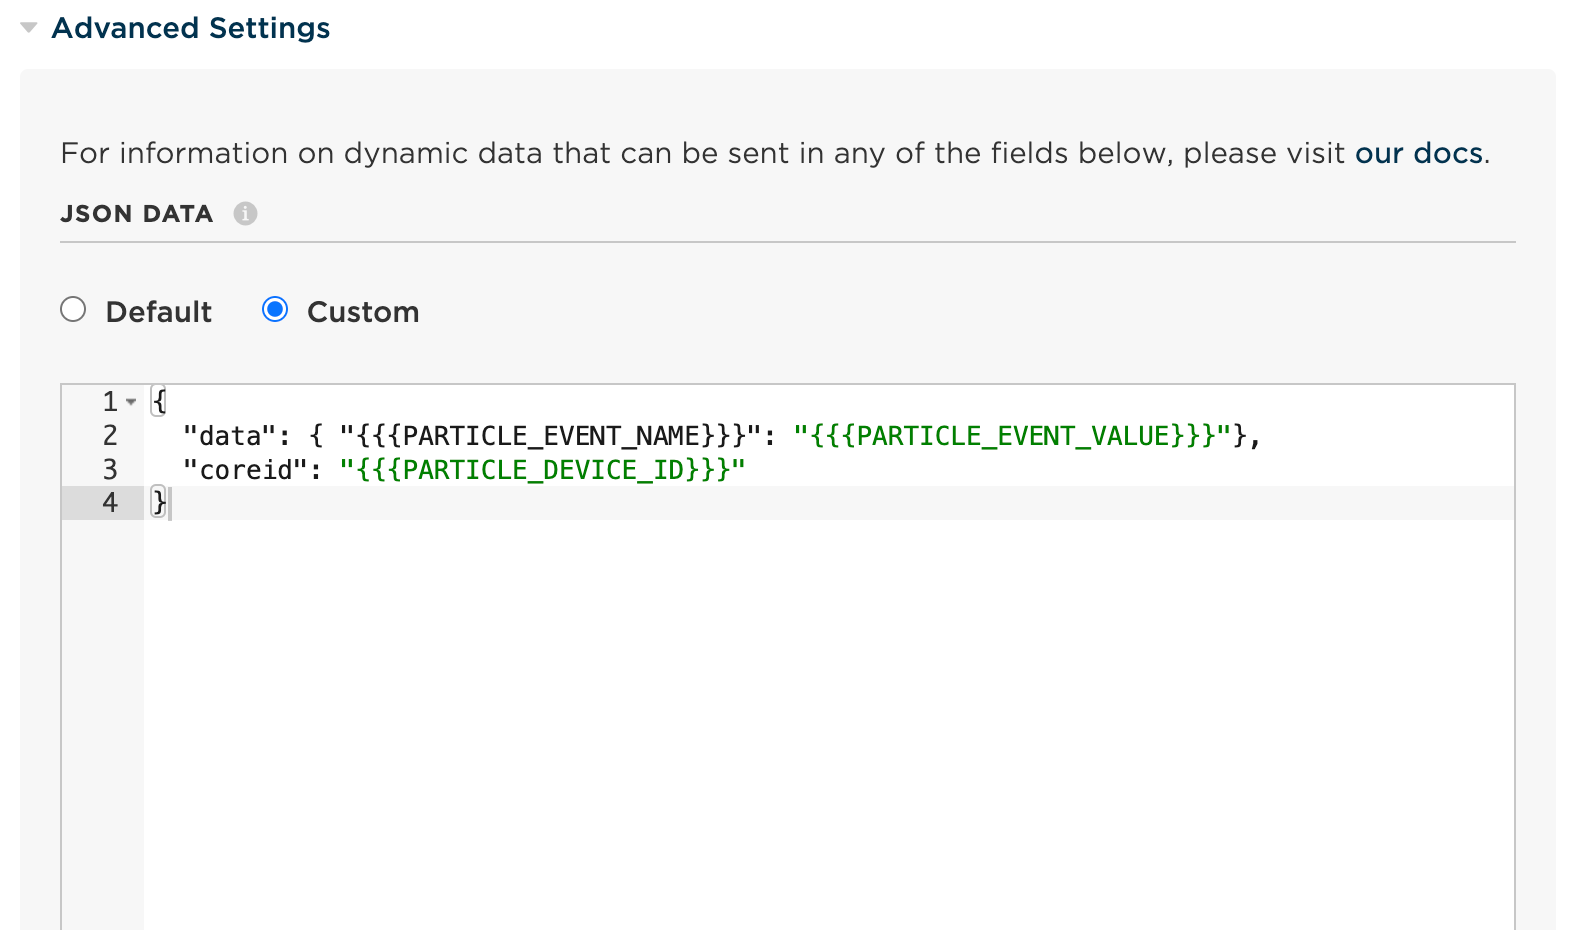
- Step (2) JSON Data Configuration
Choose Custom for the JSON Data configuration and paste the following configuration.
{
  "data": { "{{{PARTICLE_EVENT_NAME}}}": "{{{PARTICLE_EVENT_VALUE}}}"},
  "coreid": "{{{PARTICLE_DEVICE_ID}}}"
}
Example:
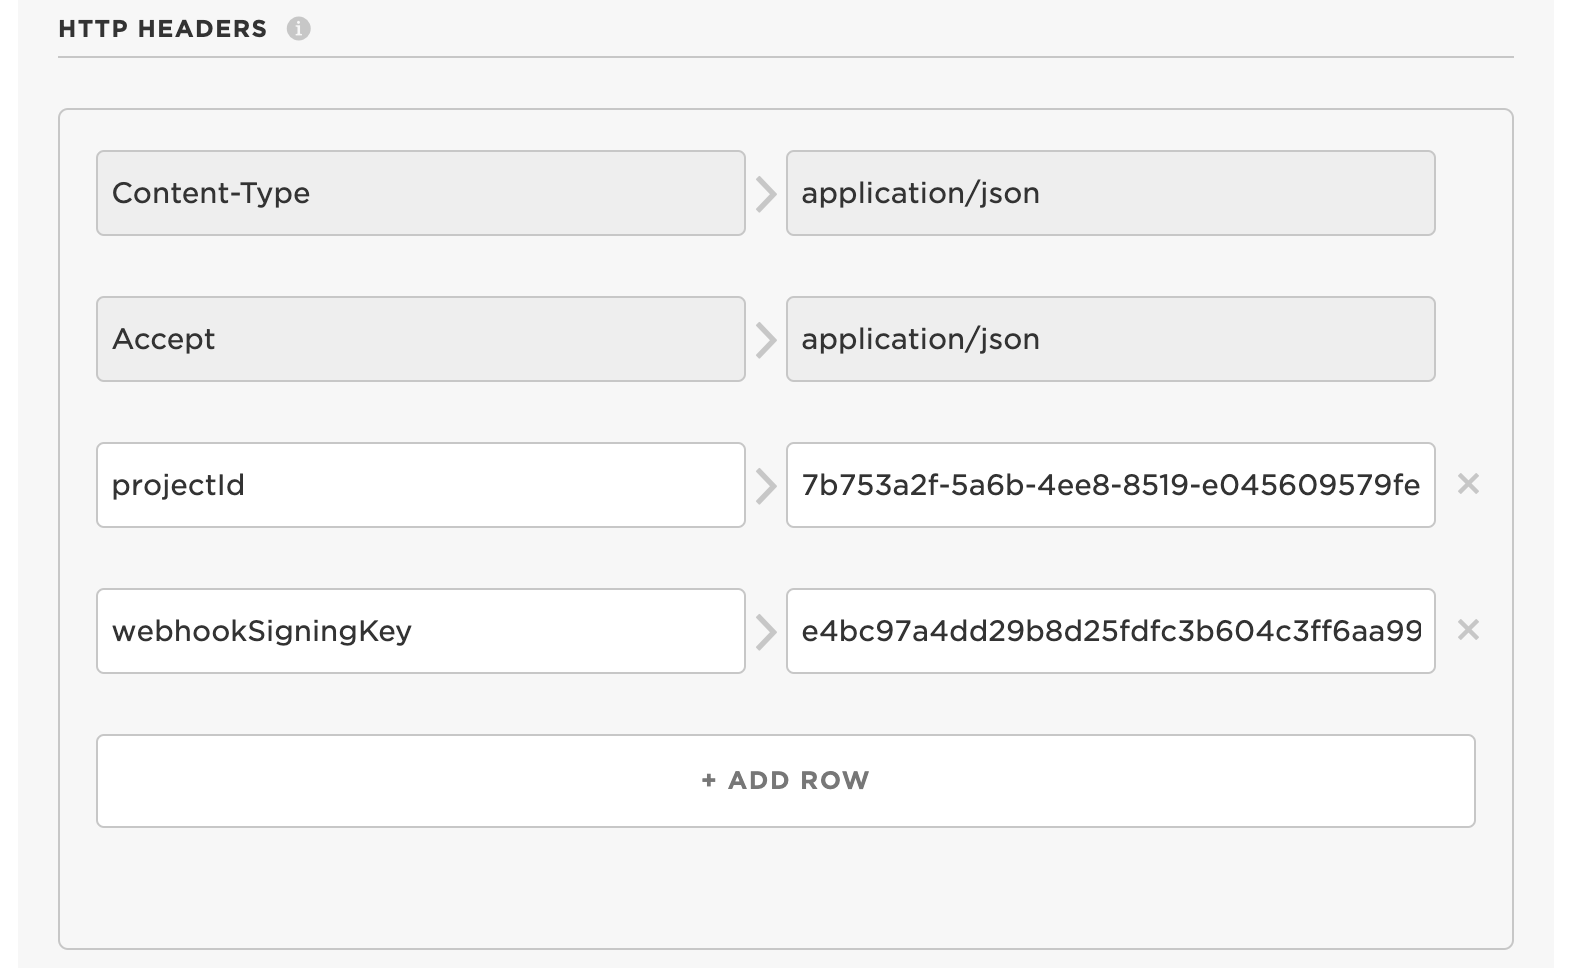
- Step (3) HTTP Headers
Add HTTP Headers** by copying and pasting each key and their values from the page you navigated in the previous step on Qubitro Portal.
Header Name: projectId - Header Value: <PROJECT_ID>
Header Name: webhookSigningKey - Header Value: <WEBHOOK_SIGNING_KEY>
Example:
- Step (4) Create Webhook
Click on Create Webhook button and go back to the Qubitro Portal.
Verify integration
Click on the Go to project button and then the Refresh button to verify that the devices are listed successfully.

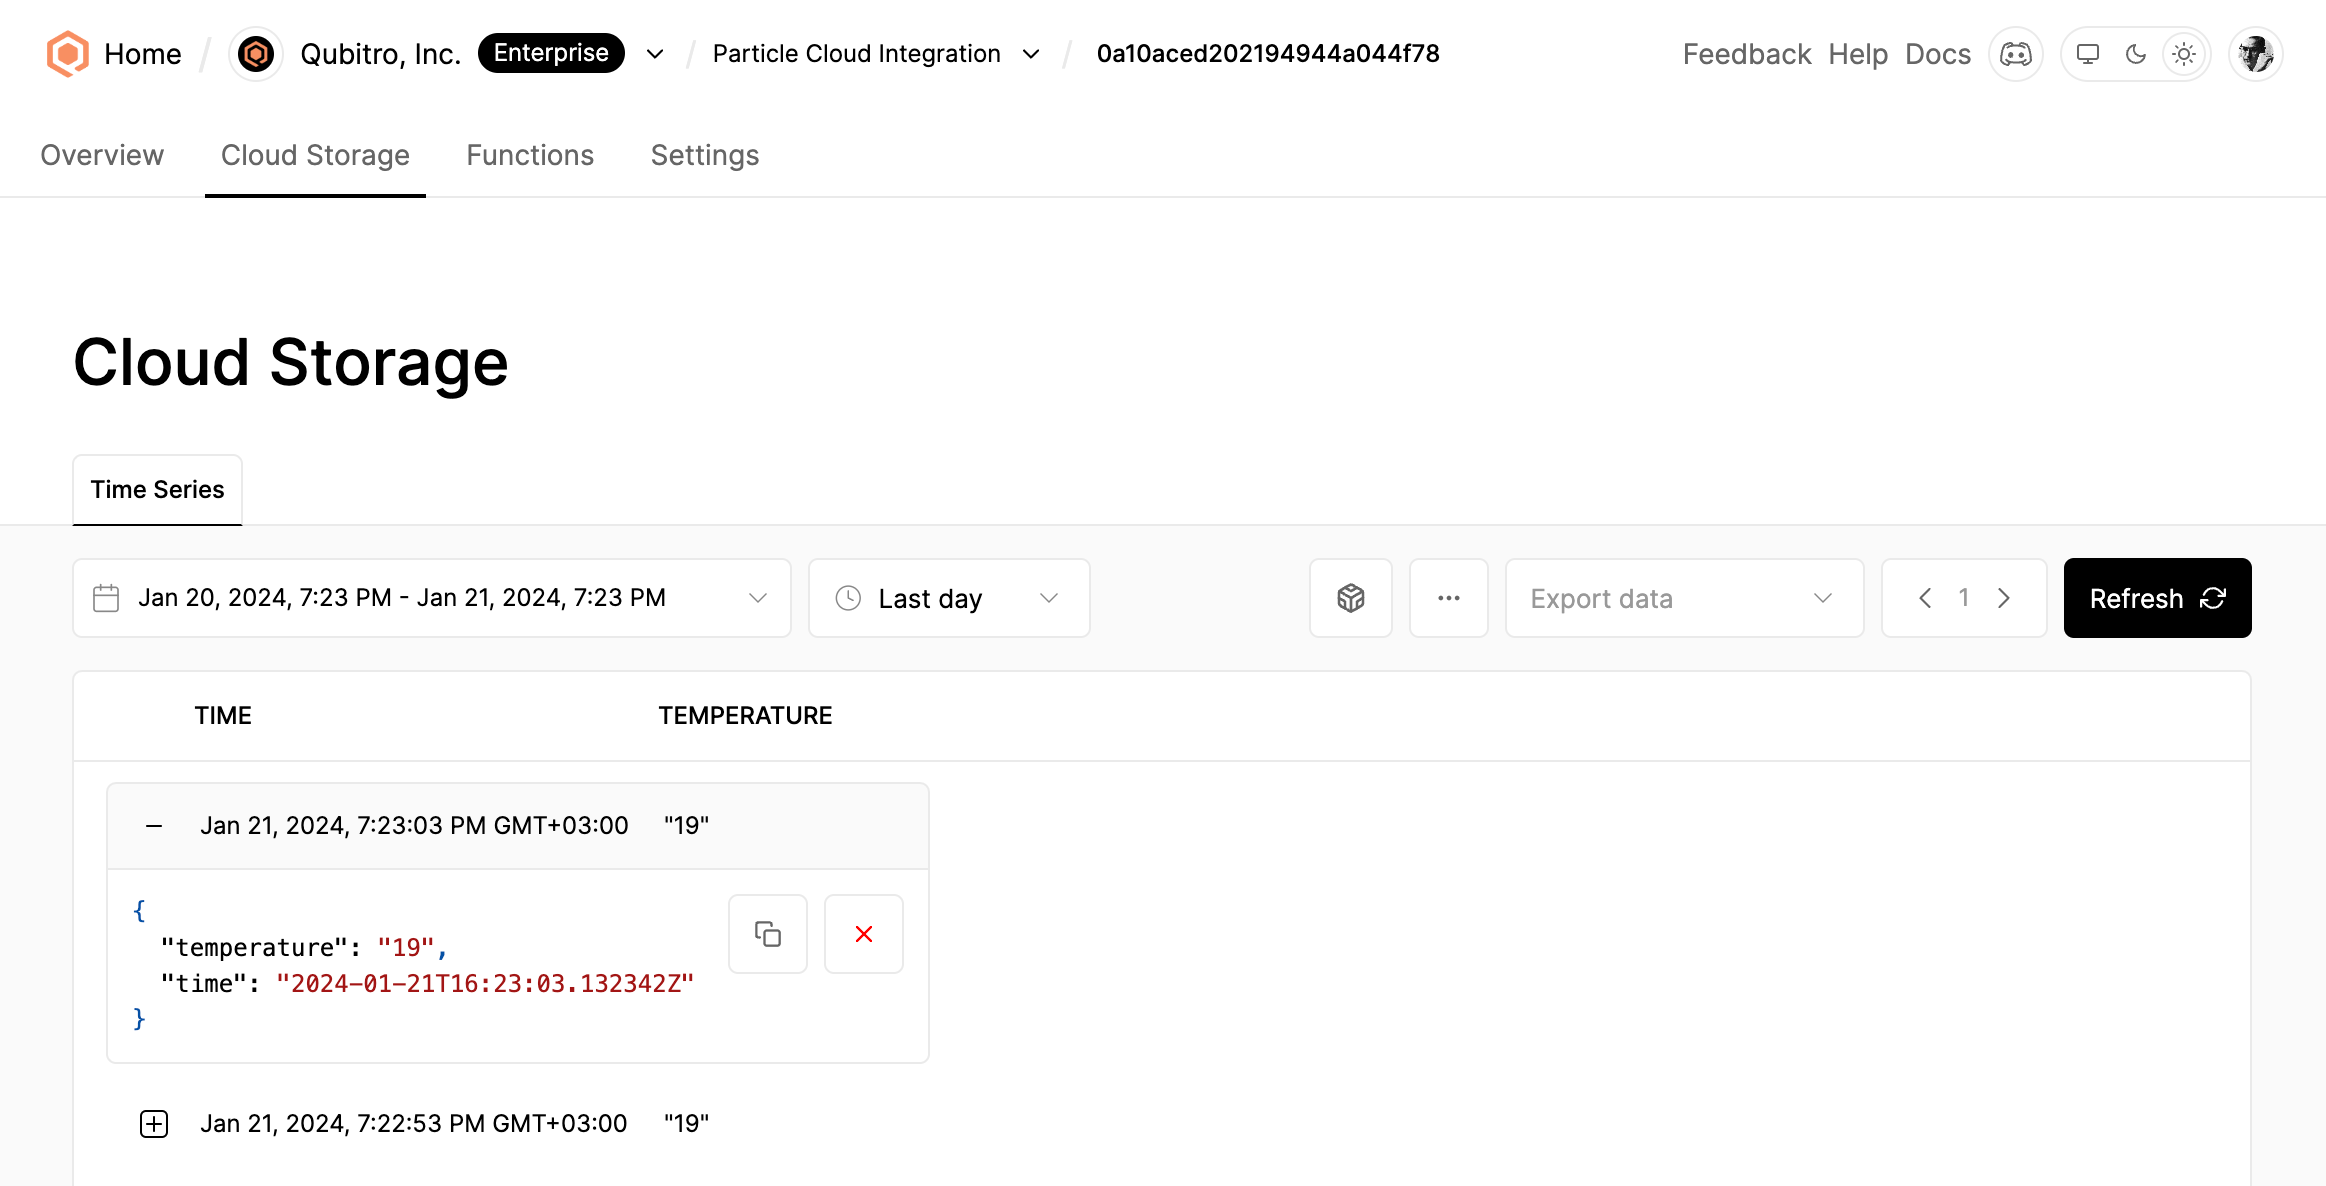
Then, navigate to the device and click on the Cloud Storage tab to verify the incoming data.
(Optional) Customize device information
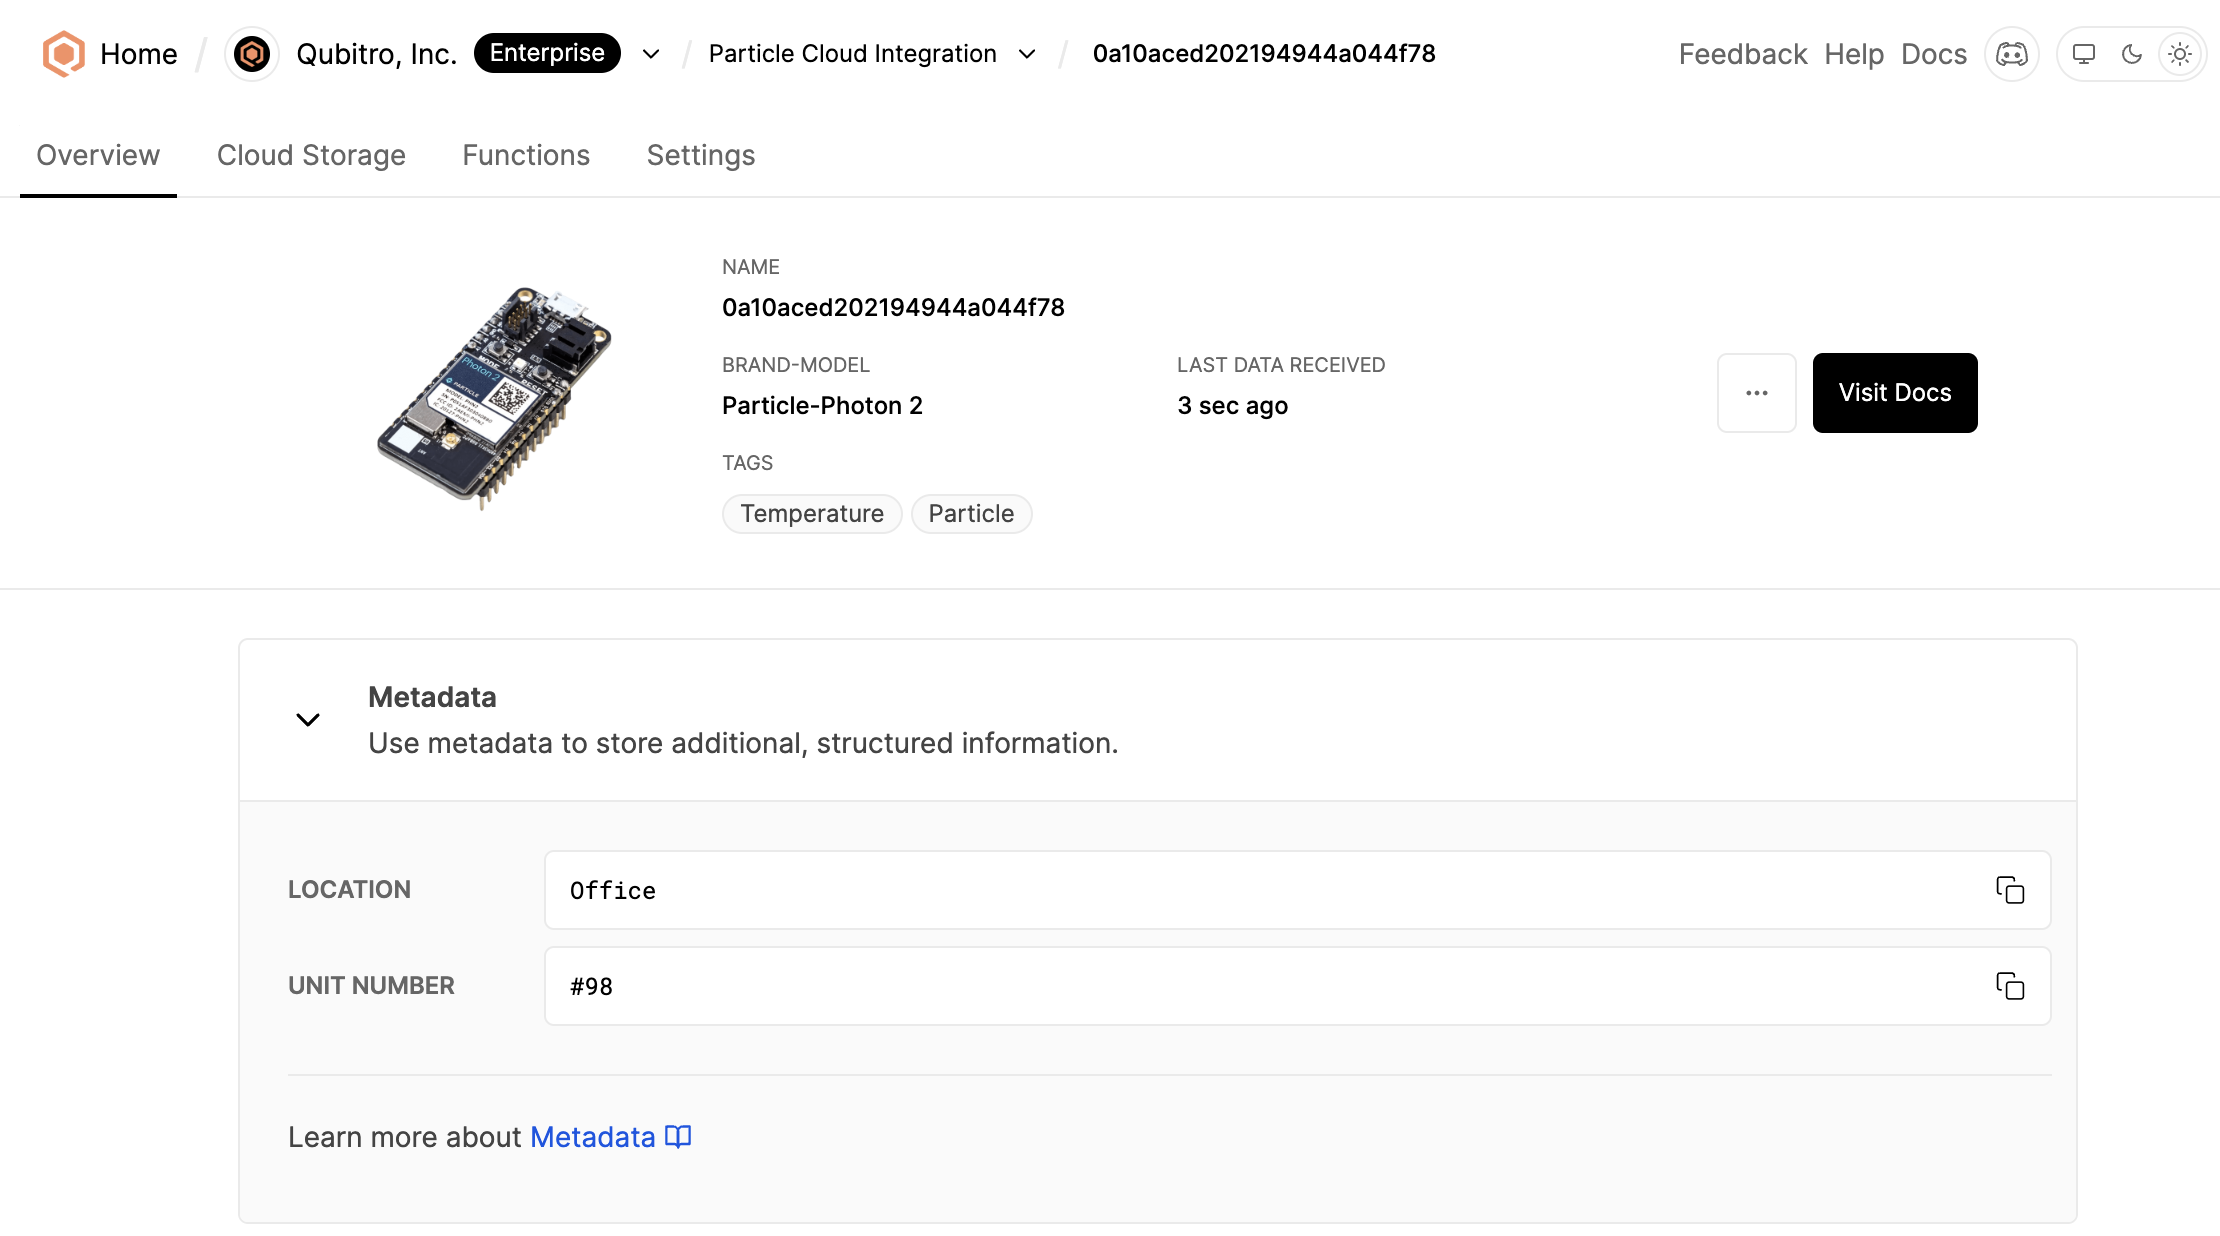
You can customize device information, such as avatar, name, brand, and model, by navigating to the device settings.
An example device configuration:
For enterprise support or further assistance, visit Qubitro support options.