
Amazon Web Services
There are four AWS integrations available:
| Integration name | Description |
|---|---|
| AWS Lambda | Serverless cloud computing service (via AWS API Gateway) |
| AWS DynamoDB | Managed NoSQL database |
| AWS S3 | Cloud storage (accessed via AWS Firehose) |
| AWS SQS | Message queueing service |
AWS Lambda
Lambda setup
- Go to Lambda and click
Create function. - Name your function and create it.
- Update the code and make sure to deploy the changes.
API Gateway setup
- Go to API Gateway service and click on
Create API. - Select
REST APIandBuild. - Name the new API Gateway and
Create API. - Click on
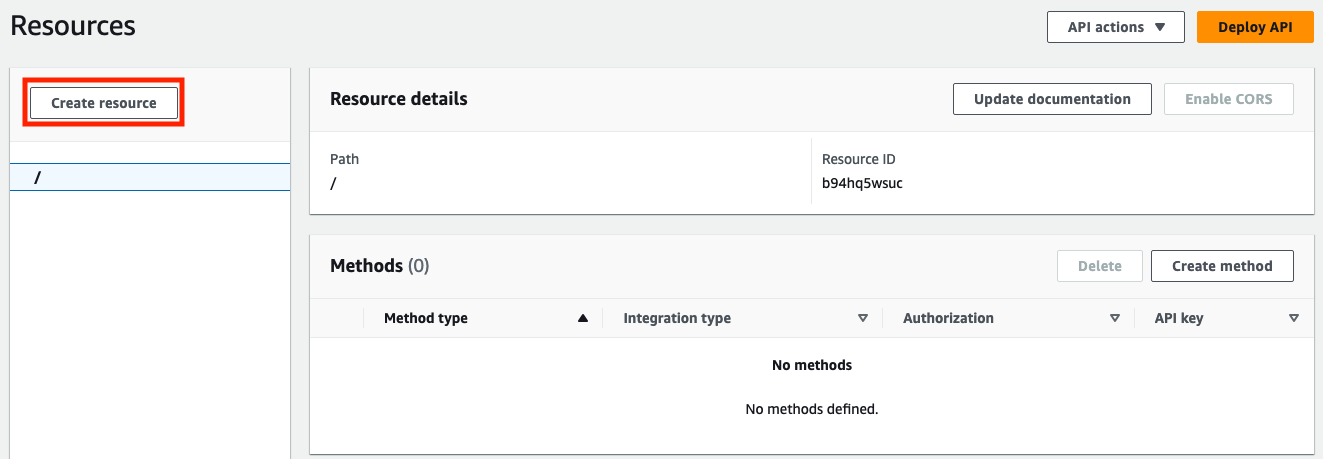
Create resource.
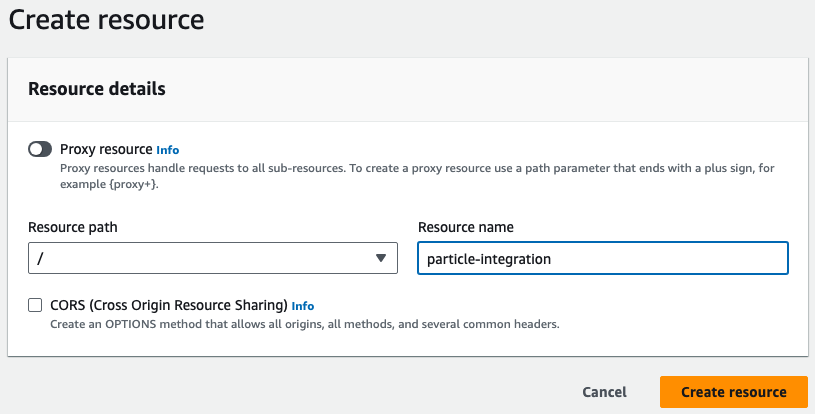
- Name your resource, this will be part of the path in your API request
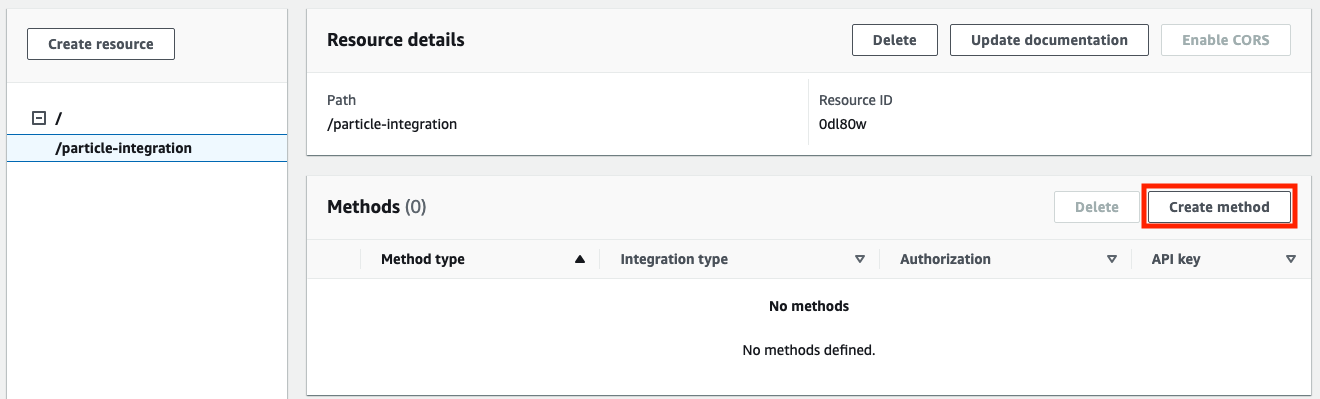
- Now create a Method, for this example we will use POST
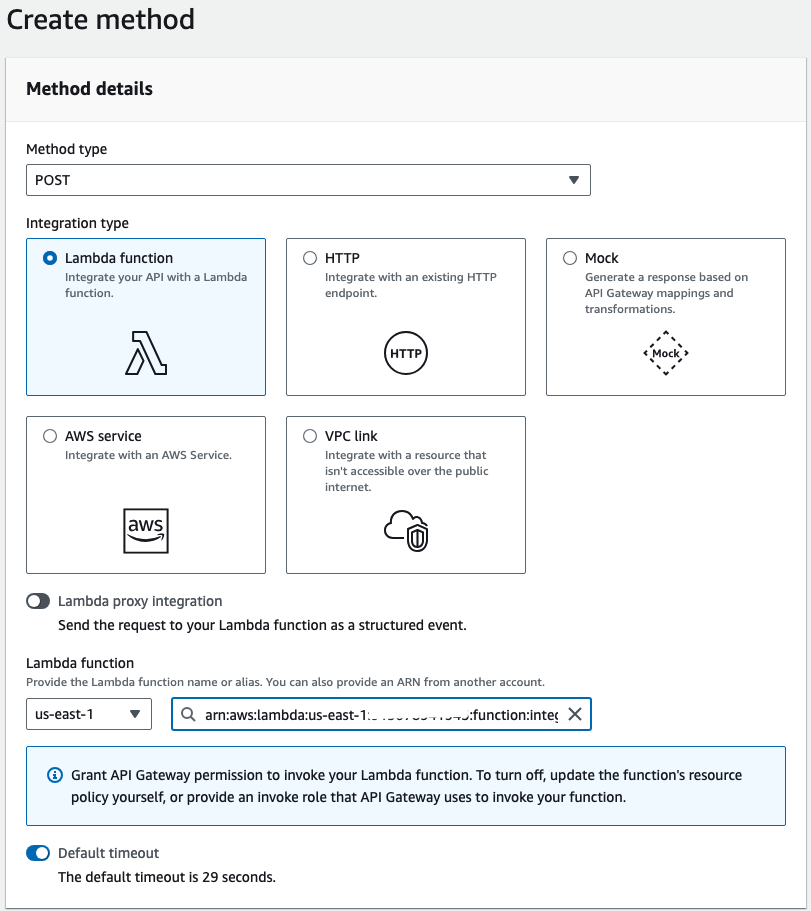
- Select
Lambda functionas integration type and choose your lambda in the dropdown.
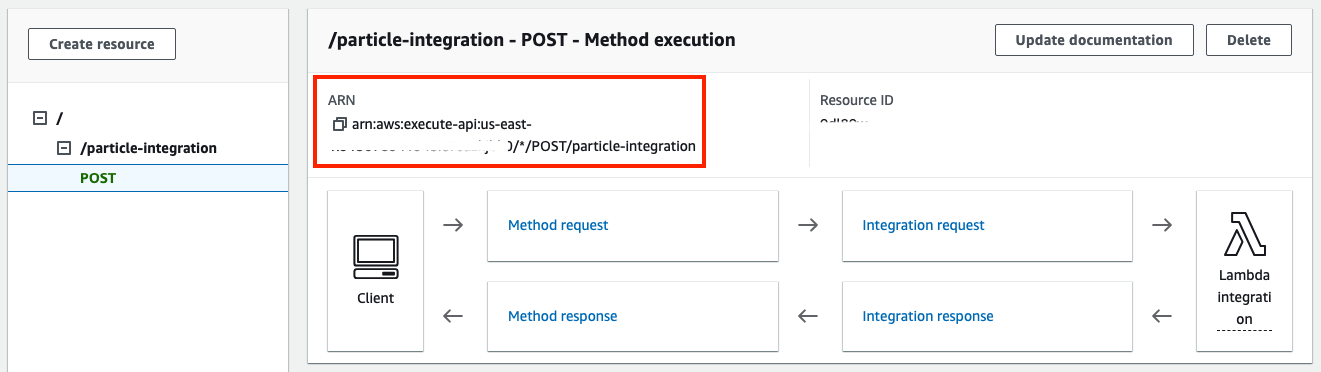
- Once the method is created, take note of its ARN. You will need it to set the right permissions to invoke it in the IAM policy.
- Go back to your lambda function details and select
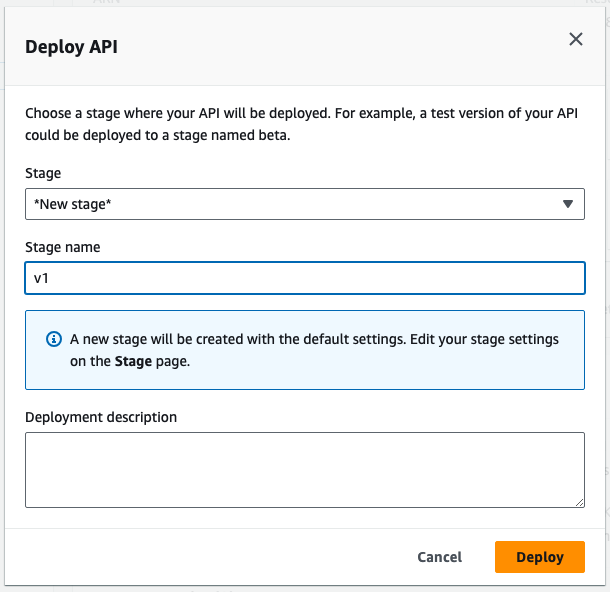
Deploy API. - Select
*New stage*option and name a first stage for the API.
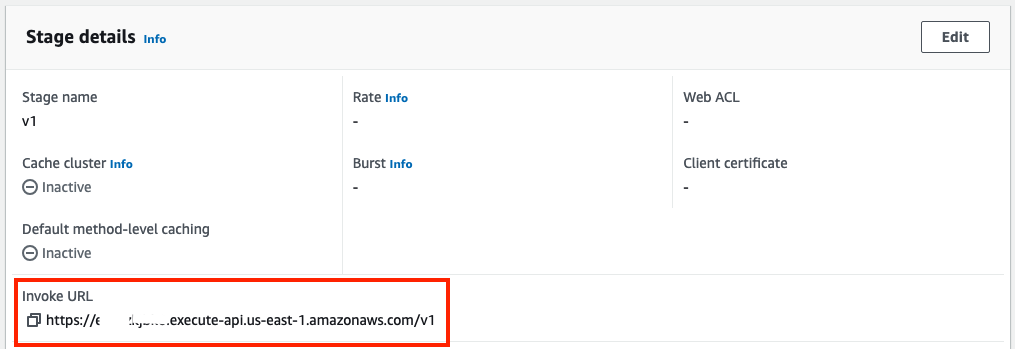
- Once your stage is created, take not of the invoke URL, this is the URL needed to configure particle webhook.
Policy creation - Lambda
Go to Identity and Access Management (IAM) and in Policies section select Create policy and go to the JSON editor.
This is the base policy JSON with the minimal permission needed to invoke a Lambda through a POST method from an API Gateway. Set the ARN of the lambda as Resource in the policy and click Next.
{
  "Version": "2012-10-17",
  "Statement": [
    {
      "Effect": "Allow",
      "Action": [
        "execute-api:Invoke"
      ],
      "Resource": "<POST METHOD ARN>"
    }
  ]
}
Name your policy and click Create policy at the bottom of the page. Continue with the AWS access configuration steps below.
AWS DynamoDB
DynamoDB is a fully managed NoSQL database service by Amazon Web Services (AWS).
Instructions
- Obtain the ARN of your DynamoDB table from the AWS Management Console.
- Ensure your AWS user has permissions to perform
dynamodb:PutItemoperations on the table. - In the webhook configuration, insert the ARN in the designated field and provide the AWS user's key pair for authentication.
Continue with the AWS access configuration steps below.
Policy creation - DynamoDB
Go to Identity and Access Management (IAM) and in Policies section select Create policy and go to the JSON editor.
This is the base policy JSON with the minimal actions needed to put items to a DynamoDB table. Set the ARN of the TABLE as Resource in the policy and click Next.
{
  "Version": "2012-10-17",
  "Statement": [
    {
      "Effect": "Allow",
      "Action": [
        "dynamodb:PutItem"
      ],
      "Resource": "<DYNAMO TABLE ARN>"
    }
  ]
}
Name your policy and click Create policy at the bottom of the page. Continue with the AWS access configuration steps below.
AWS S3
AWS S3 is a scalable storage service, and AWS Kinesis Firehose is a service for delivering real-time streaming data to destinations such as S3.
Instructions
- Ensure your AWS user has the necessary permissions (
firehose:PutRecord,firehose:PutRecordBatch) for the Kinesis Firehose stream. - Set up a Kinesis Firehose stream if not already done, and configure it to deliver data to your S3 bucket.
- Obtain the name of your Kinesis Firehose stream.
- In the webhook configuration, input the user's key pair for AWS authentication and the name of the Firehose stream to route data into your S3 bucket.
S3 setup
- Go to the S3 service and select
Create bucket. - Note the bucket name.
Firehose setup
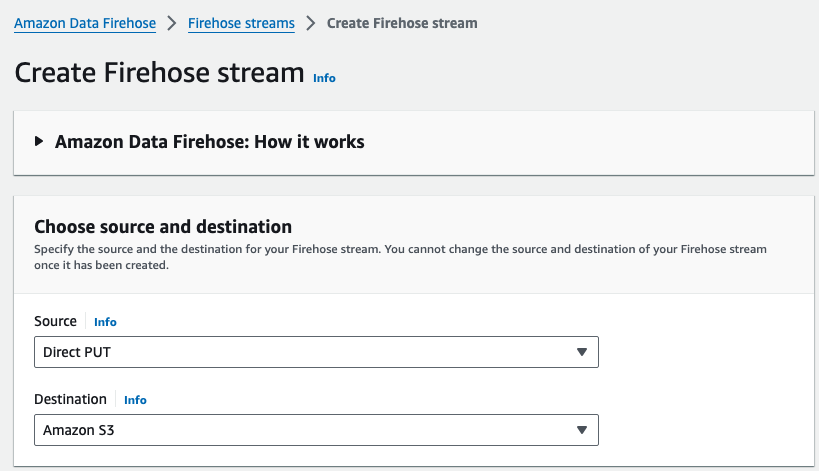
- Go to Amazon Data Firehose service and select
Create Firehose stream. - Set
Direct PUTas Source andAmazon S3as Destination.
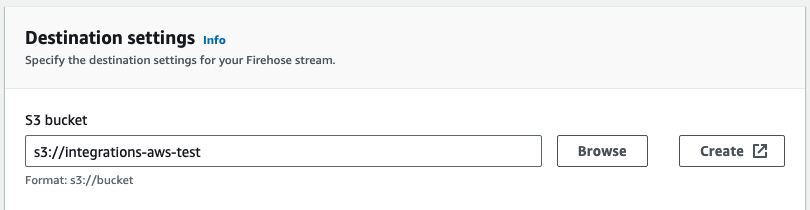
- In Destination settings section set your S3 bucket as destination for the stream.
- IMPORTANT: In
New line delimiter, selectEnabled - Click on
Create Firehose streamat the bottom of the page. - Note the newly created Firehose stream ARN.
Policy creation - S3
Go to Identity and Access Management (IAM) and in Policies section select Create policy and go to the JSON editor.
This is the base policy JSON with the minimal actions needed to write to the S3 bucket using a Firehose stream. Set the ARN of the Firebase stream as Resource in the policy and click Next.
{
  "Version": "2012-10-17",
  "Statement": [
    {
      "Effect": "Allow",
      "Action": [
        "firehose:PutRecord",
        "firehose:PutRecordBatch"
      ],
      "Resource": "<FIREBASE ARN>"
    }
  ]
}
Name your policy and click Create policy at the bottom of the page. Continue with the AWS access configuration steps below.
AWS SQS
AWS SQS (Simple Queue Service) is a fully managed message queuing service that enables you to decouple and scale microservices, distributed systems, and serverless applications.
Instructions
- Ensure your AWS user has permissions to
sqs:SendMessagefor the desired SQS queue. - Create an SQS queue if you do not have one already, and obtain its URL from the AWS Management Console.
- In the webhook configuration, provide the queue URL to specify where messages should be sent and the user's key pair for AWS authentication.
Policy creation - SQS
This is the base policy JSON with the minimal actions needed to send messages to a SQS queue. Set the ARN of the queue as Resource in the policy and click Next.
{
  "Version": "2012-10-17",
  "Statement": [
    {
      "Effect": "Allow",
      "Action": [
        "sqs:SendMessage"
      ],
      "Resource": "<SQS ARN>"
    }
  ]
}
Name your policy and click Create policy at the bottom of the page. Continue with the AWS access configuration steps below.
AWS access configuration
These steps are used for all Amazon services.
User creation
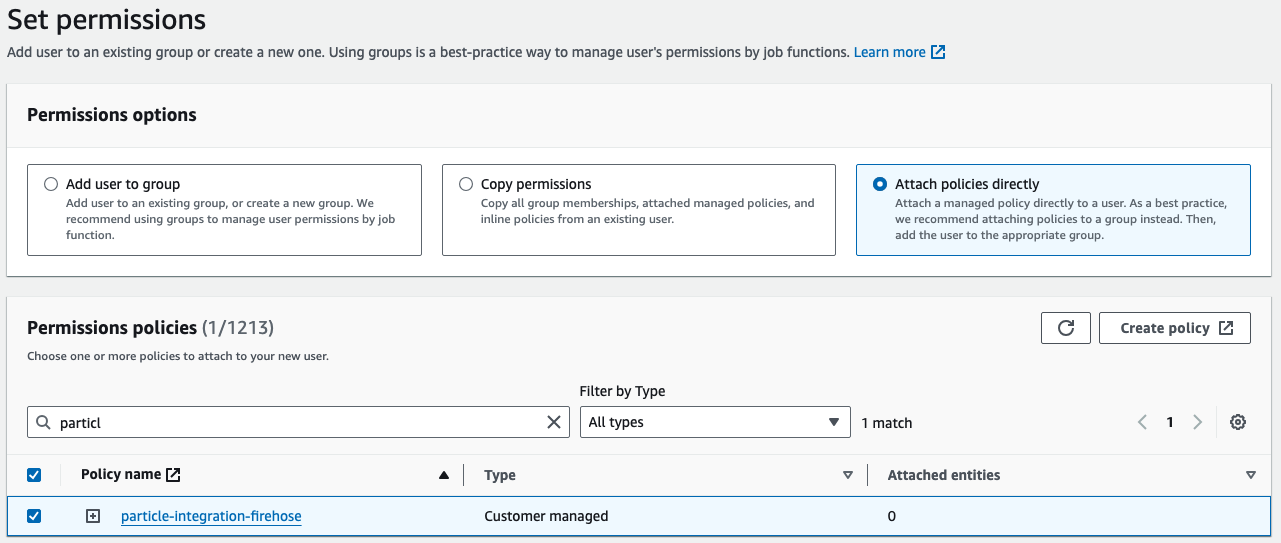
- Go to Identity and Access Management (IAM) and in User section select
Create user. - Set a name for the user and do not provide access to the AWS Console. Click
Next. - Select
Attach policies directly, select the policy policies created in the previous step and clickNext.
- Click on
Create user
Access Key pair creation
- Go to Identity and Access Management (IAM) and in User section select the user you created in the previous step.
- Click on
Create access key. - Select
Third-party serviceand clickNext. - Tag the keys at convenience. In next screen keep note of the key pair in a safe place and click on
Done. This is the key pair needed to configure the particle webhook integrated with AWS.