
Particle Debugger
The Particle Debugger is deprecated.
The Particle Debugger is no longer sold, however you can use a generic CMSIS/DAP debugger available on Amazon, eBay, or AliExpress.
- Get one that has support for drag-and-drop mode.
- For Gen 3 devices, ideally get one that indicates support for Nordic nRF52. Some do not list it but are compatible anyway, but all things being equal it's safer if it's listed because a few are compatible only with STM32 devices.
- For Gen 4 devices, it's rare that you'd see Realtek RTL872x listed explicitly, but debuggers that support ARM Cortex M and nRF52 are almost always compatible.
- It does not matter whether you get one with a USB-A or USB-C connector; both will work.
To connect a compatible debugger, see debugger adapter.
Particle Debugger
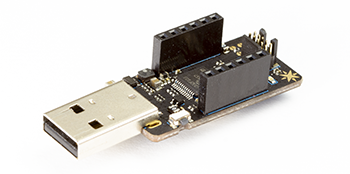
The Particle Debugger gives you the power of professional debugging at a fraction of the cost. Using this accessory, you’ll be able to program Particle Gen 3 hardware over common interfaces like JTAG and SWD, using open source tools like GDB and openocd. It can also be used with Gen 2 devices, with the addition of some jumper wires.
Supports the open source CMSIS-DAP specification and DAPLink firmware developed by ARM. On Mac, Linux, and Windows it requires no additional device drivers.
It also provides a USB to TTL serial port. This requires no device drivers on Mac, Linux, or Windows 10 or later, but you may need to install a device driver from the CMSIS-DAP specification page, above, for earlier versions of Windows to use the optional serial port feature.
Comes with one JTAG ribbon cable.
The design is open source and the design files are available here.
Debugging Gen 3 devices
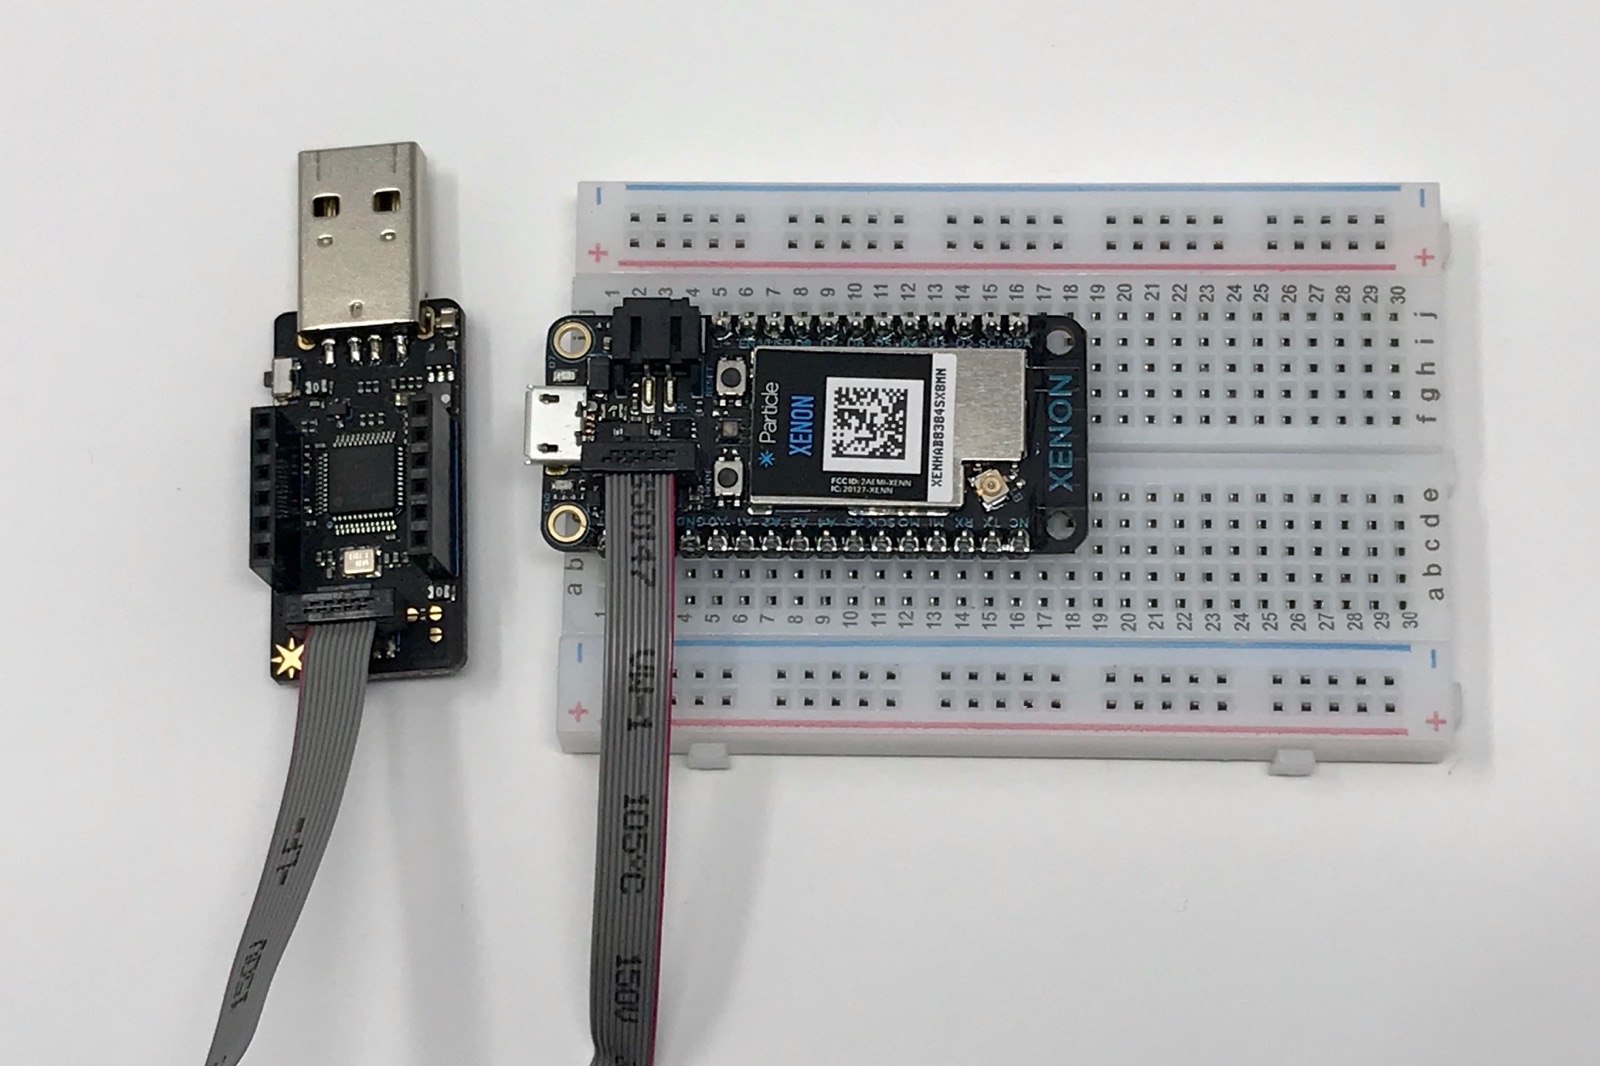
Connecting a Argon or Boron to the debugger is as easy as connecting the included ribbon cable, as pictured below. It's keyed so it will only go in one way. The devices ship with a small plastic protective plug in the debugging connector; make sure you remove that first.
Debugging Gen 2 platforms
Using the headers on the Particle Debugger you can attach it to other ARM processor devices like the STM32 in the Particle Photon, P1, Electron, and E-Series for SWD (serial wire debug).
With the debugger positioned like this, USB connector toward you and the headers facing up:
| Left Header | Right Header |
|---|---|
| VDD | SWCLK |
| RTS | SWDIO |
| RX | NC |
| TX | NC |
| CTS | GND |
| GND | VUSB |
The RX and TX pins are only available on the debugger header pins and are not connected to the Argon or Boron RX and TX pins.
The RTS and CTS (hardware flow control pins) are not currently supported by the debugger firmware and cannot be used.
In order to use SWD debugging you need to connect:
- D7: SWDIO
- D6: SWCLK
- GND
Upgrading the debugger
As of early 2021, all Particle debuggers shipped with an older version of the DAPLink debugger software. The older version did not support WebUSB mode, and also had bugs that prevented drag-and-drop flashing from working properly in many cases. If you drag a .hex file on the debugger and the volume immediately ejects without installing anything, it probably needs to be upgraded.
If you don't want to upgrade, OpenOCD mode works fine with the original version 0246.
Download the current release binary (v0254.2).
With the debugger not connected to a device (ribbon cable disconnected) and unplugged from USB, hold down the side button next to the USB connector.
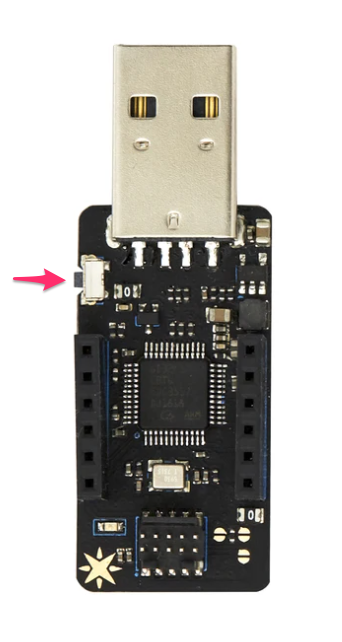
Plug the debugger into a USB port on your computer with the button held down. Wait a few seconds then release the button. It should show up as a USB drive named MAINTENANCE.
Drag and drop the debugger_v02542.hex file onto the maintenance drive. A few seconds later, the drive should eject and be upgraded!
It's normal if your operating system warns that the disk was not ejected safely. This process should work on Mac, Windows, and Linux.
If you're interested in the details of the DAPLink software that runs on the Particle Debugger, it's open source and available in the Particle DAPLink fork GitHub.
Drag-and-drop flashing only works with .hex files. You can't drop a Particle .bin file directly onto the debugger DAPLINK volume. Also, it's still not particularly reliable on Gen 2 devices (Photon, P1, Electron, and E-Series). For Gen 2 devices, you should stick with using openocd, which works quite well.
Ordering information
The Particle Debugger is no longer available for purchase.
| SKU | Description | Lifecycle | Replacement |
|---|---|---|---|
| ACC-DEBUG | Particle Debugger | Deprecated |