
Enterprise Single Sign On (SSO)
Particle supports Single Sign-On (SSO) and automated provisioning of users for Enterprise customers. With SSO, users can securely authenticate themselves with the Particle Cloud and developer tools without the need to remember or manage a Particle-specific password. Additionally, Particle supports user provisioning through the System for Cross-domain Identity Management (SCIM) standard, enabling streamlined user provisioning and access control.
This documentation will guide you through the process of setting up and configuring SSO using SAML and user provisioning with SCIM on the Particle Cloud.
Prerequisites
Before proceeding with the setup of SSO and user provisioning on the Particle Cloud, ensure you meet the following criteria:
- Particle Cloud account: SSO is available as an added feature to your new or existing Particle Professional or Enterprise plans.
- Identity Provider (IdP): The selected Identity Provider must support SAML 2.0 for SSO configuration.
- SCIM-enabled user management system (optional): If your user management system supports SCIM 2.0, you'll be able to automate user provisioning.
For more information on enabling this feature, please contact our Sales Team.
Using SSO
Once SSO is configured for your organization, your users will be able to login in either by clicking the Enterprise SSO button on https://login.particle.io (Service Provider-initiated flow) or by clicking on the Particle Cloud link in your Identity Provider dashboard (Service Provider-initiated flow).
Configuring SSO with SAML on the Particle Cloud
Step 1: Create an application in your identity provider
- Create a SAML application in your identity provider according to its documentation.
- Retrieve the necessary SAML metadata, including the Issuer URI, Single Sign-On URL, and X.509 certificate.
Step 2: Ask Particle to configure SSO for your organization
- Create a support ticket with your organization name, email domain, and the SAML metadata from the previous step.
- Particle will reply to your ticket with a metadata XML file containing the Assertion Consumer Service (ACS) URL, entity ID, and the attribute mapping.
Step 3: Complete application setup
In your identity provider (IdP), either upload the provided metadata XML file (if supported), or manually configure the integration using the ACS URL and entity ID.
To ensure proper provisioning and authentication, map the following attributes in your IdP to match the expected attribute names:
| Expected Attribute | Description |
|---|---|
email |
Primary email address of user |
firstName |
User’s first (given) name |
lastName |
User’s last (surname) name |
Note:
These exact attribute names (email, firstName, and lastName) must appear in the SAML assertion. Map them to the appropriate fields in your directory (e.g., email, givenName, surname) depending on your IdP.
Once configured, enable the application and assign it to users.
These steps allow users with an existing Particle account, and who belong to your organization, to sign in using SSO.
Configuring user provisioning with SCIM on the Particle Cloud
Configuring System for Cross-domain Identity Management (SCIM) will allow users who do not yet have a Particle account to log in and have access to your organization when you assign them the Particle Cloud application in your Identity Provider. It will also allow removing users from your organization when you unassign the Particle Cloud application.
Note that users created through SCIM will not have a password, so they will only be able to log in using SSO. Particle recommends keeping at least one user with password access (created outside of SCIM and invited to the organization manually) in case of issues with SSO login.
Step 1: Create an API User
- Create an API User with permission to manage team members using the API User creation tool. Select your organization, and click the
teams.users:invite, teams.users:remove, teams.users:list, teams.users:updatescopes. We suggest using the friendly name "SSO user provisioning" for this API user.- Copy the access token (a 40-character string) as you will need it in the next step.
Step 2: Configure SCIM in your identity provider
- Navigate to the user provisioning section of your identity provider.
- Type in the SCIM URL
https://api.particle.io/v1/orgs/<org_slug>/team/provisionwhere<org_slug>is the lowercase version of your organization name in the Console URL. The SCIM URL maybe be called Tenant URL.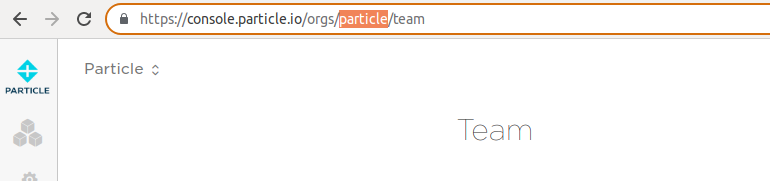
- Enter the access token for the API user that you created in the previous step in the Secret Token field.
Step 3: Provision users
- In your identity provider, assign the Particle application to the desired users.
- Wait for the identity provider to perform the next user synchronization (Azure Active Directory synchronizes users every 40 minutes).
- Expect to see the user on the team page of your organization in the Particle Console.
Troubleshooting
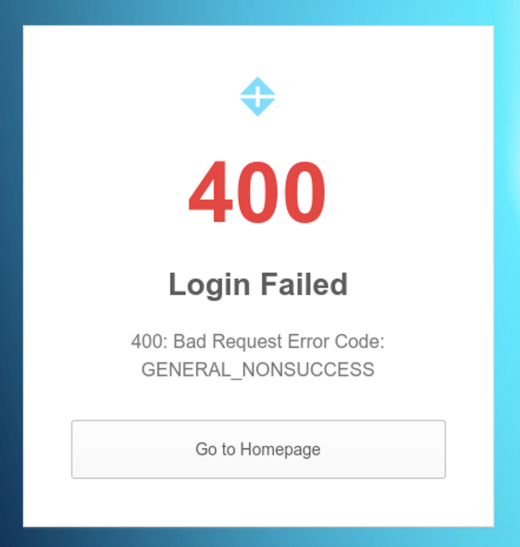
The most common issue while setting up the SAML integration is mistakes in the attribute mappings. If the Particle login system doesn’t recognize all the attributes sent by the identity provider during a SAML session, it will show a "general non-success" error like this.
Verify the spelling and capitalization of the required mapping attributes: email, firstName, and lastName.