
Lab 2: Working with Particle primitives & Grove Sensors
This page is no longer maintained and is provided for historical reference only
| Project Goal | Start programming your Argon, read sensor data, and leverage the device cloud. |
|---|---|
| What you’ll learn | How to interact with sensors, using Particle variables, cloud functions and publish/subscribe. |
| Tools you’ll need | Access to the internet for build.particle.io and console.particle.io. Plus the Particle CLI, Particle Workbench, a Particle Argon, and Grove Starter Kit for Particle Mesh |
| Time needed to complete | 60 minutes |
In this session, you'll explore the Particle ecosystem via an Argon-powered Grove Starter Kit for Particle Mesh with several sensors!
Tip: Go back to the source
If you get stuck at any point during this session, click here for the completed, working source.
If you pull this sample code into Workbench, don't forget to install the relevant libraries using the instructions below!
Create a new project in Particle Workbench
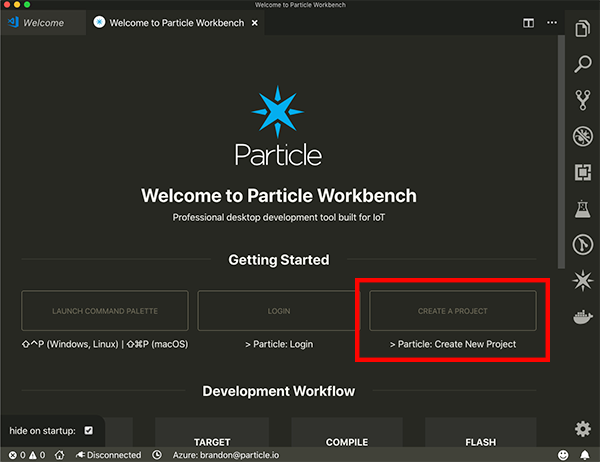
- Open Particle Workbench (VS Code) and click Create new project.
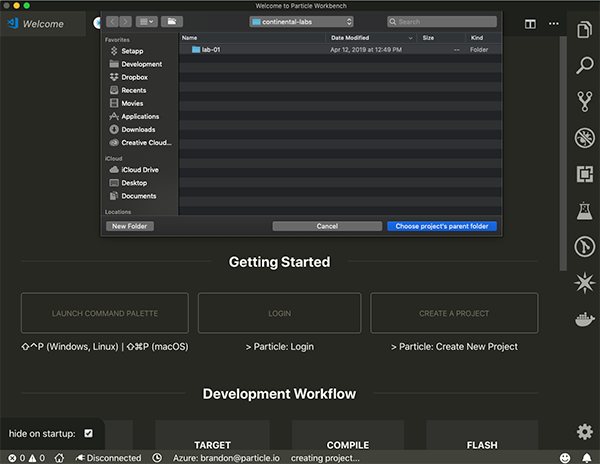
- Select the parent folder for your new project and click the Choose project's parent folder button.
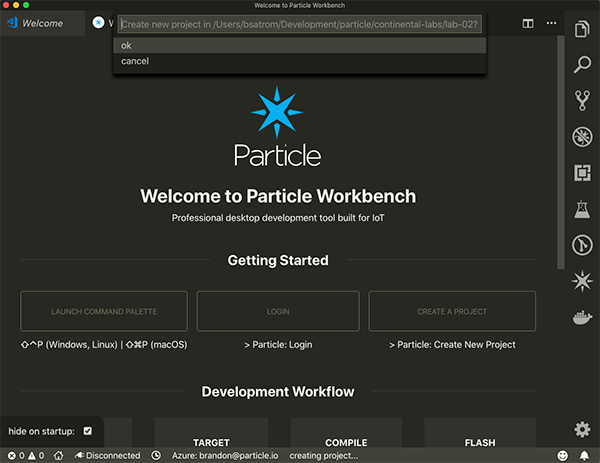
- Give the project a name and hit Enter.

- Click ok when the create project confirmation dialog pops up.
- Once the project is created, the main
.inofile will be opened in the main editor. Before you continue, let's take a look at the Workbench interface.
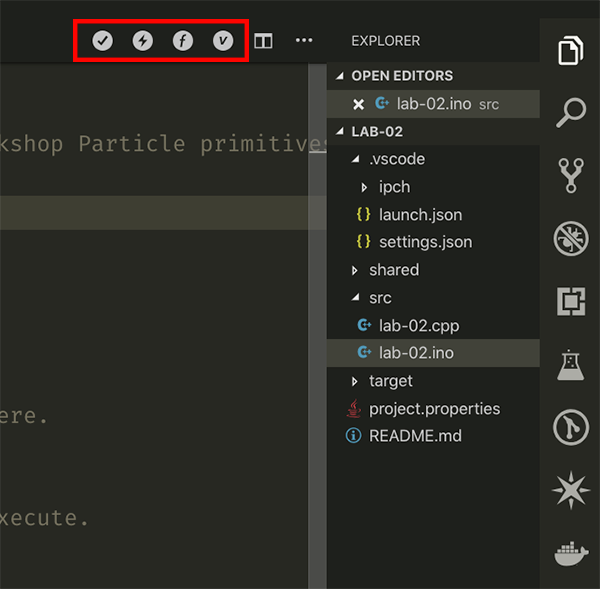
Using the command palette and quick buttons
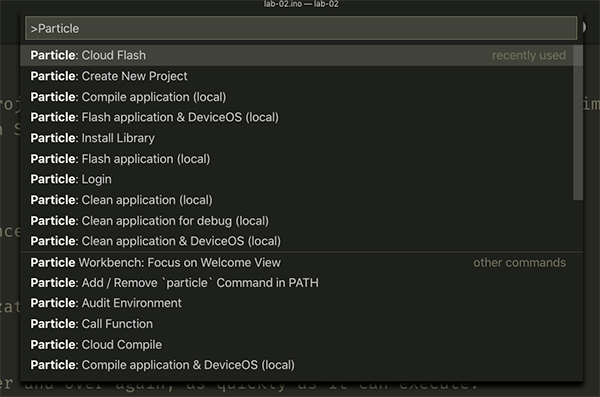
- To open the command palette, type CMD (on Mac) or CTRL (on Windows) + SHIFT + P and type Particle. To see a list of available Particle Workbench commands. Everything you can do with Workbench is in this list.
- The top nav of Particle Workbench also includes a number of handy buttons. From left to right, they are Compile (local), Flash (local), call function, and get variable.
- If this is your first time using Particle Workbench, you'll need to log in to your account. Open the command palette (CMD/CTRL + SHIFT + P) type/select the Particle: Login command, and follow the prompts to enter your username, password, and two-factor auth token (if you have two-factor authentication setup).
Configuring the workspace for your device
- Before you can flash code to your device, you need to configure the project with a device type, Device OS firmware version, and device name.
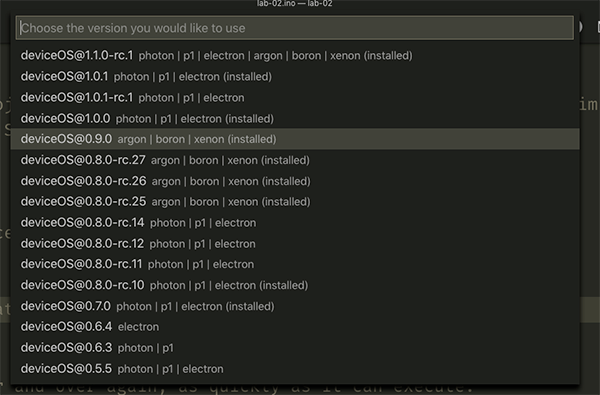
Open the command palette and select the Configure Project for Device option.
- Choose a Device OS version. For this lab, you should use 1.4.0 or newer.
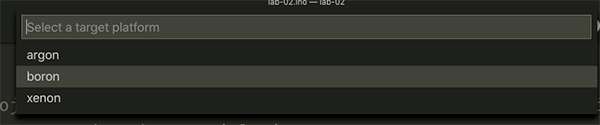
- Select the Argon as your target platform.
- Enter the name you assigned to your device when you claimed it and hit Enter.
 You're now ready to program your Argon with Particle Workbench. Let's get the device plugged into your Grove kit and start working with sensors.
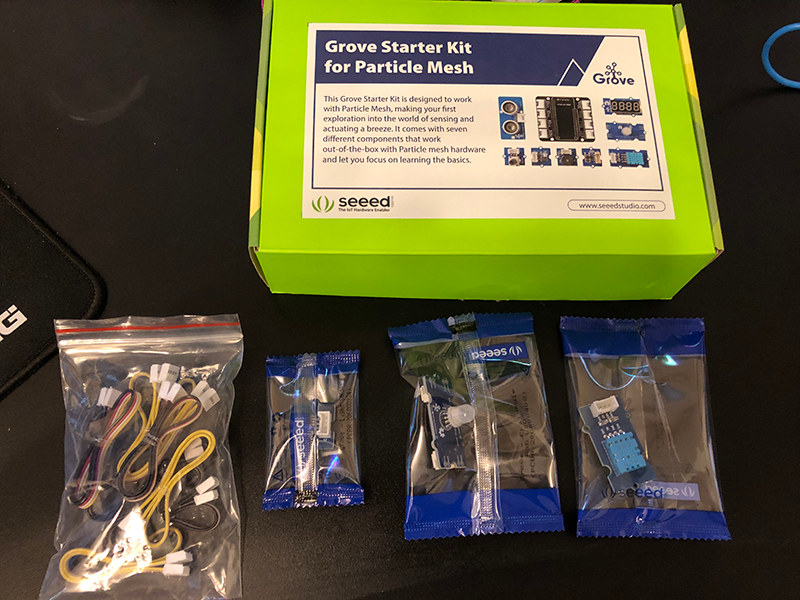
Unboxing the grove starter kit
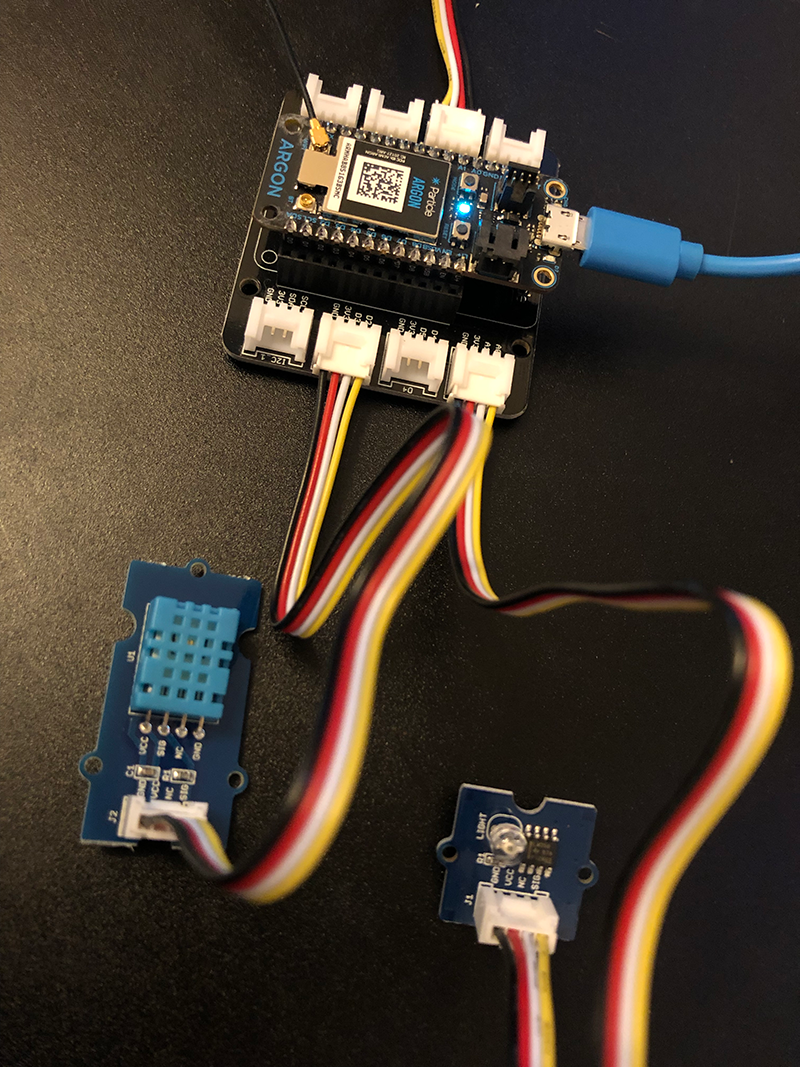
The Grove Starter Kit for Particle Mesh comes with seven different components that work out-of-the-box with Particle Mesh devices, and a Grove Shield that allows you to plug in your Feather-compatible Mesh devices for quick prototyping. The shield houses eight Grove ports that support all types of Grove accessories. For more information about the kit, click here.
For this lab, you'll need the following items from the kit:
- Argon
- Grove Starter Kit for Particle Mesh
- Grove FeatherWing
- Temperature and Humidity Sensor
- Chainable LED
- Light Sensor
- Grove wires
Note: Sourcing components
You won't need every sensor that comes with the Particle Starter Kit for Mesh for this project; however, the sensors that aren't used for this build, are used in other Particle Workshops and tutorials.
- Open the Grove Starter Kit and remove the three components listed above, as well as the bag of Grove connectors.
- Remove the Grove Shield and plug in your Argon. This should be the same device you claimed in the last lab.
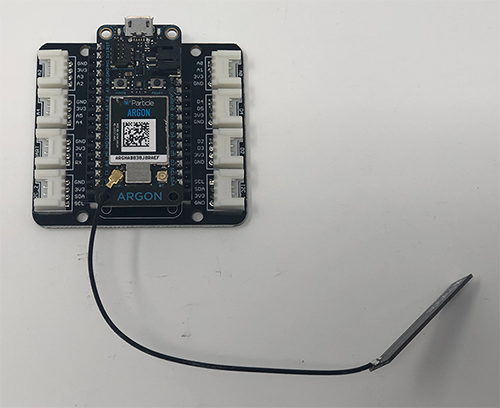
Now, you're ready to start using your first Grove component!
Working with Particle variables plus the temperature & humidity sensor
The Particle Device OS provides a simple way to access sensor values and device local state through the variable primitive. Registering an item of firmware state as a variable enables you to retrieve that state from the Particle Device Cloud. Let's explore this now with the help of the Grove Temperature and Humidity sensor.
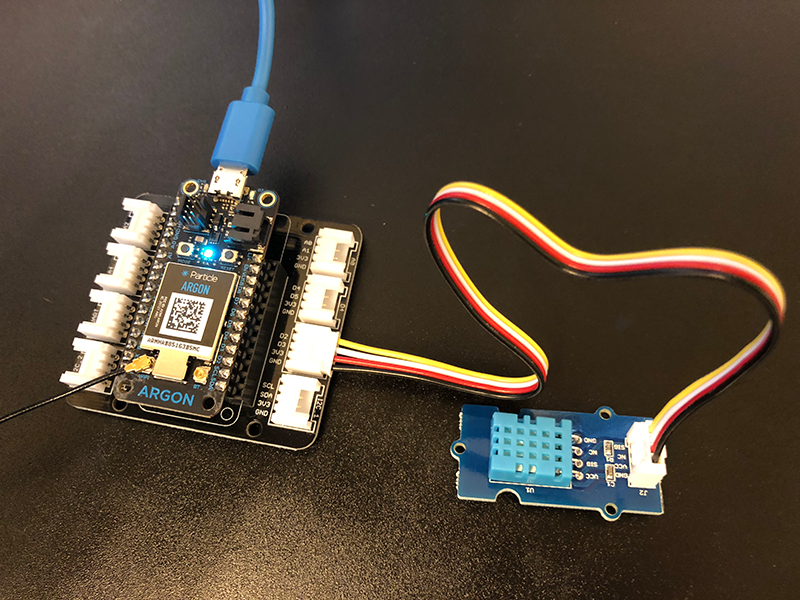
Connect the temperature sensor
To connect the sensor, connect a Grove cable to the port on the sensor. Then, connect the other end of the cable to the D2 port on the Grove shield.
Install the sensor firmware library
To read from the temperature sensor, you'll use a firmware library, which abstracts away many of the complexities of dealing with this device. That means you don't have to reading from the sensor directly or dealing with conversions, and can instead call functions like getHumidity and getTempFarenheit.
- Open your Particle Workbench project and activate the command palette (CMD/CTRL+SHIFT+P).
- Type Particle and select the Install Library option
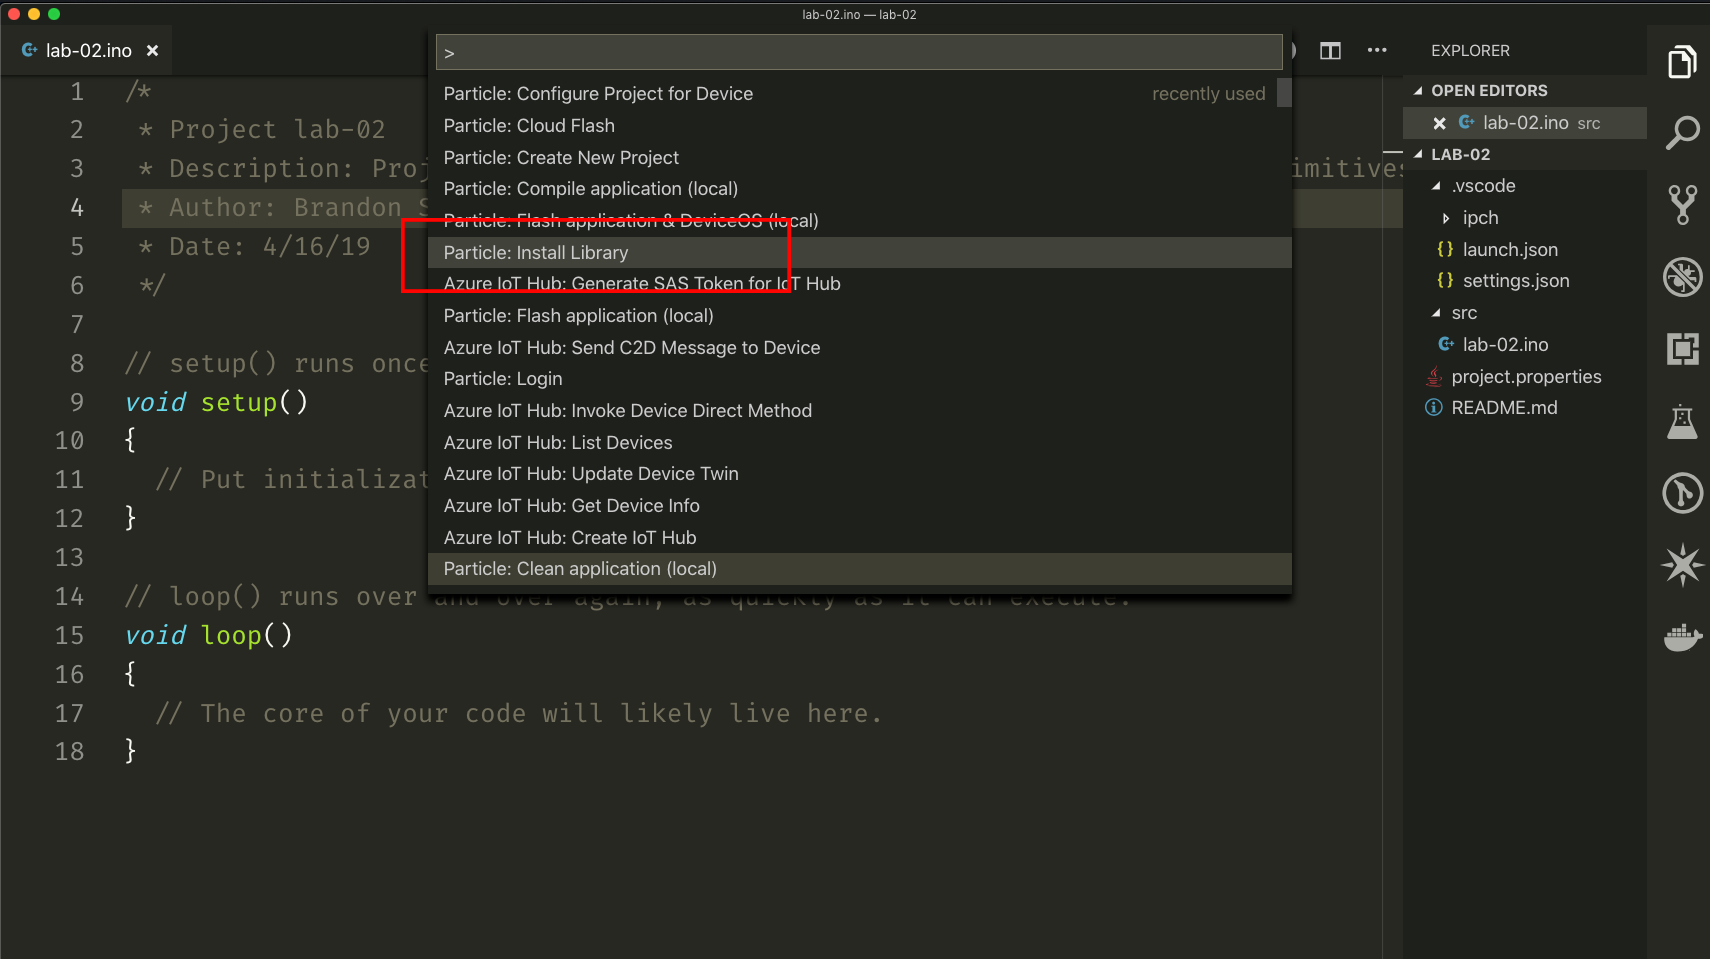
- In the input, type Grove_Temperature_And_Humidity_Sensor and click enter.

You'll be notified once the library is installed, and alibdirectory will be added to your project with the library source.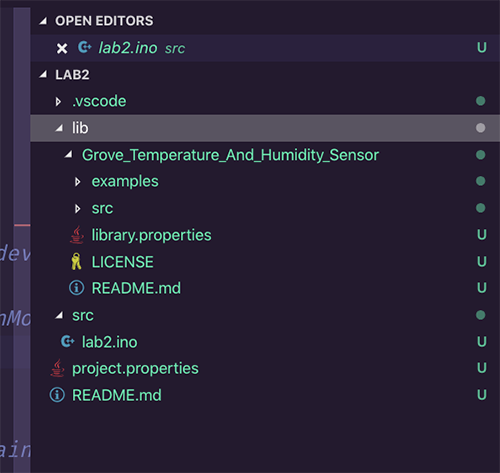
Read from the sensor
- Once the library is installed, add it to your project via an
#includestatement at the top of your main project file (.inoor.cpp).#include "Grove_Temperature_And_Humidity_Sensor.h"Tip: Get any error message from Workbench?
From time-to-time, the IntelliSense engine in VS Code that Workbench depends on may report that it cannot find a library path and draw a red squiggly under your#includestatement above. As long as your code compiles, (which you can verify by opening the command palette [CMD/CTRL+SHIFT+P] and choosing theParticle: compile application (local)) you can ignore this error.
You can also resolve the issue by trying one of the steps detailed in this community forum post, here. - Next, initialize the sensor, just after the
#includestatement.DHT dht(D2); In the
setupfunction, you'll initialize the sensor and a serial monitor.void setup() { Serial.begin(9600); dht.begin(); }Finally, take the readings in the
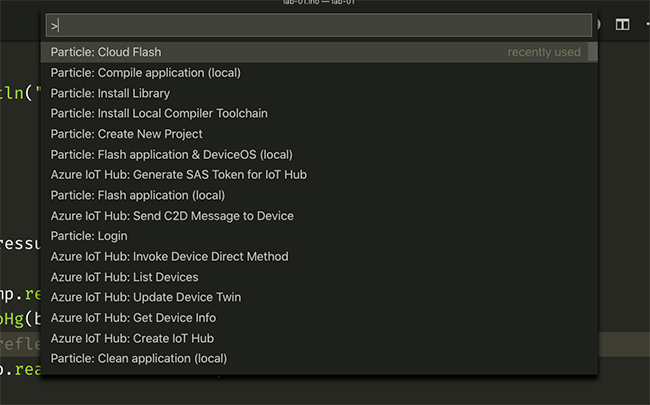
loopfunction and write them to the serial monitor.void loop() { float temp, humidity; temp = dht.getTempFarenheit(); humidity = dht.getHumidity(); Serial.printlnf("Temp: %f", temp); Serial.printlnf("Humidity: %f", humidity); delay(10000); }- Now, flash this code to your device. Open the command palette (CMD/CTRL+SHIFT+P) and select the Particle: Cloud Flash option.
- Finally, open a terminal window and run the
particle serial monitorcommand. Once your Argon comes back online, it will start logging environment readings to the serial console.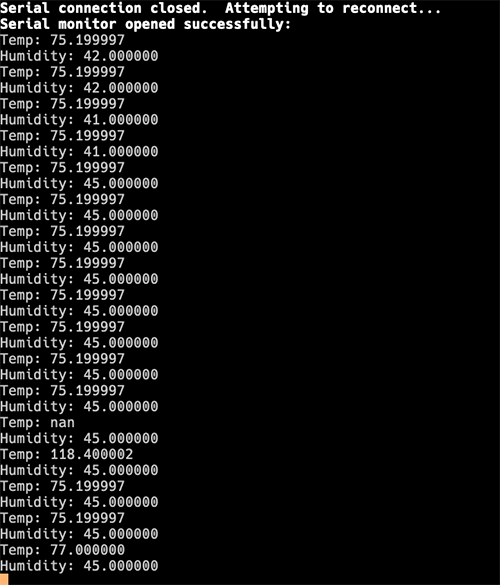
Now that you've connected the sensor, let's sprinkle in some Particle goodness.
Storing sensor data in Particle variables
To use the Particle variable primitive, you need global variables to access.
Start by moving the first line of yourloopwhich declares the two environment variables (tempandhumidity) to the top of your project, outside of thesetupandloopfunctions.
Then, add two more variables of typedouble. We'll need these because the Particle Cloud expects numeric variables to be of typeintordouble.#include "Grove_Temperature_And_Humidity_Sensor.h" DHT dht(D2); float temp, humidity; double temp_dbl, humidity_dbl; void setup() { // Existing setup code here } void loop() { // Existing loop code here }With global variables in hand, you can add Particle variables using the
Particle.variable()method, which takes two parameters: the first is a string representing the name of the variable, and the second is the firmware variable to track.Add the following lines to the end of your
setupfunction:Particle.variable("temp", temp_dbl); Particle.variable("humidity", humidity_dbl);- Next, in the
loopfunction, just after you read the temp and humidity values from the sensor, add the following two lines, which will implicitly cast the rawfloatvalues intodoublefor the Device Cloud.temp_dbl = temp; humidity_dbl = humidity; - Flash this code to your device and, when the Argon comes back online, move on to the next step.
Accessing Particle variables from the console
- To view the variables you just created, open the Particle Console by navigating to console.particle.io and clicking on your device.

- On the device detail page, your variables will be listed on the right side, under Device Vitals and Functions.
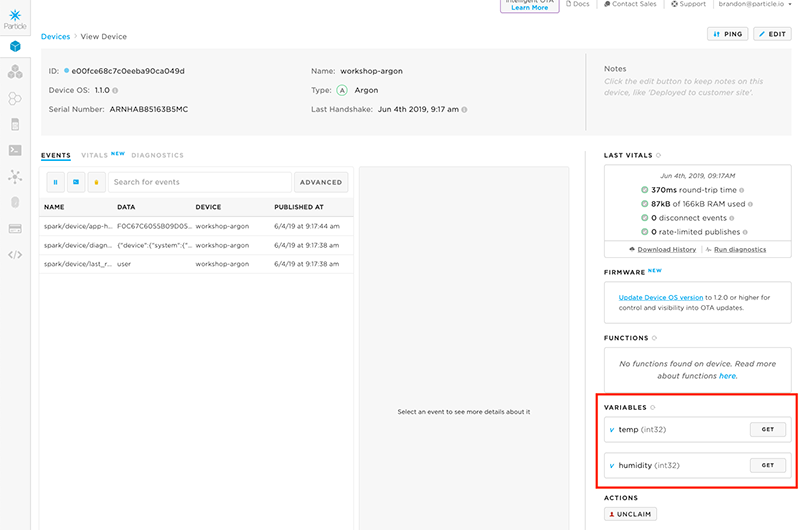
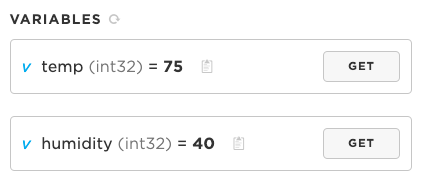
- Click the Get button next to each variable to see its value.
Now that you've mastered Particle variables for reading sensor data, let's look at how you can use the function primitive to trigger an action on the device.
Working with Particle functions and the Chainable LED
As with Particle variables, the function primitive exposes our device to the Particle Device Cloud. Where variables expose state, functions expose actions.
In this section, you'll use the Grove Chainable LED and the Particle.function command to take a heart-rate reading, on demand.
Connect the Chainable LED
- Open the bag containing the chainable LED and take one connector out of the bag.
- Connect one end of the Grove connector to the chainable LED on the side marked IN (the left side if you're looking at the device in a correct orientation).
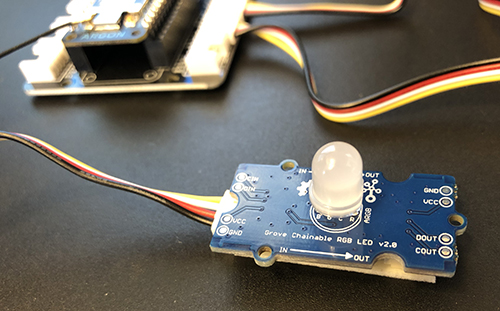
- Plug the other end of the connector into the Shield port labeled
A4.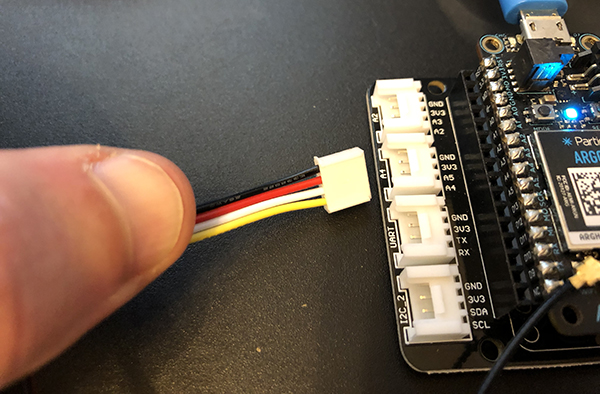
- As with the Temp and Humidity sensor, you'll need a library to help us program the chainable LED. Using the same process you followed in the last module, add the
Grove_ChainableLEDlibrary to your project in Particle Workbench. - Once the library has been added, add an include and create an object for the ChainableLED class at the top of your code file. The first two parameters specify which pin the LED is wired to, and the third is the number of LEDs you have chained together, just one in your case.
#include "Grove_ChainableLED.h" ChainableLED leds(A4, A5, 1); - Now, initialize the object in your
setupfunction. You'll also set the LED color to off after initialization.leds.init(); leds.setColorHSB(0, 0.0, 0.0, 0.0);
With our new device set-up, you can turn it on in response to Particle function calls!
Turning on the Chainable LED
- Start by creating an empty function to toggle the LED. Place the following before the
setupfunction. Note the function signature, which returns anintand takes a singleStringargument.int toggleLed(String args) { } In the
toggleLEDfunction, add a few lines turn the LED red, delay for half a second, and then turn it off again.int toggleLed(String args) { leds.setColorHSB(0, 0.0, 1.0, 0.5); delay(500); leds.setColorHSB(0, 0.0, 0.0, 0.0); delay(500); return 1; }- Now, let's call this from the loop to test things out. Add the following line before the delay.
toggleLed(""); - The last step is to flash this new code to your Argon. Once it's updated, the LED will blink red.
Setting-up Particle functions for remote execution
Now, let's modify our firmware to make the LED function a Particle Cloud function.
- Add a
Particle.functionto thesetupfunction.Particle.function("toggleLed", toggleLed);Particle.functiontakes two parameters, the name of the function for display in the console and remote execution, and a reference to the firmware function to call. - Remove the call to
toggleLedfrom theloop.
Calling Particle functions from the console
- Flash the latest firmware and navigate to the device dashboard for your Argon at console.particle.io. On the right side, you should now see your new function.
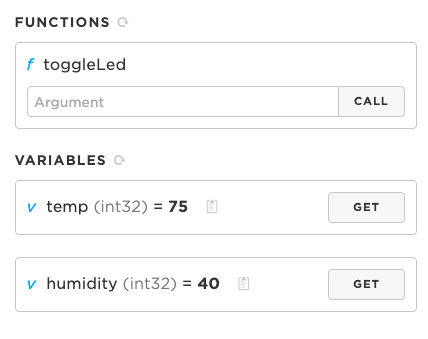
- Click the Call button and watch the chainable LED light up at your command!
Working with Particle publish & subscribe plus a light sensor
For the final section of this lab, you're going to explore the Particle pub/sub primitives, which allows inter-device (and app!) messaging through the Particle Device Cloud. You'll use the light sensor and publish messages to all listeners when light is detected.
Connect the light sensor
To connect the light sensor, connect a Grove cable to the port of the sensor. Then, connect the other end of the cable to the Analog A0/A1 port on the Grove shield.
Using the sensor
Let's set-up the sensor on the firmware side so that you can use it in our project. The light sensor is an analog device, so configuring it is easy, no library needed.
- You'll need to specify that the light sensor is an input using the
pinModefunction. Add the following line to yoursetupfunction:pinMode(A0, INPUT); - Let's also add a global variable to hold the current light level detected by the sensor. Add the following before the
setupandloopfunctions:double currentLightLevel; - Now, in the
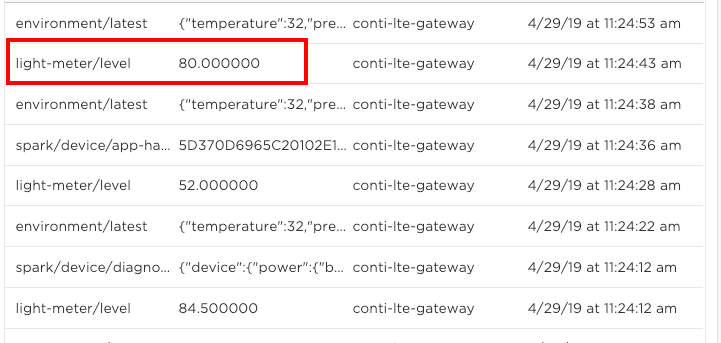
loopfunction, let's read from the sensor and use themapfunction to translate the analog reading to a value between 0 and 100 that you can work with.double lightAnalogVal = analogRead(A0); currentLightLevel = map(lightAnalogVal, 0.0, 4095.0, 0.0, 100.0); - Now, let's add a conditional to check the level and to publish an event using
Particle.publishif the value goes over a certain threshold.if (currentLightLevel > 50) { Particle.publish("light-meter/level", String(currentLightLevel), PRIVATE); } - Flash the device and open the Particle Console dashboard for your device. Shine a light on the sensor and you'll start seeing values show up in the event log.
Subscribing to published messages from the Particle CLI
In addition to viewing published messages from the console, you can subscribe to them using Particle.subscribe on another device, or use the Device Cloud API to subscribe to messages in an app. Let's use the Particle CLI to view messages as they come across.
- Open a new terminal window and type
particle subscribe light-meter mine. - Shine a light on the light sensor and wait for readings. You should see events stream across your terminal. Notice that the
light-meterstring is all you need to specify to get thelight-meter/latestevents. By using the forward slash in events, can subscribe via greedy prefix filters.
Bonus: Working with Mesh Publish and Subscribe
If you've gotten this far and still have some time on your hands, how about some extra credit? So far, everything you've created has been isolated to a single device, a Particle Argon. Particle 3rd generation devices come with built-in mesh-networking capabilities.
Appendix: Grove sensor resources
This section contains links and resources for the Grove sensors included in the Grove Starter Kit for Particle Mesh.
Button
- Sensor Type: Digital
- Particle Documentation
- Seeed Studio Documentation
Rotary angle sensor
- Sensor Type: Analog
- Particle Documentation
- Seeed Studio Documentation
Ultrasonic ranger
- Sensor Type: Digital
- Particle Firmware Library
- Particle Documentation
- Seeed Studio Documentation
Temperature and humidity sensor
- Sensor Type: Digital
- Particle Firmware Library
- Particle Documentation
- Seeed Studio Documentation
Light sensor
- Sensor Type: Analog
- Particle Documentation
- Seeed Studio Documentation
Chainable LED
- Sensor Type: Serial
- Particle Firmware Library
- Particle Documentation
- Seeed Studio Documentation
Buzzer
- Sensor Type: Digital
- Particle Documentation
- Seeed Studio Documentation
4-Digit Display
- Sensor Type: Digital
- Particle Firmware Library
- Particle Documentation
- Seeed Studio Documentation