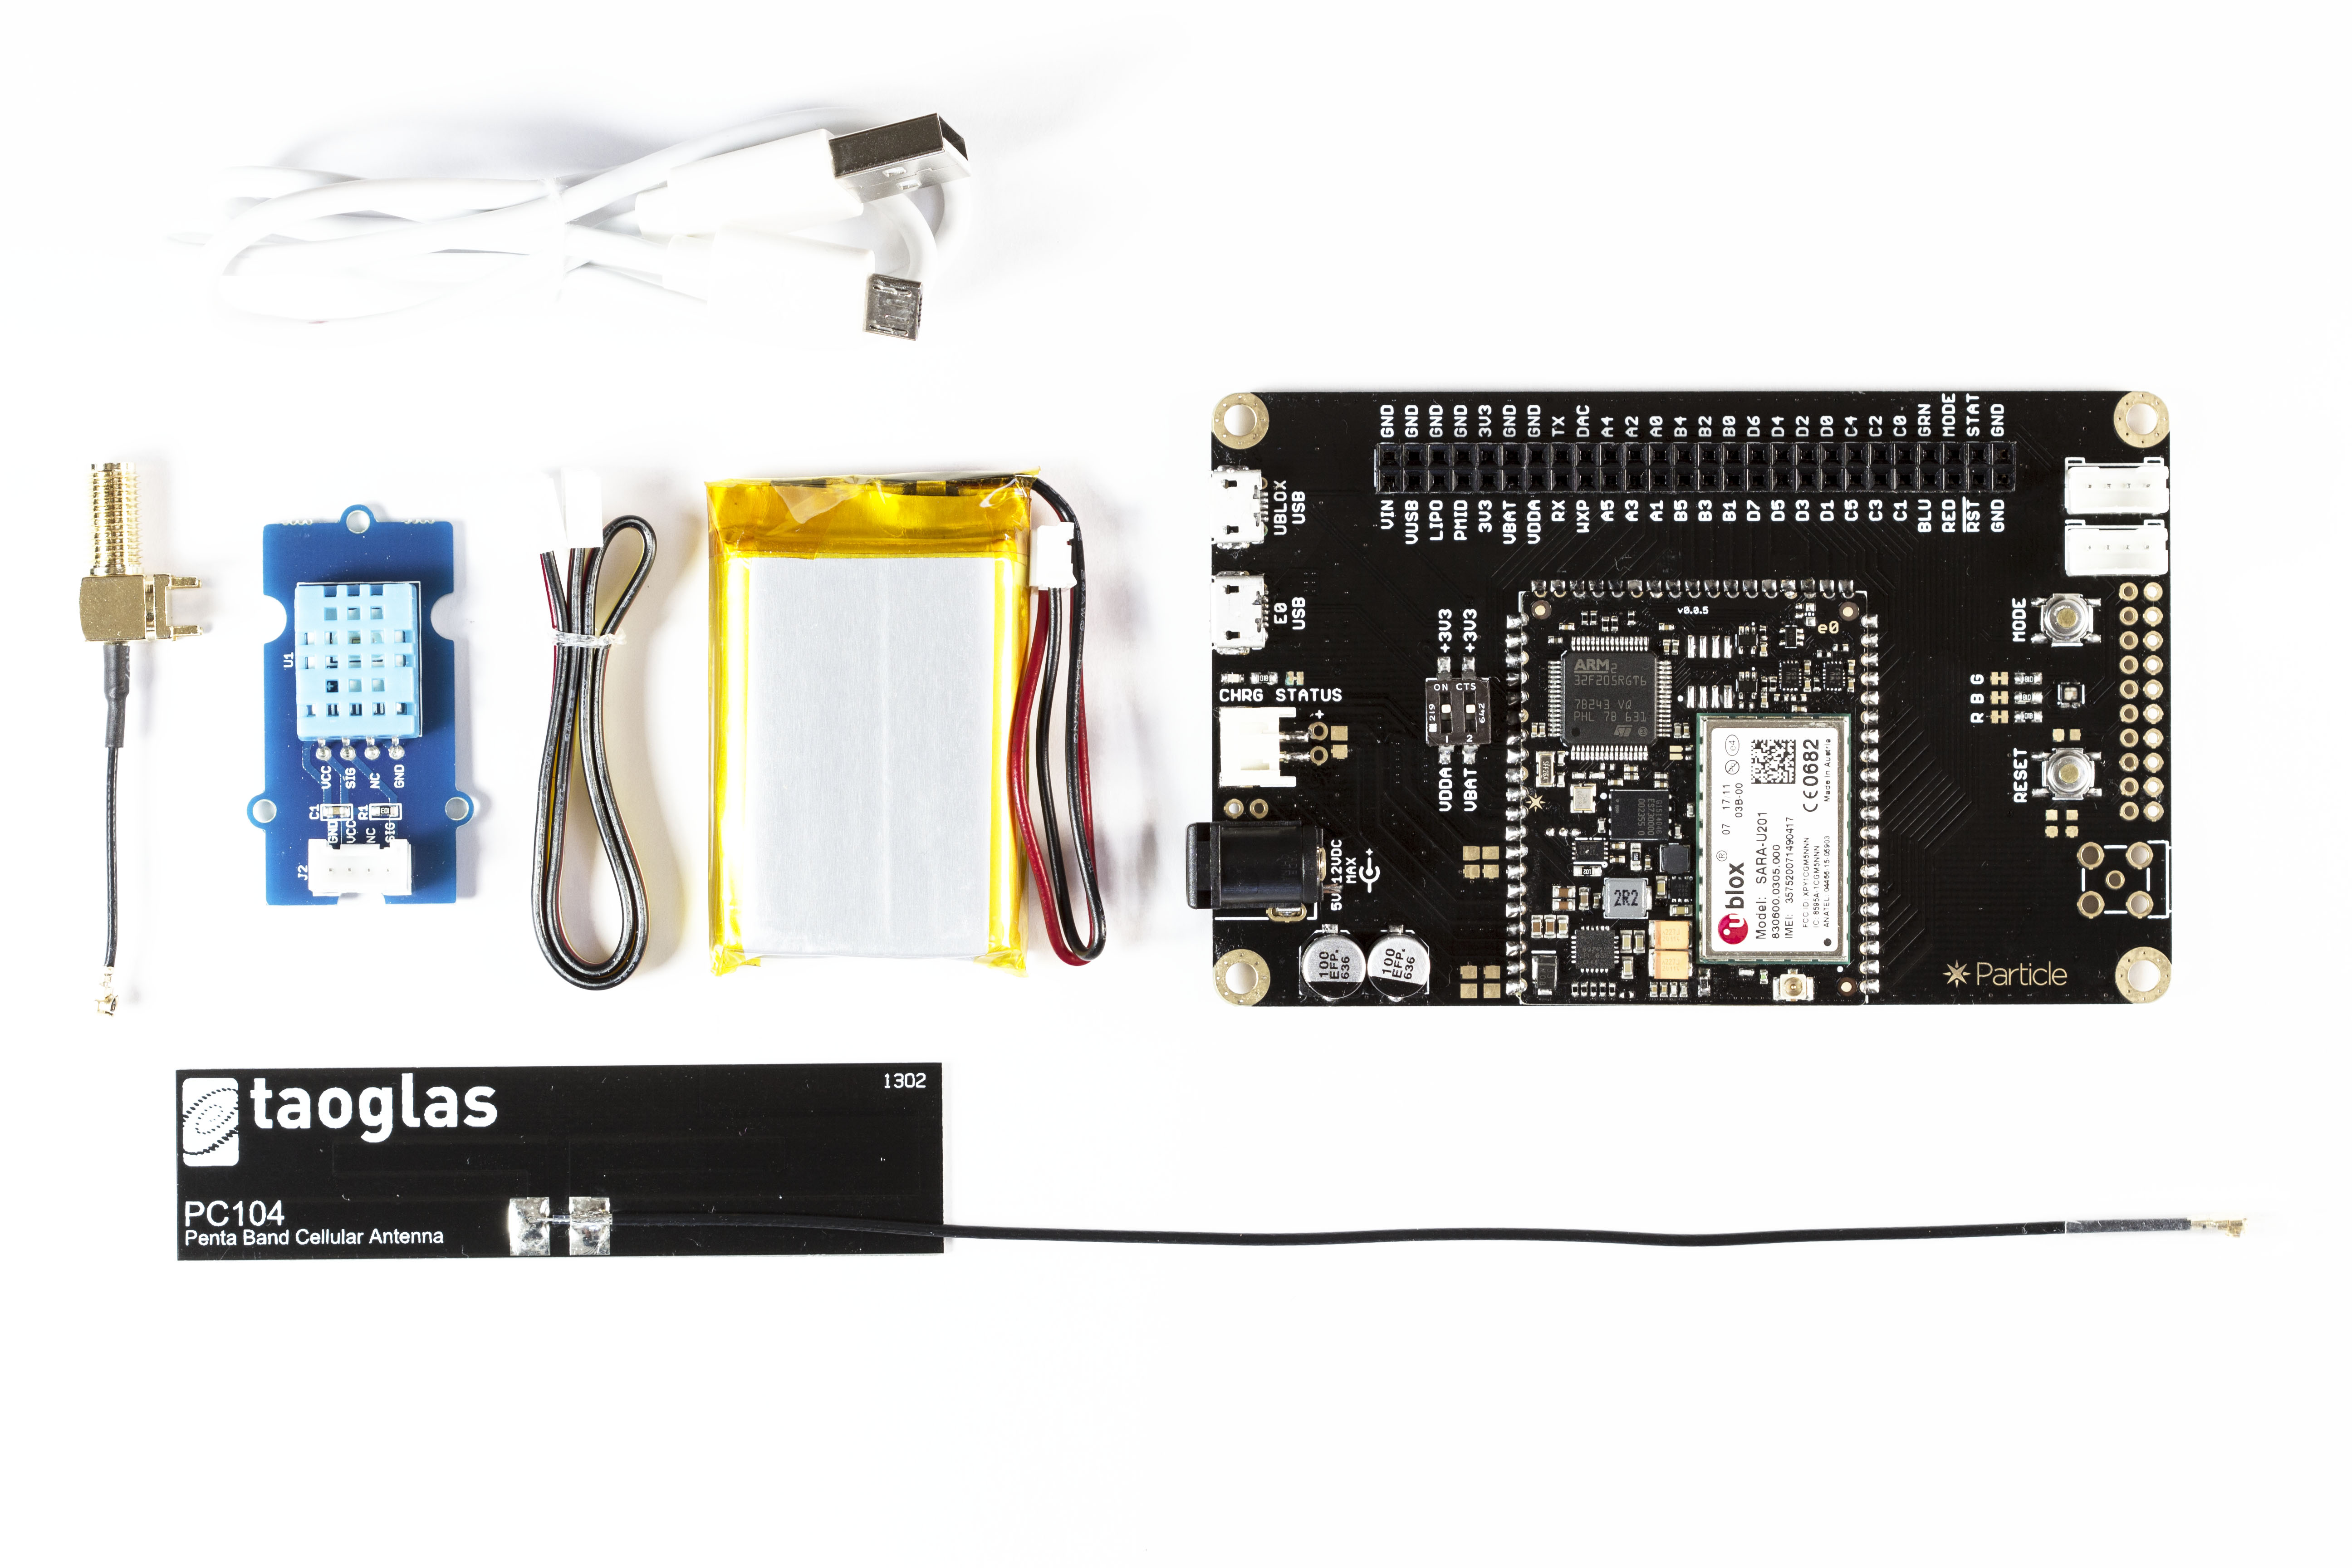
E-Series eval kit tutorials
For an in-depth information on the E series evaluation board please take a look at the datasheet here.
Tutorial #1: Temperature Monitoring
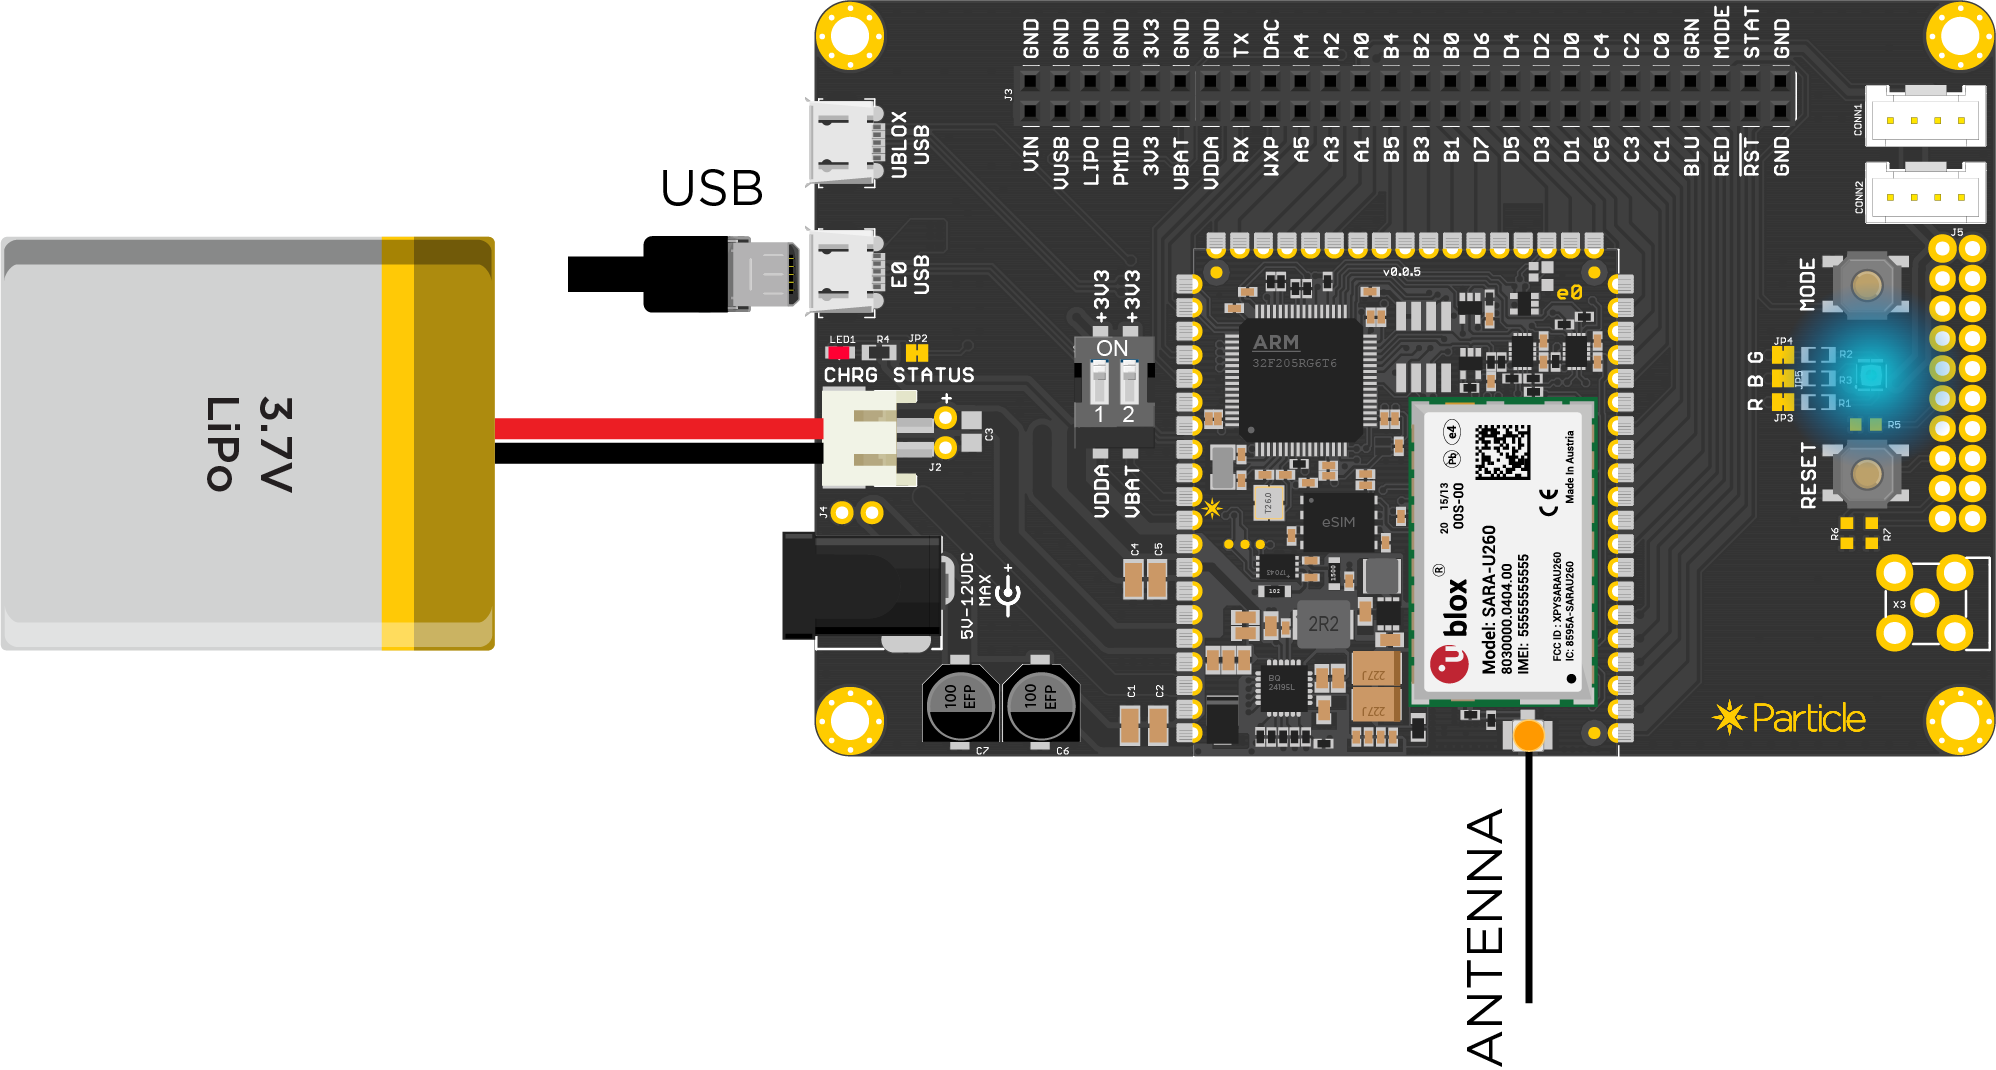
Powering up the kit
To power up the E series evaluation kit:
- Plug in the antenna to the U.FL connector (Please do this before powering up the board)
- Plug in the micro USB cable into the USB connector labeled as E0 USB.
- Plug in the LiPo battery provided with the kit
The board should now power up and connect to the Particle cloud. Make sure you have decent cell reception in the area. Testing the unit in a basement or from inside of a shipping container will usually result in frustration. After the board successfully connects to the Particle cloud, its RGB system LED will start to breath cyan.
Tip: At this point, you can click on the MODE button once to note the signal strength. The LED will blink once or up to five times and then return to breathing cyan. Number of blinks convey the signal strength (1 for poor and 5 for excellent reception).
Setup
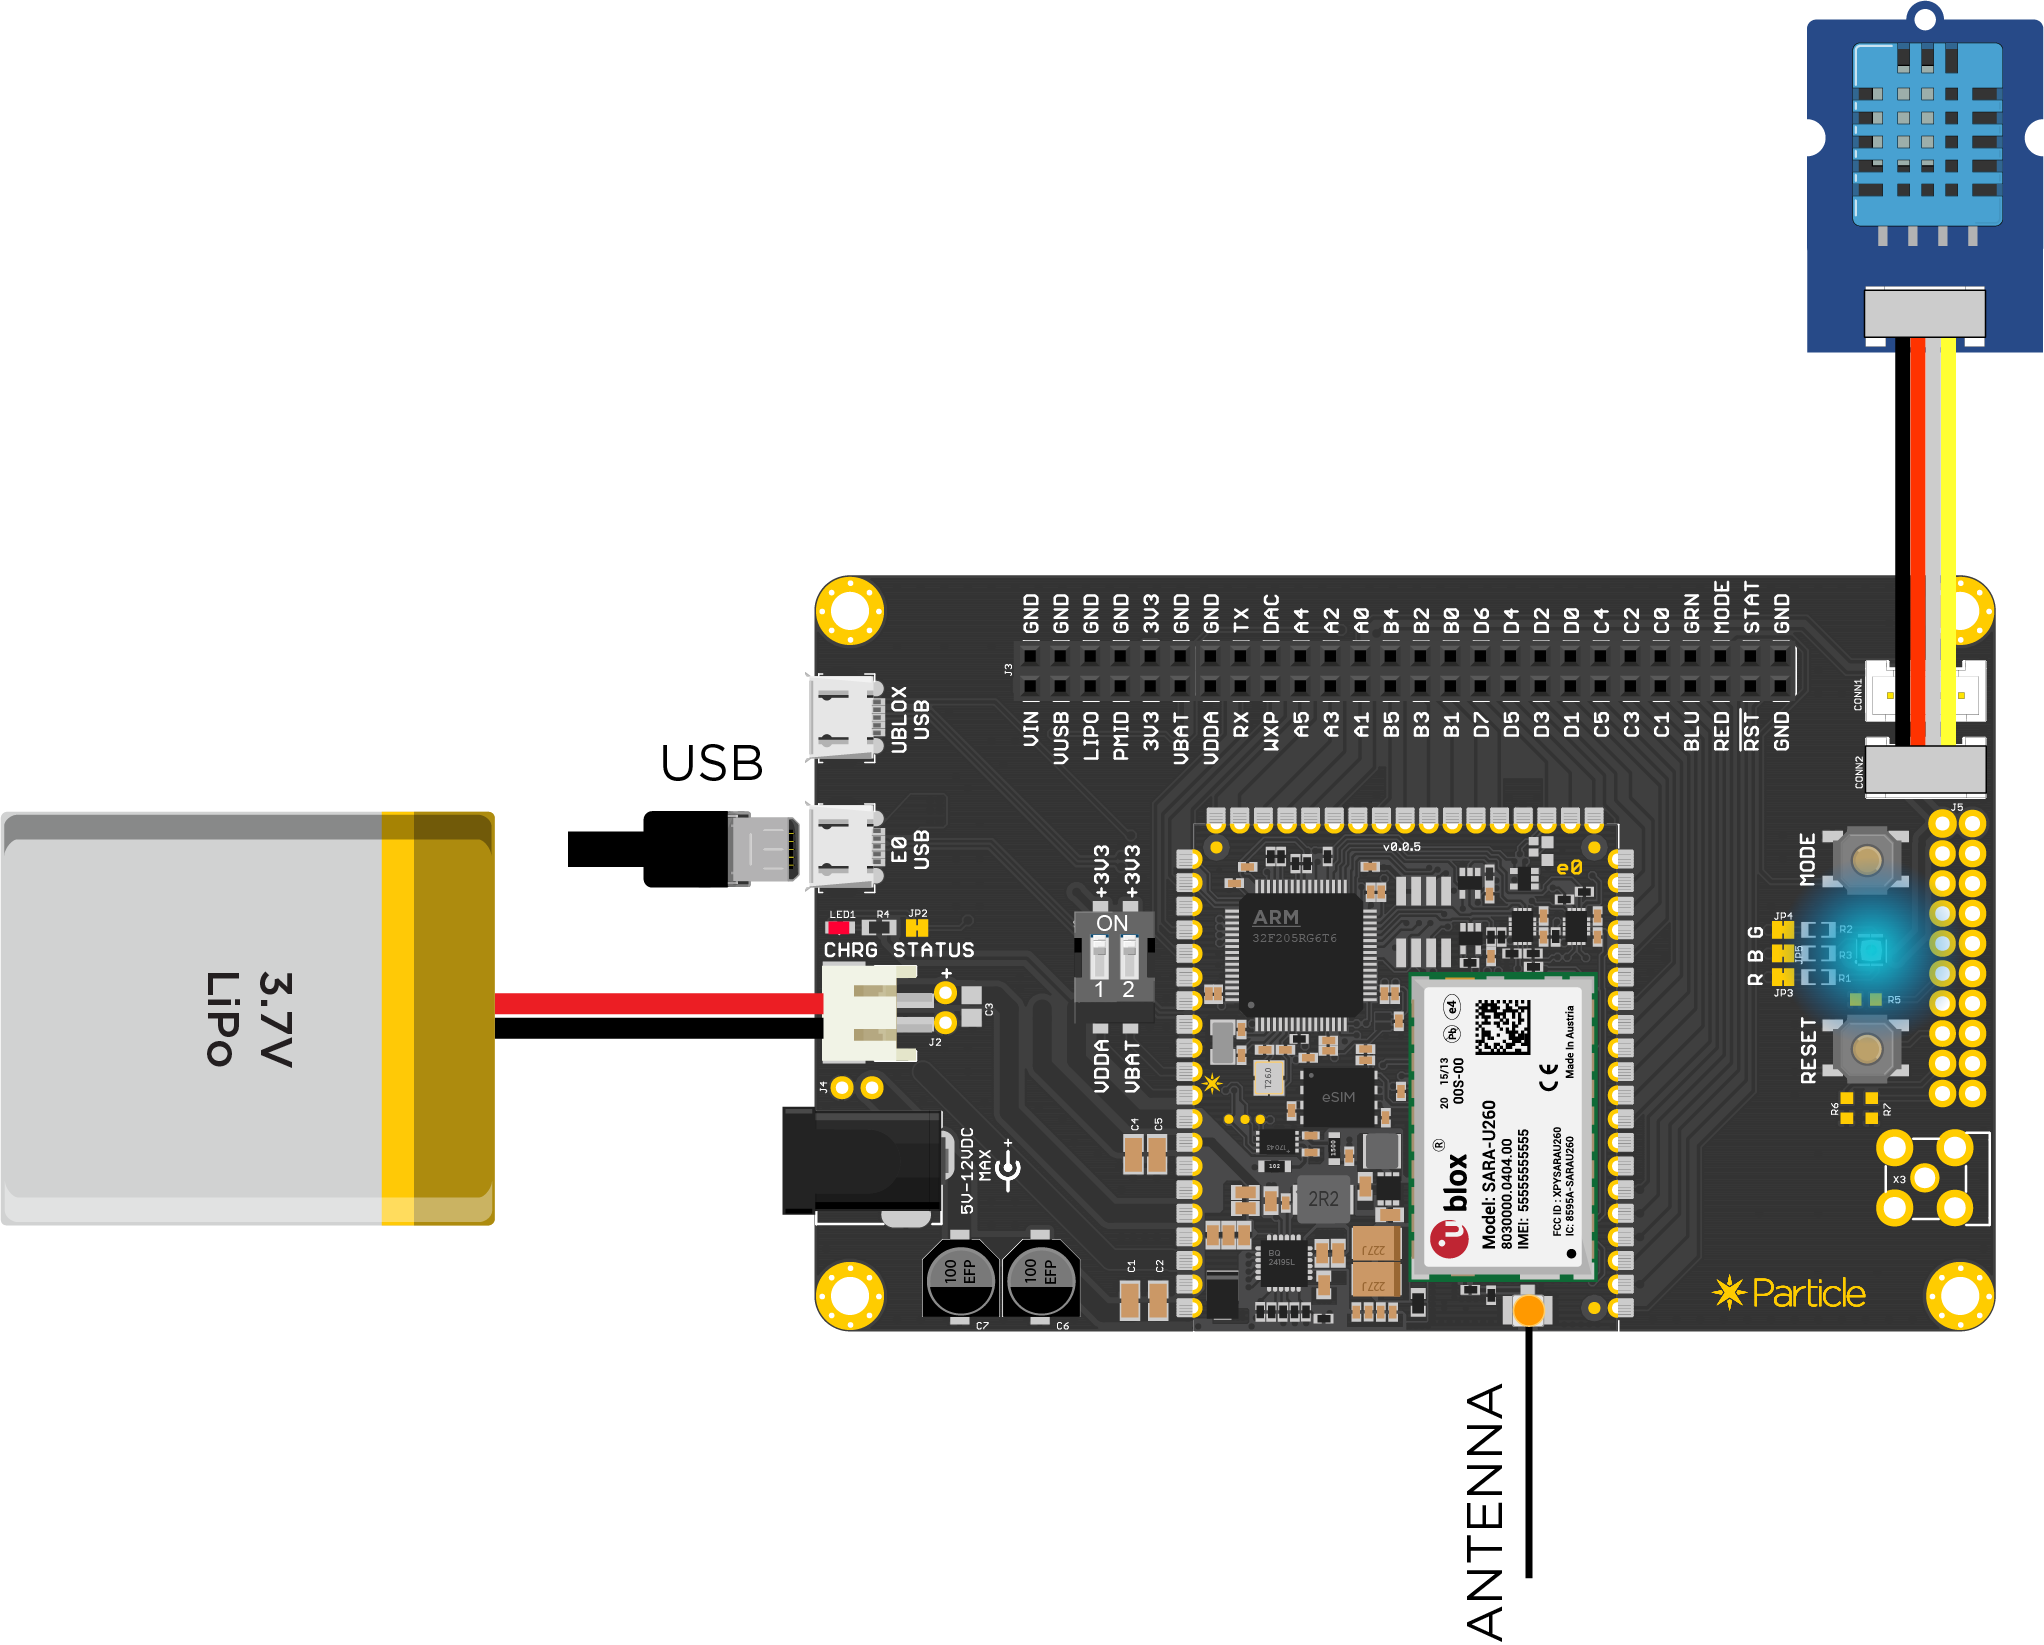
Now that your module is successfully connected to the Particle cloud and has been claimed to your account, lets put it to use! The evaluation kit includes a basic humidity/temperature sensor that communicates over an one wire serial interface.
You can connect the sensor to one of the two Grove compatible 4-pin connectors. CONN1 exposes two analog pins (A0 and A1) while CONN2 exposes the I2C pins (D0 and D1).
You can find the datasheet of the sensor here.
Flashing the grove sensor app using the web IDE
// You'll need to include the Adafruit_DHT_Particle library from the libraries section
#include "Adafruit_DHT_Particle.h"

// This example assumes the sensor to be plugged into CONN2
#define DHTPIN D1     // what pin we're connected to

// Here we define the type of sensor used
#define DHTTYPE DHT11        // DHT 11

DHT dht(DHTPIN, DHTTYPE);

void setup() {

    // We open up a serial port to monitor the sensor values
    Serial.begin(9600);
    Serial.println("DHT11 test!");

    dht.begin();
}

void loop() {
    // Wait a few seconds between measurements.
    delay(2000);

    // Reading temperature or humidity takes about 250 milliseconds!
    // Sensor readings may also be up to 2 seconds
    float h = dht.getHumidity();
    // Read temperature as Celsius
    float t = dht.getTempCelcius();
    // Read temperature as Farenheit
    float f = dht.getTempFarenheit();

    // Check if any reads failed and exit early (to try again).
    if (isnan(h) || isnan(t) || isnan(f)) {
        Serial.println("Failed to read from DHT sensor!");
        return;
    }

    // Print the data over serial
    Serial.print("Humid: ");
    Serial.print(h);
    Serial.print("% - ");
    Serial.print("Temp: ");
    Serial.print(f);
    Serial.print("*F ");
    Serial.println(Time.timeStr());

    // Publish data to the Particle cloud.
    // Remember that you'll consume data every time you publish to the cloud.
    Particle.publish("temp", String (f));
    Particle.publish("humi", String (h));
}
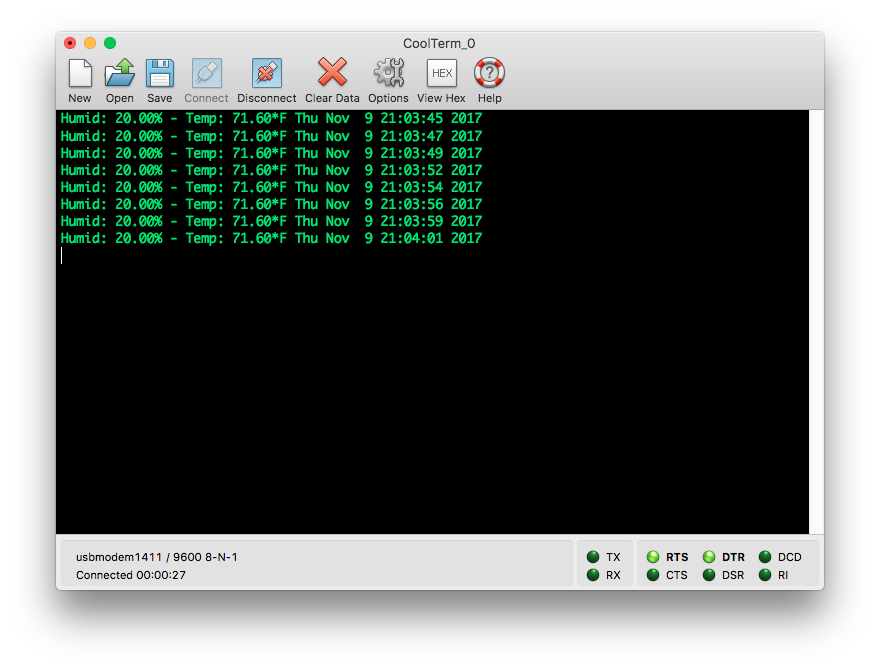
Watching results in a serial console
You can use any serial terminal on your computer to then monitor the results. In this case, we are using CoolTerm.
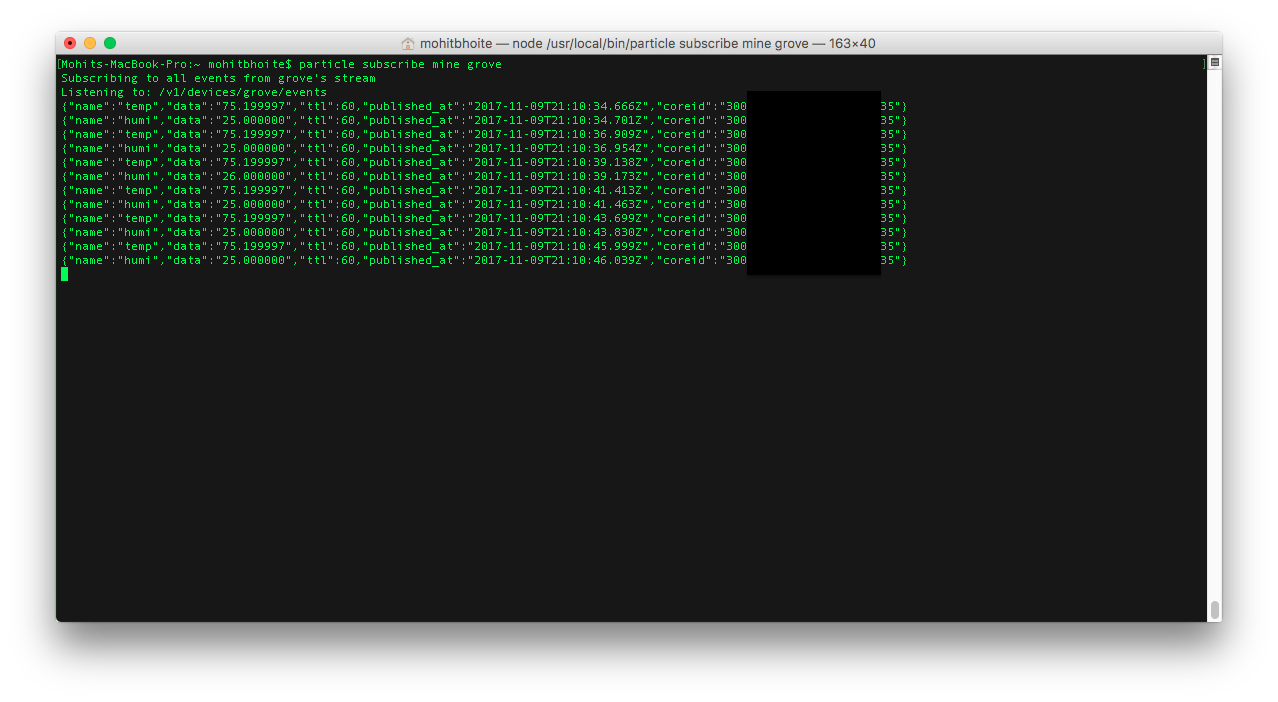
Watching results using Particle CLI
You can also use Particle CLI tool to subscribe to your's device's events using the command : particle subscribe mine YOUR_DEVICE_NAME
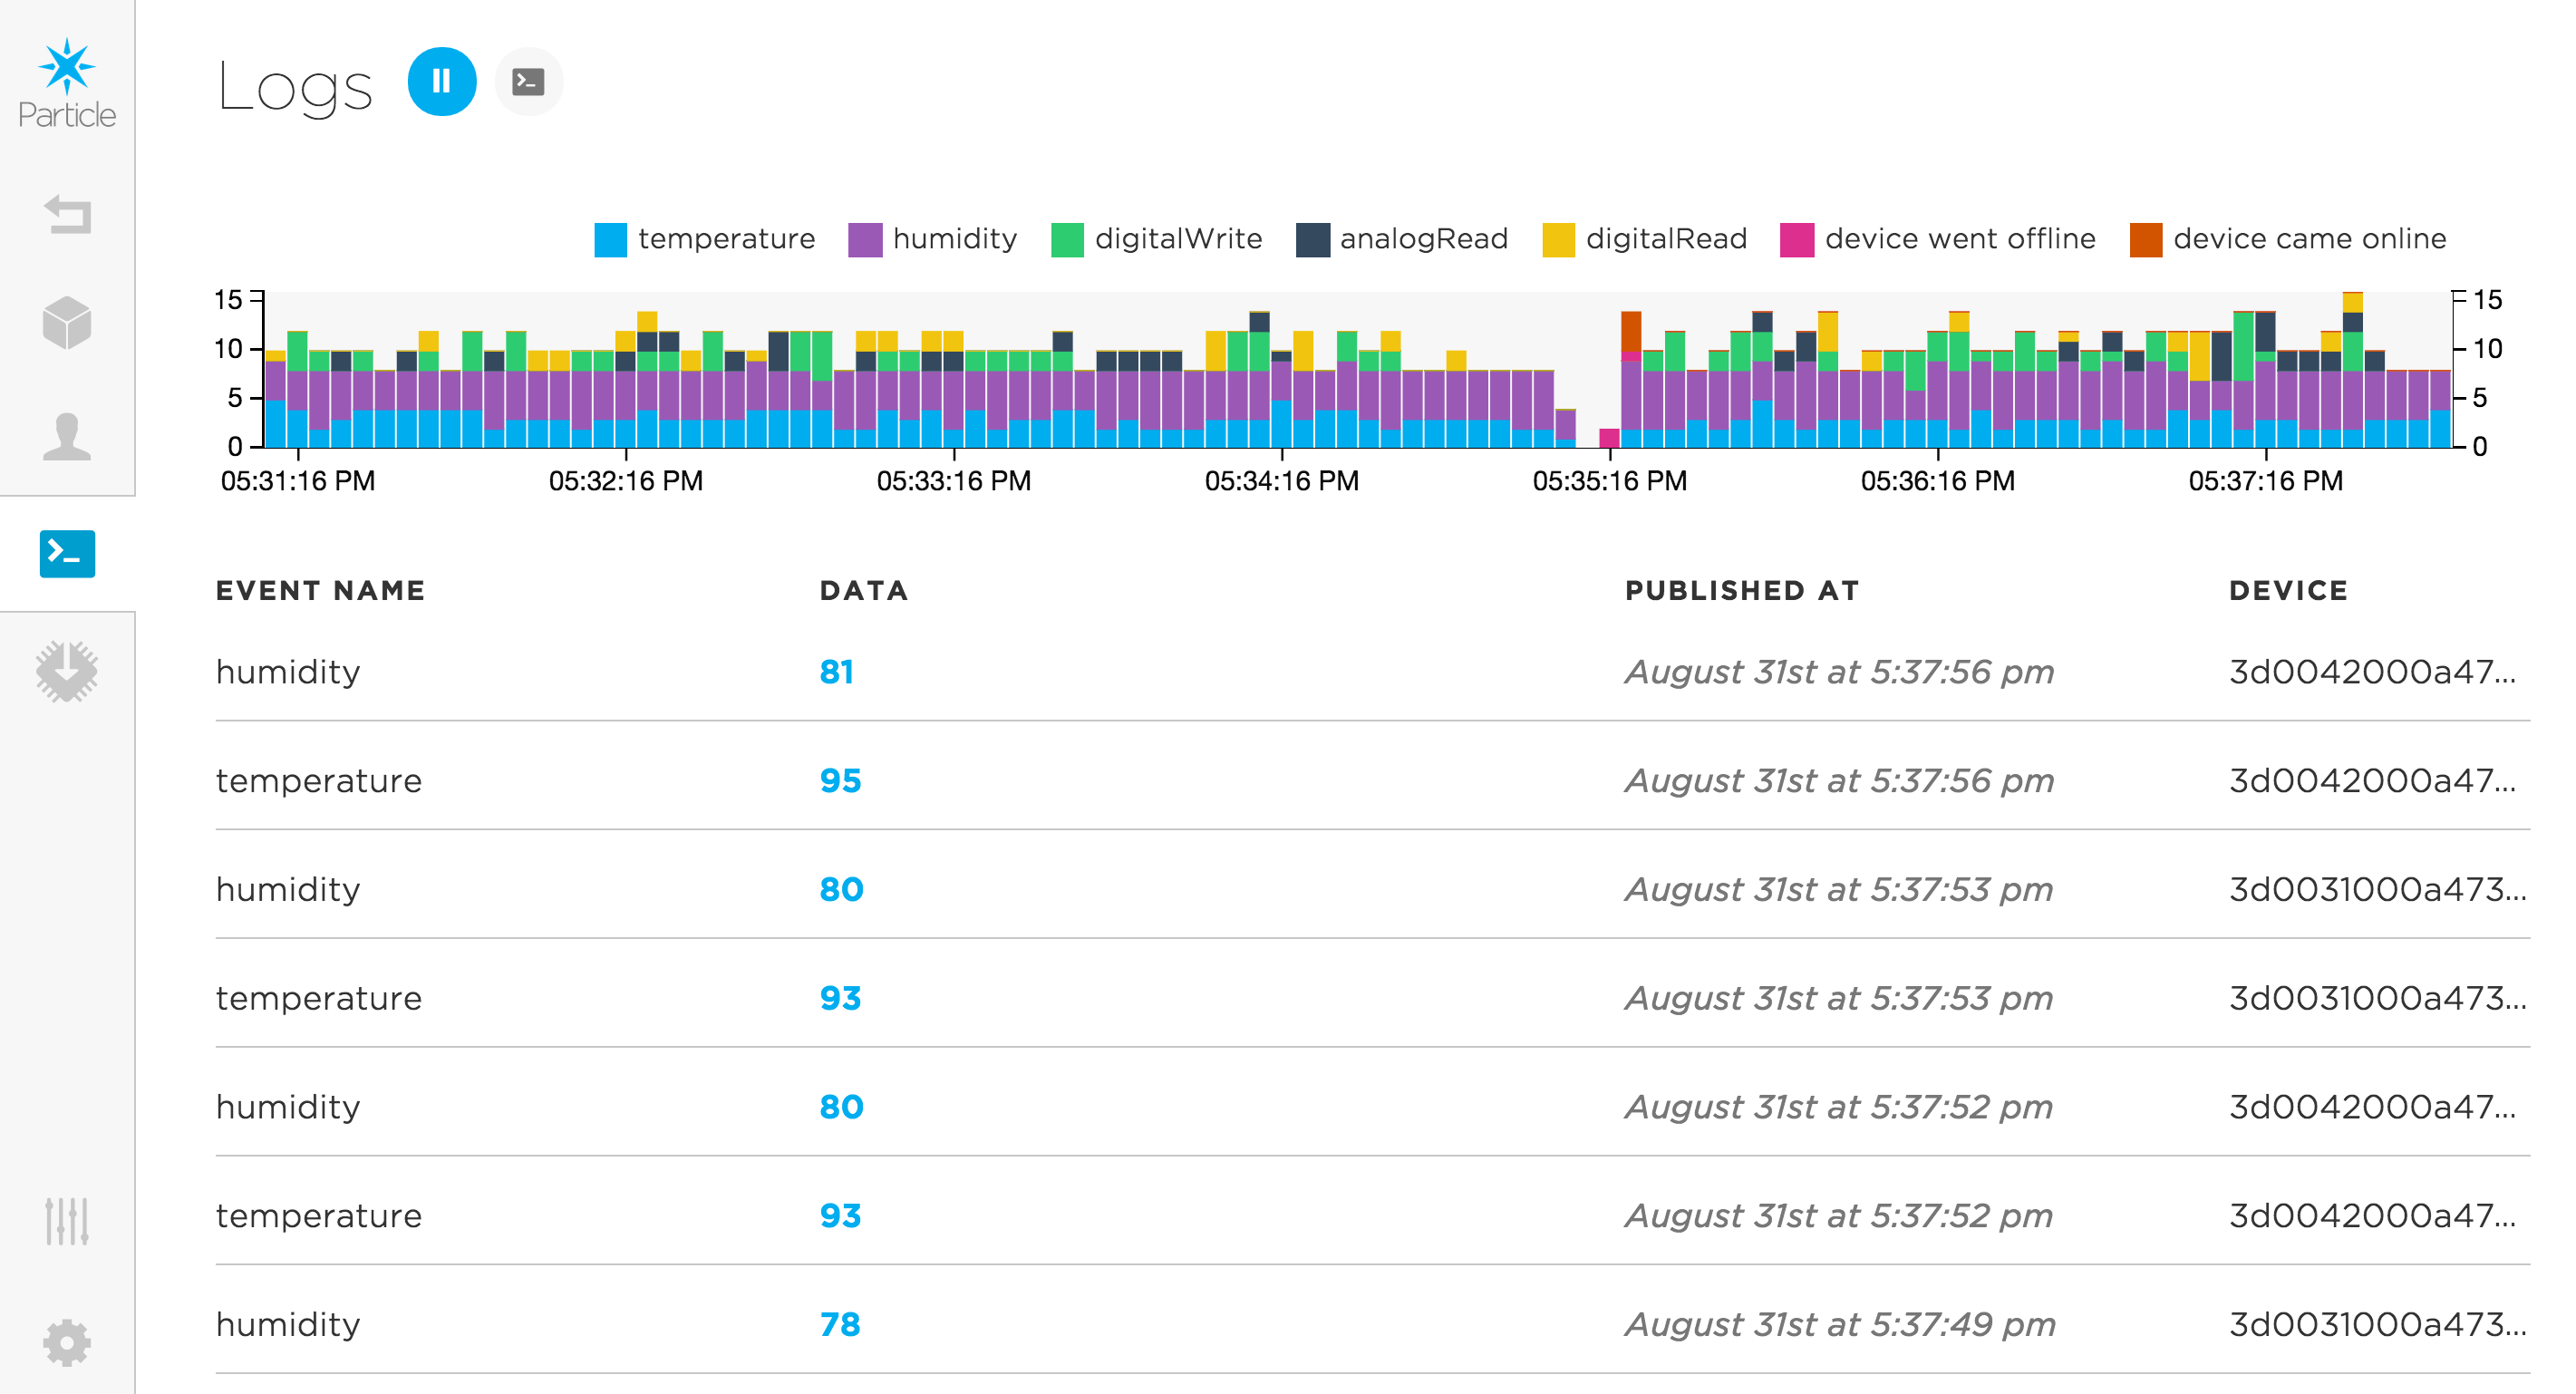
Watching results in Particle console
Yet another way to monitor the data is using the Particle Console.
Particle Console: