Doorbell SMS
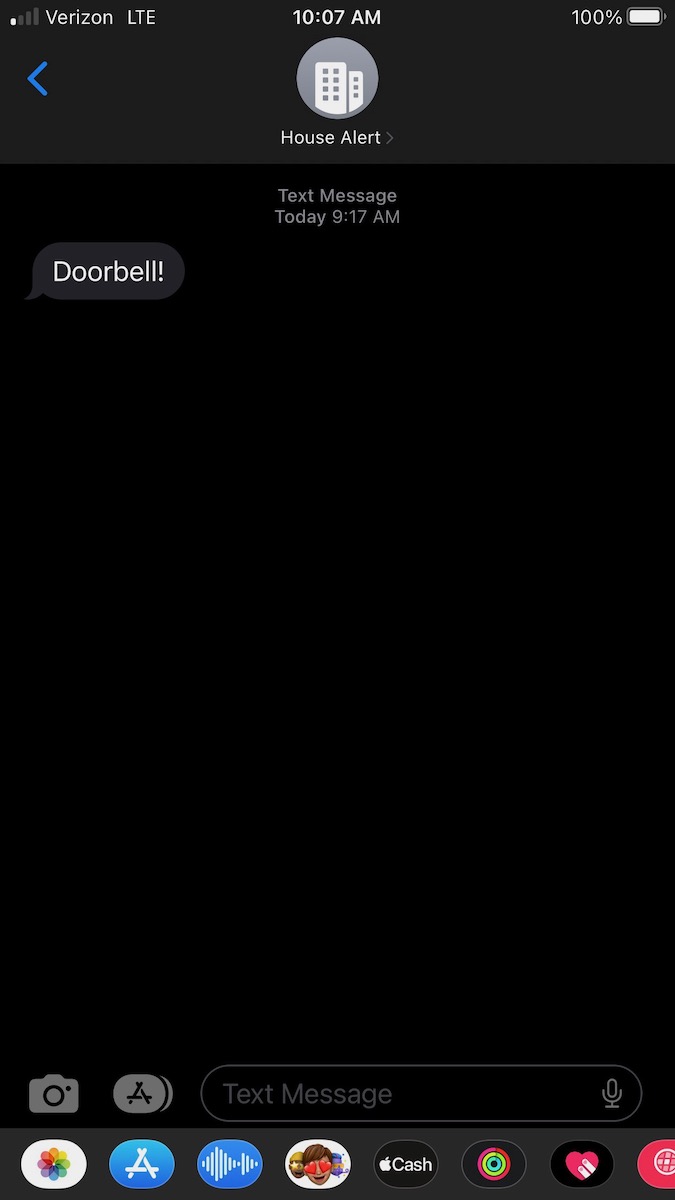
The doorbell detector works by training a model to detect the sound of your doorbell. The Photon 2 runs a classifier to detect this sound and when detected, publishes as Particle event, which triggers a Webhook, which goes to a Twilio service to generate a SMS message.
The sound processing is done entirely on-device and no ambient audio is uploaded to the Internet and cannot be saved locally.
Wiring the microphone
You will need the following hardware, included in the Edge ML Kit
- PDM digital microphone
- Photon 2 (included with the Edge ML Kit)
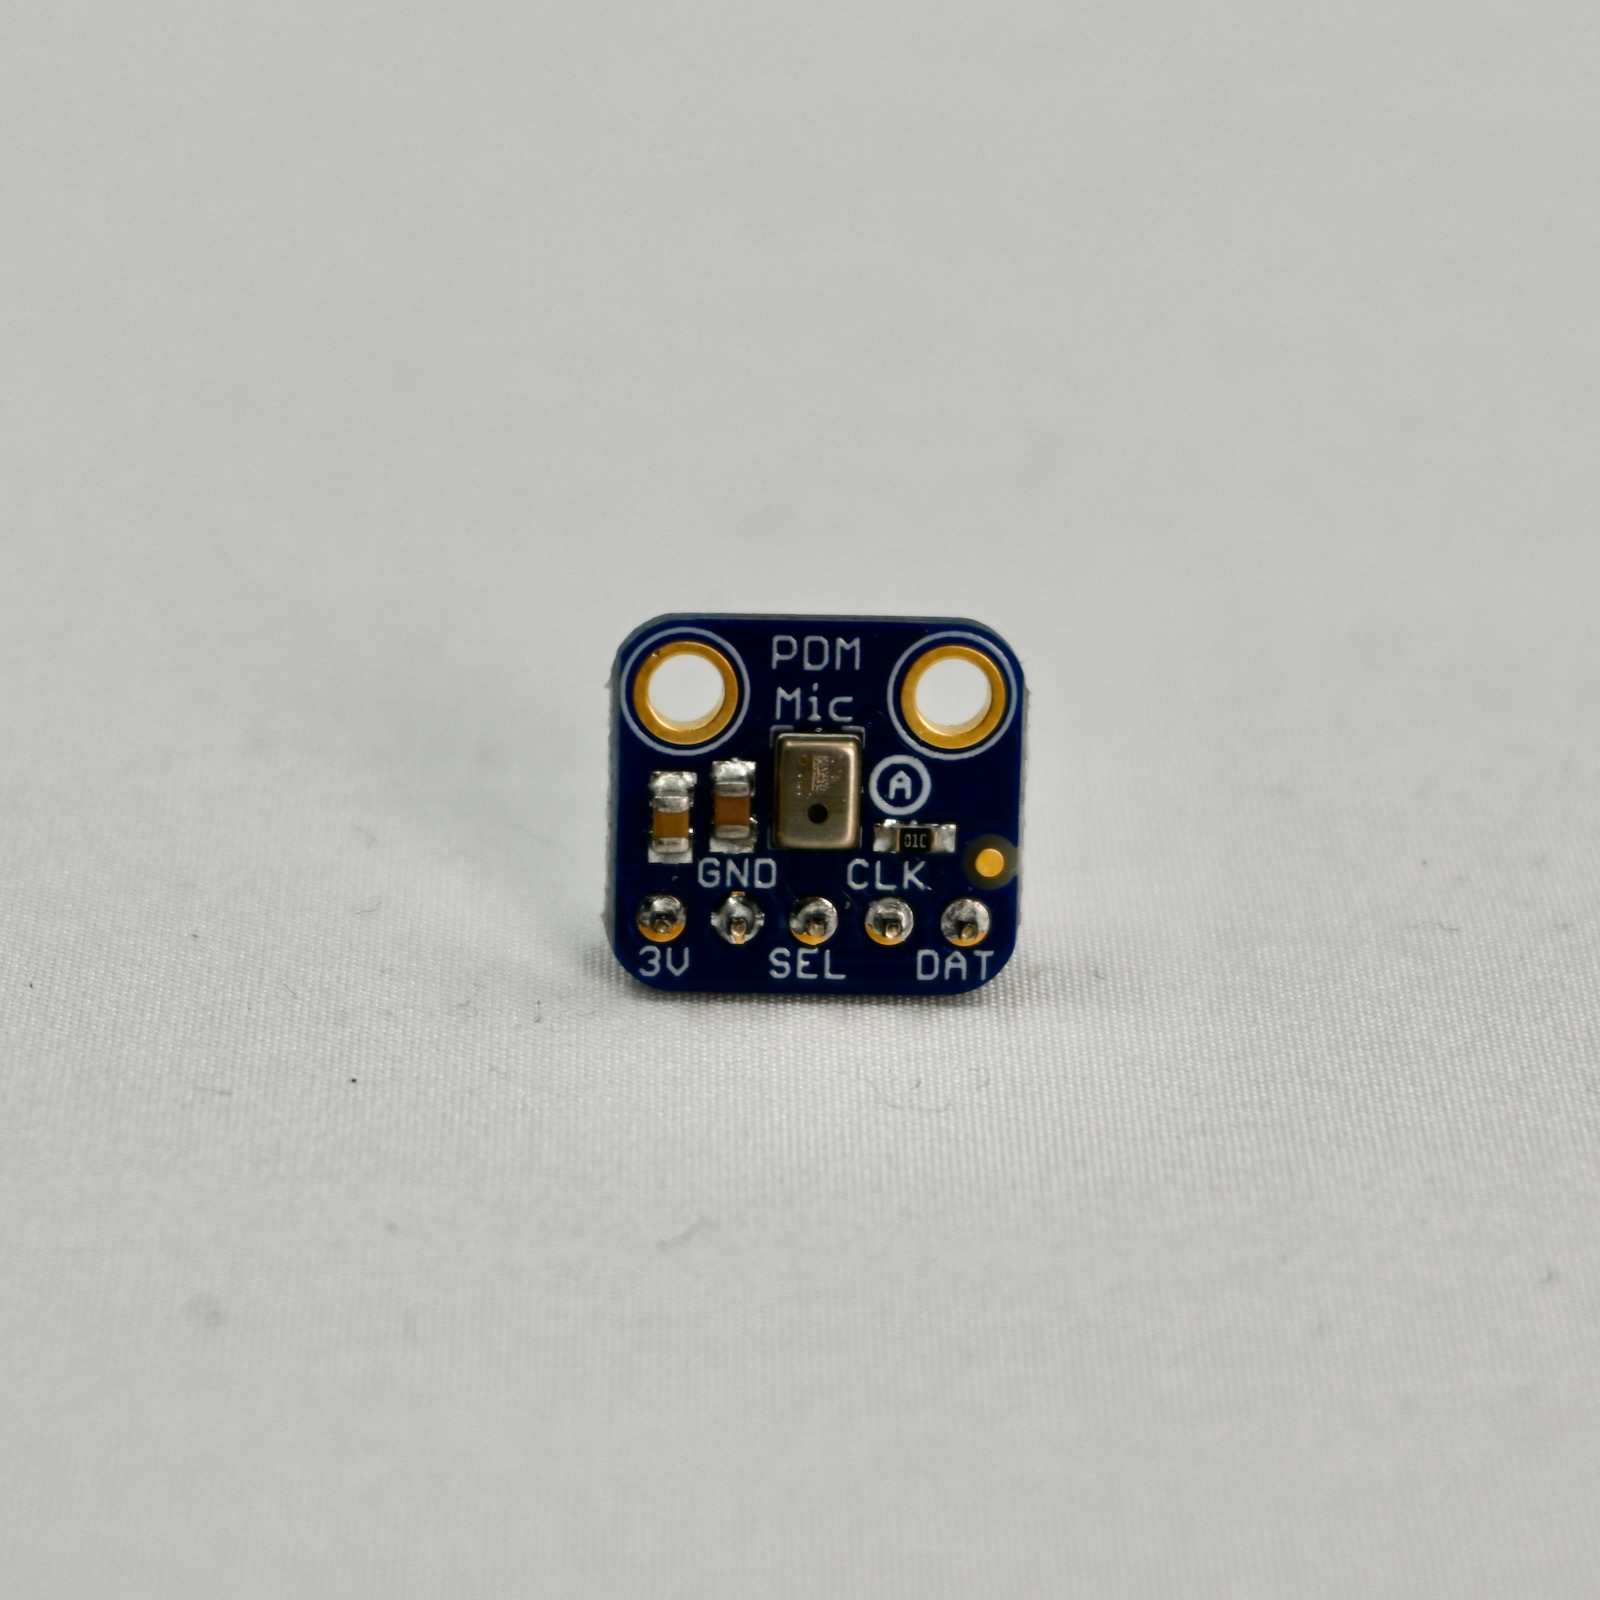
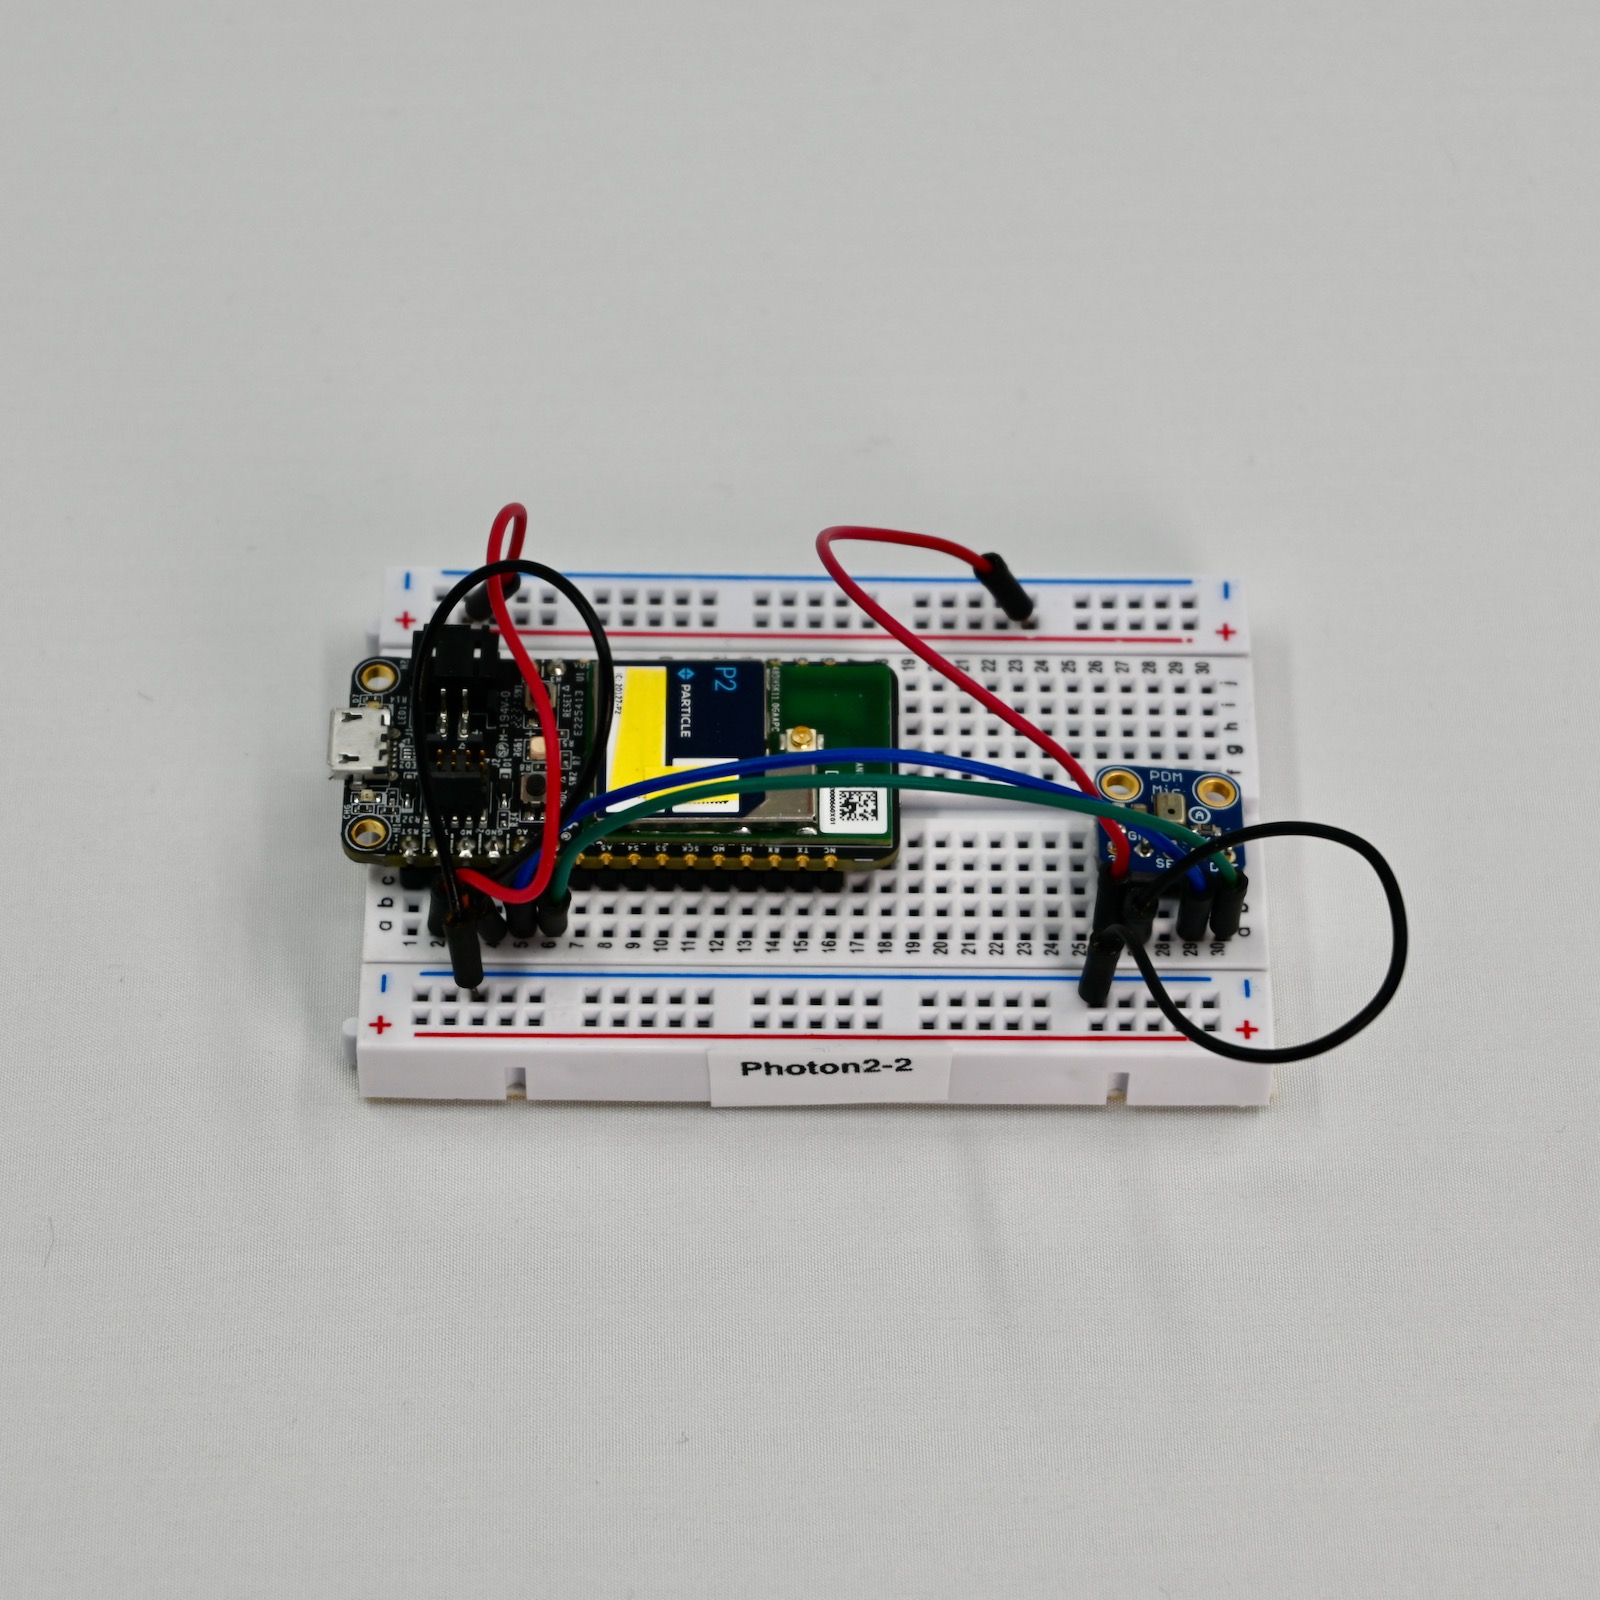
The connections on the breakout are:
| Breakout | Color | Connect To | Details |
|---|---|---|---|
| 3V | Red | 3V3 | 3.3V power |
| GND | Black | GND | Ground |
| SEL | NC | Typically leave unconnected, left/right select | |
| CLK | Blue | A0 | PDM Clock |
| DAT | Green | A1 | PDM Data |
This project can also used on the the P2, M-SoM, Boron, and B-SoM.
On the M-SoM, the connections are:
| Breakout | Color | M-SoM Connect To | Details |
|---|---|---|---|
| 3V | Red | 3V3 | 3.3V power |
| GND | Black | GND | Ground |
| SEL | NC | Typically leave unconnected, left/right select | |
| CLK | Blue | A2 | PDM Clock |
| DAT | Green | A3 | PDM Data |
Twilio Setup
This method could easily be updated to work with other SMS providers, however you may need to change authentication methods and the keys where the data is stored.
Sign up for a trial Twilio account if you don't already have an account set up.
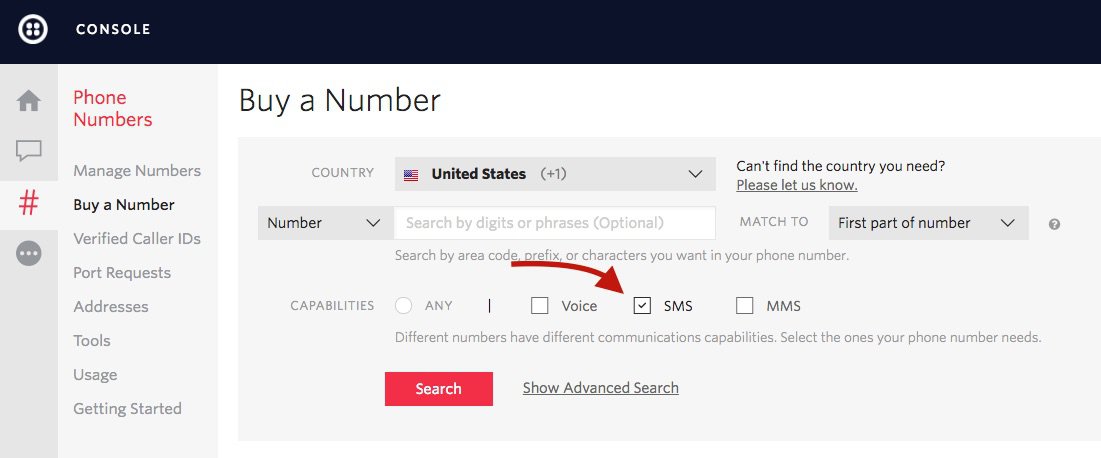
Follow the instructions to Buy a number. Make sure it has SMS enabled!
- In the Twilio Dashboard (1), note the Account SID (2) and Auth Token (3). You'll need these to create the webhook.

Webhook Setup
Open the Particle Console and select the Integrations tab.
Create a new Webhook integration.
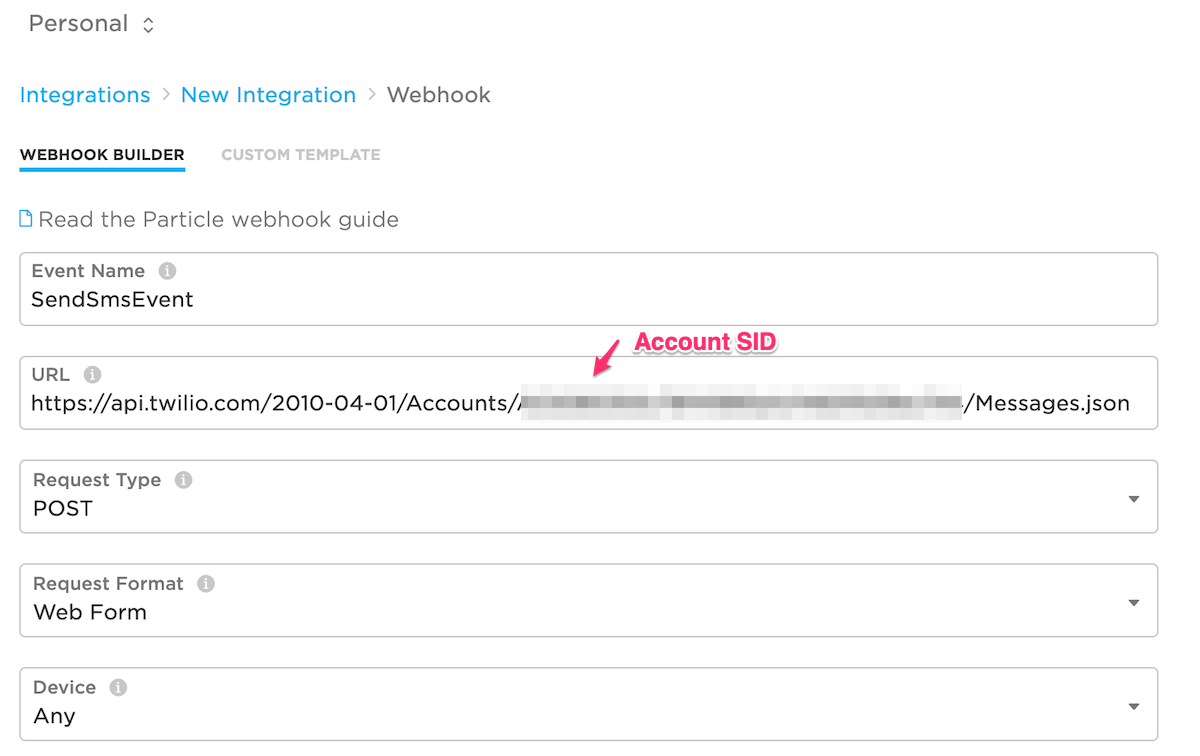
Select an Event Name. The default configured in the library is SendSmsEvent (case-sensitive!) but you can change it and use the
withEventName()method to reconfigure the library. They must match and follow event naming rules (1 - 64 ASCII characters; only use letters, numbers, underscores, dashes and slashes. Spaces and special characters should not be used). Also note that the event name is a prefix, so any event name beginning with that string will trigger the webhook.Enter the URL. Make sure you subtitute your Account SID for
$TWILIO_ACCOUNT_SID!
https://api.twilio.com/2010-04-01/Accounts/$TWILIO_ACCOUNT_SID/Messages.json
Request Type: POST is the default and the correct value.
Request Format: Web Form is the default and the correct value.
Device: Any is the default. You could also restrict the webhook to a specific device so only that device could send SMS messages.
Open the Advanced Settings.
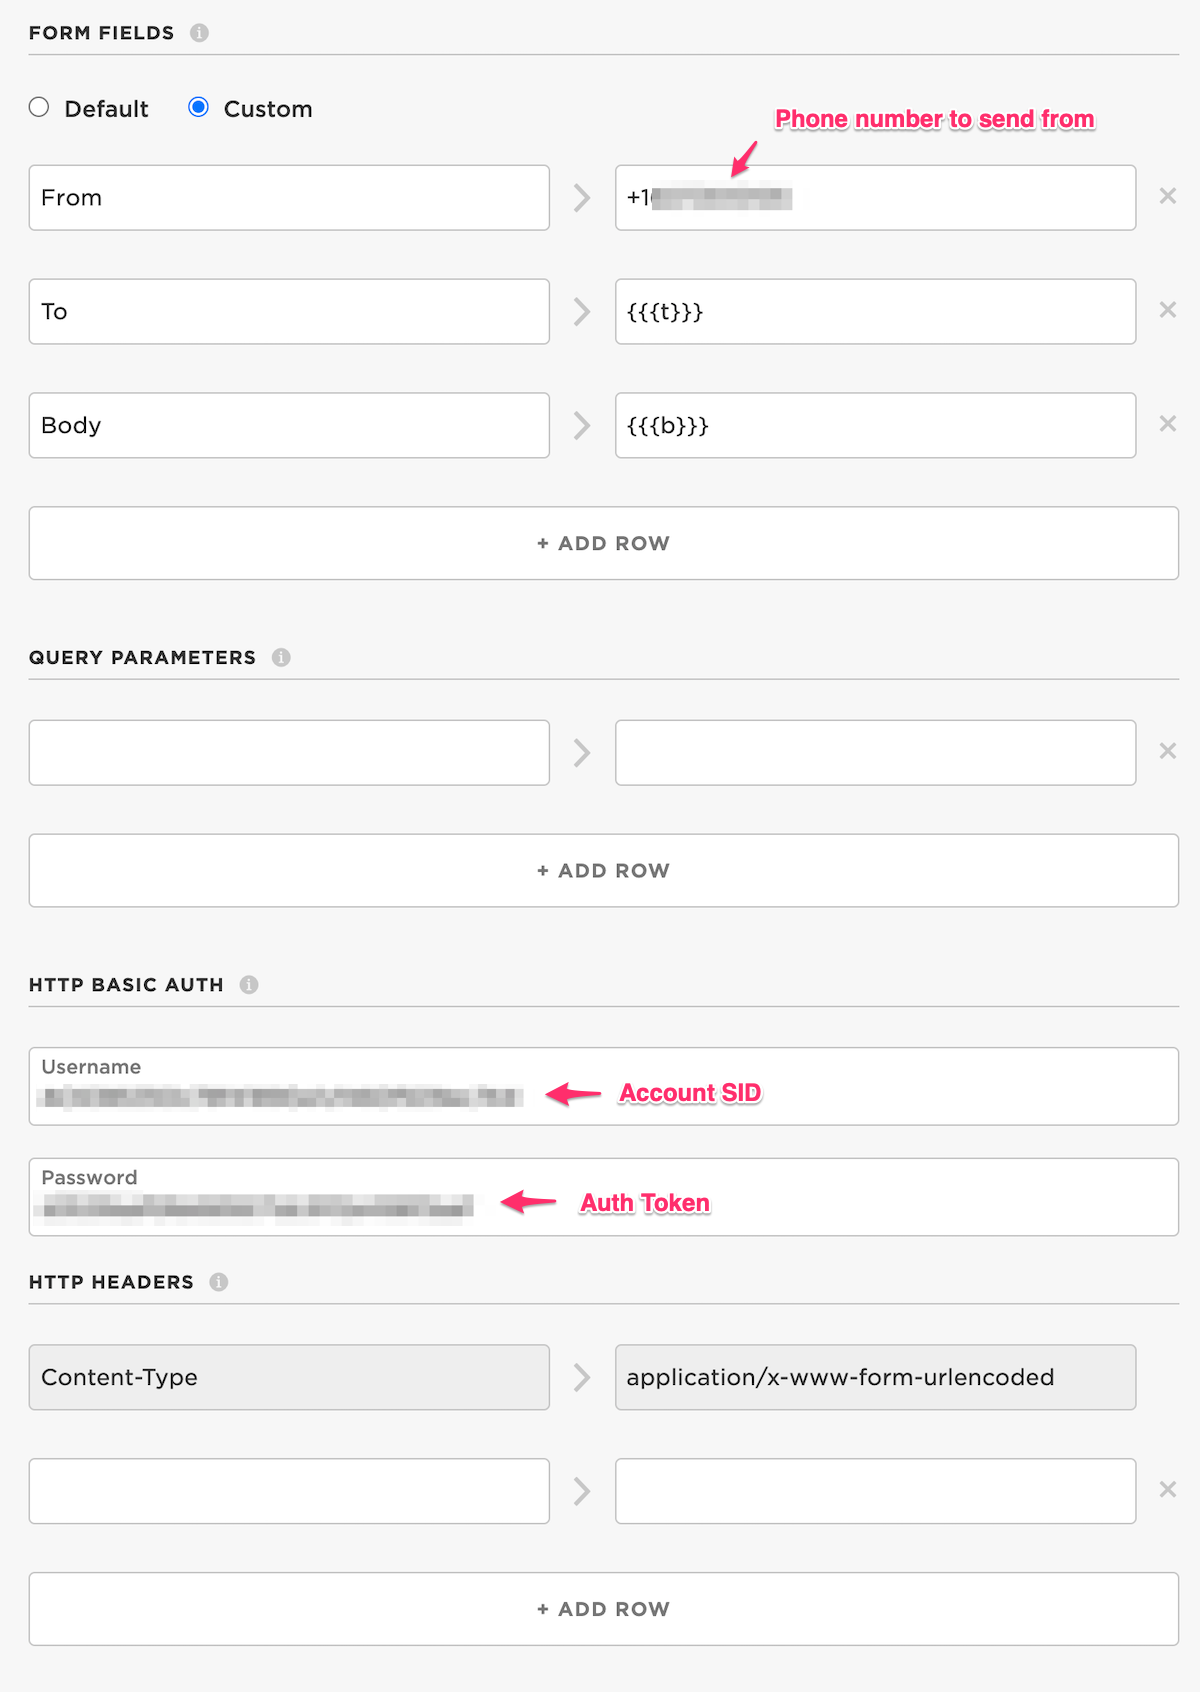
In Form Fields select Custom.
- Enter From (case-sensitive) and the SMS phone number you want to send from. This must be a Twilio Programmable Messaging phone number, not your actual phone number! Also note that it must be begin with
+then country code, so it will begin with+1in the United States. - Enter To and
(case-sensitive). The triple curly brackets are required. If you are only going to ever send to your own phone, you could enter your phone number here instead ofbut make sure it begins with a+. - Enter Body and
(case-sensitive).
- Enter From (case-sensitive) and the SMS phone number you want to send from. This must be a Twilio Programmable Messaging phone number, not your actual phone number! Also note that it must be begin with
Query Parameters should remain empty.
In HTTP Basic Auth enter:
In Username enter your Account SID. Note that your Account SID goes in two places: the URL and the Username!
In Password enter your account Auth Token.
In HTTP Headers the default Content-Type of
application/x-www-form-urlencodedis correct.Save the Webhook.
Build the software
This tutorial is a complete example, using a pre-trained model from Edge Impulse.
- Download the zip file containing the full source
- Extract the contents of the zip file
- Open Particle Workbench. From the Command Palette (Ctrl-Shift-P on Windows and Linux, Cmd-Shift-P on Mac).
- If not logged in to your Particle account, Particle: Login as this is necessary to install libraries.
- Particle: Import Project. Select the
project.propertiesfile in the zip file you just extracted. - Use Particle: Configure Project For Device and select deviceOS@5.3.2 and P2. The P2 option is also used for the Photon 2. Device OS 5.3.2 or later is required.
- Update src/main.cpp to set the phone number to send to and the message to send.
Log.info("Got doorbell chimes, sending SMS!");
lastPublish = millis();
SmsMessage mesg;
mesg.withRecipient("+12125551212")
    .withMessage("Doorbell!");
SmsWebhook::instance().queueSms(mesg);
- Connect your Photon 2 to your computer with a USB cable.
- Use Particle: Clean application (local) to make sure there are no remnants from a previous build.
- Use Particle: Cloud compile or Particle: Cloud Flash, Particle: Flash Application (local), Particle: Compile Application (local).
If you are building locally and you get a regionSRAM' overflowed by 4 bytes` error, using the cloud compiler or Docker compile will solve this occasional problem.
Building using Docker
Particularly on Windows, you can significantly speed up builds by using Docker. Also, if you get the error Argument list too long on Windows, using Docker can work around this issue. For more information, see also building using a buildpack.
- Download and install Docker Desktop.
- Docker Desktop does not automatically start when you log in, but does need to be running to do Docker builds.
- The first time you install it will take longer to download the buildpack, but subsequent builds will reuse it and be much faster.
- From the Command Palette (Ctrl-Shift-P) select Particle: Launch CLI.
- You use the
docker runcommand to start a new container and run the build in it.
| Command Fragment | Description |
|---|---|
docker run |
Create a run a container |
--name=name |
Name of the container (optional) |
-vlocal_path:/input |
Path to the source directory, must be an absolute path |
-voutput_path:/output |
Path to the output directory, must be an absolute path |
-e PLATFORM_ID=numeric_platform_id |
The numeric platform ID you are building for |
| image_name | The name of the image file |
For example, if my source directory is C:\Users\rickk\Desktop\Doorbell_Chimes_inferencing:
docker run --name=edge-compile -v C:\Users\rickk\Desktop\Doorbell_Chimes_inferencing:/input -v C:\Users\rickk\Desktop\Doorbell_Chimes_inferencing:/output -e PLATFORM_ID=32 particle/buildpack-particle-firmware:5.4.1-p2
- The
--nameis optional, however it makes it easier to keep track of your containers - Note that
-vtakes the local path, which must be an absolute path, and either:/inputor:/output, which can be the same path - You need to include
PLATFORM_IDwith the numeric platform ID (32 for P2 and Photon 2) - You can use a different version of Device OS instead of
5.4.1if desired -p2is used for both P2 and Photon 2
When the build is complete, you'll find your firmware binary in the output directory as firmware.bin.
- You can now delete the container artifacts:
docker rm edge-compile
Learn more
- You can find additional projects on the Edge Impulse ML projects page.
- Learn how to create your own projects in the Edge Impulse documentation.
