
QuestDB Integration
Particle has teamed up with QuestDB to create an easy webhook integration with the QuestDB Time Series Database. The QuestDB Time Series Database is the fastest Open Source Time Series Database and is ideal for IoT data.

Send device data from Particle into QuestDB with this simple integration
Streaming data from Particle devices into QuestDB via a webhook is now fully supported directly via a simple configuration of a webhook. You can now stream large amounts of data from your Particle devices via the Particle Device Cloud.
- Store data from a fleet of devices in the fastest open source time series database
- Query your Particle sensor data via standard SQL queries in the built-in dashboard
- Connect to QuestDB from Grafana to build interactive, live data dashboards with alerts, thresholds, etc.
Setting up QuestDB
QuestDB is an extremely small, but very powerful time series database that is simple to set up and run with minimal configuration.
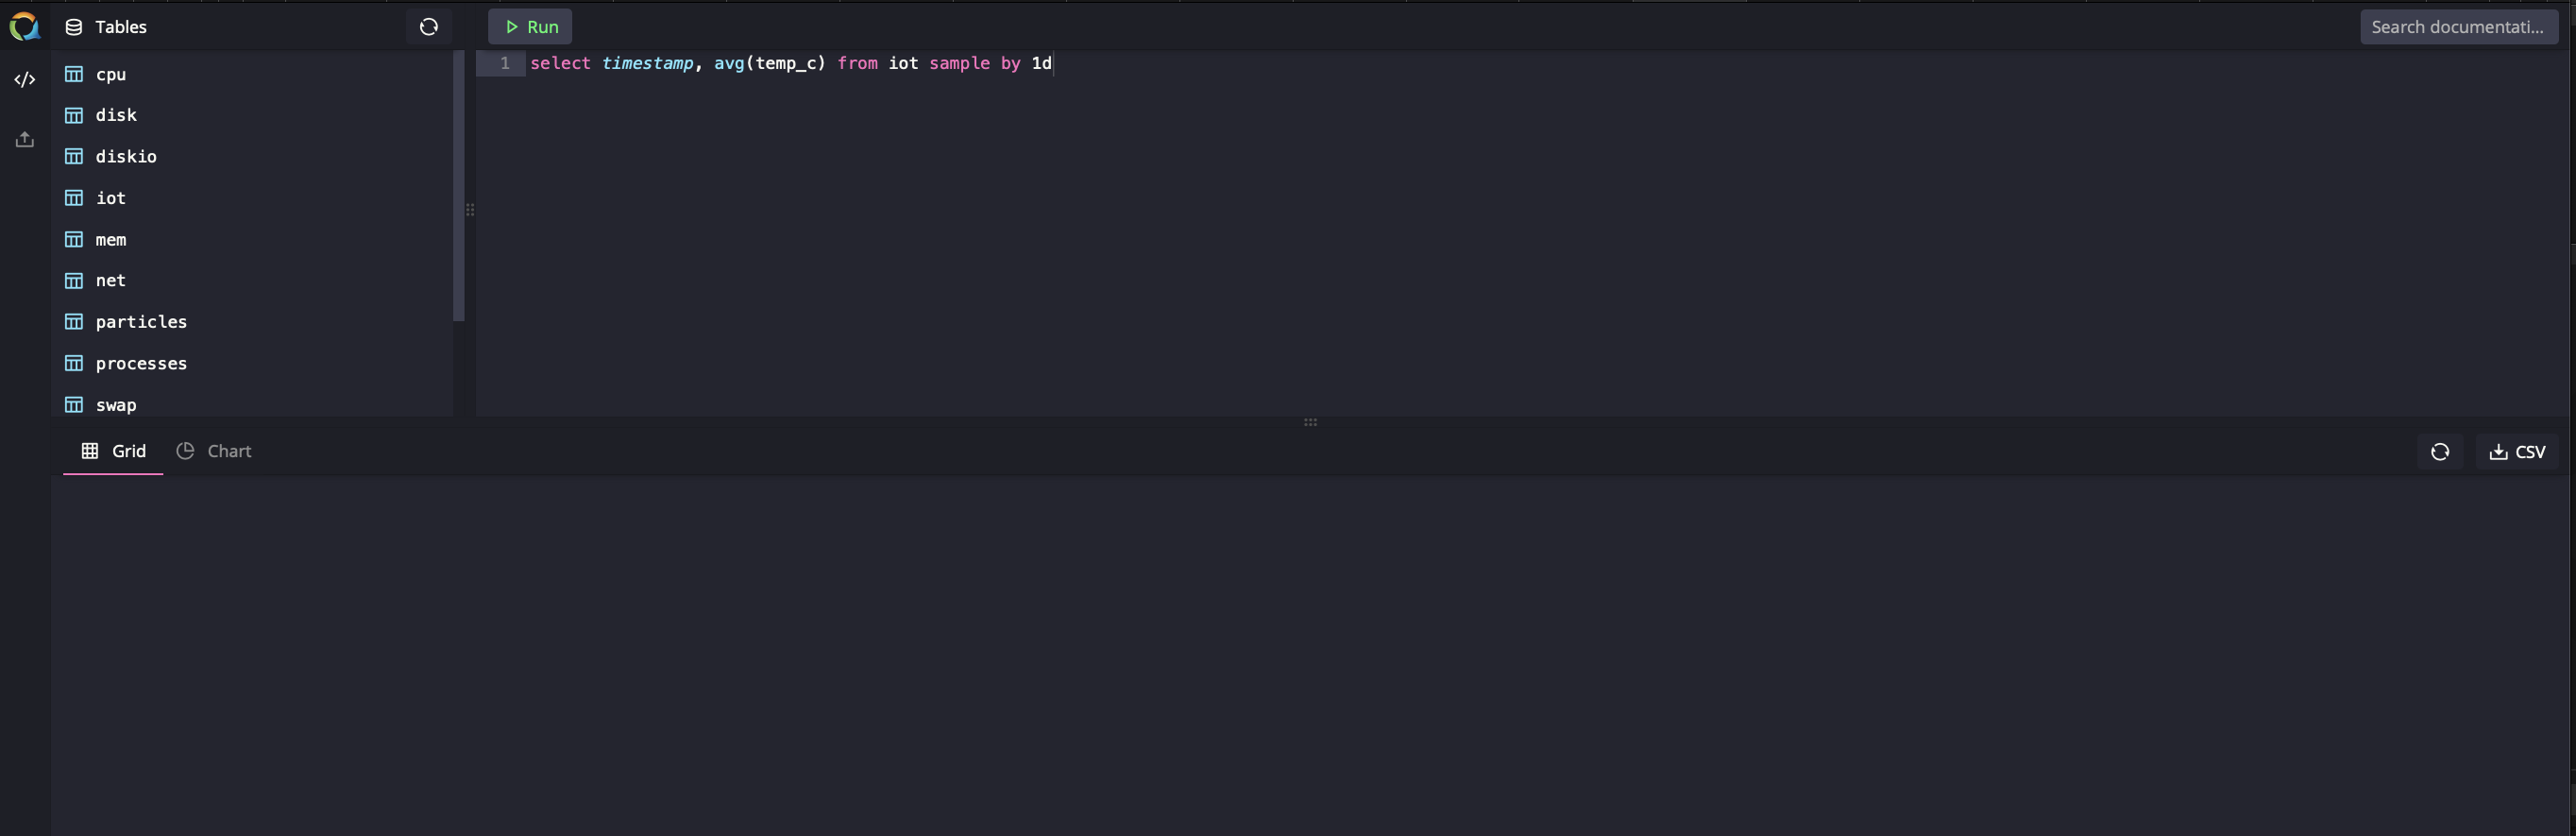
Once installed, you can check your installation by going to the built-in console on your local machine. It should look something like this:
The example here is based on the Air Quality Tutorial so if you're not using that kit, you will have to adjust some portions of it accordingly.
This example also assumes that you have already built the Air Quality kit, and completed the tutorial on it such that your device is sending data to the Particle Cloud. If you have not, pleases go complete that part of the tutorial.
Configuring your QuestDB database
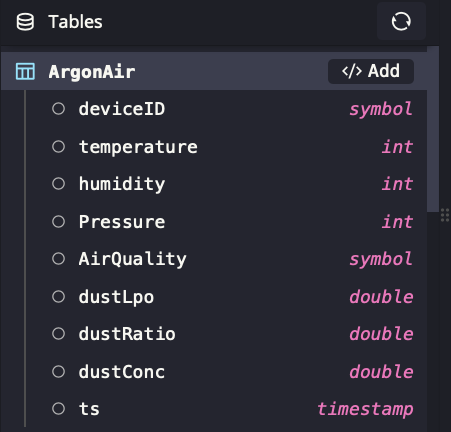
Go to your QuestDB Console on your local machine (or wherever you installed QuestDB). Here we will create the table in the database for our Particle sensor data.
The Air Quality kit sends the following readings:
| Reading | Type |
|---|---|
| temperature | int |
| humidity | int |
| pressure | int |
| air-quality | string |
| dust-lpo | float |
| dust-ratio | float |
| dust-concentration | float |
Along with the regular device variables that all Particle devices send.
To create the database, enter the following in the QuestDB Console:
CREATE TABLE ArgonAir (
  deviceID SYMBOL,
  temperature INT,
  humidity INT,
  Pressure INT,
  AirQuality SYMBOL,
  dustLpo DOUBLE,
  dustRatio DOUBLE,
  dustConc DOUBLE,
  ts timestamp
) timestamp(ts);
This will create the proper table structure for your device. A couple of things to note: QuestDB is much faster if you use the SYMBOL datatype in place of the STRING datatype, which is why you see that above. In addition, the timestamp(ts) part promotes the ts field to be a designated timestamp, which you will want for doing Time Series calculations on your data.
You can then refresh your Tables view in the console, and you should see your table laid out:
That's really all the configuration you'll need on the QuestDB side.
Configuring your QuestDB webhook
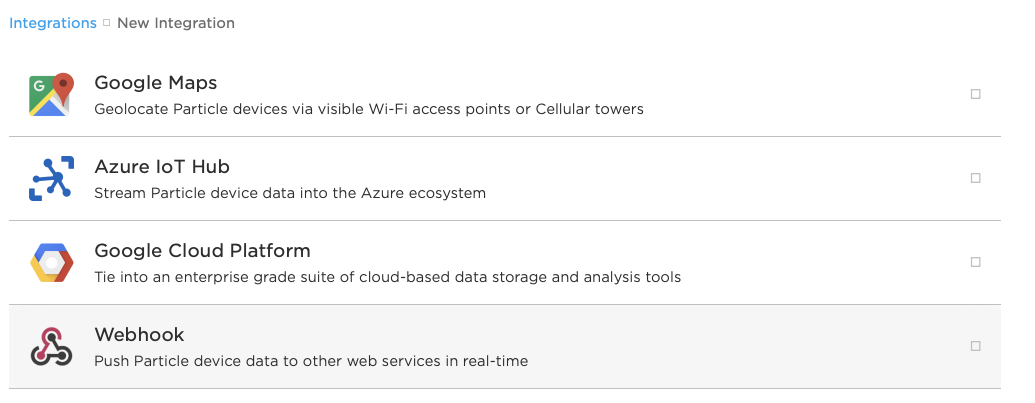
Go to the Integrations tab of your Particle Console and click on New Integration, and then click on Web Hook
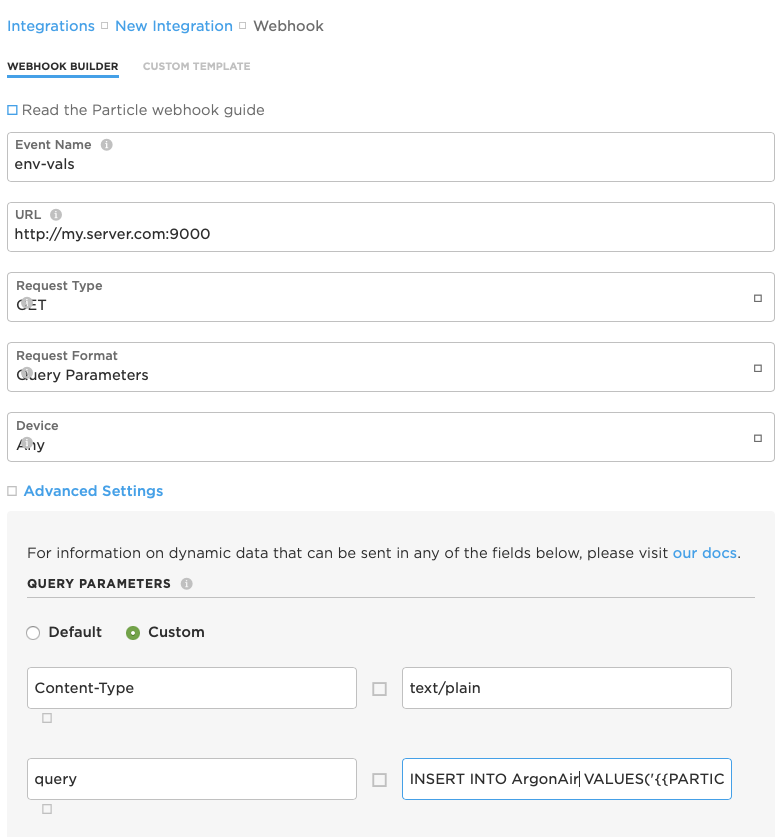
Once there, we'll fill in the form. According to the tutorial, our event is called env-vals, so enter that under Event Name.
Under URL enter the address of your QuestDB Server http:my.server.com:9000 or wherever your server is located.
Then change the Request Type to GET, and the Request Format to Query Parameters
Now for the trickiest part: The actual query parameters. First, select Custom instead of Default, and in the first box, enter Content-Type in the next box on the same row, enter text/plain Then click on the + Add Row button.
In the new row, enter query in the first box, and in the next box, enter:
INSERT INTO ArgonAir VALUES(
  '{{PARTICLE_DEVICE_ID}}',
  {{temperature}},
  {{humidity}},
  {{pressure}},
  '{{air-quality}}',
  {{dust-lpo}},
  {{dust-ratio}},
  {{dust-concentration}},
  to_timestamp('{{PARTICLE_PUBLISHED_AT}}', 'yyyy-MM-ddTHH:mm:ss.SSSz')
);
Your integration screen should look like this:
Don't forget to scroll to the bottom and _un_ check the Enforce SSL box, and then save your integration.
At this point, if your Air Quality Device is sending data to the Particle Cloud, you should begin to see readings show up in the QuestDB Console at regular intervals.
More information
For more information on using QuestDB, including using the Grafana plugin for visualizing your data, please go to questdb.io