
Getting Started
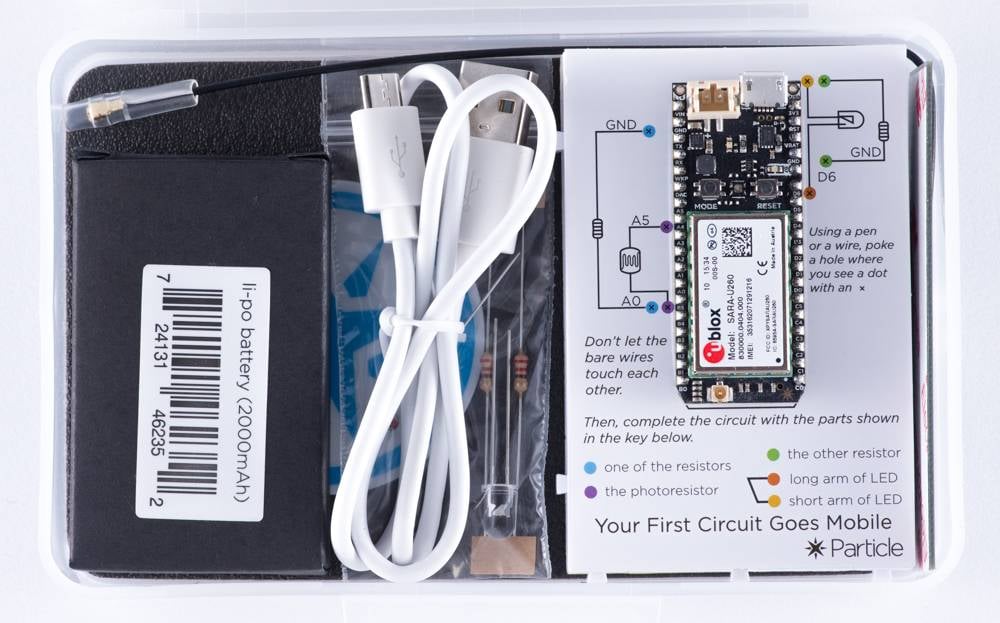
What's in the Box?
Introducing the Electron.
Congratulations on being the owner of a brand new Particle Device! Go ahead and open the box. You can see the different kit addons and check out the Electron datasheet if you like!
Let's quickly go over what you see.
What's all here?
The Cellular Module.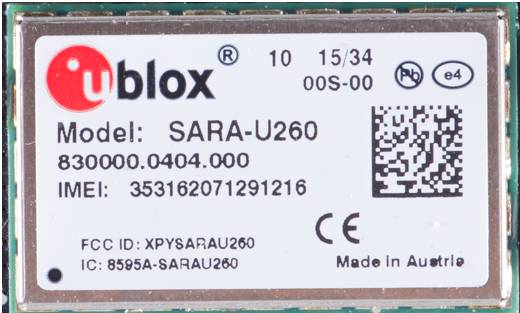 This is probably why you bought your device-- the cellular module allows your Electron to communicate with the internet in over 120 countries!
The cellular module is also accompanied with a Particle SIM card.
This is probably why you bought your device-- the cellular module allows your Electron to communicate with the internet in over 120 countries!
The cellular module is also accompanied with a Particle SIM card.
It connects your device to the internet in the same way that your smartphone might connect to its cellular network.
The Microcontroller.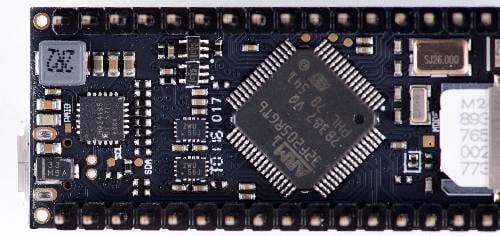 The microcontroller is the brain of your device. It runs your software and tells your prototype what to do. Unlike your computer, it can only run one application (often called firmware or an embedded application). This application can be simple (just a few lines of code), or very complex, depending on what you want to do. The microcontroller interacts with the outside world using pins.
The Pins.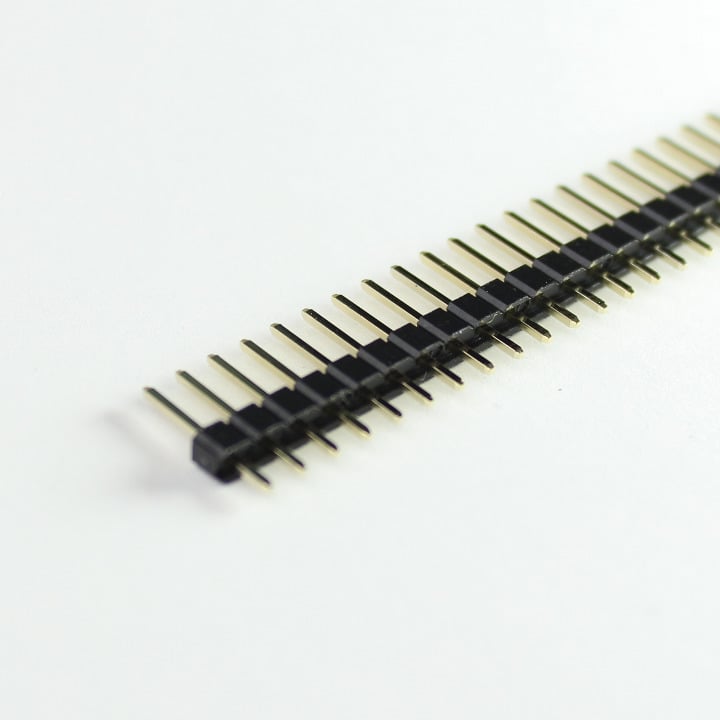
Pins are the input and output parts of the microcontroller that are exposed on the sides of your device. GPIO pins can be hooked to sensors or buttons to listen to the world, or they can be hooked to lights and buzzers to act upon the world. There are also pins to allow you to power your device, or power motors and outputs outside of your device. There are pins for Serial/UART communication, and a pin for resetting your device.
The Antenna & USB Cable.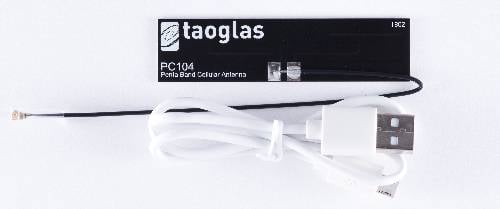 The cellular antenna is imperative for the Electron to reach connection to a cellular tower. It will operate for all 2G/3G frequencies that your
Electron needs, depending on the version you have. The USB cable provides a means to charge your Electron as well as send serial and DFU commands to your device.
The cellular antenna is imperative for the Electron to reach connection to a cellular tower. It will operate for all 2G/3G frequencies that your
Electron needs, depending on the version you have. The USB cable provides a means to charge your Electron as well as send serial and DFU commands to your device.
The Battery.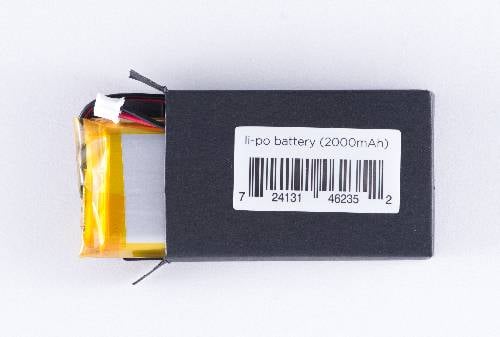 The Electron comes with a standard 1,800mAh 3.7V LiPo battery (rechargeable) which allows the Electron to be powered over long periods of time without needing a connection
to wired power source. Consider this battery your Electron's best friend!
The Electron comes with a standard 1,800mAh 3.7V LiPo battery (rechargeable) which allows the Electron to be powered over long periods of time without needing a connection
to wired power source. Consider this battery your Electron's best friend!
Buttons and LEDs. There are several awesome buttons and LEDs on your Electron to make it easier to use.
- The
MODEbutton is on the left and theRESETbutton is on the right. You can use these buttons to help you set your device's mode. - The RGB LED is in the center of your Electron, above the module. The color of the RGB LED tells you what mode your Electron is currently in.
- The D7 LED is next to the D7 pin on your Electron, on the upper right quadrant. This LED will turn on when the D7 pin is set to
HIGH.
Annotated examples
Here you will find a bunch of examples to get you started with your new Particle device!
These examples are also listed in the online IDE in the Code menu.
To complete all the examples, you will need the following materials:
Materials
- Hardware
- Your Particle device
- USB to micro USB cable (included with the Electron)
- Power source for USB cable (such as your computer, USB battery, or power brick)
- (2) Resistors between 220 Ohms and 1000 Ohms (included with the Electron)
- (1) LED, any color (included with the Electron)
- (1) Photoresistor (included with the Electron)
- LiPo Battery (included with the Electron)
All of the example circuits are based on the reference card that came along with your Electron kit. If you have misplaced yours, download it here!
- Software
- The online IDE
- or Particle Workbench
- Experience
- Connecting your Device with your browser or smartphone
NOTE:
Since Electron is a cellular device and OTA usage consumes data, it's important for us to think about conserving data. Every time you update your firmware over the air, push data to the device or remain connected to the network, you are consuming data. In the development phase of your project, it is suggested that you update firmware happen over USB, instead of the cellular network. You'll first need to install the Particle Command Line Interface on your computer.
For more hardware examples to try, visit the hardware examples.