
Device OS API - Core
This section is the Device OS API for the Spark Core only. The last version of Device OS that can be used with the Spark Core is 1.4.4.
Cloud Functions
Overview of API field limits
| API Field | Prior to 0.8.0 | Since 0.8.0 | Comment |
|---|---|---|---|
| Variable Key | 12 | 64 | |
| Variable Data | 622 | 622 | |
| Function Key | 12 | 64 | |
| Function Argument | 63 | 622 | |
| Publish/Subscribe Event Name | 64 | 64 | |
| Publish/Subscribe Event Data | 255 | 622 |
Note: Spark Core limits remain as-is prior to 0.8.0
Particle.variable()
Expose a variable through the Cloud so that it can be called with GET /v1/devices/{DEVICE_ID}/{VARIABLE}.
Returns a success value - true when the variable was registered.
Particle.variable registers a variable, so its value can be retrieved from the cloud in the future. You only call Particle.variable once per variable, typically passing in a global variable. You can change the value of the underlying global variable as often as you want; the value is only retrieved when requested, so simply changing the global variable does not use any data. You do not call Particle.variable when you change the value.
// EXAMPLE USAGE

int analogvalue = 0;
double tempC = 0;
char *message = "my name is particle";
String aString;

void setup()
{
  Particle.variable("analogvalue", analogvalue);
  Particle.variable("temp", tempC);
  if (Particle.variable("mess", message)==false)
  {
      // variable not registered!
  }
  Particle.variable("mess2", aString);

  pinMode(A0, INPUT);
}

void loop()
{
  // Read the analog value of the sensor (TMP36)
  analogvalue = analogRead(A0);
  //Convert the reading into degree celcius
  tempC = (((analogvalue * 3.3)/4095) - 0.5) * 100;
  delay(200);
}
Up to 20 cloud variables may be registered and each variable name is limited to a maximum of 12 characters (prior to 0.8.0), 64 characters (since 0.8.0). The Spark Core remains limited to 12 characters.
Note: Only use letters, numbers, underscores and dashes in variable names. Spaces and special characters may be escaped by different tools and libraries causing unexpected results.
When using SYSTEM_THREAD(ENABLED) you must be careful of when you register your variables. At the beginning of setup(), before you do any lengthy operations, delays, or things like waiting for a key press, is best. The reason is that variable and function registrations are only sent up once, about 30 seconds after connecting to the cloud. Calling Particle.variable after the registration information has been sent does not re-send the request and the variable will not work.
You will almost never call Particle.variable from loop() (or a function called from loop()).
String variables must be UTF-8 encoded. You cannot send arbitrary binary data or other character sets like ISO-8859-1. If you need to send binary data you can use a text-based encoding like Base64.
Prior to 0.4.7 firmware, variables were defined with an additional 3rd parameter
to specify the data type of the variable. From 0.4.7 onward, the system can
infer the type from the actual variable. Additionally, the variable address
was passed via the address-of operator (&). With 0.4.7 and newer, this is no longer required.
This is the pre-0.4.7 syntax:
int analogvalue = 0;
double tempC = 0;
char *message = "my name is particle";

void setup()
{
  Particle.variable("analogvalue", &analogvalue, INT);
  Particle.variable("temp", &tempC, DOUBLE);
  if (Particle.variable("mess", message, STRING)==false)
      // variable not registered!
  pinMode(A0, INPUT);
}
There are three supported data types:
INTDOUBLESTRING(maximum string length is 622 bytes)
# EXAMPLE REQUEST IN TERMINAL
# Device ID is 0123456789abcdef
# Your access token is 123412341234
curl "https://api.particle.io/v1/devices/0123456789abcdef/analogvalue?access_token=123412341234"
curl "https://api.particle.io/v1/devices/0123456789abcdef/temp?access_token=123412341234"
curl "https://api.particle.io/v1/devices/0123456789abcdef/mess?access_token=123412341234"

# In return you'll get something like this:
960
27.44322344322344
my name is particle
Particle.function()
Expose a function through the Cloud so that it can be called with POST /v1/devices/{DEVICE_ID}/{FUNCTION}.
Particle.function allows code on the device to be run when requested from the cloud API. You typically do this when you want to control something on your Core, say a LCD display or a buzzer, or control features in your firmware from the cloud.
// SYNTAX
bool success = Particle.function("funcKey", funcName);

// Cloud functions must return int and take one String
int funcName(String extra) {
  return 0;
}
Up to 15 cloud functions may be registered and each function name is limited to a maximum of 12 characters (prior to 0.8.0), 64 characters (since 0.8.0). The Spark Core remains limited to 12 characters.
Note: Only use letters, numbers, underscores and dashes in function names. Spaces and special characters may be escaped by different tools and libraries causing unexpected results. A function callback procedure needs to return as quickly as possible otherwise the cloud call will timeout.
In order to register a cloud function, the user provides the funcKey, which is the string name used to make a POST request and a funcName, which is the actual name of the function that gets called in your app. The cloud function has to return an integer; -1 is commonly used for a failed function call.
A cloud function is set up to take one argument of the String datatype. This argument length is limited to a max of 63 characters (prior to 0.8.0), 622 characters (since 0.8.0). The Spark Core remains limited to 63 characters. The String is UTF-8 encoded.
When using SYSTEM_THREAD(ENABLED) you must be careful of when you register your functions. At the beginning of setup(), before you do any lengthy operations, delays, or things like waiting for a key press, is best. The reason is that variable and function registrations are only sent up once, about 30 seconds after connecting to the cloud. Calling Particle.function after the registration information has been sent does not re-send the request and the function will not work.
// EXAMPLE USAGE

int brewCoffee(String command);

void setup()
{
  // register the cloud function
  Particle.function("brew", brewCoffee);
}

void loop()
{
  // this loops forever
}

// this function automagically gets called upon a matching POST request
int brewCoffee(String command)
{
  // look for the matching argument "coffee" <-- max of 64 characters long
  if(command == "coffee")
  {
    // some example functions you might have
    //activateWaterHeater();
    //activateWaterPump();
    return 1;
  }
  else return -1;
}
You can expose a method on a C++ object to the Cloud.
// EXAMPLE USAGE WITH C++ OBJECT

class CoffeeMaker {
  public:
    CoffeeMaker() {
    }

    void setup() {
      // You should not call Particle.function from the constructor
      // of an object that will be declared as a global variable.
      Particle.function("brew", &CoffeeMaker::brew, this);
    }

    int brew(String command) {
      // do stuff
      return 1;
    }
};

CoffeeMaker myCoffeeMaker;

void setup() {
    myCoffeeMaker.setup();
}
The API request will be routed to the device and will run your brew function. The response will have a return_value key containing the integer returned by brew.
COMPLEMENTARY API CALL
POST /v1/devices/{DEVICE_ID}/{FUNCTION}

# EXAMPLE REQUEST
curl https://api.particle.io/v1/devices/0123456789abcdef/brew \
     -d access_token=123412341234 \
     -d "args=coffee"
Particle.publish()
Publish an event through the Particle Device Cloud that will be forwarded to all registered listeners, such as callbacks, subscribed streams of Server-Sent Events, and other devices listening via Particle.subscribe().
This feature allows the device to generate an event based on a condition. For example, you could connect a motion sensor to the device and have the device generate an event whenever motion is detected.
Particle.publish pushes the value out of the device at a time controlled by the device firmware. Particle.variable allows the value to be pulled from the device when requested from the cloud side.
Note: Public events are not supported by the cloud as of August 2020. Specifying PUBLIC will essentially result in a PRIVATE event being sent or subscribed to.
Cloud events have the following properties:
- name (1–64 ASCII characters)
Note: Only use letters, numbers, underscores, dashes and slashes in event names. Spaces and special characters may be escaped by different tools and libraries causing unexpected results.
- PUBLIC/PRIVATE (prior to 0.8.0 default PUBLIC - thereafter it's a required parameter and PRIVATE is advisable)
- ttl (time to live, 0–16777215 seconds, default 60) !! NOTE: TTL is not implemented, hence the ttl value has no effect. Events must be caught immediately; once sent they will be gone immediately.
- optional data (up to 255 characters (prior to 0.8.0), 622 characters (since 0.8.0)). The Spark Core remains limited to 255 characters.
Anyone may subscribe to public events; think of them like tweets. Only the owner of the device will be able to subscribe to private events.
A device may not publish events beginning with a case-insensitive match for "spark". Such events are reserved for officially curated data originating from the Cloud.
Calling Particle.publish() when the cloud connection has been turned off will not publish an event. This is indicated by the return success code
of false.
If the cloud connection is turned on and trying to connect to the cloud unsuccessfully, Particle.publish may block for 20 seconds to 5 minutes. Checking Particle.connected() can prevent this.
For the time being there exists no way to access a previously published but TTL-unexpired event.
String variables must be UTF-8 encoded. You cannot send arbitrary binary data or other character sets like ISO-8859-1. If you need to send binary data you can use a text-based encoding like Base64.
NOTE 1: Currently, a device can publish at rate of about 1 event/sec, with bursts of up to 4 allowed in 1 second. Back to back burst of 4 messages will take 4 seconds to recover.
NOTE 2: Particle.publish() and the Particle.subscribe() handler(s) share the same buffer. As such, calling Particle.publish() within a Particle.subscribe() handler will wipe the subscribe buffer! In these cases, copying the subscribe buffer's content to a separate char buffer prior to calling Particle.publish() is recommended.
Publish a private event with the given name, no data, and the default TTL of 60 seconds.
// SYNTAX
Particle.publish(const char *eventName, PublishFlags flags);
Particle.publish(String eventName, PublishFlags flags);
Returns:
A bool indicating success: (true or false)
// EXAMPLE USAGE
bool success;
success = Particle.publish("motion-detected", PRIVATE);
if (!success) {
  // get here if event publish did not work
}
Publish a private event with the given name and data, with the default TTL of 60 seconds.
// SYNTAX
Particle.publish(const char *eventName, const char *data, PublishFlags flags);
Particle.publish(String eventName, String data, PublishFlags flags);

// EXAMPLE USAGE
Particle.publish("temperature", "19 F", PRIVATE);
Publish a private event with the given name, data, and TTL.
// SYNTAX
Particle.publish(const char *eventName, const char *data, int ttl, PublishFlags flags);
Particle.publish(String eventName, String data, int ttl, PublishFlags flags);

// EXAMPLE USAGE
Particle.publish("lake-depth/1", "28m", 21600, PRIVATE);
Publish a private event with the given name, data, and TTL.
// SYNTAX
Particle.publish(const char *eventName, const char *data, int ttl, PublishFlags flags);
Particle.publish(String eventName, String data, int ttl, PublishFlags flags);

// EXAMPLE USAGE
Particle.publish("front-door-unlocked", NULL, 60, PRIVATE);
Publish a public event with the given name.
// SYNTAX
Particle.publish(const char *eventName, PublishFlags flags);
Particle.publish(String eventName, PublishFlags flags);

// EXAMPLE USAGE
Particle.publish("front-door-unlocked", PRIVATE);
COMPLEMENTARY API CALL
GET /v1/events/{EVENT_NAME}

# EXAMPLE REQUEST
curl -H "Authorization: Bearer {ACCESS_TOKEN_GOES_HERE}" \
    https://api.particle.io/v1/events/motion-detected

# Will return a stream that echoes text when your event is published
event: motion-detected
data: {"data":"23:23:44","ttl":"60","published_at":"2014-05-28T19:20:34.638Z","deviceid":"0123456789abcdef"}
WITH_ACK flag
Since 0.6.1:
This flag causes Particle.publish() to return only after receiving an acknowledgement that the published event has been received by the Cloud.
// SYNTAX

Particle.publish("motion-detected", NULL, WITH_ACK);
Particle.publish("motion-detected", NULL, PRIVATE, WITH_ACK);
Particle.publish("motion-detected", NULL, ttl, PRIVATE, WITH_ACK);
Since 0.7.0:
Particle.publish() flags can be combined using a regular syntax with OR operator (|).
// EXAMPLE - combining Particle.publish() flags

Particle.publish("motion-detected", PRIVATE | WITH_ACK);
If you wish to send a public event, you should specify PUBLIC explictly. This will be required in the future, but is optional in 0.7.0.
Particle.publish("motion-detected", PUBLIC);
PUBLIC and PRIVATE are mutually exclusive.
Unlike functions and variables, you typically call Particle.publish from loop() (or a function called from loop).
Particle.publishVitals()
Since 1.2.0:
// SYNTAX

system_error_t Particle.publishVitals(system_tick_t period_s = particle::NOW)

Particle.publishVitals();  // Publish vitals immmediately
Particle.publishVitals(particle::NOW);  // Publish vitals immediately
Particle.publishVitals(5);  // Publish vitals every 5 seconds, indefinitely
Particle.publishVitals(0);  // Publish immediately and cancel periodic publishing
Publish vitals information
Provides a mechanism to control the interval at which system diagnostic messages are sent to the cloud. Subsequently, this controls the granularity of detail on the fleet health metrics.
Argument(s):
period_sThe period (in seconds) at which vitals messages are to be sent to the cloud (default value:particle::NOW)particle::NOW- A special value used to send vitals immediately0- Publish a final message and disable periodic publishings- Publish an initial message and subsequent messages everysseconds thereafter
Returns:
A system_error_t result code
system_error_t::SYSTEM_ERROR_NONEsystem_error_t::SYSTEM_ERROR_IO
Examples:
// EXAMPLE - Publish vitals intermittently

bool condition;

setup () {
}

loop () {
  ...  // Some logic that either will or will not set "condition"

  if ( condition ) {
    Particle.publishVitals();  // Publish vitals immmediately
  }
}
// EXAMPLE - Publish vitals periodically, indefinitely

setup () {
  Particle.publishVitals(3600);  // Publish vitals each hour
}

loop () {
}
// EXAMPLE - Publish vitals each minute and cancel vitals after one hour

size_t start = millis();

setup () {
  Particle.publishVitals(60);  // Publish vitals each minute
}

loop () {
  // Cancel vitals after one hour
  if (3600000 < (millis() - start)) {
    Particle.publishVitals(0);  // Publish immediately and cancel periodic publishing
  }
}
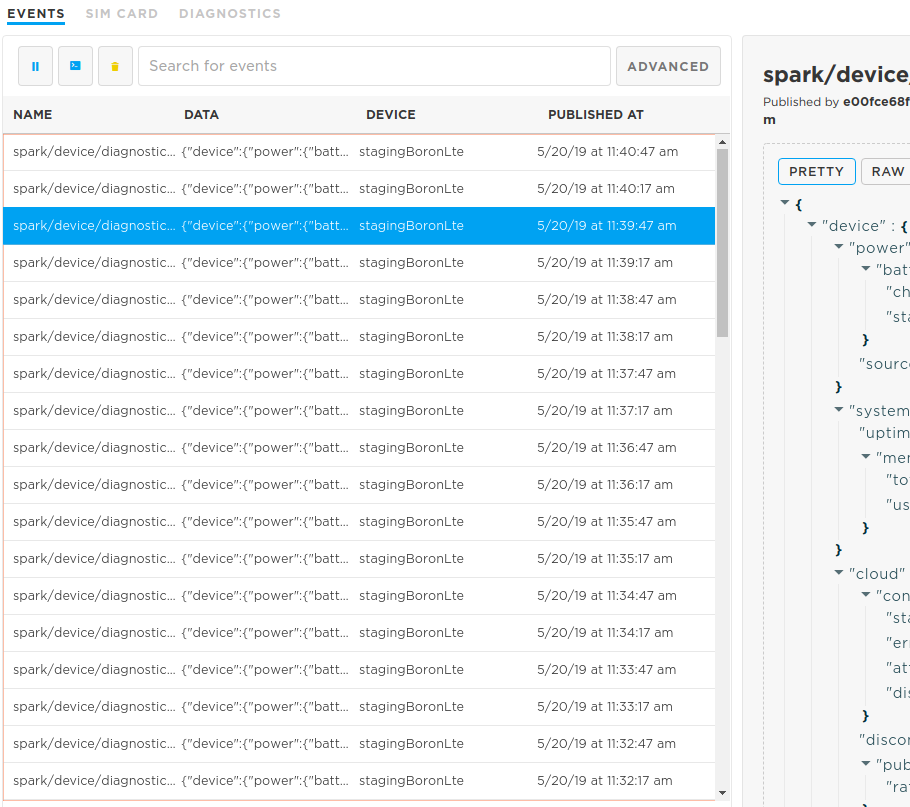
NOTE: Diagnostic messages can be viewed in the Console. Select the device in question, and view the messages under the "EVENTS" tab.
Particle.subscribe()
Subscribe to events published by devices.
This allows devices to talk to each other very easily. For example, one device could publish events when a motion sensor is triggered and another could subscribe to these events and respond by sounding an alarm.
int i = 0;

void myHandler(const char *event, const char *data)
{
  i++;
  Serial.print(i);
  Serial.print(event);
  Serial.print(", data: ");
  if (data)
    Serial.println(data);
  else
    Serial.println("NULL");
}

void setup()
{
  Particle.subscribe("temperature", myHandler, ALL_DEVICES);
  Serial.begin(9600);
}
To use Particle.subscribe(), define a handler function and register it in setup().
Note: Public events are not supported by the cloud as of August 2020. Specifying MY_DEVICES or not will subscribe to events associated with the account the device is claimed to.
You can listen to events published only by your own devices by adding a MY_DEVICES constant.
// only events from my devices
Particle.subscribe("the_event_prefix", theHandler, MY_DEVICES);
- Specifying MY_DEVICES only receives PRIVATE events.
- Specifying ALL_DEVICES or omitting the third parameter only receives PUBLIC events.
| flags | subscribe ALL_DEVICES | subscribe MY_DEVICES | subscribe default |
|---|---|---|---|
| publish PUBLIC | Y | - | Y |
| publish PRIVATE | - | Y | - |
| publish default | Y | - | Y |
You can register a method in a C++ object as a subscription handler.
#include "Particle.h"

SerialLogHandler logHandler;

class MyClass {
public:
    MyClass();
    virtual ~MyClass();

    void setup();

    void subscriptionHandler(const char *eventName, const char *data);
};

MyClass::MyClass() {
}

MyClass::~MyClass() {
}

void MyClass::setup() {
    Particle.subscribe("myEvent", &MyClass::subscriptionHandler, this, MY_DEVICES);
}

void MyClass::subscriptionHandler(const char *eventName, const char *data) {
    Log.info("eventName=%s data=%s", eventName, data);
}

// In this example, MyClass is a globally constructed object.
MyClass myClass;

void setup() {
    myClass.setup();
}

void loop() {

}
You should not call Particle.subscribe() from the constructor of a globally allocated C++ object. See Global Object Constructors for more information.
A subscription works like a prefix filter. If you subscribe to "foo", you will receive any event whose name begins with "foo", including "foo", "fool", "foobar", and "food/indian/sweet-curry-beans".
Received events will be passed to a handler function similar to Particle.function().
A subscription handler (like myHandler above) must return void and take two arguments, both of which are C strings (const char *).
- The first argument is the full name of the published event.
- The second argument (which may be NULL) is any data that came along with the event.
Particle.subscribe() returns a bool indicating success. It is OK to register a subscription when
the device is not connected to the cloud - the subscription is automatically registered
with the cloud next time the device connects.
NOTE 1: A device can register up to 4 event handlers. This means you can call Particle.subscribe() a maximum of 4 times; after that it will return false.
NOTE 2: Particle.publish() and the Particle.subscribe() handler(s) share the same buffer. As such, calling Particle.publish() within a Particle.subscribe() handler will wipe the subscribe buffer! In these cases, copying the subscribe buffer's content to a separate char buffer prior to calling Particle.publish() is recommended.
Unlike functions and variables, you can call Particle.subscribe from setup() or from loop(). The subscription list can be added to at any time, and more than once.
Particle.unsubscribe()
Removes all subscription handlers previously registered with Particle.subscribe().
// SYNTAX
Particle.unsubscribe();
Particle.connect()
Particle.connect() connects the device to the Cloud. This will automatically activate the Wi-Fi connection and attempt to connect to the Particle cloud if the device is not already connected to the cloud.
void setup() {}

void loop() {
  if (Particle.connected() == false) {
    Particle.connect();
  }
}
After you call Particle.connect(), your loop will not be called again until the device finishes connecting to the Cloud. Typically, you can expect a delay of approximately one second.
In most cases, you do not need to call Particle.connect(); it is called automatically when the device turns on. Typically you only need to call Particle.connect() after disconnecting with Particle.disconnect() or when you change the system mode.
Particle.disconnect()
Particle.disconnect() disconnects the device from the Cloud.
int counter = 10000;

void doConnectedWork() {
  digitalWrite(D7, HIGH);
  Serial.println("Working online");
}

void doOfflineWork() {
  digitalWrite(D7, LOW);
  Serial.println("Working offline");
}

bool needConnection() {
  --counter;
  if (0 == counter)
    counter = 10000;
  return (2000 > counter);
}

void setup() {
  pinMode(D7, OUTPUT);
  Serial.begin(9600);
}

void loop() {
  if (needConnection()) {
    if (!Particle.connected())
      Particle.connect();
    doConnectedWork();
  } else {
    if (Particle.connected())
      Particle.disconnect();
    doOfflineWork();
  }
}
While this function will disconnect from the Cloud, it will keep the connection to the Wi-Fi network. If you would like to completely deactivate the Wi-Fi module, use WiFi.off().
*NOTE: When the device is disconnected, many features are not possible, including over-the-air updates, reading Particle.variables, and calling Particle.functions.
If you disconnect from the Cloud, you will NOT BE ABLE to flash new firmware over the air. Safe mode can be used to reconnect to the cloud.
Particle.connected()
Returns true when connected to the Cloud, and false when disconnected from the Cloud.
// SYNTAX
Particle.connected();


// EXAMPLE USAGE
void setup() {
  Serial.begin(9600);
}

void loop() {
  if (Particle.connected()) {
    Serial.println("Connected!");
  }
  delay(1000);
}
Particle.process()
Runs the background loop. This is the public API for the former internal function
SPARK_WLAN_Loop().
Particle.process() checks the Wi-Fi module for incoming messages from the Cloud,
and processes any messages that have come in. It also sends keep-alive pings to the Cloud,
so if it's not called frequently, the connection to the Cloud may be lost.
Even in non-cloud-bound applications it can still be advisable to call Particle.process() to explicitly provide some processor time to the Wi-Fi module (e.g. immediately after WiFi.ready() to update system variables).
void setup() {
  Serial.begin(9600);
}

void loop() {
  // Do not do this in real code. You should return from loop() instead!
  while (1) {
    Particle.process();
    redundantLoop();
  }
}

void redundantLoop() {
  Serial.println("Well that was unnecessary.");
}
Particle.process() is a blocking call, and blocks for a few milliseconds. Particle.process() is called automatically after every loop() and during delays. Typically you will not need to call Particle.process() unless you block in some other way and need to maintain the connection to the Cloud, or you change the system mode. If the user puts the device into MANUAL mode, the user is responsible for calling Particle.process(). The more frequently this function is called, the more responsive the device will be to incoming messages, the more likely the Cloud connection will stay open, and the less likely that the Wi-Fi module's buffer will overrun.
Particle.syncTime()
Synchronize the time with the Particle Device Cloud. This happens automatically when the device connects to the Cloud. However, if your device runs continuously for a long time, you may want to synchronize once per day or so.
#define ONE_DAY_MILLIS (24 * 60 * 60 * 1000)
unsigned long lastSync = millis();

void loop() {
  if (millis() - lastSync > ONE_DAY_MILLIS) {
    // Request time synchronization from the Particle Device Cloud
    Particle.syncTime();
    lastSync = millis();
  }
}
Note that this function sends a request message to the Cloud and then returns.
The time on the device will not be synchronized until some milliseconds later
when the Cloud responds with the current time between calls to your loop.
See Particle.syncTimeDone(), Particle.timeSyncedLast(), Time.isValid() and Particle.syncTimePending() for information on how to wait for request to be finished.
Particle.syncTimeDone()
Since 0.6.1:
Returns true if there is no syncTime() request currently pending or there is no active connection to Particle Device Cloud. Returns false when there is a pending syncTime() request.
// SYNTAX
Particle.syncTimeDone();


// EXAMPLE

void loop()
{
  // Request time synchronization from the Particle Device Cloud
  Particle.syncTime();
  // Wait until Core receives time from Particle Device Cloud (or connection to Particle Device Cloud is lost)
  waitUntil(Particle.syncTimeDone);
  // Print current time
  Serial.println(Time.timeStr());
}
See also Particle.timeSyncedLast() and Time.isValid().
Particle.syncTimePending()
Since 0.6.1:
Returns true if there a syncTime() request currently pending. Returns false when there is no syncTime() request pending or there is no active connection to Particle Device Cloud.
// SYNTAX
Particle.syncTimePending();


// EXAMPLE

void loop()
{
  // Request time synchronization from the Particle Device Cloud
  Particle.syncTime();
  // Wait until Core receives time from Particle Device Cloud (or connection to Particle Device Cloud is lost)
  while(Particle.syncTimePending())
  {
    //
    // Do something else
    //

    Particle.process();
  }
  // Print current time
  Serial.println(Time.timeStr());
}
See also Particle.timeSyncedLast() and Time.isValid().
Particle.timeSyncedLast()
Since 0.6.1:
Used to check when time was last synchronized with Particle Device Cloud.
// SYNTAX
Particle.timeSyncedLast();
Particle.timeSyncedLast(timestamp);
Returns the number of milliseconds since the device began running the current program when last time synchronization with Particle Device Cloud was performed.
This function takes one optional argument:
timestamp:time_tvariable that will contain a UNIX timestamp received from Particle Device Cloud during last time synchronization
// EXAMPLE

#define ONE_DAY_MILLIS (24 * 60 * 60 * 1000)

void loop() {
  time_t lastSyncTimestamp;
  unsigned long lastSync = Particle.timeSyncedLast(lastSyncTimestamp);
  if (millis() - lastSync > ONE_DAY_MILLIS) {
    unsigned long cur = millis();
    Serial.printlnf("Time was last synchronized %lu milliseconds ago", millis() - lastSync);
    if (lastSyncTimestamp > 0)
    {
      Serial.print("Time received from Particle Device Cloud was: ");
      Serial.println(Time.timeStr(lastSyncTimestamp));
    }
    // Request time synchronization from Particle Device Cloud
    Particle.syncTime();
    // Wait until Core receives time from Particle Device Cloud (or connection to Particle Device Cloud is lost)
    waitUntil(Particle.syncTimeDone);
    // Check if synchronized successfully
    if (Particle.timeSyncedLast() >= cur)
    {
      // Print current time
      Serial.println(Time.timeStr());
    }
  }
}
Get Public IP
Using this feature, the device can programmatically know its own public IP address.
// Open a serial terminal and see the IP address printed out
void handler(const char *topic, const char *data) {
    Serial.println("received " + String(topic) + ": " + String(data));
}

void setup() {
    Serial.begin(115200);
    Particle.subscribe("particle/device/ip", handler, MY_DEVICES);
    Particle.publish("particle/device/ip", PRIVATE);
}
Get Device name
This gives you the device name that is stored in the cloud,
// Open a serial terminal and see the device name printed out
void handler(const char *topic, const char *data) {
    Serial.println("received " + String(topic) + ": " + String(data));
}

void setup() {
    Serial.begin(115200);
    Particle.subscribe("particle/device/name", handler);
    Particle.publish("particle/device/name");
}
Get Random seed
Grab 40 bytes of randomness from the cloud and {e}n{c}r{y}p{t} away!
void handler(const char *topic, const char *data) {
    Serial.println("received " + String(topic) + ": " + String(data));
}

void setup() {
    Serial.begin(115200);
    Particle.subscribe("particle/device/random", handler);
    Particle.publish("particle/device/random");
}
WiFi
on()
WiFi.on() turns on the Wi-Fi module. Useful when you've turned it off, and you changed your mind.
Note that WiFi.on() does not need to be called unless you have changed the system mode or you have previously turned the Wi-Fi module off.
off()
WiFi.off() turns off the Wi-Fi module. Useful for saving power, since most of the power draw of the device is the Wi-Fi module.
connect()
Attempts to connect to the Wi-Fi network. If there are no credentials stored, this will enter listening mode (see below for how to avoid this.). If there are credentials stored, this will try the available credentials until connection is successful. When this function returns, the device may not have an IP address on the LAN; use WiFi.ready() to determine the connection status.
// SYNTAX
WiFi.connect();
Since 0.4.5:
It's possible to call WiFi.connect() without entering listening mode in the case where no credentials are stored:
// SYNTAX
WiFi.connect(WIFI_CONNECT_SKIP_LISTEN);
If there are no credentials then the call does nothing other than turn on the Wi-Fi module.
disconnect()
Disconnects from the Wi-Fi network, but leaves the Wi-Fi module on.
// SYNTAX
WiFi.disconnect();
connecting()
This function will return true once the device is attempting to connect using stored Wi-Fi credentials, and will return false once the device has successfully connected to the Wi-Fi network.
// SYNTAX
WiFi.connecting();
ready()
This function will return true once the device is connected to the network and has been assigned an IP address, which means that it's ready to open TCP sockets and send UDP datagrams. Otherwise it will return false.
// SYNTAX
WiFi.ready();
listen()
This will enter or exit listening mode, which opens a Serial connection to get Wi-Fi credentials over USB, and also listens for credentials over .
// SYNTAX - enter listening mode
WiFi.listen();
Listening mode blocks application code. Advanced cases that use multithreading, interrupts, or system events have the ability to continue to execute application code while in listening mode, and may wish to then exit listening mode, such as after a timeout. Listening mode is stopped using this syntax:
// SYNTAX - exit listening mode
WiFi.listen(false);
listening()
// SYNTAX
WiFi.listening();
Because listening mode blocks your application code on the Core, this command is not useful on the Core.
It will always return false.
setListenTimeout()
Since 0.6.1:
// SYNTAX
WiFi.setListenTimeout(seconds);
WiFi.setListenTimeout(seconds) is used to set a timeout value for Listening Mode. Values are specified in seconds, and 0 disables the timeout. By default, Wi-Fi devices do not have any timeout set (seconds=0). As long as interrupts are enabled, a timer is started and running while the device is in listening mode (WiFi.listening()==true). After the timer expires, listening mode will be exited automatically. If WiFi.setListenTimeout() is called while the timer is currently in progress, the timer will be updated and restarted with the new value (e.g. updating from 10 seconds to 30 seconds, or 10 seconds to 0 seconds (disabled)).
// EXAMPLE
// If desired, use the STARTUP() macro to set the timeout value at boot time.
STARTUP(WiFi.setListenTimeout(60)); // set listening mode timeout to 60 seconds

void setup() {
  // your setup code
}
getListenTimeout()
Since 0.6.1:
// SYNTAX
uint16_t seconds = WiFi.getListenTimeout();
WiFi.getListenTimeout() is used to get the timeout value currently set for Listening Mode. Values are returned in (uint16_t)seconds, and 0 indicates the timeout is disabled. By default, Wi-Fi devices do not have any timeout set (seconds=0).
// EXAMPLE
void setup() {
  Serial.begin();
  Serial.println(WiFi.getListenTimeout());
}
setCredentials()
Allows the application to set credentials for the Wi-Fi network from within the code. These credentials will be added to the device's memory, and the device will automatically attempt to connect to this network in the future.
Your device can remember more than one set of credentials:
- Core: remembers the 7 most recently set credentials
- Photon: remembers the 5 most recently set credentials.
- Argon: remembers the 10 most recently set credentials.
Since 0.7.0: Photon can store one set of WPA Enterprise credentials.
// Connects to an unsecured network.
WiFi.setCredentials(ssid);
WiFi.setCredentials("My_Router_Is_Big");

// Connects to a network secured with WPA2 credentials.
WiFi.setCredentials(ssid, password);
WiFi.setCredentials("My_Router", "mypasswordishuge");

// Connects to a network with a specified authentication procedure.
// Options are WPA2, WPA, or WEP.
WiFi.setCredentials(ssid, password, auth);
WiFi.setCredentials("My_Router", "wepistheworst", WEP);
// Connects to a network with an authentication procedure specified by WiFiCredentials object
WiFi.setCredentials(credentials);
WiFiCredentials credentials;
credentials.setSsid("My_Router")
           .setSecurity(WEP)
           .setPassword("wepistheworst");
WiFi.setCredentials(credentials);
Since 0.7.0:
Credentials can be set using WiFiCredentials class.
Parameters:
ssid: SSID (string)password: password (string)auth: see SecurityType enum.cipher: see WLanSecurityCipher enum.credentials: an instance of WiFiCredentials class.
This function returns true if credentials were successfully saved, or false in case of an error.
Note: Setting WPA/WPA2 Enterprise credentials requires use of WiFiCredentials class.
Note: In order for WiFi.setCredentials() to work, the Wi-Fi module needs to be on (if switched off or disabled via non_AUTOMATIC SYSTEM_MODEs call WiFi.on()).
getCredentials()
Since 0.4.9:
Lists the Wi-Fi networks with credentials stored on the device. Returns the number of stored networks.
Note that this returns details about the Wi-Fi networks, but not the actual password.
// EXAMPLE
WiFiAccessPoint ap[5];
int found = WiFi.getCredentials(ap, 5);
for (int i = 0; i < found; i++) {
    Serial.print("ssid: ");
    Serial.println(ap[i].ssid);
    // security is one of WLAN_SEC_UNSEC, WLAN_SEC_WEP, WLAN_SEC_WPA, WLAN_SEC_WPA2, WLAN_SEC_WPA_ENTERPRISE, WLAN_SEC_WPA2_ENTERPRISE
    Serial.print("security: ");
    Serial.println(ap[i].security);
    // cipher is one of WLAN_CIPHER_AES, WLAN_CIPHER_TKIP or WLAN_CIPHER_AES_TKIP
    Serial.print("cipher: ");
    Serial.println(ap[i].cipher);
}
clearCredentials()
This will clear all saved credentials from the Wi-Fi module's memory. This will return true on success and false if the Wi-Fi module has an error.
// SYNTAX
WiFi.clearCredentials();
hasCredentials()
Will return true if there are Wi-Fi credentials stored in the Wi-Fi module's memory.
// SYNTAX
WiFi.hasCredentials();
macAddress()
WiFi.macAddress() returns the MAC address of the device.
// EXAMPLE USAGE

byte mac[6];

void setup() {
  WiFi.on();
  Serial.begin(9600);
  // wait up to 10 seconds for USB host to connect
  // requires firmware >= 0.5.3
  waitFor(Serial.isConnected, 10000);

  WiFi.macAddress(mac);

  for (int i=0; i<6; i++) {
    Serial.printf("%02x%s", mac[i], i != 5 ? ":" : "");
  }
}
// EXAMPLE USAGE

// Only for Spark Core using firmware < 0.4.0
// Mac address is in the reversed order and
// is fixed from v0.4.0 onwards

byte mac[6];

void setup() {
  Serial.begin(9600);
  // wait until a character sent from USB host
  while (!Serial.available()) Spark.process();

  WiFi.macAddress(mac);

  for (int i=5; i>0; i--) {
    Serial.print(mac[i]>>4,HEX);
    Serial.print(mac[i]&0x0f,HEX);
    if (i != 0) {
      Serial.print(":");
    }
  }
}

void loop() {}
SSID()
WiFi.SSID() returns the SSID of the network the device is currently connected to as a char*.
BSSID()
WiFi.BSSID() retrieves the 6-byte MAC address of the access point the device is currently connected to.
byte bssid[6];

void setup() {
  Serial.begin(9600);
  // Wait for a USB serial connection for up to 30 seconds
  waitFor(Serial.isConnected, 30000);

  WiFi.BSSID(bssid);
  Serial.printlnf("%02X:%02X:%02X:%02X:%02X:%02X", bssid[0], bssid[1], bssid[2], bssid[3], bssid[4], bssid[5]);
}
RSSI()
WiFi.RSSI() returns the signal strength of a Wi-Fi network from -127 (weak) to -1dB (strong) as an int. Positive return values indicate an error with 1 indicating a Wi-Fi chip error and 2 indicating a time-out error.
// SYNTAX
int rssi = WiFi.RSSI();
WiFiSignal rssi = WiFi.RSSI();
Since 0.8.0
WiFi.RSSI() returns an instance of WiFiSignal class.
// SYNTAX
WiFiSignal sig = WiFi.RSSI();
If you are passing the RSSI value as a variable argument, such as with Serial.printlnf, Log.info, snprintf, etc. make sure you add a cast:
Serial.printlnf("RSSI=%d", (int8_t) WiFi.RSSI()).
This is necessary for the compiler to correctly convert the WiFiSignal class into a number.
WiFiSignal Class
This class allows to query a number of signal parameters of the currently connected WiFi network.
getStrength()
Gets the signal strength as a percentage (0.0 - 100.0). See getStrengthValue() on how strength values are mapped to 0%-100% range.
// SYNTAX
WiFiSignal sig = WiFi.RSSI();
float strength = sig.getStrength();

// EXAMPLE
WiFiSignal sig = WiFi.RSSI();
Log.info("WiFi signal strength: %.02f%%", sig.getStrength());
Returns: float
getQuality()
Gets the signal quality as a percentage (0.0 - 100.0). See getQualityValue() on how quality values are mapped to 0%-100% range.
// SYNTAX
WiFiSignal sig = WiFi.RSSI();
float quality = sig.getQuality();

// EXAMPLE
WiFiSignal sig = WiFi.RSSI();
Log.info("WiFi signal quality: %.02f%%", sig.getQuality());
Returns: float
getStrengthValue()
// SYNTAX
WiFiSignal sig = WiFi.RSSI();
float strength = sig.getStrengthValue();
Gets the raw signal strength value in dBm. Range: [-90, 0].
Returns: float
getQualityValue()
// SYNTAX
WiFiSignal sig = WiFi.RSSI();
float quality = sig.getQualityValue();
Gets the raw signal quality value (SNR) in dB. Range: [0, 90].
Returns: float
ping()
WiFi.ping() allows you to ping an IP address and returns the number of packets received as an int. It takes two forms:
WiFi.ping(IPAddress remoteIP) takes an IPAddress and pings that address.
WiFi.ping(IPAddress remoteIP, uint8_t nTries) and pings that address a specified number of times.
scan()
Returns information about access points within range of the device.
The first form is the simplest, but also least flexible. You provide a
array of WiFiAccessPoint instances, and the call to WiFi.scan() fills out the array.
If there are more APs detected than will fit in the array, they are dropped.
Returns the number of access points written to the array.
// EXAMPLE - retrieve up to 20 Wi-Fi APs

WiFiAccessPoint aps[20];
int found = WiFi.scan(aps, 20);
for (int i=0; i<found; i++) {
    WiFiAccessPoint& ap = aps[i];
    Serial.print("SSID: ");
    Serial.println(ap.ssid);
    Serial.print("Security: ");
    Serial.println(ap.security);
    Serial.print("Channel: ");
    Serial.println(ap.channel);
    Serial.print("RSSI: ");
    Serial.println(ap.rssi);
}
The more advanced call to WiFi.scan() uses a callback function that receives
each scanned access point.
// EXAMPLE using a callback
void wifi_scan_callback(WiFiAccessPoint* wap, void* data)
{
    WiFiAccessPoint& ap = *wap;
    Serial.print("SSID: ");
    Serial.println(ap.ssid);
    Serial.print("Security: ");
    Serial.println(ap.security);
    Serial.print("Channel: ");
    Serial.println(ap.channel);
    Serial.print("RSSI: ");
    Serial.println(ap.rssi);
}

void loop()
{
    int result_count = WiFi.scan(wifi_scan_callback);
    Serial.print(result_count);
    Serial.println(" APs scanned.");
}
The main reason for doing this is that you gain access to all access points available without having to know in advance how many there might be.
You can also pass a 2nd parameter to WiFi.scan() after the callback, which allows
object-oriented code to be used.
// EXAMPLE - class to find the strongest AP

class FindStrongestSSID
{
    char strongest_ssid[33];
    int strongest_rssi;

    // This is the callback passed to WiFi.scan()
    // It makes the call on the `self` instance - to go from a static
    // member function to an instance member function.
    static void handle_ap(WiFiAccessPoint* wap, FindStrongestSSID* self)
    {
        self->next(*wap);
    }

    // determine if this AP is stronger than the strongest seen so far
    void next(WiFiAccessPoint& ap)
    {
        if ((ap.rssi < 0) && (ap.rssi > strongest_rssi)) {
            strongest_rssi = ap.rssi;
            strcpy(strongest_ssid, ap.ssid);
        }
    }

public:

    /**
     * Scan Wi-Fi Access Points and retrieve the strongest one.
     */
    const char* scan()
    {
        // initialize data
        strongest_rssi = -128;
        strongest_ssid[0] = 0;
        // perform the scan
        WiFi.scan(handle_ap, this);
        return strongest_ssid;
    }
};

// Now use the class
FindStrongestSSID strongestFinder;
const char* ssid = strongestFinder.scan();

}
resolve()
WiFi.resolve() finds the IP address for a domain name.
// SYNTAX
ip = WiFi.resolve(name);
Parameters:
name: the domain name to resolve (string)
It returns the IP address if the domain name is found, otherwise a blank IP address.
// EXAMPLE USAGE

IPAddress ip;
void setup() {
   ip = WiFi.resolve("www.google.com");
   if(ip) {
     // IP address was resolved
   } else {
     // name resolution failed
   }
}
localIP()
WiFi.localIP() returns the local IP address assigned to the device as an IPAddress.
void setup() {
  Serial.begin(9600);
  // Wait for a USB serial connection for up to 30 seconds
  waitFor(Serial.isConnected, 30000);

  // Prints out the local IP over Serial.
  Serial.println(WiFi.localIP());
}
subnetMask()
WiFi.subnetMask() returns the subnet mask of the network as an IPAddress.
void setup() {
  Serial.begin(9600);
  // Wait for a USB serial connection for up to 30 seconds
  waitFor(Serial.isConnected, 30000);

  // Prints out the subnet mask over Serial.
  Serial.println(WiFi.subnetMask());
}
gatewayIP()
WiFi.gatewayIP() returns the gateway IP address of the network as an IPAddress.
void setup() {
  Serial.begin(9600);
  // Wait for a USB serial connection for up to 30 seconds
  waitFor(Serial.isConnected, 30000);

  // Prints out the gateway IP over Serial.
  Serial.println(WiFi.gatewayIP());
}
dnsServerIP()
WiFi.dnsServerIP() retrieves the IP address of the DNS server that resolves
DNS requests for the device's network connection.
Note that for this value to be available requires calling Particle.process() after Wi-Fi
has connected.
dhcpServerIP()
WiFi.dhcpServerIP() retrieves the IP address of the DHCP server that manages
the IP address used by the device's network connection.
Note that for this value to be available requires calling Particle.process() after Wi-Fi
has connected.
WiFiCredentials class
This class allows to define WiFi credentials that can be passed to WiFi.setCredentials() function.
// EXAMPLE - defining and using WiFiCredentials class

void setup() {
    // Ensure that WiFi module is on
    WiFi.on();
    // Set up WPA2 access point "My AP" with password "mypassword" and AES cipher
    WiFiCredentials credentials("My AP", WPA2);
    credentials.setPassword("mypassword")
               .setCipher(WLAN_CIPHER_AES);
    // Connect if settings were successfully saved
    if (WiFi.setCredentials(credentials)) {
        WiFi.connect();
        waitFor(WiFi.ready, 30000);
        Particle.connect();
        waitFor(Particle.connected, 30000);
    }
}

void loop() {
}
WiFiCredentials()
Constructs an instance of the WiFiCredentials class. By default security type is initialized to unsecured (UNSEC).
// SYNTAX
WiFiCredentials credentials(SecurityType security = UNSEC); // 1
WiFiCredentials credentials(const char* ssid, SecurityType security = UNSEC); // 2
// EXAMPLE - constructing WiFiCredentials instance
// Empty instance, security is set to UNSEC
WiFiCredentials credentials;
// No SSID, security is set to WPA2
WiFiCredentials credentials(WPA2);
// SSID set to "My AP", security is set to UNSEC
WiFiCredentials credentials("My AP");
// SSID set to "My WPA AP", security is set to WPA
WiFiCredentials credentials("My AP", WPA);
Parameters:
ssid: SSID (string)security: see SecurityType enum.
setSsid()
Sets access point SSID.
// SYNTAX
WiFiCredentials& WiFiCredentials::setSsid(const char* ssid);
// EXAMPLE - setting ssid
WiFiCredentials credentials;
credentials.setSsid("My AP");
Parameters:
ssid: SSID (string)
setSecurity()
Sets access point security type.
// SYNTAX
WiFiCredentials& WiFiCredentials::setSecurity(SecurityType security);
// EXAMPLE - setting security type
WiFiCredentials credentials;
credentials.setSecurity(WPA2);
Parameters:
security: see SecurityType enum.
setCipher()
Sets access point cipher.
// SYNTAX
WiFiCredentials& WiFiCredentials::setCipher(WLanSecurityCipher cipher);
// EXAMPLE - setting cipher
WiFiCredentials credentials;
credentials.setCipher(WLAN_CIPHER_AES);
Parameters:
cipher: see WLanSecurityCipher enum.
setPassword()
Sets access point password.
// SYNTAX
WiFiCredentials& WiFiCredentials::setPassword(const char* password);
// EXAMPLE - setting password
WiFiCredentials credentials("My AP", WPA2);
credentials.setPassword("mypassword");
Parameters:
password: WEP/WPA/WPA2 access point password (string)
setChannel()
Sets access point channel.
// SYNYAX
WiFiCredentials& WiFiCredentials::setChannel(int channel);
// EXAMPLE - setting channel
WiFiCredentials credentials("My AP");
credentials.setChannel(10);
Parameters:
channel: WLAN channel (int)
SecurityType Enum
This enum defines wireless security types.
| Name | Description |
|---|---|
UNSEC |
Unsecured |
WEP |
Wired Equivalent Privacy |
WPA |
Wi-Fi Protected Access |
WPA2 |
Wi-Fi Protected Access II |
WPA_ENTERPRISE |
Wi-Fi Protected Access-Enterprise |
WPA2_ENTERPRISE |
Wi-Fi Protected Access-Enterprise II |
WLanSecurityCipher Enum
This enum defines wireless security ciphers.
| Name | Description |
|---|---|
WLAN_CIPHER_NOT_SET |
No cipher |
WLAN_CIPHER_AES |
AES cipher |
WLAN_CIPHER_TKIP |
TKIP cipher |
WLAN_CIPHER_AES_TKIP |
AES or TKIP cipher |
Input/Output
Additional information on which pins can be used for which functions is available on the pin information page.
pinMode()
pinMode() configures the specified pin to behave either as an input (with or without an internal weak pull-up or pull-down resistor), or an output.
// SYNTAX
pinMode(pin,mode);
pinMode() takes two arguments, pin: the number of the pin whose mode you wish to set and mode: INPUT, INPUT_PULLUP, INPUT_PULLDOWN or OUTPUT.
pinMode() does not return anything.
// EXAMPLE USAGE
int button = D0;                      // button is connected to D0
int LED = D1;                         // LED is connected to D1

void setup()
{
  pinMode(LED, OUTPUT);               // sets pin as output
  pinMode(button, INPUT_PULLDOWN);    // sets pin as input
}

void loop()
{
  // blink the LED as long as the button is pressed
  while(digitalRead(button) == HIGH) {
    digitalWrite(LED, HIGH);          // sets the LED on
    delay(200);                       // waits for 200mS
    digitalWrite(LED, LOW);           // sets the LED off
    delay(200);                       // waits for 200mS
  }
}
When using INPUT_PULLDOWN make sure a high level signal does not exceed 3.3V.
INPUT_PULLUP does not work as expected on TX on the P1, Electron, and E Series and should not be used.
- INPUT_PULLDOWN does not work as expected on D0 and D1 on the P1 because the P1 module has hardware pull-up resistors on these pins.
Also beware when using pins D3, D5, D6, and D7 as OUTPUT controlling external devices. After reset, these pins will be briefly taken over for JTAG/SWD, before being restored to the default high-impedance INPUT state during boot.
- D3, D5, and D7 are pulled high with a pull-up
- D6 is pulled low with a pull-down
- D4 is left floating
The brief change in state (especially when connected to a MOSFET that can be triggered by the pull-up or pull-down) may cause issues when using these pins in certain circuits. You can see this with the D7 blue LED which will blink dimly and briefly at boot.
getPinMode(pin)
Retrieves the current pin mode.
// EXAMPLE

if (getPinMode(D0)==INPUT) {
  // D0 is an input pin
}
digitalWrite()
Write a HIGH or a LOW value to a GPIO pin.
// SYNTAX
digitalWrite(pin, value);
If the pin has been configured as an OUTPUT with pinMode() or if previously used with analogWrite(), its voltage will be set to the corresponding value: 3.3V for HIGH, 0V (ground) for LOW.
digitalWrite() takes two arguments, pin: the number of the pin whose value you wish to set and value: HIGH or LOW.
digitalWrite() does not return anything.
// EXAMPLE USAGE
int LED = D1;              // LED connected to D1

void setup()
{
  pinMode(LED, OUTPUT);    // sets pin as output
}

void loop()
{
  digitalWrite(LED, HIGH); // sets the LED on
  delay(200);              // waits for 200mS
  digitalWrite(LED, LOW);  // sets the LED off
  delay(200);              // waits for 200mS
}
Note: All GPIO pins (A0..A7, D0..D7, DAC, WKP, RX, TX) can be used as long they are not used otherwise (e.g. as Serial1 RX/TX).
digitalRead()
Reads the value from a specified digital pin, either HIGH or LOW.
// SYNTAX
digitalRead(pin);
digitalRead() takes one argument, pin: the number of the digital pin you want to read.
digitalRead() returns HIGH or LOW.
// EXAMPLE USAGE
int button = D0;                   // button is connected to D0
int LED = D1;                      // LED is connected to D1
int val = 0;                       // variable to store the read value

void setup()
{
  pinMode(LED, OUTPUT);            // sets pin as output
  pinMode(button, INPUT_PULLDOWN); // sets pin as input
}

void loop()
{
  val = digitalRead(button);       // read the input pin
  digitalWrite(LED, val);          // sets the LED to the button's value
}
Note: All GPIO pins (A0..A7, D0..D7, DAC, WKP, RX, TX) can be used as long they are not used otherwise (e.g. as Serial1 RX/TX).
analogWrite() (PWM)
Writes an analog value to a pin as a digital PWM (pulse-width modulated) signal. The default frequency of the PWM signal is 500 Hz.
Can be used to light a LED at varying brightnesses or drive a motor at various speeds. After a call to analogWrite(), the pin will generate a steady square wave of the specified duty cycle until the next call to analogWrite() (or a call to digitalRead() or digitalWrite() on the same pin).
// SYNTAX
analogWrite(pin, value);
analogWrite(pin, value, frequency);
analogWrite() takes two or three arguments:
pin: the number of the pin whose value you wish to setvalue: the duty cycle: between 0 (always off) and 255 (always on). Since 0.6.0: between 0 and 255 (default 8-bit resolution) or2^(analogWriteResolution(pin)) - 1in general.frequency: the PWM frequency: between 1 Hz and 65535 Hz (default 500 Hz) on Gen 2 devices (Photon, P1, Electron). Since 0.6.0: between 1 Hz andanalogWriteMaxFrequency(pin).
NOTE: pinMode(pin, OUTPUT); is required before calling analogWrite(pin, value); or else the pin will not be initialized as a PWM output and set to the desired duty cycle.
analogWrite() does not return anything.
// EXAMPLE USAGE

int ledPin = D1;               // LED connected to digital pin D1
int analogPin = A0;            // potentiometer connected to analog pin A0
int val = 0;                   // variable to store the read value

void setup()
{
  pinMode(ledPin, OUTPUT);     // sets the pin as output
}

void loop()
{
  val = analogRead(analogPin); // read the input pin
  analogWrite(ledPin, val/16); // analogRead values go from 0 to 4095,
                               // analogWrite values from 0 to 255.
  delay(10);
}
- On the Photon, P1 and Electron, this function works on pins D0, D1, D2, D3, A4, A5, WKP, RX and TX with a caveat: PWM timer peripheral is duplicated on two pins (A5/D2) and (A4/D3) for 7 total independent PWM outputs. For example: PWM may be used on A5 while D2 is used as a GPIO, or D2 as a PWM while A5 is used as an analog input. However A5 and D2 cannot be used as independently controlled PWM outputs at the same time.
- Additionally on the Electron, this function works on pins B0, B1, B2, B3, C4, C5.
- Additionally on the P1, this function works on pins P1S0, P1S1, P1S6 (note: for P1S6, the WiFi Powersave Clock should be disabled for complete control of this pin.
The PWM frequency must be the same for pins in the same timer group.
- On the Photon, the timer groups are D0/D1, D2/D3/A4/A5, WKP, RX/TX.
- On the P1, the timer groups are D0/D1, D2/D3/A4/A5/P1S0/P1S1, WKP, RX/TX/P1S6.
- On the Electron, the timer groups are D0/D1/C4/C5, D2/D3/A4/A5/B2/B3, WKP, RX/TX, B0/B1.
NOTE: When used with PWM capable pins, the analogWrite() function sets up these pins as PWM only.
Additional information on which pins can be used for PWM output is available on the pin information page.
analogWriteResolution() (PWM)
Since 0.6.0:
Sets or retrieves the resolution of analogWrite() function of a particular pin.
analogWriteResolution() takes one or two arguments:
pin: the number of the pin whose resolution you wish to set or retrieveresolution: (optional) resolution in bits. The value can range from 2 to 31 bits. If the resolution is not supported, it will not be applied. The default is 8.
analogWriteResolution() returns currently set resolution.
// EXAMPLE USAGE
pinMode(D1, OUTPUT);     // sets the pin as output
analogWriteResolution(D1, 12); // sets analogWrite resolution to 12 bits
analogWrite(D1, 3000, 1000); // 3000/4095 = ~73% duty cycle at 1kHz
NOTE: The resolution also affects maximum frequency that can be used with analogWrite(). The maximum frequency allowed with current resolution can be checked by calling analogWriteMaxFrequency().
analogWriteMaxFrequency() (PWM)
Since 0.6.0:
Returns maximum frequency that can be used with analogWrite() on this pin.
analogWriteMaxFrequency() takes one argument:
pin: the number of the pin
// EXAMPLE USAGE
pinMode(D1, OUTPUT);     // sets the pin as output
analogWriteResolution(D1, 12); // sets analogWrite resolution to 12 bits
int maxFreq = analogWriteMaxFrequency(D1);
analogWrite(D1, 3000, maxFreq / 2); // 3000/4095 = ~73% duty cycle
analogRead() (ADC)
Reads the value from the specified analog pin.
The device has 8 channels (A0 to A7) with a 12-bit resolution. This means that it will map input voltages between 0 and 3.3 volts into integer values between 0 and 4095. This yields a resolution between readings of: 3.3 volts / 4096 units or, 0.0008 volts (0.8 mV) per unit.
Before 0.5.3 Note: do not set the pinMode() with analogRead(). The pinMode() is automatically set to AN_INPUT the first time analogRead() is called for a particular analog pin. If you explicitly set a pin to INPUT or OUTPUT after that first use of analogRead(), it will not attempt to switch it back to AN_INPUT the next time you call analogRead() for the same analog pin. This will create incorrect analog readings.
Since 0.5.3 Note: you do not need to set the pinMode() with analogRead(). The pinMode() is automatically set to AN_INPUT any time analogRead() is called for a particular analog pin, if that pin is set to a pinMode other than AN_INPUT. If you explicitly set a pin to INPUT, INPUT_PULLUP, INPUT_PULLDOWN or OUTPUT before using analogRead(), it will switch it back to AN_INPUT before taking the reading. If you use digitalRead() afterwards, it will automatically switch the pinMode back to whatever you originally explicitly set it to.
// SYNTAX
analogRead(pin);
analogRead() takes one argument pin: the number of the analog input pin to read from (A0 - A5)
analogRead() returns an integer value ranging from 0 to 4095.
// EXAMPLE USAGE
int ledPin = D1;                // LED connected to digital pin D1
int analogPin = A0;             // potentiometer connected to analog pin A0
int val = 0;                    // variable to store the read value

void setup()
{
  // Note: analogPin pin does not require pinMode()

  pinMode(ledPin, OUTPUT);      // sets the ledPin as output
}

void loop()
{
  val = analogRead(analogPin);  // read the analogPin
  analogWrite(ledPin, val/16);  // analogRead values go from 0 to 4095, analogWrite values from 0 to 255
  delay(10);
}
setADCSampleTime()
The function setADCSampleTime(duration) is used to change the default sample time for analogRead().
On the Photon and Electron, this parameter can be one of the following values (ADC clock = 30MHz or 33.3ns per cycle):
- ADC_SampleTime_3Cycles: Sample time equal to 3 cycles, 100ns
- ADC_SampleTime_15Cycles: Sample time equal to 15 cycles, 500ns
- ADC_SampleTime_28Cycles: Sample time equal to 28 cycles, 933ns
- ADC_SampleTime_56Cycles: Sample time equal to 56 cycles, 1.87us
- ADC_SampleTime_84Cycles: Sample time equal to 84 cycles, 2.80us
- ADC_SampleTime_112Cycles: Sample time equal to 112 cycles, 3.73us
- ADC_SampleTime_144Cycles: Sample time equal to 144 cycles, 4.80us
- ADC_SampleTime_480Cycles: Sample time equal to 480 cycles, 16.0us
The default is ADC_SampleTime_480Cycles. This means that the ADC is sampled for 16 us which can provide a more accurate reading, at the expense of taking longer than using a shorter ADC sample time. If you are measuring a high frequency signal, such as audio, you will almost certainly want to reduce the ADC sample time.
Furthermore, 5 consecutive samples at the sample time are averaged in analogRead(), so the time to convert is closer to 80 us, not 16 us, at 480 cycles.
Low Level Input/Output
The Input/Ouput functions include safety checks such as making sure a pin is set to OUTPUT when doing a digitalWrite() or that the pin is not being used for a timer function. These safety measures represent good coding and system design practice.
There are times when the fastest possible input/output operations are crucial to an applications performance. The SPI, UART (Serial) or I2C hardware are examples of low level performance-oriented devices. There are, however, times when these devices may not be suitable or available. For example, One-wire support is done in software, not hardware.
In order to provide the fastest possible bit-oriented I/O, the normal safety checks must be skipped. As such, please be aware that the programmer is responsible for proper planning and use of the low level I/O functions.
Prior to using the following low-level functions, pinMode() must be used to configure the target pin.
pinSetFast()
Write a HIGH value to a digital pin.
// SYNTAX
pinSetFast(pin);
pinSetFast() takes one argument, pin: the number of the pin whose value you wish to set HIGH.
pinSetFast() does not return anything.
// EXAMPLE USAGE
int LED = D7;              // LED connected to D7

void setup()
{
  pinMode(LED, OUTPUT);    // sets pin as output
}

void loop()
{
  pinSetFast(LED);           // set the LED on
  delay(500);
  pinResetFast(LED);       // set the LED off
  delay(500);
}
pinResetFast()
Write a LOW value to a digital pin.
// SYNTAX
pinResetFast(pin);
pinResetFast() takes one argument, pin: the number of the pin whose value you wish to set LOW.
pinResetFast() does not return anything.
// EXAMPLE USAGE
int LED = D7;              // LED connected to D7

void setup()
{
  pinMode(LED, OUTPUT);    // sets pin as output
}

void loop()
{
  pinSetFast(LED);           // set the LED on
  delay(500);
  pinResetFast(LED);       // set the LED off
  delay(500);
}
digitalWriteFast()
Write a HIGH or LOW value to a digital pin. This function will call pinSetFast() or pinResetFast() based on value and is useful when value is calculated. As such, this imposes a slight time overhead.
// SYNTAX
digitalWriteFast(pin, value);
digitalWriteFast() pin: the number of the pin whose value you wish to set and value: HIGH or LOW.
digitalWriteFast() does not return anything.
// EXAMPLE USAGE
int LED = D7;              // LED connected to D7

void setup()
{
  pinMode(LED, OUTPUT);    // sets pin as output
}

void loop()
{
  digitalWriteFast(LED, HIGH);           // set the LED on
  delay(500);
  digitalWriteFast(LED, LOW);          // set the LED off
  delay(500);
}
pinReadFast()
Reads the value from a specified digital pin, either HIGH or LOW.
// SYNTAX
pinReadFast(pin);
pinReadFast() takes one argument, pin: the number of the digital pin you want to read.
pinReadFast() returns HIGH or LOW.
// EXAMPLE USAGE
int button = D0;                   // button is connected to D0
int LED = D1;                      // LED is connected to D1
int val = 0;                       // variable to store the read value

void setup()
{
  pinMode(LED, OUTPUT);            // sets pin as output
  pinMode(button, INPUT_PULLDOWN); // sets pin as input
}

void loop()
{
  val = pinReadFast(button);       // read the input pin
  digitalWriteFast(LED, val);      // sets the LED to the button's value
}
Advanced I/O
tone()
Generates a square wave of the specified frequency and duration (and 50% duty cycle) on a timer channel pin which supports PWM. Use of the tone() function will interfere with PWM output on the selected pin. tone() is generally used to make sounds or music on speakers or piezo buzzers.
On the Photon, P1 and Electron, this function works on pins D0, D1, D2, D3, A4, A5, WKP, RX and TX with a caveat: Tone timer peripheral is duplicated on two pins (A5/D2) and (A4/D3) for 7 total independent Tone outputs. For example: Tone may be used on A5 while D2 is used as a GPIO, or D2 for Tone while A5 is used as an analog input. However A5 and D2 cannot be used as independent Tone outputs at the same time.
Additionally on the Electron, this function works on pins B0, B1, B2, B3, C4, C5.
- Additionally on the P1, this function works on pins P1S0, P1S1, P1S6 (note: for P1S6, the WiFi Powersave Clock should be disabled for complete control of this pin.
// SYNTAX
tone(pin, frequency, duration)
tone() takes three arguments, pin: the pin on which to generate the tone, frequency: the frequency of the tone in hertz and duration: the duration of the tone in milliseconds (a zero value = continuous tone).
The frequency range is from 20Hz to 20kHz. Frequencies outside this range will not be played.
tone() does not return anything.
NOTE: The PWM pins / timer channels are allocated as per the following table. If multiple, simultaneous tone() calls are needed (for example, to generate DTMF tones), use pins allocated to separate timers to avoid stuttering on the output:
| Pin | TMR1 | TMR3 | TMR4 | TMR5 |
|---|---|---|---|---|
| D0 | x | |||
| D1 | x | |||
| D2 | x | |||
| D3 | x | |||
| A4 | x | |||
| A5 | x | |||
| WKP | x | |||
| RX | x | |||
| TX | x |
On the P1:
| Pin | TMR1 | TMR3 | TMR4 | TMR5 |
|---|---|---|---|---|
| D0 | x | |||
| D1 | x | |||
| D2 | x | |||
| D3 | x | |||
| A4 | x | |||
| A5 | x | |||
| WKP | x | |||
| RX | x | |||
| TX | x | |||
| P1S0 | x | |||
| P1S1 | x | |||
| P1S6 | x |
On the Electron and E Series:
| Pin | TMR1 | TMR3 | TMR4 | TMR5 | TMR8 | |
|---|---|---|---|---|---|---|
| D0 | x | |||||
| D1 | x | |||||
| D2 | x | |||||
| D3 | x | |||||
| A4 | x | |||||
| A5 | x | |||||
| WKP | x | |||||
| RX | x | |||||
| TX | x | |||||
| B0 | x | |||||
| B1 | x | |||||
| B2 | x | |||||
| B3 | x | |||||
| C4 | x | |||||
| C5 | x |
Additional information on which pins can be used for tone() is available on the pin information page.
#include "application.h"
// The Photon has 9 PWM pins: D0, D1, D2, D3, A4, A5, A7, RX and TX.
//
// EXAMPLE USAGE
// Plays a melody - Connect small speaker to speakerPin
int speakerPin = D0;

// Notes defined in microseconds (Period/2)
// from note C to B, Octaves 3 through 7
int notes[] =
{0,
/* C,  C#,   D,  D#,   E,   F,  F#,   G,  G#,   A,  A#,   B */
3817,3597,3401,3205,3030,2857,2703,2551,2404,2273,2146,2024,   // 3 (1-12)
1908,1805,1701,1608,1515,1433,1351,1276,1205,1136,1073,1012,   // 4 (13-24)
 956, 903, 852, 804, 759, 716, 676, 638, 602, 568, 536, 506,   // 5 (25-37)
 478, 451, 426, 402, 379, 358, 338, 319, 301, 284, 268, 253,   // 6 (38-50)
 239, 226, 213, 201, 190, 179, 169, 159, 151, 142, 134, 127 }; // 7 (51-62)

#define NOTE_G3  2551
#define NOTE_G4  1276
#define NOTE_C5  956
#define NOTE_E5  759
#define NOTE_G5  638
#define RELEASE  20
#define BPM      100

// notes in the melody:
int melody[] = {NOTE_E5,NOTE_E5,0,NOTE_E5,0,NOTE_C5,NOTE_E5,0,NOTE_G5,0,0,NOTE_G4};

// note durations: 4 = quarter note, 2 = half note, etc.:
int noteDurations[] = {4,4,4,4,4,4,4,4,4,2,4,4};

void setup() {
  // iterate over the notes of the melody:
  for (int thisNote = 0; thisNote < 12; thisNote++) {

    // to calculate the note duration, take one second
    // divided by the note type.
    // e.g. quarter note = 1000 / 4, eighth note = 1000/8, etc.
    int noteDuration = 60*1000/BPM/noteDurations[thisNote];
    tone(speakerPin, (melody[thisNote]!=0)?(500000/melody[thisNote]):0,noteDuration-RELEASE);

    // blocking delay needed because tone() does not block
    delay(noteDuration);
  }
}
noTone()
Stops the generation of a square wave triggered by tone() on a specified pin. Has no effect if no tone is being generated.
The available pins are the same as for tone().
// SYNTAX
noTone(pin)
noTone() takes one argument, pin: the pin on which to stop generating the tone.
noTone() does not return anything.
//See the tone() example
shiftOut()
Shifts out a byte of data one bit at a time on a specified pin. Starts from either the most (i.e. the leftmost) or least (rightmost) significant bit. Each bit is written in turn to a data pin, after which a clock pin is pulsed (taken high, then low) to indicate that the bit is available.
NOTE: if you're interfacing with a device that's clocked by rising edges, you'll need to make sure that the clock pin is low before the call to shiftOut(), e.g. with a call to digitalWrite(clockPin, LOW).
This is a software implementation; see also the SPI function, which provides a hardware implementation that is faster but works only on specific pins.
// SYNTAX
shiftOut(dataPin, clockPin, bitOrder, value)
// EXAMPLE USAGE

// Use digital pins D0 for data and D1 for clock
int dataPin = D0;
int clock = D1;

uint8_t data = 50;

setup() {
    // Set data and clock pins as OUTPUT pins before using shiftOut()
    pinMode(dataPin, OUTPUT);
    pinMode(clock, OUTPUT);

    // shift out data using MSB first
    shiftOut(dataPin, clock, MSBFIRST, data);

    // Or do this for LSBFIRST serial
    shiftOut(dataPin, clock, LSBFIRST, data);
}

loop() {
    // nothing to do
}
shiftOut() takes four arguments, 'dataPin': the pin on which to output each bit, clockPin: the pin to toggle once the dataPin has been set to the correct value, bitOrder: which order to shift out the bits; either MSBFIRST or LSBFIRST (Most Significant Bit First, or, Least Significant Bit First) and value: the data (byte) to shift out.
shiftOut() does not return anything.
shiftIn()
Shifts in a byte of data one bit at a time. Starts from either the most (i.e. the leftmost) or least (rightmost) significant bit. For each bit, the clock pin is pulled high, the next bit is read from the data line, and then the clock pin is taken low.
NOTE: if you're interfacing with a device that's clocked by rising edges, you'll need to make sure that the clock pin is low before the call to shiftOut(), e.g. with a call to digitalWrite(clockPin, LOW).
This is a software implementation; see also the SPI function, which provides a hardware implementation that is faster but works only on specific pins.
// SYNTAX
shiftIn(dataPin, clockPin, bitOrder)
// EXAMPLE USAGE

// Use digital pins D0 for data and D1 for clock
int dataPin = D0;
int clock = D1;

uint8_t data;

setup() {
    // Set data as INPUT and clock pin as OUTPUT before using shiftIn()
    pinMode(dataPin, INPUT);
    pinMode(clock, OUTPUT);

    // shift in data using MSB first
    data = shiftIn(dataPin, clock, MSBFIRST);

    // Or do this for LSBFIRST serial
    data = shiftIn(dataPin, clock, LSBFIRST);
}

loop() {
    // nothing to do
}
shiftIn() takes three arguments, 'dataPin': the pin on which to input each bit, clockPin: the pin to toggle to signal a read from dataPin, bitOrder: which order to shift in the bits; either MSBFIRST or LSBFIRST (Most Significant Bit First, or, Least Significant Bit First).
shiftIn() returns the byte value read.
pulseIn()
Since 0.4.7:
Reads a pulse (either HIGH or LOW) on a pin. For example, if value is HIGH, pulseIn() waits for the pin to go HIGH, starts timing, then waits for the pin to go LOW and stops timing. Returns the length of the pulse in microseconds or 0 if no complete pulse was received within the timeout.
The timing of this function is based on an internal hardware counter derived from the system tick clock. Resolution is 1/Fosc (1/72MHz for Core, 1/120MHz for Photon/P1/Electron). Works on pulses from 10 microseconds to 3 seconds in length. Please note that if the pin is already reading the desired value when the function is called, it will wait for the pin to be the opposite state of the desired value, and then finally measure the duration of the desired value. This routine is blocking and does not use interrupts. The pulseIn() routine will time out and return 0 after 3 seconds.
// SYNTAX
pulseIn(pin, value)
pulseIn() takes two arguments, pin: the pin on which you want to read the pulse (this can be any GPIO, e.g. D1, A2, C0, B3, etc..), value: type of pulse to read: either HIGH or LOW. pin should be set to one of three pinMode()'s prior to using pulseIn(), INPUT, INPUT_PULLUP or INPUT_PULLDOWN.
pulseIn() returns the length of the pulse (in microseconds) or 0 if no pulse is completed before the 3 second timeout (unsigned long)
// EXAMPLE
unsigned long duration;

void setup()
{
    Serial.begin(9600);
    pinMode(D0, INPUT);

    // Pulse generator, connect D1 to D0 with a jumper
    // PWM output is 500Hz at 50% duty cycle
    // 1000us HIGH, 1000us LOW
    pinMode(D1, OUTPUT);
    analogWrite(D1, 128);
}

void loop()
{
    duration = pulseIn(D0, HIGH);
    Serial.printlnf("%d us", duration);
    delay(1000);
}

/* OUTPUT
 * 1003 us
 * 1003 us
 * 1003 us
 * 1003 us
 */
Serial
(inherits from Stream)
Used for communication between the Core and a computer or other devices. The Core has two hardware (USART) serial channels.
It also has one USB serial channel.
Serial: This channel communicates through the USB port and when connected to a computer, will show up as a virtual COM port.
// EXAMPLE USAGE
void setup()
{
  Serial.begin();
  Serial.println("Hello World!");
}
Serial1: This channel is available via the device's TX and RX pins.
To use Serial2, add #include "Serial2/Serial2.h" near the top of your app's main code file.
To use the Serial1 or Serial2 pins to communicate with your personal computer, you will need an additional USB-to-serial adapter. To use them to communicate with an external TTL serial device, connect the TX pin to your device's RX pin, the RX to your device's TX pin, and the ground of your Core to your device's ground.
// EXAMPLE USAGE
// IMPORTANT: Include the header file for Serial2
#include "Serial2/Serial2.h"

void setup()
{
  Serial1.begin(9600);
  Serial2.begin(9600);

  Serial1.println("Hello World!");
  Serial2.println("Hello World!");
}
To use the hardware serial pins of (Serial1/2) to communicate with your personal computer, you will need an additional USB-to-serial adapter. To use them to communicate with an external TTL serial device, connect the TX pin to your device's RX pin, the RX to your device's TX pin, and the ground of your Core to your device's ground.
NOTE: Please take into account that the voltage levels on these pins operate at 0V to 3.3V and should not be connected directly to a computer's RS232 serial port which operates at +/- 12V and will damage the Core.
Connect to Serial with a computer
For Windows users, we recommend downloading PuTTY. Plug your Core into your computer over USB, open a serial port in PuTTY using the standard settings, which should be:
- Baud rate: 9600
- Data Bits: 8
- Parity: none
- Stop Bits: 1
On Mac OS (OS X) and Linux systems, you can access the serial port through the terminal.
For Mac OS, open the terminal and type:
screen /dev/tty.u
and pressing tab to autocomplete.
On Linux, you can accomplish the same thing by using:
screen /dev/ttyACM
and pressing tab to autocomplete.
Now you are ready to read data sent by the Core over Serial and send data back.
begin()
Available on Serial, Serial1, Serial2.
Enables serial channel with specified configuration.
// SYNTAX
Serial.begin();          // via USB port


Serial1.begin(speed);         // via TX/RX pins
Serial1.begin(speed, config); //  "

Serial1.begin(9600, SERIAL_9N1); // via TX/RX pins, 9600 9N1 mode
Serial1.begin(9600, SERIAL_DATA_BITS_8 | SERIAL_STOP_BITS_1_5 | SERIAL_PARITY_EVEN); // via TX/RX pins, 9600 8E1.5

#include "Serial2/Serial2.h"
Serial2.begin(speed);         // RGB-LED green(TX) and blue (RX) pins
Serial2.begin(speed, config); //  "

Serial2.begin(9600);         // via RGB Green (TX) and Blue (RX) LED pins
Serial2.begin(9600, SERIAL_DATA_BITS_8 | SERIAL_STOP_BITS_1_5 | SERIAL_PARITY_EVEN); // via RGB Green (TX) and Blue (RX) LED pins, 9600 8E1.5
Parameters:
speed: parameter that specifies the baud rate (long) (optional forSerial)config: parameter that specifies the number of data bits used, parity and stop bits (long) (not used withSerial)
// EXAMPLE USAGE
void setup()
{
  Serial.begin(9600);   // open serial over USB

  // Wait for a USB serial connection for up to 30 seconds
  waitFor(Serial.isConnected, 30000);

  Serial1.begin(9600);  // open serial over TX and RX pins

  Serial.println("Hello Computer");
  Serial1.println("Hello Serial 1");
}

void loop() {}
Since 0.5.0: 28800 baudrate set by the Host on Serial will put the device in Listening Mode, where a YMODEM download can be started by additionally sending an f character. Baudrate 14400 can be used to put the device into DFU Mode.
When using hardware serial channels (Serial1, Serial2), the configuration of the serial channel may also specify the number of data bits, stop bits, parity, flow control and other settings. The default is SERIAL_8N1 (8 data bits, no parity and 1 stop bit) and does not need to be specified to achieve this configuration. To specify one of the following configurations, add one of these defines as the second parameter in the begin() function, e.g. Serial1.begin(9600, SERIAL_8E1); for 8 data bits, even parity and 1 stop bit.
Pre-defined Serial configurations available:
SERIAL_FLOW_CONTROL_NONE- no flow controlSERIAL_FLOW_CONTROL_RTS- RTS flow controlSERIAL_FLOW_CONTROL_CTS- CTS flow controlSERIAL_FLOW_CONTROL_RTS_CTS- RTS/CTS flow control
end()
Available on Serial, Serial1, Serial2.
Disables serial channel.
When used with hardware serial channels (Serial1, Serial2), disables serial communication, allowing channel's RX and TX pins to be used for general input and output. To re-enable serial communication, call SerialX.begin().
Since 0.6.0:
When used with USB serial channels (Serial), end() will cause the device to quickly disconnect from Host and connect back without the selected serial channel.
// SYNTAX
Serial1.end();
available()
Available on Serial, Serial1, Serial2.
Get the number of bytes (characters) available for reading from the serial port. This is data that's already arrived and stored in the serial receive buffer.
The receive buffer size for hardware serial channels (Serial1, Serial2) is 64 bytes and cannot be changed.
The receive buffer size for Serial is 64 bytes.
// EXAMPLE USAGE
void setup()
{
  Serial.begin(9600);
  Serial1.begin(9600);

}

void loop()
{
  // read from port 0, send to port 1:
  if (Serial.available())
  {
    int inByte = Serial.read();
    Serial1.write(inByte);
  }
  // read from port 1, send to port 0:
  if (Serial1.available())
  {
    int inByte = Serial1.read();
    Serial.write(inByte);
  }
}
availableForWrite()
Since 0.4.9: Available on Serial1, Serial2.
Since 0.5.0: Available on USB Serial (Serial)
Retrieves the number of bytes (characters) that can be written to this serial port without blocking.
If blockOnOverrun(false) has been called, the method returns the number of bytes that can be written to the buffer without causing buffer overrun, which would cause old data to be discarded and overwritten.
blockOnOverrun()
Since 0.4.9: Available on Serial1, Serial2.
Since 0.5.0: Available on USB Serial (Serial)
Defines what should happen when calls to write()/print()/println()/printlnf() that would overrun the buffer.
blockOnOverrun(true)- this is the default setting. When there is no room in the buffer for the data to be written, the program waits/blocks until there is room. This avoids buffer overrun, where data that has not yet been sent over serial is overwritten by new data. Use this option for increased data integrity at the cost of slowing down realtime code execution when lots of serial data is sent at once.blockOnOverrun(false)- when there is no room in the buffer for data to be written, the data is written anyway, causing the new data to replace the old data. This option is provided when performance is more important than data integrity.
// EXAMPLE - fast and furious over Serial1
Serial1.blockOnOverrun(false);
Serial1.begin(115200);
serialEvent()
A family of application-defined functions that are called whenever there is data to be read from a serial peripheral.
serialEvent: called when there is data available from
SerialserialEvent1: called when there is data available from
Serial1- serialEvent2: called when there is data available from
Serial2
The serialEvent functions are called in between calls to the application loop(). This means that if loop() runs for a long time due to delay() calls or other blocking calls the serial buffer might become full between subsequent calls to serialEvent and serial characters might be lost. Avoid long delay() calls in your application if using serialEvent.
Since serialEvent functions are an
extension of the application loop, it is ok to call any functions that you would also call from loop(). Because of this, there is little advantage to using serial events over just reading serial from loop().
// EXAMPLE - echo all characters typed over serial

void setup()
{
   Serial.begin(9600);
}

void serialEvent()
{
    char c = Serial.read();
    Serial.print(c);
}
peek()
Available on Serial, Serial1, Serial2.
Returns the next byte (character) of incoming serial data without removing it from the internal serial buffer. That is, successive calls to peek() will return the same character, as will the next call to read().
// SYNTAX
Serial.peek();
Serial1.peek();
peek() returns the first byte of incoming serial data available (or -1 if no data is available) - int
write()
Available on Serial, Serial1, Serial2.
Writes binary data to the serial port. This data is sent as a byte or series of bytes; to send the characters representing the digits of a number use the print() function instead.
// SYNTAX
Serial.write(val);
Serial.write(str);
Serial.write(buf, len);
// EXAMPLE USAGE

void setup()
{
  Serial.begin(9600);
}

void loop()
{
  Serial.write(45); // send a byte with the value 45

  int bytesSent = Serial.write(“hello”); //send the string “hello” and return the length of the string.
}
Parameters:
val: a value to send as a single bytestr: a string to send as a series of bytesbuf: an array to send as a series of byteslen: the length of the buffer
write() will return the number of bytes written, though reading that number is optional.
read()
Available on Serial, Serial1, Serial2.
Reads incoming serial data.
// SYNTAX
Serial.read();
Serial1.read();
read() returns the first byte of incoming serial data available (or -1 if no data is available) - int
// EXAMPLE USAGE
int incomingByte = 0; // for incoming serial data

void setup() {
  Serial.begin(9600); // opens serial port, sets data rate to 9600 bps
}

void loop() {
  // send data only when you receive data:
  if (Serial.available() > 0) {
    // read the incoming byte:
    incomingByte = Serial.read();

    // say what you got:
    Serial.print("I received: ");
    Serial.println(incomingByte, DEC);
  }
}
print()
Available on Serial, Serial1, Serial2.
Prints data to the serial port as human-readable ASCII text. This command can take many forms. Numbers are printed using an ASCII character for each digit. Floats are similarly printed as ASCII digits, defaulting to two decimal places. Bytes are sent as a single character. Characters and strings are sent as is. For example:
- Serial.print(78) gives "78"
- Serial.print(1.23456) gives "1.23"
- Serial.print('N') gives "N"
- Serial.print("Hello world.") gives "Hello world."
An optional second parameter specifies the base (format) to use; permitted values are BIN (binary, or base 2), OCT (octal, or base 8), DEC (decimal, or base 10), HEX (hexadecimal, or base 16). For floating point numbers, this parameter specifies the number of decimal places to use. For example:
- Serial.print(78, BIN) gives "1001110"
- Serial.print(78, OCT) gives "116"
- Serial.print(78, DEC) gives "78"
- Serial.print(78, HEX) gives "4E"
- Serial.println(1.23456, 0) gives "1"
- Serial.println(1.23456, 2) gives "1.23"
- Serial.println(1.23456, 4) gives "1.2346"
println()
Available on Serial, Serial1, Serial2.
Prints data to the serial port as human-readable ASCII text followed by a carriage return character (ASCII 13, or '\r') and a newline character (ASCII 10, or '\n'). This command takes the same forms as Serial.print().
// SYNTAX
Serial.println(val);
Serial.println(val, format);
Parameters:
val: the value to print - any data typeformat: specifies the number base (for integral data types) or number of decimal places (for floating point types)
println() returns the number of bytes written, though reading that number is optional - size_t (long)
// EXAMPLE
//reads an analog input on analog in A0, prints the value out.

int analogValue = 0;    // variable to hold the analog value

void setup()
{
  // Make sure your Serial Terminal app is closed before powering your device
  Serial.begin(9600);
  // Wait for a USB serial connection for up to 30 seconds
  waitFor(Serial.isConnected, 30000);
}

void loop() {
  // read the analog input on pin A0:
  analogValue = analogRead(A0);

  // print it out in many formats:
  Serial.println(analogValue);       // print as an ASCII-encoded decimal
  Serial.println(analogValue, DEC);  // print as an ASCII-encoded decimal
  Serial.println(analogValue, HEX);  // print as an ASCII-encoded hexadecimal
  Serial.println(analogValue, OCT);  // print as an ASCII-encoded octal
  Serial.println(analogValue, BIN);  // print as an ASCII-encoded binary

  // delay 10 milliseconds before the next reading:
  delay(10);
}
printf()
Since 0.4.6:
Available on Serial, Serial1, Serial2.
Provides printf-style formatting over serial.
printf allows strings to be built by combining a number of values with text.
Serial.printf("Reading temperature sensor at %s...", Time.timeStr().c_str());
float temp = readTemp();
Serial.printf("the temperature today is %f Kelvin", temp);
Serial.println();
Running this code prints:
Reading temperature sensor at Thu 01 Oct 2015 12:34...the temperature today is 293.1 Kelvin.
The last printf() call could be changed to printlnf() to avoid a separate call to println().
printlnf()
Since 0.4.6:
Available on Serial, Serial1, Serial2.
formatted output followed by a newline. Produces the same output as printf which is then followed by a newline character, so to that subsequent output appears on the next line.
flush()
Waits for the transmission of outgoing serial data to complete.
// SYNTAX
Serial.flush();
Serial1.flush();
flush() neither takes a parameter nor returns anything.
halfduplex()
Available on Serial1, Serial2.
Puts Serial1 into half-duplex mode. In this mode both the transmit and receive are on the TX pin. This mode can be used for a single wire bus communications scheme between microcontrollers.
// SYNTAX
Serial1.halfduplex(true);  // Enable half-duplex mode
Serial1.halfduplex(false); // Disable half-duplex mode
// EXAMPLE
// Initializes Serial1 at 9600 baud and enables half duplex mode

Serial1.begin(9600);
Serial1.halfduplex(true);
halfduplex() takes one argument: true enables half-duplex mode, false disables half-duplex mode
halfduplex() returns nothing
isConnected()
// EXAMPLE USAGE
void setup()
{
  Serial.begin();   // open serial over USB
  while(!Serial.isConnected()) // wait for Host to open serial port
    Particle.process();

  Serial.println("Hello there!");
}
Another technique is to use waitFor which makes it easy to time-limit the waiting period.
// EXAMPLE USAGE
void setup()
{
  Serial.begin();   // open serial over USB

  // Wait for a USB serial connection for up to 30 seconds
  waitFor(Serial.isConnected, 30000);

  Serial.println("Hello there!");
}
Since 0.5.3 Available on Serial.
Since 0.6.0 Available on Serial.
Used to check if host has serial port (virtual COM port) open.
Returns:
truewhen Host has virtual COM port open.
SPI
This library allows you to communicate with SPI devices, with the Core as the master device.
The hardware SPI pin functions, which can
be used via the SPI object, are mapped as follows:
SS=>A2(default)SCK=>A3MISO=>A4MOSI=>A5
begin()
Initializes the SPI bus by setting SCK, MOSI, and a user-specified slave-select pin to outputs, MISO to input. SCK is pulled either high or low depending on the configured SPI data mode (default high for SPI_MODE3). Slave-select is pulled high.
Note: The SPI firmware ONLY initializes the user-specified slave-select pin as an OUTPUT. The user's code must control the slave-select pin with digitalWrite() before and after each SPI transfer for the desired SPI slave device. Calling SPI.end() does NOT reset the pin mode of the SPI pins.
// SYNTAX
SPI.begin(ss);
Where, the parameter ss is the SPI device slave-select pin to initialize. If no pin is specified, the default pin is:
- Argon, Boron, Xenon:
A5 (D14) - B Series SoM:
D8 - Photon, P1, Electron, and E Series:
A2
// Example using SPI1, with D5 as the SS pin:
SPI1.begin();
// or
SPI1.begin(D5);
Wire (I2C)
(inherits from Stream)
This library allows you to communicate with I2C / TWI (Two Wire Interface) devices.
On the Core/Photon/Electron, D0 is the Serial Data Line (SDA) and D1 is the Serial Clock (SCL). Both SCL and SDA pins are open-drain outputs that only pull LOW and typically operate with 3.3V logic, but are tolerant to 5V. Connect a pull-up resistor(1.5k to 10k) on the SDA line to 3V3. Connect a pull-up resistor(1.5k to 10k) on the SCL line to 3V3. If you are using a breakout board with an I2C peripheral, check to see if it already incorporates pull-up resistors.
These pins are used via the Wire object.
SCL=>D1SDA=>D0
setSpeed()
Sets the I2C clock speed. This is an optional call (not from the original Arduino specs.) and must be called once before calling begin(). The default I2C clock speed is 100KHz and the maximum clock speed is 400KHz.
// SYNTAX
Wire.setSpeed(clockSpeed);
Wire.begin();
Parameters:
clockSpeed: CLOCK_SPEED_100KHZ, CLOCK_SPEED_400KHZ or a user specified speed in hertz (e.g.Wire.setSpeed(20000)for 20kHz)
stretchClock()
Enables or Disables I2C clock stretching. This is an optional call (not from the original Arduino specs.) and must be called once before calling begin(). I2C clock stretching is only used with I2C Slave mode. The default I2C clock stretching mode is enabled.
// SYNTAX
Wire.stretchClock(stretch);
Wire.begin(4); // I2C Slave mode, address #4
Parameters:
stretch: boolean.truewill enable clock stretching (default).falsewill disable clock stretching.
begin()
Initiate the Wire library and join the I2C bus as a master or slave. This should normally be called only once.
// SYNTAX
Wire.begin();
Wire.begin(address);
Parameters: address: the 7-bit slave address (optional); if not specified, join the bus as an I2C master. If address is specified, join the bus as an I2C slave.
end()
Since 0.4.6:
Releases the I2C bus so that the pins used by the I2C bus are available for general purpose I/O.
isEnabled()
Used to check if the Wire library is enabled already. Useful if using multiple slave devices on the same I2C bus. Check if enabled before calling Wire.begin() again.
// SYNTAX
Wire.isEnabled();
Returns: boolean true if I2C enabled, false if I2C disabled.
// EXAMPLE USAGE

// Initialize the I2C bus if not already enabled
if (!Wire.isEnabled()) {
    Wire.begin();
}
requestFrom()
Used by the master to request bytes from a slave device. The bytes may then be retrieved with the available() and read() functions.
// SYNTAX
Wire.requestFrom(address, quantity);
Wire.requestFrom(address, quantity, stop);
Parameters:
address: the 7-bit address of the device to request bytes fromquantity: the number of bytes to request (Max. 32)stop: boolean.truewill send a stop message after the request, releasing the bus.falsewill continually send a restart after the request, keeping the connection active. The bus will not be released, which prevents another master device from transmitting between messages. This allows one master device to send multiple transmissions while in control. If no argument is specified, the default value istrue.
Returns: byte : the number of bytes returned from the slave device. If a timeout occurs, will return 0.
reset()
Since 0.4.6:
Attempts to reset the I2C bus. This should be called only if the I2C bus has has hung. In 0.4.6 additional rework was done for the I2C bus on the Photon and Electron, so we hope this function isn't required, and it's provided for completeness.
beginTransmission()
Begin a transmission to the I2C slave device with the given address. Subsequently, queue bytes for transmission with the write() function and transmit them by calling endTransmission().
// SYNTAX
Wire.beginTransmission(address);
Parameters: address: the 7-bit address of the device to transmit to.
endTransmission()
Ends a transmission to a slave device that was begun by beginTransmission() and transmits the bytes that were queued by write().
// SYNTAX
Wire.endTransmission();
Wire.endTransmission(stop);
Parameters: stop : boolean.
true will send a stop message after the last byte, releasing the bus after transmission. false will send a restart, keeping the connection active. The bus will not be released, which prevents another master device from transmitting between messages. This allows one master device to send multiple transmissions while in control. If no argument is specified, the default value is true.
Returns: byte, which indicates the status of the transmission:
- 0: success
- 1: busy timeout upon entering endTransmission()
- 2: START bit generation timeout
- 3: end of address transmission timeout
- 4: data byte transfer timeout
- 5: data byte transfer succeeded, busy timeout immediately after
write()
Queues bytes for transmission from a master to slave device (in-between calls to beginTransmission() and endTransmission()), or writes data from a slave device in response to a request from a master. Buffer size is truncated to 32 bytes; writing bytes beyond 32 before calling endTransmission() will be ignored.
// SYNTAX
Wire.write(value);
Wire.write(string);
Wire.write(data, length);
Parameters:
value: a value to send as a single bytestring: a string to send as a series of bytesdata: an array of data to send as byteslength: the number of bytes to transmit (Max. 32)
Returns: byte
write() will return the number of bytes written, though reading that number is optional.
// EXAMPLE USAGE

// Master Writer running on Device No.1 (Use with corresponding Slave Reader running on Device No.2)

void setup() {
  Wire.begin();              // join i2c bus as master
}

byte x = 0;

void loop() {
  Wire.beginTransmission(4); // transmit to slave device #4
  Wire.write("x is ");       // sends five bytes
  Wire.write(x);             // sends one byte
  Wire.endTransmission();    // stop transmitting

  x++;
  delay(500);
}
available()
Returns the number of bytes available for retrieval with read(). This should be called on a master device after a call to requestFrom() or on a slave inside the onReceive() handler.
Wire.available();
Returns: The number of bytes available for reading.
read()
Reads a byte that was transmitted from a slave device to a master after a call to requestFrom() or was transmitted from a master to a slave. read() inherits from the Stream utility class.
// SYNTAX
Wire.read() ;
Returns: The next byte received
// EXAMPLE USAGE

// Master Reader running on Device No.1 (Use with corresponding Slave Writer running on Device No.2)

void setup() {
  Wire.begin();              // join i2c bus as master
  Serial.begin(9600);        // start serial for output
}

void loop() {
  Wire.requestFrom(2, 6);    // request 6 bytes from slave device #2

  while(Wire.available()){   // slave may send less than requested
    char c = Wire.read();    // receive a byte as character
    Serial.print(c);         // print the character
  }

  delay(500);
}
peek()
Similar in use to read(). Reads (but does not remove from the buffer) a byte that was transmitted from a slave device to a master after a call to requestFrom() or was transmitted from a master to a slave. read() inherits from the Stream utility class. Useful for peeking at the next byte to be read.
// SYNTAX
Wire.peek();
Returns: The next byte received (without removing it from the buffer)
onReceive()
Registers a function to be called when a slave device receives a transmission from a master.
Parameters: handler: the function to be called when the slave receives data; this should take a single int parameter (the number of bytes read from the master) and return nothing, e.g.: void myHandler(int numBytes)
Note: This handler will lock up the device if System calls such as Particle.publish() are made within, due to interrupts being disabled for atomic operations during this handler. Do not overload this handler with extra function calls other than what is immediately required to receive I2C data. Post process outside of this handler.
// EXAMPLE USAGE

// Slave Reader running on Device No.2 (Use with corresponding Master Writer running on Device No.1)

// function that executes whenever data is received from master
// this function is registered as an event, see setup()
void receiveEvent(int howMany) {
  while(1 < Wire.available()) { // loop through all but the last
    char c = Wire.read();       // receive byte as a character
    Serial.print(c);            // print the character
  }
  int x = Wire.read();          // receive byte as an integer
  Serial.println(x);            // print the integer
}

void setup() {
  Wire.begin(4);                // join i2c bus with address #4
  Wire.onReceive(receiveEvent); // register event
  Serial.begin(9600);           // start serial for output
}

void loop() {
  delay(100);
}
onRequest()
Register a function to be called when a master requests data from this slave device.
Parameters: handler: the function to be called, takes no parameters and returns nothing, e.g.: void myHandler()
Note: This handler will lock up the device if System calls such as Particle.publish() are made within, due to interrupts being disabled for atomic operations during this handler. Do not overload this handler with extra function calls other than what is immediately required to send I2C data. Post process outside of this handler.
// EXAMPLE USAGE

// Slave Writer running on Device No.2 (Use with corresponding Master Reader running on Device No.1)

// function that executes whenever data is requested by master
// this function is registered as an event, see setup()
void requestEvent() {
  Wire.write("hello ");         // respond with message of 6 bytes as expected by master
}

void setup() {
  Wire.begin(2);                // join i2c bus with address #2
  Wire.onRequest(requestEvent); // register event
}

void loop() {
  delay(100);
}
IPAddress
Creates an IP address that can be used with TCPServer, TCPClient, and UDP objects.
// EXAMPLE USAGE

IPAddress localIP;
IPAddress server(8,8,8,8);
IPAddress IPfromInt( 167772162UL );  // 10.0.0.2 as 10*256^3+0*256^2+0*256+2
uint8_t server[] = { 10, 0, 0, 2};
IPAddress IPfromBytes( server );
The IPAddress also allows for comparisons.
if (IPfromInt == IPfromBytes)
{
  Serial.println("Same IP addresses");
}
You can also use indexing the get or change individual bytes in the IP address.
// PING ALL HOSTS ON YOUR SUBNET EXCEPT YOURSELF
IPAddress localIP = WiFi.localIP();
uint8_t myLastAddrByte = localIP[3];
for(uint8_t ipRange=1; ipRange<255; ipRange++)
{
  if (ipRange != myLastAddrByte)
  {
    localIP[3] = ipRange;
    WiFi.ping(localIP);
  }
}
You can also assign to an IPAddress from an array of uint8's or a 32-bit unsigned integer.
IPAddress IPfromInt;  // 10.0.0.2 as 10*256^3+0*256^2+0*256+2
IPfromInt = 167772162UL;
uint8_t server[] = { 10, 0, 0, 2};
IPAddress IPfromBytes;
IPfromBytes = server;
Finally IPAddress can be used directly with print.
// PRINT THE DEVICE'S IP ADDRESS IN
// THE FORMAT 192.168.0.10
IPAddress myIP = WiFi.localIP();
Serial.println(myIP);    // prints the device's IP address
TCPServer
Create a server that listens for incoming connections on the specified port.
// SYNTAX
TCPServer server = TCPServer(port);
Parameters: port: the port to listen on (int)
// EXAMPLE USAGE

// telnet defaults to port 23
TCPServer server = TCPServer(23);
TCPClient client;

void setup()
{
  // start listening for clients
  server.begin();

  // Make sure your Serial Terminal app is closed before powering your device
  Serial.begin(9600);
  // Wait for a USB serial connection for up to 30 seconds
  waitFor(Serial.isConnected, 30000);

  Serial.println(WiFi.localIP());
  Serial.println(WiFi.subnetMask());
  Serial.println(WiFi.gatewayIP());
  Serial.println(WiFi.SSID());
}

void loop()
{
  if (client.connected()) {
    // echo all available bytes back to the client
    while (client.available()) {
      server.write(client.read());
    }
  } else {
    // if no client is yet connected, check for a new connection
    client = server.available();
  }
}
begin()
Tells the server to begin listening for incoming connections.
// SYNTAX
server.begin();
available()
Gets a client that is connected to the server and has data available for reading. The connection persists when the returned client object goes out of scope; you can close it by calling client.stop().
available() inherits from the Stream utility class.
write()
Write data to the last client that connected to a server. This data is sent as a byte or series of bytes. This function is blocking by default and may block the application thread indefinitely until all the data is sent.
Since 0.7.0
The application code may additionally check if an error occurred during the last write() call by checking getWriteError() return value. Any non-zero error code indicates and error during write operation.
// SYNTAX
server.write(val);
server.write(buf, len);
Parameters:
val: a value to send as a single byte (byte or char)buf: an array to send as a series of bytes (byte or char)len: the length of the buffer
Returns: size_t: the number of bytes written
NOTE: write() currently may return negative error codes. This behavior will change in the next major release (0.9.0). Applications will be required to use getWriteError() to check for write errors.
print()
Print data to the last client connected to a server. Prints numbers as a sequence of digits, each an ASCII character (e.g. the number 123 is sent as the three characters '1', '2', '3').
// SYNTAX
server.print(data);
server.print(data, BASE);
Parameters:
data: the data to print (char, byte, int, long, or string)BASE(optional): the base in which to print numbers: BIN for binary (base 2), DEC for decimal (base 10), OCT for octal (base 8), HEX for hexadecimal (base 16).
Returns: size_t: the number of bytes written
println()
Print data, followed by a newline, to the last client connected to a server. Prints numbers as a sequence of digits, each an ASCII character (e.g. the number 123 is sent as the three characters '1', '2', '3').
// SYNTAX
server.println();
server.println(data);
server.println(data, BASE) ;
Parameters:
data(optional): the data to print (char, byte, int, long, or string)BASE(optional): the base in which to print numbers: BIN for binary (base 2), DEC for decimal (base 10), OCT for octal (base 8), HEX for hexadecimal (base 16).
getWriteError()
Get the error code of the most recent write() operation.
Returns: int 0 when everything is ok, a non-zero error code in case of an error.
This value is updated every after every call to write() or can be manually cleared by clearWriteError()
// SYNTAX
int err = server.getWriteError();
// EXAMPLE
TCPServer server;
// Write in non-blocking mode to the last client that connected to the server
int bytes = server.write(buf, len, 0);
int err = server.getWriteError();
if (err != 0) {
  Log.trace("TCPServer::write() failed (error = %d), number of bytes written: %d", err, bytes);
}
clearWriteError()
Clears the error code of the most recent write() operation setting it to 0. This function is automatically called by write().
clearWriteError() does not return anything.
TCPClient
(inherits from Stream via Client)
Creates a client which can connect to a specified internet IP address and port (defined in the client.connect() function).
// SYNTAX
TCPClient client;
// EXAMPLE USAGE

TCPClient client;
byte server[] = { 74, 125, 224, 72 }; // Google
void setup()
{
  // Make sure your Serial Terminal app is closed before powering your device
  Serial.begin(9600);
  // Wait for a USB serial connection for up to 30 seconds
  waitFor(Serial.isConnected, 30000);

  Serial.println("connecting...");

  if (client.connect(server, 80))
  {
    Serial.println("connected");
    client.println("GET /search?q=unicorn HTTP/1.0");
    client.println("Host: www.google.com");
    client.println("Content-Length: 0");
    client.println();
  }
  else
  {
    Serial.println("connection failed");
  }
}

void loop()
{
  if (client.available())
  {
    char c = client.read();
    Serial.print(c);
  }

  if (!client.connected())
  {
    Serial.println();
    Serial.println("disconnecting.");
    client.stop();
    for(;;);
  }
}
connected()
Whether or not the client is connected. Note that a client is considered connected if the connection has been closed but there is still unread data.
// SYNTAX
client.connected();
Returns true if the client is connected, false if not.
status()
Returns true if the network socket is open and the underlying network is ready.
// SYNTAX
client.status();
This is different than connected() which returns true if the socket is closed but there is still unread buffered data, available() is non-zero.
connect()
Connects to a specified IP address and port. The return value indicates success or failure. Also supports DNS lookups when using a domain name.
// SYNTAX
client.connect();
client.connect(ip, port);
client.connect(hostname, port);
Parameters:
ip: the IP address that the client will connect to (array of 4 bytes)hostname: the host name the client will connect to (string, ex.:"particle.io")port: the port that the client will connect to (int)
Returns true if the connection succeeds, false if not.
write()
Write data to the server the client is connected to. This data is sent as a byte or series of bytes. This function is blocking by default and may block the application thread indefinitely until all the data is sent.
Since 0.7.0
The application code may additionally check if an error occurred during the last write() call by checking getWriteError() return value. Any non-zero error code indicates and error during write operation.
// SYNTAX
client.write(val);
client.write(buf, len);
Parameters:
val: a value to send as a single byte (byte or char)buf: an array to send as a series of bytes (byte or char)len: the length of the buffer
Returns: size_t: write() returns the number of bytes written.
NOTE: write() currently may return negative error codes. This behavior will change in the next major release (0.9.0). Applications will be required to use getWriteError() to check for write errors.
print()
Print data to the server that a client is connected to. Prints numbers as a sequence of digits, each an ASCII character (e.g. the number 123 is sent as the three characters '1', '2', '3').
// SYNTAX
client.print(data);
client.print(data, BASE) ;
Parameters:
data: the data to print (char, byte, int, long, or string)BASE(optional): the base in which to print numbers: BIN for binary (base 2), DEC for decimal (base 10), OCT for octal (base 8), HEX for hexadecimal (base 16).
Returns: byte: print() will return the number of bytes written, though reading that number is optional
println()
Print data, followed by a carriage return and newline, to the server a client is connected to. Prints numbers as a sequence of digits, each an ASCII character (e.g. the number 123 is sent as the three characters '1', '2', '3').
// SYNTAX
client.println();
client.println(data);
client.println(data, BASE) ;
Parameters:
data(optional): the data to print (char, byte, int, long, or string)BASE(optional): the base in which to print numbers: BIN for binary (base 2), DEC for decimal (base 10), OCT for octal (base 8), HEX for hexadecimal (base 16).
available()
Returns the number of bytes available for reading (that is, the amount of data that has been written to the client by the server it is connected to).
// SYNTAX
client.available();
Returns the number of bytes available.
read()
Read the next byte received from the server the client is connected to (after the last call to read()).
// SYNTAX
client.read();
Returns the next byte (or character), or -1 if none is available.
or int read(uint8_t *buffer, size_t size) reads all readily available bytes up to size from the server the client is connected to into the provided buffer.
// SYNTAX
bytesRead = client.read(buffer, length);
Returns the number of bytes (or characters) read into buffer.
flush()
Waits until all outgoing data in buffer has been sent.
NOTE: That this function does nothing at present.
// SYNTAX
client.flush();
remoteIP()
Since 0.4.5:
Retrieves the remote IPAddress of a connected TCPClient. When the TCPClient is retrieved
from TCPServer.available() (where the client is a remote client connecting to a local server) the
IPAddress gives the remote address of the connecting client.
When TCPClient was created directly via TCPClient.connect(), then remoteIP
returns the remote server the client is connected to.
// EXAMPLE - TCPClient from TCPServer

TCPServer server(80);
// ...

void setup()
{
    Serial.begin(9600);
    server.begin(80);
}

void loop()
{
    // check for a new client to our server
    TCPClient client = server.available();
    if (client.connected())
    {
        // we got a new client
        // find where the client's remote address
        IPAddress clientIP = client.remoteIP();
        // print the address to Serial
        Serial.println(clientIP);
    }
}
// EXAMPLE - TCPClient.connect()

TCPClient client;
client.connect("www.google.com", 80);
if (client.connected())
{
    IPAddress clientIP = client.remoteIP();
    // IPAddress equals whatever www.google.com resolves to
}
stop()
Disconnect from the server.
// SYNTAX
client.stop();
getWriteError()
Get the error code of the most recent write() operation.
Returns: int 0 when everything is ok, a non-zero error code in case of an error.
This value is updated every after every call to write() or can be manually cleared by clearWriteError()
// SYNTAX
int err = client.getWriteError();
// EXAMPLE
TCPClient client;
// Write in non-blocking mode
int bytes = client.write(buf, len, 0);
int err = client.getWriteError();
if (err != 0) {
  Log.trace("TCPClient::write() failed (error = %d), number of bytes written: %d", err, bytes);
}
clearWriteError()
Clears the error code of the most recent write() operation setting it to 0. This function is automatically called by write().
clearWriteError() does not return anything.
UDP
(inherits from Stream and Printable)
This class enables UDP messages to be sent and received.
// EXAMPLE USAGE

// UDP Port used for two way communication
unsigned int localPort = 8888;

// An UDP instance to let us send and receive packets over UDP
UDP Udp;

void setup() {
  // start the UDP
  Udp.begin(localPort);

  // Print your device IP Address via serial
  Serial.begin(9600);
  Serial.println(WiFi.localIP());
}

void loop() {
  // Check if data has been received
  if (Udp.parsePacket() > 0) {

    // Read first char of data received
    char c = Udp.read();

    // Ignore other chars
    while(Udp.available())
      Udp.read();

    // Store sender ip and port
    IPAddress ipAddress = Udp.remoteIP();
    int port = Udp.remotePort();

    // Echo back data to sender
    Udp.beginPacket(ipAddress, port);
    Udp.write(c);
    Udp.endPacket();
  }
}
Note that UDP does not guarantee that messages are always delivered, or that
they are delivered in the order supplied. In cases where your application
requires a reliable connection, TCPClient is a simpler alternative.
There are two primary ways of working with UDP - buffered operation and unbuffered operation.
buffered operation allows you to read and write packets in small pieces, since the system takes care of allocating the required buffer to hold the entire packet.
- to read a buffered packet, call
parsePacket, then useavailableandreadto retrieve the packet received - to write a buffered packet, optionally call
setBufferto set the maximum size of the packet (the default is 512 bytes), followed bybeginPacket, then as many calls towrite/printas necessary to build the packet contents, followed finally byendto send the packet over the network.
- to read a buffered packet, call
unbuffered operation allows you to read and write entire packets in a single operation - your application is responsible for allocating the buffer to contain the packet to be sent or received over the network.
- to read an unbuffered packet, call
receivePacketwith a buffer to hold the received packet. - to write an unbuffered packet, call
sendPacketwith the packet buffer to send, and the destination address.
- to read an unbuffered packet, call
begin()
Initializes the UDP library and network settings.
// SYNTAX
Udp.begin(port);
available()
Get the number of bytes (characters) available for reading from the buffer. This is data that's already arrived.
// SYNTAX
int count = Udp.available();
This function can only be successfully called after UDP.parsePacket().
available() inherits from the Stream utility class.
Returns the number of bytes available to read.
beginPacket()
Starts a connection to write UDP data to the remote connection.
// SYNTAX
Udp.beginPacket(remoteIP, remotePort);
Parameters:
remoteIP: the IP address of the remote connection (4 bytes)remotePort: the port of the remote connection (int)
It returns nothing.
endPacket()
Called after writing buffered UDP data using write() or print(). The buffered data is then sent to the
remote UDP peer.
// SYNTAX
Udp.endPacket();
Parameters: NONE
write()
Writes UDP data to the buffer - no data is actually sent. Must be wrapped between beginPacket() and endPacket(). beginPacket() initializes the packet of data, it is not sent until endPacket() is called.
// SYNTAX
Udp.write(message);
Udp.write(buffer, size);
Parameters:
message: the outgoing message (char)buffer: an array to send as a series of bytes (byte or char)size: the length of the buffer
Returns:
byte: returns the number of characters sent. This does not have to be read
receivePacket()
Checks for the presence of a UDP packet and returns the size. Note that it is possible to receive a valid packet of zero bytes, this will still return the sender's address and port after the call to receivePacket().
// SYNTAX
size = Udp.receivePacket(buffer, size);
// EXAMPLE USAGE - get a string without buffer copy
UDP Udp;
char message[128];
int port = 8888;
int rxError = 0;

Udp.begin (port);
int count = Udp.receivePacket((byte*)message, 127);
if (count >= 0 && count < 128) {
  message[count] = 0;
  rxError = 0;
} else if (count < -1) {
  rxError = count;
  // need to re-initialize on error
  Udp.begin(port);
}
if (!rxError) {
  Serial.println (message);
}
Parameters:
buffer: the buffer to hold any received bytes (uint8_t).size: the size of the buffer.
Returns:
int: on success the size (greater then or equal to zero) of a received UDP packet. On failure the internal error code.
parsePacket()
Checks for the presence of a UDP packet, and reports the size. parsePacket() must be called before reading the buffer with UDP.read().
// SYNTAX
size = Udp.parsePacket();
Parameters: NONE
Returns:
int: the size of a received UDP packet
read()
Reads UDP data from the specified buffer. If no arguments are given, it will return the next character in the buffer.
This function can only be successfully called after UDP.parsePacket().
// SYNTAX
count = Udp.read();
count = Udp.read(packetBuffer, MaxSize);
Parameters:
packetBuffer: buffer to hold incoming packets (char)MaxSize: maximum size of the buffer (int)
Returns:
int: returns the character in the buffer or -1 if no character is available
flush()
Waits until all outgoing data in buffer has been sent.
NOTE: That this function does nothing at present.
// SYNTAX
Udp.flush();
stop()
Disconnect from the server. Release any resource being used during the UDP session.
// SYNTAX
Udp.stop();
Parameters: NONE
remoteIP()
Returns the IP address of sender of the packet parsed by Udp.parsePacket()/Udp.receivePacket().
// SYNTAX
ip = Udp.remoteIP();
Parameters: NONE
Returns:
- IPAddress : the IP address of the sender of the packet parsed by
Udp.parsePacket()/Udp.receivePacket().
remotePort()
Returns the port from which the UDP packet was sent. The packet is the one most recently processed by Udp.parsePacket()/Udp.receivePacket().
// SYNTAX
int port = Udp.remotePort();
Parameters: NONE
Returns:
int: the port from which the packet parsed byUdp.parsePacket()/Udp.receivePacket()was sent.
setBuffer()
Since 0.4.5:
Initializes the buffer used by a UDP instance for buffered reads/writes. The buffer
is used when your application calls beginPacket() and parsePacket(). If setBuffer() isn't called,
the buffer size defaults to 512 bytes, and is allocated when buffered operation is initialized via beginPacket() or parsePacket().
// SYNTAX
Udp.setBuffer(size); // dynamically allocated buffer
Udp.setBuffer(size, buffer); // application provided buffer

// EXAMPLE USAGE - dynamically allocated buffer
UDP Udp;

// uses a dynamically allocated buffer that is 1024 bytes in size
if (!Udp.setBuffer(1024))
{
    // on no, couldn't allocate the buffer
}
else
{
    // 'tis good!
}
// EXAMPLE USAGE - application-provided buffer
UDP Udp;

char appBuffer[800];
Udp.setBuffer(800, appBuffer);
Parameters:
unsigned int: the size of the bufferpointer: the buffer. If not provided, orNULLthe system will attempt to allocate a buffer of the size requested.
Returns:
truewhen the buffer was successfully allocated,falseif there was insufficient memory. (For application-provided buffers the function always returnstrue.)
releaseBuffer()
Since 0.4.5:
Releases the buffer previously set by a call to setBuffer().
// SYNTAX
Udp.releaseBuffer();
This is typically required only when performing advanced memory management and the UDP instance is not scoped to the lifetime of the application.
sendPacket()
Since 0.4.5:
Sends a packet, unbuffered, to a remote UDP peer.
// SYNTAX
Udp.sendPacket(buffer, bufferSize, remoteIP, remotePort);

// EXAMPLE USAGE
UDP Udp;

char buffer[] = "Particle powered";

IPAddress remoteIP(192, 168, 1, 100);
int port = 1337;

void setup() {
  // Required for two way communication
  Udp.begin(8888);

  if (Udp.sendPacket(buffer, sizeof(buffer), remoteIP, port) < 0) {
    Particle.publish("Error");
  }
}
Parameters:
pointer(buffer): the buffer of data to sendint(bufferSize): the number of bytes of data to sendIPAddress(remoteIP): the destination address of the remote peerint(remotePort): the destination port of the remote peer
Returns:
int: The number of bytes written. Negative value on error.
Servo
This library allows your device to control RC (hobby) servo motors. Servos have integrated gears and a shaft that can be precisely controlled. Standard servos allow the shaft to be positioned at various angles, usually between 0 and 180 degrees. Continuous rotation servos allow the rotation of the shaft to be set to various speeds.
This example uses pin D0, but D0 cannot be used for Servo on all devices.
// EXAMPLE CODE

Servo myservo;  // create servo object to control a servo
                // a maximum of eight servo objects can be created

int pos = 0;    // variable to store the servo position

void setup()
{
  myservo.attach(D0);  // attaches the servo on the D0 pin to the servo object
  // Only supported on pins that have PWM
}


void loop()
{
  for(pos = 0; pos < 180; pos += 1)  // goes from 0 degrees to 180 degrees
  {                                  // in steps of 1 degree
    myservo.write(pos);              // tell servo to go to position in variable 'pos'
    delay(15);                       // waits 15ms for the servo to reach the position
  }
  for(pos = 180; pos>=1; pos-=1)     // goes from 180 degrees to 0 degrees
  {
    myservo.write(pos);              // tell servo to go to position in variable 'pos'
    delay(15);                       // waits 15ms for the servo to reach the position
  }
}
NOTE: Unlike Arduino, you do not need to include Servo.h; it is included automatically.
attach()
Set up a servo on a particular pin. Note that, Servo can only be attached to pins with a timer.
- on the Core, Servo can be connected to A0, A1, A4, A5, A6, A7, D0, and D1.
- on the Photon, Servo can be connected to A4, A5, WKP, RX, TX, D0, D1, D2, D3
- on the P1, Servo can be connected to A4, A5, WKP, RX, TX, D0, D1, D2, D3, P1S0, P1S1
- on the Electron, Servo can be connected to A4, A5, WKP, RX, TX, D0, D1, D2, D3, B0, B1, B2, B3, C4, C5
- on Gen 3 Argon, Boron, and Xenon devices, pin A0, A1, A2, A3, D2, D3, D4, D5, D6, and D8 can be used for Servo.
- On Gen 3 B Series SoM devices, pins A0, A1, A6, A7, D4, D5, and D6 can be used for Servo.
// SYNTAX
servo.attach(pin)
write()
Writes a value to the servo, controlling the shaft accordingly. On a standard servo, this will set the angle of the shaft (in degrees), moving the shaft to that orientation. On a continuous rotation servo, this will set the speed of the servo (with 0 being full-speed in one direction, 180 being full speed in the other, and a value near 90 being no movement).
// SYNTAX
servo.write(angle)
writeMicroseconds()
Writes a value in microseconds (uS) to the servo, controlling the shaft accordingly. On a standard servo, this will set the angle of the shaft. On standard servos a parameter value of 1000 is fully counter-clockwise, 2000 is fully clockwise, and 1500 is in the middle.
// SYNTAX
servo.writeMicroseconds(uS)
Note that some manufactures do not follow this standard very closely so that servos often respond to values between 700 and 2300. Feel free to increase these endpoints until the servo no longer continues to increase its range. Note however that attempting to drive a servo past its endpoints (often indicated by a growling sound) is a high-current state, and should be avoided.
Continuous-rotation servos will respond to the writeMicrosecond function in an analogous manner to the write function.
read()
Read the current angle of the servo (the value passed to the last call to write()). Returns an integer from 0 to 180 degrees.
// SYNTAX
servo.read()
attached()
Check whether the Servo variable is attached to a pin. Returns a boolean.
// SYNTAX
servo.attached()
detach()
Detach the Servo variable from its pin.
// SYNTAX
servo.detach()
setTrim()
Sets a trim value that allows minute timing adjustments to correctly calibrate 90 as the stationary point.
// SYNTAX
// shortens the pulses sent to the servo
servo.setTrim(-3);
// a larger trim value
servo.setTrim(30);
// removes any previously configured trim
servo.setTrim(0);
RGB
This library allows the user to control the RGB LED on the front of the device.
// EXAMPLE CODE
// take control of the LED
RGB.control(true);
// red, green, blue, 0-255.
// the following sets the RGB LED to white:
RGB.color(255, 255, 255);
// wait one second
delay(1000);
// scales brightness of all three colors, 0-255.
// the following sets the RGB LED brightness to 25%:
RGB.brightness(64);
// wait one more second
delay(1000);
// resume normal operation
RGB.control(false);
control(user_control)
User can take control of the RGB LED, or give control back to the system.
// take control of the RGB LED
RGB.control(true);
// resume normal operation
RGB.control(false);
controlled()
Returns Boolean true when the RGB LED is under user control, or false when it is not.
// take control of the RGB LED
RGB.control(true);
// Print true or false depending on whether
// the RGB LED is currently under user control.
// In this case it prints "true".
Serial.println(RGB.controlled());
// resume normal operation
RGB.control(false);
color(red, green, blue)
Set the color of the RGB with three values, 0 to 255 (0 is off, 255 is maximum brightness for that color). User must take control of the RGB LED before calling this method.
// Set the RGB LED to red
RGB.color(255, 0, 0);
// Sets the RGB LED to cyan
RGB.color(0, 255, 255);
// Sets the RGB LED to white
RGB.color(255, 255, 255);
brightness(val)
Scale the brightness value of all three RGB colors with one value, 0 to 255 (0 is 0%, 255 is 100%). This setting persists after RGB.control() is set to false, and will govern the overall brightness of the RGB LED under normal system operation. User must take control of the RGB LED before calling this method.
// Scale the RGB LED brightness to 25%
RGB.brightness(64);
// Scale the RGB LED brightness to 50%
RGB.brightness(128);
// Scale the RGB LED brightness to 100%
RGB.brightness(255);
brightness()
Returns current brightness value.
// EXAMPLE
uint8_t value = RGB.brightness();
onChange(handler)
Specifies a function to call when the color of the RGB LED changes. It can be used to implement an external RGB LED.
// EXAMPLE USAGE
void ledChangeHandler(uint8_t r, uint8_t g, uint8_t b) {
// Duplicate the green color to an external LED
analogWrite(D0, g);
}
void setup()
{
pinMode(D0, OUTPUT);
RGB.onChange(ledChangeHandler);
}
onChange can also call a method on an object.
// Automatically mirror the onboard RGB LED to an external RGB LED
// No additional code needed in setup() or loop()
class ExternalRGB {
public:
ExternalRGB(pin_t r, pin_t g, pin_t b) : pin_r(r), pin_g(g), pin_b(b) {
pinMode(pin_r, OUTPUT);
pinMode(pin_g, OUTPUT);
pinMode(pin_b, OUTPUT);
RGB.onChange(&ExternalRGB::handler, this);
}
void handler(uint8_t r, uint8_t g, uint8_t b) {
analogWrite(pin_r, 255 - r);
analogWrite(pin_g, 255 - g);
analogWrite(pin_b, 255 - b);
}
private:
pin_t pin_r;
pin_t pin_g;
pin_t pin_b;
};
// Connect an external RGB LED to D0, D1 and D2 (R, G, and B)
ExternalRGB myRGB(D0, D1, D2);
The onChange handler is called 1000 times per second so you should be careful to not do any lengthy computations or functions that take a long time to execute. Do not call functions like Log.info, Serial.print, or Particle.publish from the onChange handler. Instead, save the values from onChange in global variables and handle lengthy operations from loop if you need to do lengthy operations.
LED Signaling
Since 0.6.1:
This library allows applications to share control over the on-device RGB
LED with the Device OS in a non-exclusive way, making it possible for the system to use the LED for various important indications, such as cloud connection errors, even if an application already uses the LED for its own signaling. For this to work, an application needs to assign a priority to every application-specific LED indication (using instances of the LEDStatus class), and the system will ensure that the LED only shows a highest priority indication at any moment of time.
The library also allows to set a custom theme for the system LED signaling. Refer to the Device Modes and LEDSignal Enum sections for information about default LED signaling patterns used by the system.
Note: Consider using this library instead of the RGB API for all application-specific LED signaling, unless a low-level control over the LED is required.
LEDStatus Class
This class allows to define a LED status that represents an application-specific LED indication. Every LED status is described by a signaling pattern, speed and color parameters. Typically, applications use separate status instance for each application state that requires LED indication.
// EXAMPLE - defining and using a LED status
LEDStatus blinkRed(RGB_COLOR_RED, LED_PATTERN_BLINK, LED_SPEED_NORMAL, LED_PRIORITY_IMPORTANT);
void setup() {
// Blink red for 3 seconds after connecting to the Cloud
blinkRed.setActive(true);
delay(3000);
blinkRed.setActive(false);
}
void loop() {
}
In the provided example, the application defines a single LED status (blinkRed) and activates it for 3 seconds, causing the LED to start blinking in red color. Note that there is no need to toggle the LED on and off manually – this is done automatically by the system, according to the parameters passed to the status instance.
LEDStatus()
Constructs a status instance. Initially, a newly constructed status instance is set to inactive state and doesn't affect the LED until setActive() method is called by an application to activate this instance.
// SYNTAX
LEDStatus::LEDStatus(uint32_t color = RGB_COLOR_WHITE, LEDPattern pattern = LED_PATTERN_SOLID, LEDPriority priority = LED_PRIORITY_NORMAL); // 1
LEDStatus::LEDStatus(uint32_t color, LEDPattern pattern, LEDSpeed speed, LEDPriority priority = LED_PRIORITY_NORMAL); // 2
LEDStatus::LEDStatus(uint32_t color, LEDPattern pattern, uint16_t period, LEDPriority priority = LED_PRIORITY_NORMAL); // 3
LEDStatus::LEDStatus(LEDPattern pattern, LEDPriority priority = LED_PRIORITY_NORMAL); // 4
// EXAMPLE - constructing LEDStatus instance
// Solid green; normal priority (default)
LEDStatus status1(RGB_COLOR_GREEN);
// Blinking blue; normal priority (default)
LEDStatus status2(RGB_COLOR_BLUE, LED_PATTERN_BLINK);
// Fast blinking blue; normal priority (default)
LEDStatus status3(RGB_COLOR_BLUE, LED_PATTERN_BLINK, LED_SPEED_FAST);
// Breathing red with custom pattern period; important priority
LEDStatus status4(RGB_COLOR_RED, LED_PATTERN_FADE, 1000 /* 1 second */, LED_PRIORITY_IMPORTANT);
Parameters:
color: RGB color (uint32_t, default value isRGB_COLOR_WHITE)pattern: pattern type (LEDPattern, default value isLED_PATTERN_SOLID)speed: pattern speed (LEDSpeed, default value isLED_SPEED_NORMAL)period: pattern period in milliseconds (uint16_t)priority: status priority (LEDPriority, default value isLED_PRIORITY_NORMAL)
setColor()
Sets status color.
// SYNTAX
void LEDStatus::setColor(uint32_t color);
uint32_t LEDStatus::color() const;
// EXAMPLE - setting and getting status color
LEDStatus status;
status.setColor(RGB_COLOR_BLUE);
uint32_t color = status.color(); // Returns 0x000000ff
Parameters:
color: RGB color (uint32_t)
color()
Returns status color (uint32_t).
setPattern()
Sets pattern type.
// SYNTAX
void LEDStatus::setPattern(LEDPattern pattern);
LEDPattern LEDStatus::pattern() const;
// EXAMPLE - setting and getting pattern type
LEDStatus status;
status.setPattern(LED_PATTERN_BLINK);
LEDPattern pattern = status.pattern(); // Returns LED_PATTERN_BLINK
Parameters:
pattern: pattern type (LEDPattern)
pattern()
Returns pattern type (LEDPattern).
setSpeed()
Sets pattern speed. This method resets pattern period to a system-default value that depends on specified pattern speed and current pattern type set for this status instance.
// SYNTAX
void LEDStatus::setSpeed(LEDSpeed speed);
// EXAMPLE - setting pattern speed
LEDStatus status;
status.setSpeed(LED_SPEED_FAST);
Parameters:
speed: pattern speed (LEDSpeed)
setPeriod()
Sets pattern period. Pattern period specifies duration of a signaling pattern in milliseconds. For example, given the pattern type LED_PATTERN_BLINK (blinking color) with period set to 1000 milliseconds, the system will toggle the LED on and off every 500 milliseconds.
// SYNTAX
void LEDStatus::setPeriod(uint16_t period);
uint16_t LEDStatus::period() const;
// EXAMPLE - setting and getting pattern period
LEDStatus status;
status.setPeriod(1000); // 1 second
uint16_t period = status.period(); // Returns 1000
Parameters:
period: pattern period in milliseconds (uint16_t)
period()
Returns pattern period in milliseconds (uint16_t).
setPriority()
Sets status priority. Note that a newly assigned priority will take effect only after setActive() method is called for the next time.
// SYNTAX
void LEDStatus::setPriority(LEDPriority priority);
LEDPriority LEDStatus::priority() const;
// EXAMPLE - setting and getting status priority
LEDStatus status;
status.setPriority(LED_PRIORITY_IMPORTANT);
LEDPriority priority = status.priority(); // Returns LED_PRIORITY_IMPORTANT
Parameters:
priority: status priority (LEDPriority)
priority()
Returns status priority (LEDPriority).
on()
Turns the LED on.
// SYNTAX
void LEDStatus::on();
void LEDStatus::off();
void LEDStatus::toggle();
bool LEDStatus::isOn() const;
bool LEDStatus::isOff() const;
// EXAMPLE - turning the LED on and off
LEDStatus status;
status.off(); // Turns the LED off
bool on = status.isOn(); // Returns false
status.on(); // Turns the LED on
on = status.isOn(); // Returns true
status.toggle(); // Toggles the LED
on = status.isOn(); // Returns false
status.toggle();
on = status.isOn(); // Returns true
off()
Turns the LED off.
toggle()
Toggles the LED on or off.
isOn()
Returns true if the LED is turned on, or false otherwise.
isOff()
Returns true if the LED turned off, or false otherwise.
setActive()
Activates or deactivates this status instance. The overloaded method that takes priority argument assigns a new priority to this status instance before activating it.
// SYNTAX
void LEDStatus::setActive(bool active = true); // 1
void LEDStatus::setActive(LEDPriority priority); // 2
bool LEDStatus::isActive() const;
// EXAMPLE - activating and deactivating a status instance
LEDStatus status;
status.setActive(true); // Activates status
bool active = status.isActive(); // Returns true
status.setActive(false); // Deactivates status
active = status.isActive(); // Returns false
status.setActive(LED_PRIORITY_IMPORTANT); // Activates status with new priority
LEDPriority priority = status.priority(); // Returns LED_PRIORITY_IMPORTANT
active = status.isActive(); // Returns true
Parameters:
active: whether the status should be activated (true) or deactivated (false). Default value istruepriority: status priority (LEDPriority)
isActive()
Returns true if this status is active, or false otherwise.
Custom Patterns
LEDStatus class can be subclassed to implement a custom signaling pattern.
// EXAMPLE - implementing a custom signaling pattern
class CustomStatus: public LEDStatus {
public:
explicit CustomStatus(LEDPriority priority) :
LEDStatus(LED_PATTERN_CUSTOM, priority),
colorIndex(0),
colorTicks(0) {
}
protected:
virtual void update(system_tick_t ticks) override {
// Change status color every 300 milliseconds
colorTicks += ticks;
if (colorTicks > 300) {
if (++colorIndex == colorCount) {
colorIndex = 0;
}
setColor(colors[colorIndex]);
colorTicks = 0;
}
}
private:
size_t colorIndex;
system_tick_t colorTicks;
static const uint32_t colors[];
static const size_t colorCount;
};
const uint32_t CustomStatus::colors[] = {
RGB_COLOR_MAGENTA,
RGB_COLOR_BLUE,
RGB_COLOR_CYAN,
RGB_COLOR_GREEN,
RGB_COLOR_YELLOW
};
const size_t CustomStatus::colorCount =
sizeof(CustomStatus::colors) /
sizeof(CustomStatus::colors[0]);
CustomStatus customStatus(LED_PRIORITY_IMPORTANT);
void setup() {
// Activate custom status
customStatus.setActive(true);
}
void loop() {
}
In the provided example, CustomStatus class implements a signaling pattern that alternates between some of the predefined colors.
Any class implementing a custom pattern needs to pass LED_PATTERN_CUSTOM pattern type to the constructor of the base LEDStatus class and reimplement its update() method. Once an instance of such class is activated, the system starts to call its update() method periodically in background, passing number of milliseconds passed since previous update in ticks argument.
Note: The system may call update() method within an ISR. Ensure provided implementation doesn't make any blocking calls, returns as quickly as possible, and, ideally, only updates internal timing and makes calls to setColor(), setActive() and other methods of the base LEDStatus class.
LEDSystemTheme Class
This class allows to set a custom theme for the system LED signaling. Refer to the LEDSignal Enum section for the list of LED signals defined by the system.
// EXAMPLE - setting custom colors for network status indication
LEDSystemTheme theme;
theme.setColor(LED_SIGNAL_NETWORK_OFF, RGB_COLOR_GRAY);
theme.setColor(LED_SIGNAL_NETWORK_ON, RGB_COLOR_WHITE);
theme.setColor(LED_SIGNAL_NETWORK_CONNECTING, RGB_COLOR_YELLOW);
theme.setColor(LED_SIGNAL_NETWORK_DHCP, RGB_COLOR_YELLOW);
theme.setColor(LED_SIGNAL_NETWORK_CONNECTED, RGB_COLOR_YELLOW);
theme.apply(); // Apply theme settings
LEDSystemTheme()
Constructs a theme instance and initializes it with current system settings.
// SYNTAX
LEDSystemTheme::LEDSystemTheme();
// EXAMPLE - constructing theme instance
LEDSystemTheme theme;
setColor()
Sets signal color.
// SYNTAX
void LEDSystemTheme::setColor(LEDSignal signal, uint32_t color);
uint32_t LEDSystemTheme::color(LEDSignal signal) const;
// EXAMPLE - setting and getting signal color
LEDSystemTheme theme;
theme.setColor(LED_SIGNAL_NETWORK_ON, RGB_COLOR_BLUE);
uint32_t color = theme.color(LED_SIGNAL_NETWORK_ON); // Returns 0x000000ff
Parameters:
color()
Returns signal color (uint32_t).
setPattern()
Sets signal pattern.
// SYNTAX
void LEDSystemTheme::setPattern(LEDSignal signal, LEDPattern pattern);
LEDPattern LEDSystemTheme::pattern(LEDSignal signal) const;
// EXAMPLE - setting and getting signal pattern
LEDSystemTheme theme;
theme.setPattern(LED_SIGNAL_NETWORK_ON, LED_PATTERN_BLINK);
LEDPattern pattern = theme.pattern(LED_SIGNAL_NETWORK_ON); // Returns LED_PATTERN_BLINK
Parameters:
signal: LED signal (LEDSignal)pattern: pattern type (LEDPattern)
pattern()
Returns signal pattern (LEDPattern).
setSpeed()
Sets signal speed.
// SYNTAX
void LEDSystemTheme::setSpeed(LEDSignal signal, LEDSpeed speed);
// EXAMPLE - setting signal speed
LEDSystemTheme theme;
theme.setSpeed(LED_SIGNAL_NETWORK_ON, LED_SPEED_FAST);
Parameters:
setPeriod()
Sets signal period.
// SYNTAX
void LEDSystemTheme::setPeriod(LEDSignal signal, uint16_t period);
uint16_t LEDSystemTheme::period(LEDSignal signal) const;
// EXAMPLE - setting and getting signal period
LEDSystemTheme theme;
theme.setPeriod(LED_SIGNAL_NETWORK_ON, 1000); // 1 second
uint16_t period = theme.period(); // Returns 1000
Parameters:
signal: LED signal (LEDSignal)period: pattern period in milliseconds (uint16_t)
period()
Returns signal period in milliseconds (uint16_t).
setSignal()
Sets several signal parameters at once.
// SYNTAX
void LEDSystemTheme::setSignal(LEDSignal signal, uint32_t color); // 1
void LEDSystemTheme::setSignal(LEDSignal signal, uint32_t color, LEDPattern pattern, LEDSpeed speed = LED_SPEED_NORMAL); // 2
void LEDSystemTheme::setSignal(LEDSignal signal, uint32_t color, LEDPattern pattern, uint16_t period); // 3
// EXAMPLE - setting signal parameters
LEDSystemTheme theme;
theme.setSignal(LED_SIGNAL_NETWORK_ON, RGB_COLOR_BLUE, LED_PATTERN_BLINK, LED_SPEED_FAST);
Parameters:
signal: LED signal (LEDSignal)color: RGB color (uint32_t)pattern: pattern type (LEDPattern)speed: pattern speed (LEDSpeed)period: pattern period in milliseconds (uint16_t)
apply()
Applies theme settings.
// SYNTAX
void LEDSystemTheme::apply(bool save = false);
// EXAMPLE - applying theme settings
LEDSystemTheme theme;
theme.setColor(LED_SIGNAL_NETWORK_ON, RGB_COLOR_BLUE);
theme.apply();
Parameters:
save: whether theme settings should be saved to a persistent storage (default value isfalse)
restoreDefault()
Restores factory default theme.
// SYNTAX
static void LEDSystemTheme::restoreDefault();
// EXAMPLE - restoring factory default theme
LEDSystemTheme::restoreDefault();
LEDSignal Enum
This enum defines LED signals supported by the system:
| Name | Description | Priority | Default Pattern |
|---|---|---|---|
| LED_SIGNAL_NETWORK_OFF | Network is off | Background | Breathing white |
| LED_SIGNAL_NETWORK_ON | Network is on | Background | Breathing blue |
| LED_SIGNAL_NETWORK_CONNECTING | Connecting to network | Normal | Blinking green |
| LED_SIGNAL_NETWORK_DHCP | Getting network address | Normal | Fast blinking green |
| LED_SIGNAL_NETWORK_CONNECTED | Connected to network | Background | Breathing green |
| LED_SIGNAL_CLOUD_CONNECTING | Connecting to the Cloud | Normal | Blinking cyan |
| LED_SIGNAL_CLOUD_HANDSHAKE | Performing handshake with the Cloud | Normal | Fast blinking cyan |
| LED_SIGNAL_CLOUD_CONNECTED | Connected to the Cloud | Background | Breathing cyan |
| LED_SIGNAL_SAFE_MODE | Connected to the Cloud in safe mode | Background | Breathing magenta |
| LED_SIGNAL_LISTENING_MODE | Listening mode | Normal | Slow blinking blue |
| LED_SIGNAL_DFU_MODE * | DFU mode | Critical | Blinking yellow |
| LED_SIGNAL_FIRMWARE_UPDATE * | Performing firmware update | Critical | Blinking magenta |
| LED_SIGNAL_POWER_OFF | Soft power down is pending | Critical | Solid gray |
Note: Signals marked with an asterisk (*) are implemented within the bootloader and currently don't support pattern type and speed customization due to flash memory constraints. This may be changed in future versions of the firmware.
LEDPriority Enum
This enum defines LED priorities supported by the system (from lowest to highest priority):
LED_PRIORITY_BACKGROUND: long-lasting background indicationsLED_PRIORITY_NORMAL: regular, typically short indicationsLED_PRIORITY_IMPORTANT: important indicationsLED_PRIORITY_CRITICAL: critically important indications
Internally, the system uses the same set of priorities for its own LED signaling. In a situation when both an application and the system use same priority for their active indications, system indication takes precedence. Refer to the LEDSignal Enum section for information about system signal priorities.
LEDPattern Enum
This enum defines LED patterns supported by the system:
LED_PATTERN_SOLID: solid colorLED_PATTERN_BLINK: blinking colorLED_PATTERN_FADE: breathing colorLED_PATTERN_CUSTOM: custom pattern
LEDSpeed Enum
This enum defines system-default LED speed values:
LED_SPEED_SLOW: slow speedLED_SPEED_NORMAL: normal speedLED_SPEED_FAST: fast speed
RGB Colors
RGB colors are represented by 32-bit integer values (uint32_t) with the following layout in hex: 0x00RRGGBB, where R, G and B are bits of the red, green and blue color components respectively.
For convenience, the library defines constants for the following basic colors:
RGB_COLOR_BLUE: blue (0x000000ff)RGB_COLOR_GREEN: green (0x0000ff00)RGB_COLOR_CYAN: cyan (0x0000ffff)RGB_COLOR_RED: red (0x00ff0000)RGB_COLOR_MAGENTA: magenta (0x00ff00ff)RGB_COLOR_YELLOW: yellow (0x00ffff00)RGB_COLOR_WHITE: white (0x00ffffff)RGB_COLOR_GRAY: gray (0x001f1f1f)RGB_COLOR_ORANGE: orange (0x00ff6000)
Time
The device synchronizes time with the Particle Device Cloud during the handshake. From then, the time is continually updated on the device. This reduces the need for external libraries to manage dates and times.
Before the device gets online and for short intervals, you can use the
millis() and micros() functions.
millis()
Returns the number of milliseconds since the device began running the current program. This number will overflow (go back to zero), after approximately 49 days.
unsigned long time = millis();
// EXAMPLE USAGE
unsigned long time;
void setup()
{
Serial.begin(9600);
}
void loop()
{
Serial.print("Time: ");
time = millis();
//prints time since program started
Serial.println(time);
// wait a second so as not to send massive amounts of data
delay(1000);
}
Note: The return value for millis is an unsigned long, errors may be generated if a programmer tries to do math with other data types such as ints.
micros()
Returns the number of microseconds since the device booted.
unsigned long time = micros();
// EXAMPLE USAGE
unsigned long time;
void setup()
{
Serial.begin(9600);
}
void loop()
{
Serial.print("Time: ");
time = micros();
//prints time since program started
Serial.println(time);
// wait a second so as not to send massive amounts of data
delay(1000);
}
In Device OS v0.4.3 and earlier this number will overflow (go back to zero), after exactly 59,652,323 microseconds (0 .. 59,652,322) on the Core and after exactly 35,791,394 microseconds (0 .. 35,791,394) on the Photon and Electron. In newer Device OS versions, it overflows at the maximum 32-bit unsigned long value.
delay()
Pauses the program for the amount of time (in milliseconds) specified as parameter. (There are 1000 milliseconds in a second.)
// SYNTAX
delay(ms);
ms is the number of milliseconds to pause (unsigned long)
// EXAMPLE USAGE
int ledPin = D1; // LED connected to digital pin D1
void setup()
{
pinMode(ledPin, OUTPUT); // sets the digital pin as output
}
void loop()
{
digitalWrite(ledPin, HIGH); // sets the LED on
delay(1000); // waits for a second
digitalWrite(ledPin, LOW); // sets the LED off
delay(1000); // waits for a second
}
NOTE: the parameter for millis is an unsigned long, errors may be generated if a programmer tries to do math with other data types such as ints.
delayMicroseconds()
Pauses the program for the amount of time (in microseconds) specified as parameter. There are a thousand microseconds in a millisecond, and a million microseconds in a second.
// SYNTAX
delayMicroseconds(us);
us is the number of microseconds to pause (unsigned int)
// EXAMPLE USAGE
int outPin = D1; // digital pin D1
void setup()
{
pinMode(outPin, OUTPUT); // sets the digital pin as output
}
void loop()
{
digitalWrite(outPin, HIGH); // sets the pin on
delayMicroseconds(50); // pauses for 50 microseconds
digitalWrite(outPin, LOW); // sets the pin off
delayMicroseconds(50); // pauses for 50 microseconds
}
hour()
Retrieve the hour for the current or given time. Integer is returned without a leading zero.
// Print the hour for the current time
Serial.print(Time.hour());
// Print the hour for the given time, in this case: 4
Serial.print(Time.hour(1400647897));
Optional parameter: time_t (Unix timestamp), coordinated universal time (UTC), long integer
Returns: Integer 0-23
If you have set a timezone using zone(), beginDST(), etc. the hour returned will be local time. You must still pass in UTC time, otherwise the time offset will be applied twice.
hourFormat12()
Retrieve the hour in 12-hour format for the current or given time. Integer is returned without a leading zero.
// Print the hour in 12-hour format for the current time
Serial.print(Time.hourFormat12());
// Print the hour in 12-hour format for a given time, in this case: 3
Serial.print(Time.hourFormat12(1400684400));
Optional parameter: time_t (Unix timestamp), coordinated universal time (UTC), long integer
Returns: Integer 1-12
If you have set a timezone using zone(), beginDST(), etc. the hour returned will be local time. You must still pass in UTC time, otherwise the time offset will be applied twice.
isAM()
Returns true if the current or given time is AM.
// Print true or false depending on whether the current time is AM
Serial.print(Time.isAM());
// Print whether the given time is AM, in this case: true
Serial.print(Time.isAM(1400647897));
Optional parameter: time_t (Unix timestamp), coordinated universal time (UTC), long integer
Returns: Unsigned 8-bit integer: 0 = false, 1 = true
If you have set a timezone using zone(), beginDST(), etc. the hour returned will be local time. You must still pass in UTC time, otherwise the time offset will be applied twice, potentially causing AM/PM to be calculated incorrectly.
isPM()
Returns true if the current or given time is PM.
// Print true or false depending on whether the current time is PM
Serial.print(Time.isPM());
// Print whether the given time is PM, in this case: false
Serial.print(Time.isPM(1400647897));
Optional parameter: time_t (Unix timestamp), coordinated universal time (UTC), long integer
Returns: Unsigned 8-bit integer: 0 = false, 1 = true
If you have set a timezone using zone(), beginDST(), etc. the hour returned will be local time. You must still pass in UTC time, otherwise the time offset will be applied twice, potentially causing AM/PM to be calculated incorrectly.
minute()
Retrieve the minute for the current or given time. Integer is returned without a leading zero.
// Print the minute for the current time
Serial.print(Time.minute());
// Print the minute for the given time, in this case: 51
Serial.print(Time.minute(1400647897));
Optional parameter: time_t (Unix timestamp), coordinated universal time (UTC), long integer
Returns: Integer 0-59
If you have set a timezone using zone(), beginDST(), etc. the hour returned will be local time. You must still pass in UTC time, otherwise the time offset will be applied twice.
second()
Retrieve the seconds for the current or given time. Integer is returned without a leading zero.
// Print the second for the current time
Serial.print(Time.second());
// Print the second for the given time, in this case: 51
Serial.print(Time.second(1400647897));
Optional parameter: time_t (Unix timestamp), coordinated universal time (UTC), long integer
Returns: Integer 0-59
day()
Retrieve the day for the current or given time. Integer is returned without a leading zero.
// Print the day for the current time
Serial.print(Time.day());
// Print the day for the given time, in this case: 21
Serial.print(Time.day(1400647897));
Optional parameter: time_t (Unix timestamp), coordinated universal time (UTC), long integer
Returns: Integer 1-31
If you have set a timezone using zone(), beginDST(), etc. the hour returned will be local time. You must still pass in UTC time, otherwise the time offset will be applied twice, potentially causing an incorrect date.
weekday()
Retrieve the weekday for the current or given time.
- 1 = Sunday
- 2 = Monday
- 3 = Tuesday
- 4 = Wednesday
- 5 = Thursday
- 6 = Friday
- 7 = Saturday
// Print the weekday number for the current time
Serial.print(Time.weekday());
// Print the weekday for the given time, in this case: 4
Serial.print(Time.weekday(1400647897));
Optional parameter: time_t (Unix timestamp), coordinated universal time (UTC), long integer
Returns: Integer 1-7
If you have set a timezone using zone(), beginDST(), etc. the hour returned will be local time. You must still pass in UTC time, otherwise the time offset will be applied twice, potentially causing an incorrect day of week.
month()
Retrieve the month for the current or given time. Integer is returned without a leading zero.
// Print the month number for the current time
Serial.print(Time.month());
// Print the month for the given time, in this case: 5
Serial.print(Time.month(1400647897));
Optional parameter: time_t (Unix timestamp), coordinated universal time (UTC), long integer
Returns: Integer 1-12
If you have set a timezone using zone(), beginDST(), etc. the hour returned will be local time. You must still pass in UTC time, otherwise the time offset will be applied twice, potentially causing an incorrect date.
year()
Retrieve the 4-digit year for the current or given time.
// Print the current year
Serial.print(Time.year());
// Print the year for the given time, in this case: 2014
Serial.print(Time.year(1400647897));
Optional parameter: time_t (Unix timestamp), coordinated universal time (UTC), long integer
Returns: Integer
now()
Retrieve the current time as seconds since January 1, 1970 (commonly known as "Unix time" or "epoch time"). This time is not affected by the timezone setting, it's coordinated universal time (UTC).
// Print the current Unix timestamp
Serial.print(Time.now()); // 1400647897
Returns: time_t (Unix timestamp), coordinated universal time (UTC), long integer (32-bit)
local()
Retrieve the current time in the configured timezone as seconds since January 1, 1970 (commonly known as "Unix time" or "epoch time"). This time is affected by the timezone setting.
Note that the functions in the Time class expect times in UTC time, so the result from this should be used carefully. You should not pass Time.local() to Time.format(), for example.
Since 0.6.0
Local time is also affected by the Daylight Saving Time (DST) settings.
zone()
Set the time zone offset (+/-) from UTC. The device will remember this offset until reboot.
NOTE: This function does not observe daylight savings time.
// Set time zone to Eastern USA daylight saving time
Time.zone(-4);
Parameters: floating point offset from UTC in hours, from -12.0 to 14.0
isDST()
Since 0.6.0:
Returns true if Daylight Saving Time (DST) is in effect.
// Print true or false depending on whether the DST in in effect
Serial.print(Time.isDST());
Returns: Unsigned 8-bit integer: 0 = false, 1 = true
This function only returns the current DST setting that you choose using beginDST() or endDST(). The setting does not automatically change based on the calendar date.
getDSTOffset()
Since 0.6.0:
Retrieve the current Daylight Saving Time (DST) offset that is added to the current local time when Time.beginDST() has been called. The default is 1 hour.
// Get current DST offset
float offset = Time.getDSTOffset();
Returns: floating point DST offset in hours (default is +1.0 hours)
setDSTOffset()
Since 0.6.0:
Set a custom Daylight Saving Time (DST) offset. The device will remember this offset until reboot.
// Set DST offset to 30 minutes
Time.setDSTOffset(0.5);
Parameters: floating point offset in hours, from 0.0 to 2.0
beginDST()
Since 0.6.0:
Start applying Daylight Saving Time (DST) offset to the current time.
You must call beginDST() at startup if you want use DST mode. The setting is not remembered and is not automatically changed based on the calendar.
endDST()
Since 0.6.0:
Stop applying Daylight Saving Time (DST) offset to the current time.
You must call endDST() on the appropriate date to end DST mode. It is not calculated automatically.
setTime()
Set the system time to the given timestamp.
NOTE: This will override the time set by the Particle Device Cloud. If the cloud connection drops, the reconnection handshake will set the time again
Also see: Particle.syncTime()
// Set the time to 2014-10-11 13:37:42
Time.setTime(1413034662);
Parameter: time_t (Unix timestamp), coordinated universal time (UTC), long integer
timeStr()
Return string representation for the given time.
Serial.print(Time.timeStr()); // Wed May 21 01:08:47 2014
Returns: String
NB: In 0.3.4 and earlier, this function included a newline at the end of the returned string. This has been removed in 0.4.0.
format()
Formats a time string using a configurable format.
// SYNTAX
Time.format(time, strFormat); // fully qualified (e.g. current time with custom format)
Time.format(strFormat); // current time with custom format
Time.format(time); // custom time with preset format
Time.format(); // current time with preset format
// EXAMPLE
time_t time = Time.now();
Time.format(time, TIME_FORMAT_DEFAULT); // Sat Jan 10 08:22:04 2004 , same as Time.timeStr()
Time.zone(-5.25); // setup a time zone, which is part of the ISO8601 format
Time.format(time, TIME_FORMAT_ISO8601_FULL); // 2004-01-10T08:22:04-05:15
The formats available are:
TIME_FORMAT_DEFAULTTIME_FORMAT_ISO8601_FULL- custom format based on strftime()
Optional parameter: time_t (Unix timestamp), coordinated universal time (UTC), long integer
If you have set the time zone using Time.zone(), beginDST(), etc. the formatted time will be formatted in local time.
Note: The custom time provided to Time.format() needs to be UTC based and not contain the time zone offset (as Time.local() would), since the time zone correction is performed by the high level Time methods internally.
setFormat()
Sets the format string that is the default value used by format().
Time.setFormat(TIME_FORMAT_ISO8601_FULL);
In more advanced cases, you can set the format to a static string that follows
the same syntax as the strftime() function.
// custom formatting
Time.format(Time.now(), "Now it's %I:%M%p.");
// Now it's 03:21AM.
getFormat()
Retrieves the currently configured format string for time formatting with format().
isValid()
Since 0.6.1:
// SYNTAX
Time.isValid();
Used to check if current time is valid. This function will return true if:
- Time has been set manually using
Time.setTime() - Time has been successfully synchronized with the Particle Device Cloud. The device synchronizes time with the Particle Device Cloud during the handshake. The application may also manually synchronize time with Particle Device Cloud using
Particle.syncTime() - Correct time has been maintained by RTC.
NOTE: When Core is running in AUTOMATIC mode this function will block if current time is not valid and there is an active connection to Particle Device Cloud. Once Core synchronizes the time with Particle Device Cloud or the connection to Particle Device Cloud is lost, Time.isValid() will return its current state. This function is also implicitly called by any Time function that returns current time or date (e.g. Time.hour()/Time.now()/etc).
// Print true or false depending on whether current time is valid
Serial.print(Time.isValid());
void setup()
{
// Wait for time to be synchronized with Particle Device Cloud (requires active connection)
waitFor(Time.isValid, 60000);
}
void loop()
{
// Print current time
Serial.println(Time.timeStr());
}
Advanced
For more advanced date parsing, formatting, normalization and manipulation functions, use the C standard library time functions like mktime. See the note about the standard library on the Core and the description of the C standard library time functions.
Interrupts
Interrupts are a way to write code that is run when an external event occurs. As a general rule, interrupt code should be very fast, and non-blocking. This means performing transfers, such as I2C, Serial, TCP should not be done as part of the interrupt handler. Rather, the interrupt handler can set a variable which instructs the main loop that the event has occurred.
attachInterrupt()
Specifies a function to call when an external interrupt occurs. Replaces any previous function that was attached to the interrupt.
NOTE:
pinMode() MUST be called prior to calling attachInterrupt() to set the desired mode for the interrupt pin (INPUT, INPUT_PULLUP or INPUT_PULLDOWN).
External interrupts are supported on the following pins:
Photon
Not supported on the Photon (you can't use attachInterrupt on these pins):
- D0, A5 (shared with SETUP button)
No restrictions on the Photon (all of these can be used at the same time):
- D5, D6, D7, A2, WKP, TX, RX
Shared on the Photon (only one pin for each bullet item can be used at the same time):
- D1, A4
- D2, A0, A3
- D3, DAC
- D4, A1
For example, you can use attachInterrupt on D1 or A4, but not both. Since they share an EXTI line, there is no way to tell which pin generated the interrupt.
But you can still attachInterrupt to D2, D3, and D4, as those are on different EXTI lines.
P1
Not supported on the P1 (you can't use attachInterrupt on these pins):
- D0, A5 (shared with MODE button)
No restrictions on the P1 (all of these can be used at the same time):
- D5, D6, A2, TX, RX
Shared on the P1 (only one pin for each bullet item can be used at the same time):
- D1, A4
- D2, A0, A3
- D3, DAC, P1S3
- D4, A1
- D7, P1S4
- A7 (WKP), P1S0, P1S2
- P1S1, P1S5
Electron/E Series
Not supported on the Electron/E series (you can't use attachInterrupt on these pins):
- D0, A5 (shared with MODE button)
- D7 (shared with BATT_INT_PC13)
- C1 (shared with RXD_UC)
- C2 (shared with RI_UC)
No restrictions on the Electron/E series (all of these can be used at the same time):
- D5, D6
Shared on the Electron/E series (only one pin for each bullet item can be used at the same time):
- D1, A4, B1
- D2, A0, A3
- D3, DAC
- D4, A1
- A2, C0
- A7 (WKP), B2, B4
- B0, C5
- B3, B5
- C3, TX
- C4, RX
Additional information on which pins can be used for interrupts is available on the pin information page.
// SYNTAX
attachInterrupt(pin, function, mode);
attachInterrupt(pin, function, mode, priority);
attachInterrupt(pin, function, mode, priority, subpriority);
Parameters:
pin: the pin numberfunction: the function to call when the interrupt occurs; this function must take no parameters and return nothing. This function is sometimes referred to as an interrupt service routine (ISR).mode: defines when the interrupt should be triggered. Three constants are predefined as valid values:- CHANGE to trigger the interrupt whenever the pin changes value,
- RISING to trigger when the pin goes from low to high,
- FALLING for when the pin goes from high to low.
priority(optional): the priority of this interrupt. Default priority is 13. Lower values increase the priority of the interrupt.subpriority(optional): the subpriority of this interrupt. Default subpriority is 0.
The function returns a boolean whether the ISR was successfully attached (true) or not (false).
// EXAMPLE USAGE
void blink(void);
int ledPin = D1;
volatile int state = LOW;
void setup()
{
pinMode(ledPin, OUTPUT);
pinMode(D2, INPUT_PULLUP);
attachInterrupt(D2, blink, CHANGE);
}
void loop()
{
digitalWrite(ledPin, state);
}
void blink()
{
state = !state;
}
You can attach a method in a C++ object as an interrupt handler.
class Robot {
public:
Robot() {
pinMode(D2, INPUT_PULLUP);
attachInterrupt(D2, &Robot::handler, this, CHANGE);
}
void handler() {
// do something on interrupt
}
};
Robot myRobot;
// nothing else needed in setup() or loop()
Using Interrupts: Interrupts are useful for making things happen automatically in microcontroller programs, and can help solve timing problems. Good tasks for using an interrupt may include reading a rotary encoder, or monitoring user input.
If you wanted to insure that a program always caught the pulses from a rotary encoder, so that it never misses a pulse, it would make it very tricky to write a program to do anything else, because the program would need to constantly poll the sensor lines for the encoder, in order to catch pulses when they occurred. Other sensors have a similar interface dynamic too, such as trying to read a sound sensor that is trying to catch a click, or an infrared slot sensor (photo-interrupter) trying to catch a coin drop. In all of these situations, using an interrupt can free the microcontroller to get some other work done while not missing the input.
About Interrupt Service Routines: ISRs are special kinds of functions that have some unique limitations most other functions do not have. An ISR cannot have any parameters, and they shouldn't return anything.
Generally, an ISR should be as short and fast as possible. If your sketch uses multiple ISRs, only one can run at a time, other interrupts will be executed after the current one finishes in an order that depends on the priority they have. millis() relies on interrupts to count, so it will never increment inside an ISR. Since delay() requires interrupts to work, it will not work if called inside an ISR. Using delayMicroseconds() will work as normal.
Typically global variables are used to pass data between an ISR and the main program. To make sure variables shared between an ISR and the main program are updated correctly, declare them as volatile.
detachInterrupt()
Turns off the given interrupt.
// SYNTAX
detachInterrupt(pin);
pin is the pin number of the interrupt to disable.
interrupts()
Re-enables interrupts (after they've been disabled by noInterrupts()). Interrupts allow certain important tasks to happen in the background and are enabled by default. Some functions will not work while interrupts are disabled, and incoming communication may be ignored. Interrupts can slightly disrupt the timing of code, however, and may be disabled for particularly critical sections of code.
// EXAMPLE USAGE
void setup() {}
void loop()
{
noInterrupts(); // disable interrupts
//
// put critical, time-sensitive code here
//
interrupts(); // enable interrupts
//
// other code here
//
}
interrupts() neither accepts a parameter nor returns anything.
noInterrupts()
Disables interrupts (you can re-enable them with interrupts()). Interrupts allow certain important tasks to happen in the background and are enabled by default. Some functions will not work while interrupts are disabled, and incoming communication may be ignored. Interrupts can slightly disrupt the timing of code, however, and may be disabled for particularly critical sections of code.
// SYNTAX
noInterrupts();
noInterrupts() neither accepts a parameter nor returns anything.
Software Timers
_Since 0.4.7. This feature is available on the Photon, P1 and Electron out the box. On the Core, the
freertos4core Particle library (Timers.ino example found here) should be used to add FreeRTOS to the core._
Software Timers provide a way to have timed actions in your program. FreeRTOS provides the ability to have up to 10 Software Timers at a time with a minimum resolution of 1 millisecond. It is common to use millis() based "timers" though exact timing is not always possible (due to other program delays). Software timers are maintained by FreeRTOS and provide a more reliable method for running timed actions using callback functions. Please note that Software Timers are "chained" and will be serviced sequentially when several timers trigger simultaneously, thus requiring special consideration when writing callback functions.
// EXAMPLE
void print_every_second()
{
static int count = 0;
Serial.println(count++);
}
Timer timer(1000, print_every_second);
void setup()
{
Serial.begin(9600);
timer.start();
}
(That is for illustration only. You should not call Serial.println from a software timer because Serial is not thread-safe. It's possible that text being written from the main loop thread would be inter-mixed with text from the timer.)
Timers may be started, stopped, reset within a user program or an ISR. They may also be "disposed", removing them from the (max. 10) active timer list.
The timer callback is similar to an interrupt - it shouldn't block. However, it is less restrictive than an interrupt. If the code does block, the system will not crash - the only consequence is that other software timers that should have triggered will be delayed until the blocking timer callback function returns.
You should not use functions like Particle.publish from a timer callback.
Software timers run with a smaller stack (1024 bytes vs. 6144 bytes). This can limit the functions you use from the callback function.
// SYNTAX
Timer timer(period, callback, one_shot)
periodis the period of the timer in milliseconds (unsigned int)callbackis the callback function which gets called when the timer expires.one_shot(optional, since 0.4.9) whentrue, the timer is fired once and then stopped automatically. The default isfalse- a repeating timer.
Class member callbacks
Since 0.4.9:
A class member function can be used as a callback using this syntax to create the timer:
Timer timer(period, callback, instance, one_shot)
periodis the period of the timer in milliseconds (unsigned int)callbackis the class member function which gets called when the timer expires.instancethe instance of the class to call the callback function on.one_shot(optional, since 0.4.9) whentrue, the timer is fired once and then stopped automatically. The default isfalse- a repeating timer.
// Class member function callback example
class CallbackClass
{
public:
void onTimeout();
}
CallbackClass callback;
Timer t(1000, &CallbackClass::onTimeout, callback);
start()
Starts a stopped timer (a newly created timer is stopped). If start() is called for a running timer, it will be reset.
start()
// EXAMPLE USAGE
timer.start(); // starts timer if stopped or resets it if started.
stop()
Stops a running timer.
stop()
// EXAMPLE USAGE
timer.stop(); // stops a running timer.
changePeriod()
Changes the period of a previously created timer. It can be called to change the period of an running or stopped timer. Note that changing the period of a dormant timer will also start the timer.
changePeriod(newPeriod)
newPeriod is the new timer period (unsigned int)
// EXAMPLE USAGE
timer.changePeriod(1000); // Reset period of timer to 1000ms.
reset()
Resets a timer. If a timer is running, it will reset to "zero". If a timer is stopped, it will be started.
reset()
// EXAMPLE USAGE
timer.reset(); // reset timer if running, or start timer if stopped.
startFromISR()
stopFromISR()
resetFromISR()
changePeriodFromISR()
startFromISR()
stopFromISR()
resetFromISR()
changePeriodFromISR()
Start, stop and reset a timer or change a timer's period (as above) BUT from within an ISR. These functions MUST be called when doing timer operations within an ISR.
// EXAMPLE USAGE
timer.startFromISR(); // WITHIN an ISR, starts timer if stopped or resets it if started.
timer.stopFromISR(); // WITHIN an ISR,stops a running timer.
timer.resetFromISR(); // WITHIN an ISR, reset timer if running, or start timer if stopped.
timer.changePeriodFromISR(newPeriod); // WITHIN an ISR, change the timer period.
dispose()
dispose()
Stop and remove a timer from the (max. 10) timer list, freeing a timer "slot" in the list.
// EXAMPLE USAGE
timer.dispose(); // stop and delete timer from timer list.
isActive()
Since 0.5.0:
bool isActive()
Returns true if the timer is in active state (pending), or false otherwise.
// EXAMPLE USAGE
if (timer.isActive()) {
// ...
}
Math
Note that in addition to functions outlined below all of the newlib math functions described at sourceware.org are also available for use by simply including the math.h header file thus:
#include "math.h"
min()
Calculates the minimum of two numbers.
min(x, y)
x is the first number, any data type
y is the second number, any data type
The functions returns the smaller of the two numbers.
// EXAMPLE USAGE
sensVal = min(sensVal, 100); // assigns sensVal to the smaller of sensVal or 100
// ensuring that it never gets above 100.
NOTE: Perhaps counter-intuitively, max() is often used to constrain the lower end of a variable's range, while min() is used to constrain the upper end of the range.
WARNING: Because of the way the min() function is implemented, avoid using other functions inside the brackets, it may lead to incorrect results
min(a++, 100); // avoid this - yields incorrect results
a++;
min(a, 100); // use this instead - keep other math outside the function
max()
Calculates the maximum of two numbers.
max(x, y)
x is the first number, any data type
y is the second number, any data type
The functions returns the larger of the two numbers.
// EXAMPLE USAGE
sensVal = max(senVal, 20); // assigns sensVal to the larger of sensVal or 20
// (effectively ensuring that it is at least 20)
NOTE: Perhaps counter-intuitively, max() is often used to constrain the lower end of a variable's range, while min() is used to constrain the upper end of the range.
WARNING: Because of the way the max() function is implemented, avoid using other functions inside the brackets, it may lead to incorrect results
max(a--, 0); // avoid this - yields incorrect results
a--; // use this instead -
max(a, 0); // keep other math outside the function
abs()
Computes the absolute value of a number.
abs(x);
where x is the number
The function returns x if x is greater than or equal to 0
and returns -x if x is less than 0.
WARNING: Because of the way the abs() function is implemented, avoid using other functions inside the brackets, it may lead to incorrect results.
abs(a++); // avoid this - yields incorrect results
a++; // use this instead -
abs(a); // keep other math outside the function
constrain()
Constrains a number to be within a range.
constrain(x, a, b);
x is the number to constrain, all data types
a is the lower end of the range, all data types
b is the upper end of the range, all data types
The function will return:
x: if x is between a and b
a: if x is less than a
b: if x is greater than b
// EXAMPLE USAGE
sensVal = constrain(sensVal, 10, 150);
// limits range of sensor values to between 10 and 150
map()
// EXAMPLE USAGE
// Map an analog value to 8 bits (0 to 255)
void setup() {
pinMode(D1, OUTPUT);
}
void loop()
{
int val = analogRead(A0);
val = map(val, 0, 4095, 0, 255);
analogWrite(D1, val);
}
Re-maps a number from one range to another. That is, a value of fromLow would get mapped to toLow, a value of fromHigh to toHigh, values in-between to values in-between, etc.
map(value, fromLow, fromHigh, toLow, toHigh);
Does not constrain values to within the range, because out-of-range values are sometimes intended and useful. The constrain() function may be used either before or after this function, if limits to the ranges are desired.
Note that the "lower bounds" of either range may be larger or smaller than the "upper bounds" so the map() function may be used to reverse a range of numbers, for example
y = map(x, 1, 50, 50, 1);
The function also handles negative numbers well, so that this example
y = map(x, 1, 50, 50, -100);
is also valid and works well.
When called with integers, the map() function uses integer math so will not generate fractions, when the math might indicate that it should do so. Fractional remainders are truncated, not rounded.
Parameters can either be integers or floating point numbers:
value: the number to mapfromLow: the lower bound of the value's current rangefromHigh: the upper bound of the value's current rangetoLow: the lower bound of the value's target rangetoHigh: the upper bound of the value's target range
The function returns the mapped value, as integer or floating point depending on the arguments.
Appendix: For the mathematically inclined, here's the whole function
int map(int value, int fromStart, int fromEnd, int toStart, int toEnd)
{
if (fromEnd == fromStart) {
return value;
}
return (value - fromStart) * (toEnd - toStart) / (fromEnd - fromStart) + toStart;
}
pow()
Calculates the value of a number raised to a power. pow() can be used to raise a number to a fractional power. This is useful for generating exponential mapping of values or curves.
pow(base, exponent);
base is the number (float)
exponent is the power to which the base is raised (float)
The function returns the result of the exponentiation (double)
EXAMPLE TBD
sqrt()
Calculates the square root of a number.
sqrt(x)
x is the number, any data type
The function returns the number's square root (double)
Random Numbers
The firmware incorporates a pseudo-random number generator.
random()
Retrieves the next random value, restricted to a given range.
random(max);
Parameters
max- the upper limit of the random number to retrieve.
Returns: a random value between 0 and up to, but not including max.
int r = random(10);
// r is >= 0 and < 10
// The smallest value returned is 0
// The largest value returned is 9
NB: When max is 0, the result is always 0.
random(min,max);
Parameters:
min- the lower limit (inclusive) of the random number to retrieve.max- the upper limit (exclusive) of the random number to retrieve.
Returns: a random value from min and up to, but not including max.
int r = random(10, 100);
// r is >= 10 and < 100
// The smallest value returned is 10
// The largest value returned is 99
NB: If min is greater or equal to max, the result is always 0.
randomSeed()
randomSeed(newSeed);
Parameters:
newSeed- the new random seed
The pseudorandom numbers produced by the firmware are derived from a single value - the random seed.
The value of this seed fully determines the sequence of random numbers produced by successive
calls to random(). Using the same seed on two separate runs will produce
the same sequence of random numbers, and in contrast, using different seeds
will produce a different sequence of random numbers.
On startup, the default random seed is set by the system to 1. Unless the seed is modified, the same sequence of random numbers would be produced each time the system starts.
Fortunately, when the device connects to the cloud, it receives a very randomized seed value, which is used as the random seed. So you can be sure the random numbers produced will be different each time your program is run.
Disable random seed from the cloud
When the device receives a new random seed from the cloud, it's passed to this function:
void random_seed_from_cloud(unsigned int seed);
The system implementation of this function calls randomSeed() to set
the new seed value. If you don't wish to use random seed values from the cloud,
you can take control of the random seeds set by adding this code to your app:
void random_seed_from_cloud(unsigned int seed) {
// don't do anything with this. Continue with existing seed.
}
In the example, the seed is simply ignored, so the system will continue using whatever seed was previously set. In this case, the random seed will not be set from the cloud, and setting the seed is left to up you.
EEPROM
EEPROM emulation allocates a region of the device's built-in Flash memory to act as EEPROM. Unlike "true" EEPROM, flash doesn't suffer from write "wear" with each write to each individual address. Instead, the page suffers wear when it is filled.
Each write containing changed values will add more data to the page until it is full, causing a page erase. When writing unchanged data, there is no flash wear, but there is a penalty in CPU cycles. Try not write to EEPROM every loop() iteration to avoid unnecessary CPU cycle penalties.
The EEPROM functions can be used to store small amounts of data in Flash that will persist even after the device resets after a deep sleep or is powered off.
length()
Returns the total number of bytes available in the emulated EEPROM.
// SYNTAX
size_t length = EEPROM.length();
- The Core has 127 bytes of emulated EEPROM.
- The Gen 2 (Photon, P1, Electron, and E Series) have 2047 bytes of emulated EEPROM.
- The Gen 3 (Argon, Boron, Xenon) devices have 4096 bytes of emulated EEPROM.
put()
This function will write an object to the EEPROM. You can write single values like int and
float or group multiple values together using struct to ensure that all values of the struct are
updated together.
// SYNTAX
EEPROM.put(int address, object)
address is the start address (int) of the EEPROM locations to write. It must be a value between 0
and EEPROM.length()-1
object is the object data to write. The number of bytes to write is automatically determined from
the type of object.
// EXAMPLE USAGE
// Write a value (2 bytes in this case) to the EEPROM address
int addr = 10;
uint16_t value = 12345;
EEPROM.put(addr, value);
// Write an object to the EEPROM address
addr = 20;
struct MyObject {
uint8_t version;
float field1;
uint16_t field2;
char name[10];
};
MyObject myObj = { 0, 12.34f, 25, "Test!" };
EEPROM.put(addr, myObj);
The object data is first compared to the data written in the EEPROM to avoid writing values that haven't changed.
If the Core loses power before the write finishes, the partially written data will be ignored.
If you write several objects to EEPROM, make sure they don't overlap: the address of the second object must be larger than the address of the first object plus the size of the first object. You can leave empty room between objects in case you need to make the first object bigger later.
get()
This function will retrieve an object from the EEPROM. Use the same type of object you used in the
put call.
// SYNTAX
EEPROM.get(int address, object)
address is the start address (int) of the EEPROM locations to read. It must be a value between 0
and EEPROM.length()-1
object is the object data that would be read. The number of bytes read is automatically determined
from the type of object.
// EXAMPLE USAGE
// Read a value (2 bytes in this case) from EEPROM addres
int addr = 10;
uint16_t value;
EEPROM.get(addr, value);
if(value == 0xFFFF) {
// EEPROM was empty -> initialize value
value = 25;
}
// Read an object from the EEPROM addres
addr = 20;
struct MyObject {
uint8_t version;
float field1;
uint16_t field2;
char name[10];
};
MyObject myObj;
EEPROM.get(addr, myObj);
if(myObj.version != 0) {
// EEPROM was empty -> initialize myObj
MyObject defaultObj = { 0, 12.34f, 25, "Test!" };
myObj = defaultObj;
}
The default value of bytes in the EEPROM is 255 (hexadecimal 0xFF) so reading an object on a new Core will return an object filled with 0xFF. One trick to deal with default data is to include a version field that you can check to see if there was valid data written in the EEPROM.
read()
Read a single byte of data from the emulated EEPROM.
// SYNTAX
uint8_t value = EEPROM.read(int address);
address is the address (int) of the EEPROM location to read
// EXAMPLE USAGE
// Read the value of the second byte of EEPROM
int addr = 1;
uint8_t value = EEPROM.read(addr);
When reading more than 1 byte, prefer get() over multiple read() since it's faster.
write()
Write a single byte of data to the emulated EEPROM.
// SYNTAX
write(int address, uint8_t value);
address is the address (int) of the EEPROM location to write to
value is the byte data (uint8_t) to write
// EXAMPLE USAGE
// Write a byte value to the second byte of EEPROM
int addr = 1;
uint8_t val = 0x45;
EEPROM.write(addr, val);
When writing more than 1 byte, prefer put() over multiple write() since it's faster and it ensures
consistent data even when power is lost while writing.
The object data is first compared to the data written in the EEPROM to avoid writing values that haven't changed.
clear()
Erase all the EEPROM so that all reads will return 255 (hexadecimal 0xFF).
// EXAMPLE USAGE
// Reset all EEPROM locations to 0xFF
EEPROM.clear();
Calling this function pauses processor execution (including code running in interrupts) for 800ms since no instructions can be fetched from Flash while the Flash controller is busy erasing both EEPROM pages.
hasPendingErase()
performPendingErase()
Automatic page erase is the default behavior. This section describes optional functions the application can call to manually control page erase for advanced use cases.
After enough data has been written to fill the first page, the EEPROM emulation will write new data to a second page. The first page must be erased before being written again.
Erasing a page of Flash pauses processor execution (including code running in interrupts) for 500ms since no instructions can be fetched from Flash while the Flash controller is busy erasing the EEPROM page. This could cause issues in applications that use EEPROM but rely on precise interrupt timing.
hasPendingErase() lets the application developer check if a full EEPROM page needs to be erased.
When the application determines it is safe to pause processor execution to erase EEPROM it calls
performPendingErase(). You can call this at boot, or when your device is idle if you expect it to
run without rebooting for a long time.
// EXAMPLE USAGE
void setup() {
// Erase full EEPROM page at boot when necessary
if(EEPROM.hasPendingErase()) {
EEPROM.performPendingErase();
}
}
To estimate how often page erases will be necessary in your application, assume that it takes
2*EEPROM.length() byte writes to fill a page (it will usually be more because not all bytes will always be
updated with different values).
If the application never calls performPendingErase() then the pending page erase will be performed
when data is written using put() or write() and both pages are full. So calling
performPendingErase() is optional and provided to avoid the uncertainty of a potential processor
pause any time put() or write() is called.
Macros
STARTUP()
Since 0.4.5:
Typically an application will have its initialization code in the setup() function.
This works well if a delay of a few seconds from power on/reset is acceptable.
In other cases, the application wants to have code run as early as possible, before the cloud or network connection
are initialized. The STARTUP() function instructs the system to execute the code early on in startup.
void setup_the_fundulating_conbobulator()
{
pinMode(D3, OUTPUT);
digitalWrite(D3, HIGH);
}
// The STARTUP call is placed outside of any other function
// What goes inside is any valid code that can be executed. Here, we use a function call.
// Using a single function is preferable to having several `STARTUP()` calls.
STARTUP( setup_the_fundulating_conbobulator() );
The code referenced by STARTUP() is executed very early in the startup sequence, so it's best suited
to initializing digital I/O and peripherals. Networking setup code should still be placed in setup().
Note that when startup code performs digital I/O, there will still be a period of at least few hundred milliseconds
where the I/O pins are in their default power-on state, namely INPUT. Circuits should be designed with this
in mind, using pullup/pulldown resistors as appropriate.
PRODUCT_ID()
When preparing software for your product, it is essential to include your product ID and version at the top of the firmware source code.
// EXAMPLE
PRODUCT_ID(94); // replace by your product ID
PRODUCT_VERSION(1); // increment each time you upload to the console
You can find more details about the product ID and how to get yours in the Console guide.
System Events
Since 0.4.9:
System Events Overview
System events are messages sent by the system and received by application code. They inform the application about changes in the system, such as when the system has entered setup mode (listening mode, blinking dark blue), or when an Over-the-Air (OTA) update starts, or when the system is about to reset.
System events are received by the application by registering a handler. The handler has this general format:
void handler(system_event_t event, int data, void* moredata);
Unused parameters can be removed from right to left, giving these additional function signatures:
void handler(system_event_t event, int data);
void handler(system_event_t event);
void handler();
Here's an example of an application that listens for reset events so that the application is notified the device is about to reset. The application publishes a reset message to the cloud and turns off connected equipment before returning from the handler, allowing the device to reset.
void reset_handler()
{
// turn off the crankenspitzen
digitalWrite(D6, LOW);
// tell the world what we are doing
Particle.publish("reset", "going down for reboot NOW!");
}
void setup()
{
// register the reset handler
System.on(reset, reset_handler);
}
Some event types provide additional information. For example the button_click event provides a parameter with the number of button clicks:
void button_clicked(system_event_t event, int param)
{
int times = system_button_clicks(param);
Serial.printlnf("button was clicked %d times", times);
}
Registering multiple events with the same handler
It's possible to subscribe to multiple events with the same handler in cases where you want the same handler to be notified for all the events. For example:
void handle_all_the_events(system_event_t event, int param)
{
Serial.printlnf("got event %d with value %d", event, param);
}
void setup()
{
// listen for Wi-Fi Listen events and Firmware Update events
System.on(wifi_listen+firmware_update, handle_all_the_events);
}
To subscribe to all events, there is the placeholder all_events:
void setup()
{
// listen for network events and firmware update events
System.on(all_events, handle_all_the_events);
}
System Events Reference
These are the system events produced by the system, their numeric value (what you will see when printing the system event to Serial) and details of how to handle the parameter value. The version of firmware these events became available is noted in the first column below.
Setup mode is also referred to as listening mode (blinking dark blue).
| Since | Event Name | ID | Description | Parameter |
|---|---|---|---|---|
| setup_begin | 2 | signals the device has entered setup mode | not used | |
| setup_update | 4 | periodic event signaling the device is still in setup mode. | milliseconds since setup mode was started | |
| setup_end | 8 | signals setup mode was exited | time in ms since setup mode was started | |
| network_credentials | 16 | network credentials were changed | network_credentials_added or network_credentials_cleared |
|
| 0.6.1 | network_status | 32 | network connection status | one of network_status_powering_on, network_status_on, network_status_powering_off, network_status_off, network_status_connecting, network_status_connected |
| 0.6.1 | cloud_status | 64 | cloud connection status | one of cloud_status_connecting, cloud_status_connected, cloud_status_disconnecting, cloud_status_disconnected |
| button_status | 128 | button pressed or released | the duration in ms the button was pressed: 0 when pressed, >0 on release. | |
| firmware_update | 256 | firmware update status | one of firmware_update_begin, firmware_update_progress, firmware_update_complete, firmware_update_failed |
|
| firmware_update_pending | 512 | notifies the application that a firmware update is available. This event is sent even when updates are disabled, giving the application chance to re-enable firmware updates with System.enableUpdates() |
not used | |
| reset_pending | 1024 | notifies the application that the system would like to reset. This event is sent even when resets are disabled, giving the application chance to re-enable resets with System.enableReset() |
not used | |
| reset | 2048 | notifies that the system will reset once the application has completed handling this event | not used | |
| button_click | 4096 | event sent each time SETUP/MODE button is clicked. | int clicks = system_button_clicks(param); retrieves the number of clicks so far. |
|
| button_final_click | 8192 | sent after a run of one or more clicks not followed by additional clicks. Unlike the button_click event, the button_final_click event is sent once, at the end of a series of clicks. |
int clicks = system_button_clicks(param); retrieves the number of times the button was pushed. |
|
| 0.6.1 | time_changed | 16384 | device time changed | time_changed_manually or time_changed_sync |
| 0.6.1 | low_battery | 32768 | generated when low battery condition is detected. | not used |
| 0.8.0 | out_of_memory | 1<<18 | event generated when a request for memory could not be satisfied | the amount in bytes of memory that could not be allocated |
System Modes
System modes help you control how the device manages the connection with the cloud.
By default, the device connects to the Cloud and processes messages automatically. However there are many cases where a user will want to take control over that connection. There are three available system modes: AUTOMATIC, SEMI_AUTOMATIC, and MANUAL. These modes describe how connectivity is handled.
These system modes describe how connectivity is handled and when user code is run.
System modes must be called before the setup() function. By default, the device is always in AUTOMATIC mode.
Automatic mode
The automatic mode of connectivity provides the default behavior of the device, which is that:
SYSTEM_MODE(AUTOMATIC);
void setup() {
// This won't be called until the device is connected to the cloud
}
void loop() {
// Neither will this
}
- When the device starts up, it automatically tries to connect to Wi-Fi and the Particle Device Cloud.
- Once a connection with the Particle Device Cloud has been established, the user code starts running.
- Messages to and from the Cloud are handled in between runs of the user loop; the user loop automatically alternates with
Particle.process(). Particle.process()is also called during any delay() of at least 1 second.- If the user loop blocks for more than about 20 seconds, the connection to the Cloud will be lost. To prevent this from happening, the user can call
Particle.process()manually. - If the connection to the Cloud is ever lost, the device will automatically attempt to reconnect. This re-connection will block from a few milliseconds up to 8 seconds.
SYSTEM_MODE(AUTOMATIC)does not need to be called, because it is the default state; however the user can invoke this method to make the mode explicit.
In automatic mode, the user can still call Particle.disconnect() to disconnect from the Cloud, but is then responsible for re-connecting to the Cloud by calling Particle.connect().
Semi-automatic mode
The semi-automatic mode will not attempt to connect the device to the Cloud automatically. However once the device is connected to the Cloud (through some user intervention), messages will be processed automatically, as in the automatic mode above.
SYSTEM_MODE(SEMI_AUTOMATIC);
void setup() {
// This is called immediately
}
void loop() {
if (buttonIsPressed()) {
Particle.connect();
} else {
doOfflineStuff();
}
}
The semi-automatic mode is therefore much like the automatic mode, except:
- When the device boots up,
setup()andloop()will begin running immediately. - Once the user calls
Particle.connect(), the user code will be blocked while the device attempts to negotiate a connection. This connection will block execution ofloop()orsetup()until either the device connects to the Cloud or an interrupt is fired that callsParticle.disconnect().
Manual mode
The "manual" mode puts the device's connectivity completely in the user's control. This means that the user is responsible for both establishing a connection to the Particle Device Cloud and handling communications with the Cloud by calling Particle.process() on a regular basis.
SYSTEM_MODE(MANUAL);
void setup() {
// This will run automatically
}
void loop() {
if (buttonIsPressed()) {
Particle.connect();
}
if (Particle.connected()) {
Particle.process();
doOtherStuff();
}
}
When using manual mode:
- The user code will run immediately when the device is powered on.
- Once the user calls
Particle.connect(), the device will attempt to begin the connection process. - Once the device is connected to the Cloud (
Particle.connected()== true), the user must callParticle.process()regularly to handle incoming messages and keep the connection alive. The more frequentlyParticle.process()is called, the more responsive the device will be to incoming messages. - If
Particle.process()is called less frequently than every 20 seconds, the connection with the Cloud will die. It may take a couple of additional calls ofParticle.process()for the device to recognize that the connection has been lost.
System Calls
version()
Since 0.4.7:
Determine the version of Device OS available. Returns a version string of the format:
MAJOR.MINOR.PATCH
Such as "0.4.7".
For example
void setup()
{
Serial.printlnf("System version: %s", System.version().c_str());
// prints
// System version: 0.4.7
}
versionNumber()
Determines the version of Device OS available. Returns the version encoded as a number:
0xAABBCCDD
AAis the major releaseBBis the minor releaseCCis the patch numberDDis 0
Firmware 0.4.7 has a version number 0x00040700
buttonPushed()
Since 0.4.6:
Can be used to determine how long the System button (MODE on Core/Electron, SETUP on Photon) has been pushed.
Returns uint16_t as duration button has been held down in milliseconds.
// EXAMPLE USAGE
void button_handler(system_event_t event, int duration, void* )
{
if (!duration) { // just pressed
RGB.control(true);
RGB.color(255, 0, 255); // MAGENTA
}
else { // just released
RGB.control(false);
}
}
void setup()
{
System.on(button_status, button_handler);
}
void loop()
{
// it would be nice to fire routine events while
// the button is being pushed, rather than rely upon loop
if (System.buttonPushed() > 1000) {
RGB.color(255, 255, 0); // YELLOW
}
}
System Cycle Counter
Since 0.4.6:
The system cycle counter is incremented for each instruction executed. It functions in normal code and during interrupts. Since it operates at the clock frequency of the device, it can be used for accurately measuring small periods of time.
// overview of System tick functions
uint32_t now = System.ticks();
// for converting an the unknown system tick frequency into microseconds
uint32_t scale = System.ticksPerMicrosecond();
// delay a given number of ticks.
System.ticksDelay(10);
The system ticks are intended for measuring times from less than a microsecond up to a second. For longer time periods, using micros() or millis() would be more suitable.
ticks()
Returns the current value of the system tick count. One tick corresponds to one cpu cycle.
// measure a precise time whens something start
uint32_t ticks = System.ticks();
ticksPerMicrosecond();
Retrieves the number of ticks per microsecond for this device. This is useful when converting between a number of ticks and time in microseconds.
uint32_t start = System.ticks();
startTheFrobnicator();
uint32_t end = System.ticks();
uint32_t duration = (end-start)/System.ticksPerMicrosecond();
Serial.printlnf("The frobnicator took %d microseconds to start", duration);
ticksDelay()
Pause execution a given number of ticks. This can be used to implement precise delays.
// delay 10 ticks. How long this is actually depends upon the clock speed of the
// device.
System.ticksDelay(10);
// to delay for 3 microseconds on any device:
System.ticksDelay(3*System.ticksPerMicrosecond());
The system code has been written such that the compiler can compute the number of ticks to delay at compile time and inline the function calls, reducing overhead to a minimum.
freeMemory()
Since 0.4.4:
Retrieves the amount of free memory in the system in bytes.
uint32_t freemem = System.freeMemory();
Serial.print("free memory: ");
Serial.println(freemem);
dfu()
The device will enter DFU-mode to allow new user firmware to be refreshed. DFU mode is cancelled by
- flashing firmware to the device using dfu-util, specifying the
:leaveoption, or - a system reset
System.dfu()
To make DFU mode permanent - so that it continues to enter DFU mode even after a reset until
new firmware is flashed, pass true to the dfu() function.
System.dfu(true); // persistent DFU mode - will enter DFU after a reset until firmware is flashed.
deviceID()
System.deviceID() provides an easy way to extract the device ID of your device. It returns a String object of the device ID, which is used to identify your device.
// EXAMPLE USAGE
void setup()
{
// Make sure your Serial Terminal app is closed before powering your device
Serial.begin(9600);
// Wait for a USB serial connection for up to 30 seconds
waitFor(Serial.isConnected, 30000);
String myID = System.deviceID();
// Prints out the device ID over Serial
Serial.println(myID);
}
void loop() {}
enterSafeMode()
Since 0.4.6:
// SYNTAX
System.enterSafeMode();
Resets the device and restarts in safe mode.
sleep() [ Sleep ]
System.sleep() can be used to dramatically improve the battery life of a Particle-powered project. There are several variations of System.sleep() based on which arguments are passed.
System.sleep(SLEEP_MODE_DEEP, long seconds) can be used to put the entire device into a deep sleep mode, sometimes referred to as "standby sleep mode."
// SYNTAX
System.sleep(SLEEP_MODE_DEEP, long seconds);
// EXAMPLE USAGE
// Put the device into deep sleep for 60 seconds
System.sleep(SLEEP_MODE_DEEP,60);
// The device LED will shut off during deep sleep
// Since 0.8.0
// Put the device into deep sleep for 60 seconds and disable WKP pin
System.sleep(SLEEP_MODE_DEEP, 60, SLEEP_DISABLE_WKP_PIN);
// The device LED will shut off during deep sleep
// The device will not wake up if a rising edge signal is applied to WKP
In this particular mode, the device shuts down the network subsystem and puts the microcontroller in a standby mode.
When the device awakens from deep sleep, it will reset and run all user code from the beginning with no values being maintained in memory from before the deep sleep.
The standby mode is used to achieve the lowest power consumption. After entering standby mode, the RAM and register contents are lost.
For cellular devices, reconnecting to cellular after SLEEP_MODE_DEEP will generally use more power than using SLEEP_NETWORK_STANDBY for periods less than 15 minutes. You should definitely avoid using SLEEP_MODE_DEEP on cellular devices for periods of 5 minutes. Your SIM can be blocked by your mobile carrier for aggressive reconnection if you reconnect to cellular very frequently. Using SLEEP_NETWORK_STANDBY keeps the connection up, and supports sleeping for shorter intervals.
The device will automatically wake up after the specified number of seconds or by applying a rising edge signal to the WKP pin.
Since 0.8.0:
Wake up by WKP pin may be disabled by passing SLEEP_DISABLE_WKP_PIN option to System.sleep(): System.sleep(SLEEP_MODE_DEEP, long seconds, SLEEP_DISABLE_WKP_PIN).
System.sleep(uint16_t wakeUpPin, uint16_t edgeTriggerMode) can be used to put the entire device into a stop mode with wakeup on interrupt. In this particular mode, the device shuts down the network and puts the microcontroller in a stop mode with configurable wakeup pin and edge triggered interrupt. When the specific interrupt arrives, the device awakens from stop mode. The Core will not reset before going into stop mode so all the application variables are preserved after waking up from this mode. This mode achieves the lowest power consumption while retaining the contents of RAM and registers.
// SYNTAX
System.sleep(uint16_t wakeUpPin, uint16_t edgeTriggerMode);
// EXAMPLE USAGE
// Put the device into stop mode with wakeup using RISING edge interrupt on D1 pin
System.sleep(D1,RISING);
// The device LED will shut off during sleep
Parameters:
wakeUpPin: the wakeup pin number. supports external interrupts on the following pins:- supports external interrupts on the following pins:
- D1, D2, D3, D4, A0, A1, A3, A4, A6, A7
- The same pin limitations as
attachInterruptapply
- supports external interrupts on the following pins:
edgeTriggerMode: defines when the interrupt should be triggered. Three constants are predefined as valid values:- CHANGE to trigger the interrupt whenever the pin changes value,
- RISING to trigger when the pin goes from low to high,
- FALLING for when the pin goes from high to low.
The device will automatically reconnect to the cloud if the cloud was connected when sleep was entered. If disconnected prior to sleep, it will stay disconnected on wake.
Since 0.8.0:
// SYNTAX
System.sleep(std::initializer_list<pin_t> wakeUpPins, InterruptMode edgeTriggerMode);
System.sleep(const pin_t* wakeUpPins, size_t wakeUpPinsCount, InterruptMode edgeTriggerMode);
System.sleep(std::initializer_list<pin_t> wakeUpPins, std::initializer_list<InterruptMode> edgeTriggerModes);
System.sleep(const pin_t* wakeUpPins, size_t wakeUpPinsCount, const InterruptMode* edgeTriggerModes, size_t edgeTriggerModesCount);
// EXAMPLE USAGE
// Put the device into stop mode with wakeup using RISING edge interrupt on D1 and A4 pins
// Specify the pins in-place (using std::initializer_list)
System.sleep({D1, A4}, RISING);
// The device LED will shut off during sleep
// Put the device into stop mode with wakeup using RISING edge interrupt on D1 and FALLING edge interrupt on A4 pin
// Specify the pins and edge trigger mode in-place (using std::initializer_list)
System.sleep({D1, A4}, {RISING, FALLING});
// The device LED will shut off during sleep
// Put the device into stop mode with wakeup using RISING edge interrupt on D1 and A4 pins
// Specify the pins in an array
pin_t wakeUpPins[2] = {D1, A4};
System.sleep(wakeUpPins, 2, RISING);
// The device LED will shut off during sleep
// Put the device into stop mode with wakeup using RISING edge interrupt on D1 and FALLING edge interrupt on A4 pin
// Specify the pins and edge trigger modes in an array
pin_t wakeUpPins[2] = {D1, A4};
InterruptMode edgeTriggerModes[2] = {RISING, FALLING};
System.sleep(wakeUpPins, 2, edgeTriggerModes, 2);
// The device LED will shut off during sleep
Multiple wakeup pins may be specified for this mode.
Parameters:
wakeUpPins: a list of wakeup pins:std::initializer_list<pin_t>: e.g.{D1, D2, D3}- a
pin_tarray. The length of the array needs to be provided inwakeUpPinsCountargument - supports external interrupts on the following pins:
- D1, D2, D3, D4, A0, A1, A3, A4, A6, A7
- The same pin limitations as
attachInterruptapply
wakeUpPinsCount: the length of the list of wakeup pins provided inwakeUpPinsargument. This argument should only be specified ifwakeUpPinsis an array of pins and not anstd::initializer_list.edgeTriggerMode: defines when the interrupt should be triggered. Three constants are predefined as valid values:- CHANGE to trigger the interrupt whenever the pin changes value,
- RISING to trigger when the pin goes from low to high,
- FALLING for when the pin goes from high to low.
edgeTriggerModes: defines when the interrupt should be triggered on a specific pin fromwakeUpPinslist:std::initializer_list<InterruptMode>: e.g.{RISING, FALLING, CHANGE}- an
InterruptModearray. The length of the array needs to be provided inedgeTriggerModesCountargument
edgeTriggerModesCount: the length of the edge trigger modes provided inedgeTriggerModesargument. This argument should only be specified ifedgeTriggerModesis an array of modes and not anstd::initializer_list.
// SYNTAX
System.sleep(uint16_t wakeUpPin, uint16_t edgeTriggerMode, long seconds);
// EXAMPLE USAGE
// Put the device into stop mode with wakeup using RISING edge interrupt on D1 pin or wakeup after 60 seconds whichever comes first
System.sleep(D1,RISING,60);
// The device LED will shut off during sleep
System.sleep(uint16_t wakeUpPin, uint16_t edgeTriggerMode, long seconds) can be used to put the entire device into a stop mode with wakeup on interrupt or wakeup after specified seconds. In this particular mode, the device shuts network subsystem and puts the microcontroller in a stop mode with configurable wakeup pin and edge triggered interrupt or wakeup after the specified seconds. When the specific interrupt arrives or upon reaching the configured timeout, the device awakens from stop mode. The device will not reset before going into stop mode so all the application variables are preserved after waking up from this mode. The voltage regulator is put in low-power mode. This mode achieves the lowest power consumption while retaining the contents of RAM and registers.
Parameters:
wakeUpPin: the wakeup pin number. supports external interrupts on the following pins:- supports external interrupts on the following pins:
- D1, D2, D3, D4, A0, A1, A3, A4, A6, A7
- The same pin limitations as
attachInterruptapply apply
- supports external interrupts on the following pins:
edgeTriggerMode: defines when the interrupt should be triggered. Three constants are predefined as valid values:- CHANGE to trigger the interrupt whenever the pin changes value,
- RISING to trigger when the pin goes from low to high,
- FALLING for when the pin goes from high to low.
seconds: wakeup after the specified number of seconds (0 = no alarm is set).
Since 0.8.0:
// SYNTAX
System.sleep(std::initializer_list<pin_t> wakeUpPins, InterruptMode edgeTriggerMode, long seconds);
System.sleep(const pin_t* wakeUpPins, size_t wakeUpPinsCount, InterruptMode edgeTriggerMode, long seconds);
System.sleep(std::initializer_list<pin_t> wakeUpPins, std::initializer_list<InterruptMode> edgeTriggerModes, long seconds);
System.sleep(const pin_t* wakeUpPins, size_t wakeUpPinsCount, const InterruptMode* edgeTriggerModes, size_t edgeTriggerModesCount, long seconds);
// EXAMPLE USAGE
// Put the device into stop mode with wakeup using RISING edge interrupt on D1 and A4 pins or wakeup after 60 seconds whichever comes first
// Specify the pins in-place (using std::initializer_list)
System.sleep({D1, A4}, RISING, 60);
// The device LED will shut off during sleep
// Put the device into stop mode with wakeup using RISING edge interrupt on D1 and FALLING edge interrupt on A4 pin or wakeup after 60 seconds whichever comes first
// Specify the pins and edge trigger mode in-place (using std::initializer_list)
System.sleep({D1, A4}, {RISING, FALLING}, 60);
// The device LED will shut off during sleep
// Put the device into stop mode with wakeup using RISING edge interrupt on D1 and A4 pins or wakeup after 60 seconds whichever comes first
// Specify the pins in an array
pin_t wakeUpPins[2] = {D1, A4};
System.sleep(wakeUpPins, 2, RISING, 60);
// The device LED will shut off during sleep
// Put the device into stop mode with wakeup using RISING edge interrupt on D1 and FALLING edge interrupt on A4 pin or wakeup after 60 seconds whichever comes first
// Specify the pins and edge trigger modes in an array
pin_t wakeUpPins[2] = {D1, A4};
InterruptMode edgeTriggerModes[2] = {RISING, FALLING};
System.sleep(wakeUpPins, 2, edgeTriggerModes, 2, 60);
// The device LED will shut off during sleep
Multiple wakeup pins may be specified for this mode.
Parameters:
wakeUpPins: a list of wakeup pins:std::initializer_list<pin_t>: e.g.{D1, D2, D3}- a
pin_tarray. The length of the array needs to be provided inwakeUpPinsCountargument - supports external interrupts on the following pins:
- D1, D2, D3, D4, A0, A1, A3, A4, A6, A7
- The same pin limitations as
attachInterruptapply (#attachinterrupt-) apply
wakeUpPinsCount: the length of the list of wakeup pins provided inwakeUpPinsargument. This argument should only be specified ifwakeUpPinsis an array of pins and not anstd::initializer_list.edgeTriggerMode: defines when the interrupt should be triggered. Three constants are predefined as valid values:- CHANGE to trigger the interrupt whenever the pin changes value,
- RISING to trigger when the pin goes from low to high,
- FALLING for when the pin goes from high to low.
edgeTriggerModes: defines when the interrupt should be triggered on a specific pin fromwakeUpPinslist:std::initializer_list<InterruptMode>: e.g.{RISING, FALLING, CHANGE}- an
InterruptModearray. The length of the array needs to be provided inedgeTriggerModesCountargument
edgeTriggerModesCount: the length of the edge trigger modes provided inedgeTriggerModesargument. This argument should only be specified ifedgeTriggerModesis an array of modes and not anstd::initializer_list.seconds: wakeup after the specified number of seconds (0 = no alarm is set).
Since 0.4.5. The state of the Wi-Fi and Cloud connections is restored when the system wakes up from sleep. So if the device was connected to the cloud before sleeping, then the cloud connection is automatically resumed on waking up.
Since 0.5.0 In automatic modes, the sleep() function doesn't return until the cloud connection has been established. This means that application code can use the cloud connection as soon as sleep() returns. In previous versions, it was necessary to call Particle.process() to have the cloud reconnected by the system in the background.
Since 0.8.0 All System.sleep() variants return an instance of SleepResult class that can be queried on the result of System.sleep() execution.
Since 0.8.0 An application may check the information about the latest sleep by using System.sleepResult() or additional accessor methods:
System.wakeUpReason()System.wokenUpByPin()System.wokenUpByRtc()System.wakeUpPin()System.sleepError()
System.sleep(long seconds) does NOT stop the execution of application code (non-blocking call). Application code will continue running while the Wi-Fi module is in this mode.
This mode is not recommended; it is better to manually control the network connection using SYSTEM_MODE(MANUAL) instead.
// SYNTAX
System.sleep(long seconds);
// EXAMPLE USAGE
// Put the Wi-Fi module in standby (low power) for 5 seconds
System.sleep(5);
// The device LED will breathe white during sleep
SleepResult Class
Since 0.8.0:
This class allows to query the information about the latest System.sleep().
reason()
// SYNTAX
SleepResult result = System.sleepResult();
int reason = result.reason();
Get the wake up reason.
// EXAMPLE
SleepResult result = System.sleepResult();
switch (result.reason()) {
case WAKEUP_REASON_NONE: {
Log.info("Core did not wake up from sleep");
break;
}
case WAKEUP_REASON_PIN: {
Log.info("Core was woken up by a pin");
break;
}
case WAKEUP_REASON_RTC: {
Log.info("Core was woken up by the RTC (after a specified number of seconds)");
break;
}
case WAKEUP_REASON_PIN_OR_RTC: {
Log.info("Core was woken up by either a pin or the RTC (after a specified number of seconds)");
break;
}
}
Returns a code describing a reason Core woke up from sleep. The following reasons are defined:
WAKEUP_REASON_NONE: Core did not wake up from sleepWAKEUP_REASON_PIN: Core was woken up by an edge signal to a pinWAKEUP_REASON_RTC: Core was woken up by the RTC (after a specified number of seconds)WAKEUP_REASON_PIN_OR_RTC: Core was woken up either by an edge signal to a pin or by the RTC (after a specified number of seconds)
wokenUpByPin()
// SYNTAX
SleepResult result = System.sleepResult();
bool r = result.wokenUpByPin();
// EXAMPLE
SleepResult result = System.sleepResult();
if (result.wokenUpByPin()) {
Log.info("Core was woken up by a pin");
}
Returns true when Core was woken up by a pin.
wokenUpByRtc()
Returns true when Core was woken up by the RTC (after a specified number of seconds).
// SYNTAX
SleepResult result = System.sleepResult();
bool r = result.wokenUpByRtc();
// EXAMPLE
SleepResult result = System.sleepResult();
if (result.wokenUpByRtc()) {
Log.info("Core was woken up by the RTC (after a specified number of seconds)");
}
rtc()
An alias to wokenUpByRtc().
pin()
// SYNTAX
SleepResult result = System.sleepResult();
pin_t pin = result.pin();
// EXAMPLE
SleepResult result = System.sleepResult();
pin_t pin = result.pin();
if (result.wokenUpByPin()) {
Log.info("Core was woken up by the pin number %d", pin);
}
Returns: the number of the pin that woke the device.
error()
Get the error code of the latest sleep.
// SYNTAX
SleepResult result = System.sleepResult();
int err = result.error();
Returns: SYSTEM_ERROR_NONE (0) when there was no error during latest sleep or a non-zero error code.
sleepResult()
Since 0.8.0:
// SYNTAX
SleepResult result = System.sleepResult();
Retrieves the information about the latest sleep.
Returns: an instance of SleepResult class.
wakeUpReason()
Since 0.8.0:
// SYNTAX
int reason = System.wakeUpReason();
See SleepResult documentation.
wokenUpByPin()
Since 0.8.0:
// SYNTAX
bool result = System.wokenUpByPin();
See SleepResult documentation.
wokenUpByRtc()
Since 0.8.0
// SYNTAX
bool result = System.wokenUpByRtc();
See SleepResult documentation.
wakeUpPin()
Since 0.8.0:
// SYNTAX
pin_t pin = System.wakeUpPin();
See SleepResult documentation.
sleepError()
Since 0.8.0:
// SYNTAX
int err = System.sleepError();
See SleepResult documentation.
reset()
Resets the device, just like hitting the reset button or powering down and back up.
uint32_t lastReset = 0;
void setup() {
lastReset = millis();
}
void loop() {
// Reset after 5 minutes of operation
// ==================================
if (millis() - lastReset > 5*60000UL) {
System.reset();
}
}
disableReset()
This method allows to disable automatic resetting of the device on such events as successful firmware update.
// EXAMPLE
void on_reset_pending() {
// Enable resetting of the device. The system will reset after this method is called
System.enableReset();
}
void setup() {
// Register the event handler
System.on(reset_pending, on_reset_pending);
// Disable resetting of the device
System.disableReset();
}
void loop() {
}
When the system needs to reset the device it first sends the reset_pending event to the application, and, if automatic resetting is disabled, waits until the application has called enableReset() to finally perform the reset. This allows the application to perform any necessary cleanup before resetting the device.
enableReset()
Allows the system to reset the device when necessary.
resetPending()
Returns true if the system needs to reset the device.
Reset Reason
Since 0.6.0:
The system can track the hardware and software resets of the device.
// EXAMPLE
// Restart in safe mode if the device previously reset due to a PANIC (SOS code)
STARTUP(System.enableFeature(FEATURE_RESET_INFO));
void setup() {
if (System.resetReason() == RESET_REASON_PANIC) {
System.enterSafeMode();
}
}
You can also pass in your own data as part of an application-initiated reset:
// EXAMPLE
STARTUP(System.enableFeature(FEATURE_RESET_INFO));
void setup() {
// Reset the device 3 times in a row
if (System.resetReason() == RESET_REASON_USER) {
uint32_t data = System.resetReasonData();
if (data < 3) {
System.reset(data + 1);
}
} else {
// This will set the reset reason to RESET_REASON_USER
System.reset(1);
}
}
Note: This functionality requires FEATURE_RESET_INFO flag to be enabled in order to work.
resetReason()
Returns a code describing reason of the last device reset. The following codes are defined:
RESET_REASON_PIN_RESET: Reset button or reset pinRESET_REASON_POWER_MANAGEMENT: Low-power management resetRESET_REASON_POWER_DOWN: Power-down resetRESET_REASON_POWER_BROWNOUT: Brownout resetRESET_REASON_WATCHDOG: Hardware watchdog resetRESET_REASON_UPDATE: Successful firmware updateRESET_REASON_UPDATE_TIMEOUT: Firmware update timeoutRESET_REASON_FACTORY_RESET: Factory reset requestedRESET_REASON_SAFE_MODE: Safe mode requestedRESET_REASON_DFU_MODE: DFU mode requestedRESET_REASON_PANIC: System panicRESET_REASON_USER: User-requested resetRESET_REASON_UNKNOWN: Unspecified reset reasonRESET_REASON_NONE: Information is not available
resetReasonData()
Returns a user-defined value that has been previously specified for the System.reset() call.
reset(uint32_t data)
This overloaded method accepts an arbitrary 32-bit value, stores it to the backup register and resets the device. The value can be retrieved via resetReasonData() method after the device has restarted.
System Config [ set ]
System configuration can be modified with the System.set() call.
// SYNTAX
System.set(SYSTEM_CONFIG_..., "value");
System.set(SYSTEM_CONFIG_..., buffer, length);
// EXAMPLE
// Change the SSID prefix in listening mode
System.set(SYSTEM_CONFIG_SOFTAP_PREFIX, "Gizmo");
// Change the SSID suffix in listening mode
System.set(SYSTEM_CONFIG_SOFTAP_SUFFIX, "ABC");
The following configuration values can be changed:
SYSTEM_CONFIG_DEVICE_KEY: the device private key. Max length ofDCT_DEVICE_PRIVATE_KEY_SIZE(1216).SYSTEM_CONFIG_SERVER_KEY: the server public key. Max length ofSYSTEM_CONFIG_SERVER_KEY(768).SYSTEM_CONFIG_SOFTAP_PREFIX: the prefix of the SSID broadcast in listening mode. Defaults to Photon. Max length ofDCT_SSID_PREFIX_SIZE-1(25).SYSTEM_CONFIG_SOFTAP_SUFFIX: the suffix of the SSID broadcast in listening mode. Defaults to a random 4 character alphanumerical string. Max length ofDCT_DEVICE_ID_SIZE(6).
System Flags [ disable ]
The system allows to alter certain aspects of its default behavior via the system flags. The following system flags are defined:
SYSTEM_FLAG_PUBLISH_RESET_INFO: enables publishing of the last reset reason to the cloud (enabled by default)SYSTEM_FLAG_RESET_NETWORK_ON_CLOUD_ERRORS: enables resetting of the network connection on cloud connection errors (enabled by default)
// EXAMPLE
// Do not publish last reset reason
System.disable(SYSTEM_FLAG_PUBLISH_RESET_INFO);
// Do not reset network connection on cloud errors
System.disable(SYSTEM_FLAG_RESET_NETWORK_ON_CLOUD_ERRORS);
System.enable(system_flag_t flag)
Enables the system flag.
System.disable(system_flag_t flag)
Disables the system flag.
System.enabled(system_flag_t flag)
Returns true if the system flag is enabled.
System Uptime
Since 0.8.0
System.millis()
Returns the number of milliseconds passed since the device was last reset. This function is similar to the global millis() function but returns a 64-bit value.
System.uptime()
Returns the number of seconds passed since the device was last reset.
System Interrupts
This is advanced, low-level functionality, intended primarily for library writers.
System interrupts happen as a result of peripheral events within the system. These system interrupts are supported on all platforms:
| Identifier | Description |
|---|---|
| SysInterrupt_SysTick | System Tick (1ms) handler |
| SysInterrupt_TIM3 | Timer 3 interrupt |
| SysInterrupt_TIM4 | Timer 4 interrupt |
NB: SysInterrupt_TIM3 and SysInterrupt_TIM4 are used by the system to provide tone() and PWM output.
See the full list of interrupts in the firmware repository.
When implementing an interrupt handler, the handler must execute quickly, or the system operation may be impaired. Any variables shared between the interrupt handler and the main program should be declared as
volatileto ensure that changes in the interrupt handler are visible in the main loop and vice versa.
attachSystemInterrupt()
Registers a function that is called when a system interrupt happens.
void handle_timer5()
{
// called when timer 5 fires an interrupt
}
void setup()
{
attachSystemInterrupt(SysInterrupt_TIM5, handle_timer5);
}
detachSystemInterrupt()
Removes all handlers for the given interrupt, or for all interrupts.
detachSystemInterrupt(SysInterrupt_TIM5);
// remove all handlers for the SysInterrupt_TIM5 interrupt
attachInteruptDirect()
Since 0.8.0
Registers a function that is called when an interrupt happens. This function installs the interrupt handler function directly into the interrupt vector table and will override system handlers for the specified interrupt.
NOTE: Most likely use-cases:
- if lower latency is required: handlers registered with
attachInterrupt()orattachSystemInterrupt()may be called with some delay due to handler chaining or some additional processing done by the system - system interrupt handler needs to be overriden
- interrupt unsupported by
attachSystemInterrupt()needs to be handled
// SYNTAX
attachInterruptDirect(irqn, handler);
// EXAMPLE
void handle_timer5()
{
// called when timer 5 fires an interrupt
}
void setup()
{
attachSystemInterrupt(TIM5_IRQn, handle_timer5);
}
Parameters:
irqn: platform-specific IRQ numberhandler: interrupt handler function pointer
detachInterruptDirect()
Since 0.8.0
Unregisters application-provided interrupt handlers for the given interrupt and restores the default one.
// SYNTAX
detachInterruptDirect(irqn);
// EXAMPLE
detachInterruptDirect(TIM5_IRQn);
Parameters:
irqn: platform-specific IRQ number
OTA Updates
This section describes the Device OS APIs that control firmware updates for Particle devices.
Many of the behaviors described below require Device OS version 1.2.0 or higher.
Controlling OTA Availability
This feature allows the application developer to control when the device is available for firmware updates. This affects both over-the-air (OTA) and over-the-wire (OTW) updates. OTA availability also affects both single device OTA updates (flashing a single device) and fleet-wide OTA updates (deploying a firmware update to many devices in a Product).
Firmware updates are enabled by default when the device starts up after a deep sleep or system reset. Applications may choose to disable firmware updates during critical periods by calling the System.disableUpdates() function and then enabling them again with System.enableUpdates().
When the firmware update is the result of an Intelligent
Firmware Release,
the update is delivered immediately after System.enableUpdates() is called.
Standard Firmware Releases are delivered the next time the device connects to the cloud or when the current session expires or is revoked.
Note: Calling System.disableUpdates() and System.enableUpdates()
for devices running Device OS version 1.2.0 or later will result in a
message sent to the Device Cloud. This will result in a small amount of
additional data usage each time they are called.
System.disableUpdates()
// System.disableUpdates() example where updates are disabled
// when the device is busy.
int unlockScooter(String arg) {
// scooter is busy, so disable updates
System.disableUpdates();
// ... do the unlock step
// ...
return 0;
}
int parkScooter(String arg) {
// scooter is no longer busy, so enable updates
System.enableUpdates();
// ... do the park step
// ...
return 0;
}
void setup() {
Particle.function("unlockScooter", unlockScooter);
Particle.function("parkScooter", parkScooter);
}
Disables OTA updates on this device. An attempt to begin an OTA update from the cloud will be prevented by the device. When updates are disabled, firmware updates are not delivered to the device unless forced.
Since 1.2.0
Device OS version 1.2.0 introduced enhanced support of
System.disableUpdates() and System.enableUpdates(). When running Device OS version 1.2.0
or higher, the device will notify the Device Cloud of its OTA
availability, which is visible in the
Console
as well as queryable via the REST
API. The cloud
will use this information to deliver Intelligent Firmware
Releases.
In addition, a cloud-side system event will be emitted when updates are disabled,
particle/device/updates/enabled with a data value of false. This event is sent
only if updates were not already disabled.
| Version | Self service customers | Standard Product | Enterprise Product |
|---|---|---|---|
| Device OS < 1.2.0 | Limited Support | Limited Support | Limited Support |
| Device OS >= 1.2.0 | Full support | Full Support | Full Support |
Enterprise Feature
When updates are disabled, an attempt to send a firmware update to a
device that has called System.disableUpdates() will result in the
System.updatesPending() function returning true.
System.enableUpdates()
// System.enableUpdates() example where updates are disabled on startup
SYSTEM_MODE(SEMI_AUTOMATIC);
void setup() {
System.disableUpdates(); // updates are disabled most of the time
Particle.connect(); // now connect to the cloud
}
bool isSafeToUpdate() {
// determine if the device is in a good state to receive updates.
// In a real application, this function would inspect the device state
// to determine if it is busy or not.
return true;
}
void loop() {
if (isSafeToUpdate()) {
// Calling System.enableUpdates() when updates are already enabled
// is safe, and doesn't use any data.
System.enableUpdates();
}
else {
// Calling System.disableUpdates() when updates are already disabled
// is safe, and doesn't use any data.
System.disableUpdates();
}
}
Enables firmware updates on this device. Updates are enabled by default when the device starts.
Calling this function marks the device as available for updates. When updates are enabled, updates triggered from the Device Cloud are delivered to the device.
In addition, a cloud-side system event will be emitted when updates are
enabled,
particle/device/updates/enabled with a data value of true. This event is sent
only if updates were not already enabled.
Since 1.2.0
Device OS version 1.2.0 introduced enhanced support of
System.disableUpdates() and System.enableUpdates(). If running 1.2.0
or higher, the device will notify the Device Cloud of its OTA update
availability, which is visible in the
Console
as well as queryable via the REST
API. The cloud
will use this information to deliver Intelligent Firmware
Releases.
| Version | Self service customers | Standard Product | Enterprise Product |
|---|---|---|---|
| Device OS < 1.2.0 | Limited Support | Limited Support | Limited Support |
| Device OS >= 1.2.0 | Full support | Full Support | Full Support |
System.updatesEnabled()
// System.updatesEnabled() example
bool isSafeToUpdate() {
return true;
}
void loop() {
if (!isSafeToUpdate() && System.updatesEnabled()) {
Particle.publish("error", "Updates are enabled but the device is not safe to update.");
}
}
Determine if firmware updates are presently enabled or disabled for this device.
Returns true on startup, and after System.enableUpdates() has been called. Returns false after System.disableUpdates() has been called.
| Version | Self service customers | Standard Product | Enterprise Product |
|---|---|---|---|
| Device OS < 1.2.0 | Supported | Supported | Supported |
| Device OS >= 1.2.0 | Supported | Supported | Supported |
System.updatesPending()
// System.updatesPending() example
SYSETM_MODE(SEMI_AUTOMATIC);
void setup() {
// When disabling updates by default, you must use either system
// thread enabled or system mode SEMI_AUTOMATIC or MANUAL
System.disableUpdates();
// After setting the disable updates flag, it's safe to connect to
// the cloud.
Particle.connect();
}
bool isSafeToUpdate() {
// ...
return true;
}
void loop() {
// NB: System.updatesPending() should only be used in a Product on the Enterprise Plan
if (isSafeToUpdate() && System.updatesPending()) {
System.enableUpdates();
// Wait 2 minutes for the update to complete and the device
// to restart. If the device doesn't automatically reset, manually
// reset just in case.
unsigned long start = millis();
while (millis() - start < (120 * 1000)) {
Particle.process();
}
// You normally won't reach this point as the device will
// restart automatically to apply the update.
System.reset();
}
else {
// ... do some critical activity that shouldn't be interrupted
}
}
Enterprise Feature, Since 1.2.0
System.updatesPending() indicates if there is a firmware update pending that was not delivered to the device while updates were disabled. When an update is pending, the firmware_update_pending system event is emitted and the System.updatesPending() function returns true.
When new product firmware is released with the intelligent option
enabled, the firmware is delivered immediately after release for devices
that have firmware updates are enabled.
For devices with updates disabled, firmware
updates are deferred by the device. The device is notified of the
pending update at the time of deferral. The system event
firmware_update_pending is emmitted and the System.updatesPending()
function returns true. The update is delivered when the application
later re-enables updates by calling System.enableUpdates(), or when
updates are force enabled from the cloud, or when the device is restarted.
In addition, a cloud-side system event will be emitted when a pending
OTA update is queued,
particle/device/updates/pending with a data value of true.
| Version | Self service customers | Standard Product | Enterprise Product |
|---|---|---|---|
| Device OS < 1.2.0 | N/A | N/A | N/A |
| Device OS >= 1.2.0 | N/A | N/A | Supported |
System.updatesForced()
// System.updatesForced() example
void loop() {
if (System.updatesForced()) {
// don't perform critical functions while updates are forced
}
else {
// perform critical functions
}
}
Since 1.2.0
When the device is not available for updates, the pending firmware
update is not normally delivered to the device. Updates can be forced in
the cloud either via the Console or the REST API to override the local
setting on the device. This means that firmware updates are delivered
even when System.disableUpdates() has been called by the device application.
When updates are forced in the cloud, the System.updatesForced() function returns true.
In addition, a cloud-side system event will be emitted when OTA updates
are force enabled from the cloud, particle/device/updates/forced with
a data value of true.
Updates may be forced for a particular device. When this happens, updates are delivered even when System.disableUpdates() has been called.
When updates are forced in the cloud, this function returns true.
Forced updates may be used with Product firmware releases or single device OTA updates.
| Version | Self service customers | Standard Product | Enterprise Product | ||
|---|---|---|---|---|---|
| Device OS < 1.2.0 | N/A | N/A | N/A | ||
| Device OS >= 1.2.0 | Supported | Supported | Supported |
Checking for Features
User firmware is designed to run transparently regardless of what type of device it is run on. However, sometimes you will need to have code that varies depending on the capabilities of the device.
It's always best to check for a capability, rather than a specific device. For example, checking for cellular instead of checking for the Electron allows the code to work properly on the Boron without modification.
Some commonly used features include:
- Wiring_Cellular
- Wiring_Ethernet
- Wiring_IPv6
- Wiring_Keyboard
- Wiring_Mesh
- Wiring_Mouse
- Wiring_Serial2
- Wiring_Serial3
- Wiring_Serial4
- Wiring_Serial5
- Wiring_SPI1
- Wiring_SPI2
- Wiring_USBSerial1
- Wiring_WiFi
- Wiring_Wire1
- Wiring_Wire3
- Wiring_WpaEnterprise
For example, you might have code like this to declare two different methods, depending on your network type:
#if Wiring_WiFi
const char *wifiScan();
#endif
#if Wiring_Cellular
const char *cellularScan();
#endif
The official list can be found in the source.
Checking Device OS Version
The define value SYSTEM_VERSION specifies the system version.
For example, if you had code that you only wanted to include in 0.7.0 and later, you'd check for:
#if SYSTEM_VERSION >= SYSTEM_VERSION_v070
// Code to include only for 0.7.0 and later
#endif
Checking Platform ID
It's always best to check for features, but it is possible to check for a specific platform:
#if PLATFORM_ID == PLATFORM_BORON
// Boron-specific code goes here
#endif
You can find a complete list of platforms in the source.
Arduino Compatibility
All versions of Particle firmware to date have supported parts of the Arduino API, such as digitalRead, Serial and String.
From 0.6.2 onwards, the firmware API will continue to provide increasing levels of support for new Arduino APIs to make porting applications and libraries as straightforward as possible.
However, to prevent breaking existing applications and libraries, these new Arduino APIs have to be specifically enabled in order to be available for use in your application or library.
Arduino APIs that need to be enabled explicitly are marked with "requires Arduino.h" in this reference documentation.
Enabling Extended Arduino SDK Compatibility
The extended Arduino APIs that are added from 0.6.2 onwards are not immediately available but have to be enabled by declaring Arduino support in your app or library.
This is done by adding #include "Arduino.h" to each source file that requires an extended Arduino API.
Arduino APIs added by Firmware Version
Once Arduino.h has been added to a source file, additional Arduino APIs are made available.
The APIs added are determined by the targeted firmware version. In addition to defining the new APIs,
the ARDUINO symbol is set to a value that describes the supported SDK version. (e.g. 10800 for 1.8.0)
The table below lists the Arduino APIs added for each firmware version
and the value of the ARDUINO symbol.
| API name | description | ARDUINO version | Particle version |
|---|---|---|---|
| SPISettings | 10800 | 0.6.2 | |
| __FastStringHelper | 10800 | 0.6.2 | |
| Wire.setClock | synonym for Wire.setSpeed |
10800 | 0.6.2 |
| SPI.usingInterrupt | NB: this function is included to allow libraries to compile, but is implemented as a empty function. | 10800 | 0.6.2 |
| LED_BUILTIN | defines the pin that corresponds to the built-in LED | 10800 | 0.6.2 |
Adding Arduino Symbols to Applications and Libraries
The Arduino SDK has a release cycle that is independent from Particle firmware. When a new Arduino SDK is released, the new APIs introduced will not be available in the Particle firmware until the next Particle firmware release at the earliest.
However, this does not have to stop applications and library authors from using these new Arduino APIs. In some cases, it's possible to duplicate the sources in your application or library. However, it is necessary to be sure these APIs defined in your code are only conditionally included, based on the version of the Arduino SDK provided by Particle firmware used to compile the library or application.
For example, let's say that in Arduino SDK 1.9.5, a new function was added, engageHyperdrive().
You read the description and determine this is perfect for your application or library and that you want to use it.
In your application sources, or library headers you would add the definition like this:
// Example of adding an Arduino SDK API in a later Arduino SDK than presently supported
#include "Arduino.h" // this declares that our app/library wants the extended Arduino support
#if ARDUINO < 10905 // the API is added in SDK version 1.9.5 so we don't re-define it when the SDK already has it
// now to define the new API
bool engageHyperdrive() {
return false; // womp womp
}
#endif
In your source code, you use the function normally. When compiling against a version of firmware that supports
an older Arduino SDK, then your own version of the API will be used. Later, when engageHyperdrive() is added to
Particle firmware, our version will be used. This happens when the ARDUINO version is the same or greater than
the the corresponding version of the Arduino SDK, which indicates the API is provided by Particle firmware.
By using this technique, you can use new APIs and functions right away, while also allowing them to be later defined in the Arduino support provided by Particle, and crucially, without clashes.
Note: for this to work, the version check has to be correct and must use the value that the Arduino SDK sets the
ARDUINO symbol to when the new Arduino API is first introduced in the Arduino SDK.
String Class
The String class allows you to use and manipulate strings of text in more complex ways than character arrays do. You can concatenate Strings, append to them, search for and replace substrings, and more. It takes more memory than a simple character array, but it is also more useful.
For reference, character arrays are referred to as strings with a small s, and instances of the String class are referred to as Strings with a capital S. Note that constant strings, specified in "double quotes" are treated as char arrays, not instances of the String class.
String()
Constructs an instance of the String class. There are multiple versions that construct Strings from different data types (i.e. format them as sequences of characters), including:
- a constant string of characters, in double quotes (i.e. a char array)
- a single constant character, in single quotes
- another instance of the String object
- a constant integer or long integer
- a constant integer or long integer, using a specified base
- an integer or long integer variable
- an integer or long integer variable, using a specified base
- a float variable, showing a specific number of decimal places
// SYNTAX
String(val)
String(val, base)
// EXAMPLES
String stringOne = "Hello String"; // using a constant String
String stringOne = String('a'); // converting a constant char into a String
String stringTwo = String("This is a string"); // converting a constant string into a String object
String stringOne = String(stringTwo + " with more"); // concatenating two strings
String stringOne = String(13); // using a constant integer
String stringOne = String(analogRead(0), DEC); // using an int and a base
String stringOne = String(45, HEX); // using an int and a base (hexadecimal)
String stringOne = String(255, BIN); // using an int and a base (binary)
String stringOne = String(millis(), DEC); // using a long and a base
String stringOne = String(34.5432, 2); // using a float showing only 2 decimal places shows 34.54
Constructing a String from a number results in a string that contains the ASCII representation of that number. The default is base ten, so
String thisString = String(13)
gives you the String "13". You can use other bases, however. For example,
String thisString = String(13, HEX)
gives you the String "D", which is the hexadecimal representation of the decimal value 13. Or if you prefer binary,
String thisString = String(13, BIN)
gives you the String "1101", which is the binary representation of 13.
Parameters:
- val: a variable to format as a String - string, char, byte, int, long, unsigned int, unsigned long
- base (optional) - the base in which to format an integral value
Returns: an instance of the String class
charAt()
Access a particular character of the String.
// SYNTAX
string.charAt(n)
Parameters:
string: a variable of type Stringn: the character to access
Returns: the n'th character of the String
compareTo()
Compares two Strings, testing whether one comes before or after the other, or whether they're equal. The strings are compared character by character, using the ASCII values of the characters. That means, for example, that 'a' comes before 'b' but after 'A'. Numbers come before letters.
// SYNTAX
string.compareTo(string2)
Parameters:
- string: a variable of type String
- string2: another variable of type String
Returns:
- a negative number: if string comes before string2
- 0: if string equals string2
- a positive number: if string comes after string2
concat()
Combines, or concatenates two strings into one string. The second string is appended to the first, and the result is placed in the original string.
// SYNTAX
string.concat(string2)
Parameters:
- string, string2: variables of type String
Returns: None
endsWith()
Tests whether or not a String ends with the characters of another String.
// SYNTAX
string.endsWith(string2)
Parameters:
- string: a variable of type String
- string2: another variable of type String
Returns:
- true: if string ends with the characters of string2
- false: otherwise
equals()
Compares two strings for equality. The comparison is case-sensitive, meaning the String "hello" is not equal to the String "HELLO".
// SYNTAX
string.equals(string2)
Parameters:
- string, string2: variables of type String
Returns:
- true: if string equals string2
- false: otherwise
equalsIgnoreCase()
Compares two strings for equality. The comparison is not case-sensitive, meaning the String("hello") is equal to the String("HELLO").
// SYNTAX
string.equalsIgnoreCase(string2)
Parameters:
- string, string2: variables of type String
Returns:
- true: if string equals string2 (ignoring case)
- false: otherwise
format()
Since 0.4.6:
Provides printf-style formatting for strings.
Particle.publish("startup", String::format("frobnicator started at %s", Time.timeStr().c_str()));
getBytes()
Copies the string's characters to the supplied buffer.
// SYNTAX
string.getBytes(buf, len)
Parameters:
- string: a variable of type String
- buf: the buffer to copy the characters into (byte [])
- len: the size of the buffer (unsigned int)
Returns: None
c_str()
Gets a pointer (const char *) to the internal c-string representation of the string. You can use this to pass to a function that require a c-string. This string cannot be modified.
The object also supports operator const char * so for things that specifically take a c-string (like Particle.publish) the conversion is automatic.
You would normally use c_str() if you need to pass the string to something like Serial.printlnf or Log.info where the conversion is ambiguous:
Serial.printlnf("the string is: %s", string.c_str());
This is also helpful if you want to print out an IP address:
Serial.printlnf("ip addr: %s", WiFi.localIP().toString().c_str());
indexOf()
Locates a character or String within another String. By default, searches from the beginning of the String, but can also start from a given index, allowing for the locating of all instances of the character or String.
// SYNTAX
string.indexOf(val)
string.indexOf(val, from)
Parameters:
- string: a variable of type String
- val: the value to search for - char or String
- from: the index to start the search from
Returns: The index of val within the String, or -1 if not found.
lastIndexOf()
Locates a character or String within another String. By default, searches from the end of the String, but can also work backwards from a given index, allowing for the locating of all instances of the character or String.
// SYNTAX
string.lastIndexOf(val)
string.lastIndexOf(val, from)
Parameters:
- string: a variable of type String
- val: the value to search for - char or String
- from: the index to work backwards from
Returns: The index of val within the String, or -1 if not found.
length()
Returns the length of the String, in characters. (Note that this doesn't include a trailing null character.)
// SYNTAX
string.length()
Parameters:
- string: a variable of type String
Returns: The length of the String in characters.
remove()
The String remove() function modifies a string, in place, removing chars from the provided index to the end of the string or from the provided index to index plus count.
// SYNTAX
string.remove(index)
string.remove(index,count)
Parameters:
- string: the string which will be modified - a variable of type String
- index: a variable of type unsigned int
- count: a variable of type unsigned int
Returns: None
replace()
The String replace() function allows you to replace all instances of a given character with another character. You can also use replace to replace substrings of a string with a different substring.
// SYNTAX
string.replace(substring1, substring2)
Parameters:
- string: the string which will be modified - a variable of type String
- substring1: searched for - another variable of type String (single or multi-character), char or const char (single character only)
- substring2: replaced with - another variable of type String (single or multi-character), char or const char (single character only)
Returns: None
reserve()
The String reserve() function allows you to allocate a buffer in memory for manipulating strings.
// SYNTAX
string.reserve(size)
Parameters:
- size: unsigned int declaring the number of bytes in memory to save for string manipulation
Returns: None
//EXAMPLE
String myString;
void setup() {
// initialize serial and wait for port to open:
Serial.begin(9600);
while (!Serial) {
; // wait for serial port to connect. Needed for Leonardo only
}
myString.reserve(26);
myString = "i=";
myString += "1234";
myString += ", is that ok?";
// print the String:
Serial.println(myString);
}
void loop() {
// nothing to do here
}
setCharAt()
Sets a character of the String. Has no effect on indices outside the existing length of the String.
// SYNTAX
string.setCharAt(index, c)
Parameters:
- string: a variable of type String
- index: the index to set the character at
- c: the character to store to the given location
Returns: None
startsWith()
Tests whether or not a String starts with the characters of another String.
// SYNTAX
string.startsWith(string2)
Parameters:
- string, string2: variable2 of type String
Returns:
- true: if string starts with the characters of string2
- false: otherwise
substring()
Get a substring of a String. The starting index is inclusive (the corresponding character is included in the substring), but the optional ending index is exclusive (the corresponding character is not included in the substring). If the ending index is omitted, the substring continues to the end of the String.
// SYNTAX
string.substring(from)
string.substring(from, to)
Parameters:
- string: a variable of type String
- from: the index to start the substring at
- to (optional): the index to end the substring before
Returns: the substring
toCharArray()
Copies the string's characters to the supplied buffer.
// SYNTAX
string.toCharArray(buf, len)
Parameters:
- string: a variable of type String
- buf: the buffer to copy the characters into (char [])
- len: the size of the buffer (unsigned int)
Returns: None
toFloat()
Converts a valid String to a float. The input string should start with a digit. If the string contains non-digit characters, the function will stop performing the conversion. For example, the strings "123.45", "123", and "123fish" are converted to 123.45, 123.00, and 123.00 respectively. Note that "123.456" is approximated with 123.46. Note too that floats have only 6-7 decimal digits of precision and that longer strings might be truncated.
// SYNTAX
string.toFloat()
Parameters:
- string: a variable of type String
Returns: float (If no valid conversion could be performed because the string doesn't start with a digit, a zero is returned.)
toInt()
Converts a valid String to an integer. The input string should start with an integral number. If the string contains non-integral numbers, the function will stop performing the conversion.
// SYNTAX
string.toInt()
Parameters:
- string: a variable of type String
Returns: long (If no valid conversion could be performed because the string doesn't start with a integral number, a zero is returned.)
toLowerCase()
Get a lower-case version of a String. toLowerCase() modifies the string in place.
// SYNTAX
string.toLowerCase()
Parameters:
- string: a variable of type String
Returns: None
toUpperCase()
Get an upper-case version of a String. toUpperCase() modifies the string in place.
// SYNTAX
string.toUpperCase()
Parameters:
- string: a variable of type String
Returns: None
trim()
Get a version of the String with any leading and trailing whitespace removed.
// SYNTAX
string.trim()
Parameters:
- string: a variable of type String
Returns: None
Stream Class
Stream is the base class for character and binary based streams. It is not called directly, but invoked whenever you use a function that relies on it. The Particle Stream Class is based on the Arduino Stream Class.
Stream defines the reading functions in Particle. When using any core functionality that uses a read() or similar method, you can safely assume it calls on the Stream class. For functions like print(), Stream inherits from the Print class.
Some of the Particle classes that rely on Stream include :
Serial
Wire
TCPClient
UDP
setTimeout()
setTimeout() sets the maximum milliseconds to wait for stream data, it defaults to 1000 milliseconds.
// SYNTAX
stream.setTimeout(time);
Parameters:
- stream: an instance of a class that inherits from Stream
- time: timeout duration in milliseconds (unsigned int)
Returns: None
find()
find() reads data from the stream until the target string of given length is found.
// SYNTAX
stream.find(target); // reads data from the stream until the target string is found
stream.find(target, length); // reads data from the stream until the target string of given length is found
Parameters:
- stream : an instance of a class that inherits from Stream
- target : pointer to the string to search for (char *)
- length : length of target string to search for (size_t)
Returns: returns true if target string is found, false if timed out
findUntil()
findUntil() reads data from the stream until the target string or terminator string is found.
// SYNTAX
stream.findUntil(target, terminal); // reads data from the stream until the target string or terminator is found
stream.findUntil(target, terminal, length); // reads data from the stream until the target string of given length or terminator is found
Parameters:
- stream : an instance of a class that inherits from Stream
- target : pointer to the string to search (char *)
- terminal : pointer to the terminal string to search for (char *)
- length : length of target string to search for (size_t)
Returns: returns true if target string or terminator string is found, false if timed out
readBytes()
readBytes() read characters from a stream into a buffer. The function terminates if the determined length has been read, or it times out.
// SYNTAX
stream.readBytes(buffer, length);
Parameters:
- stream : an instance of a class that inherits from Stream
- buffer : pointer to the buffer to store the bytes in (char *)
- length : the number of bytes to read (size_t)
Returns: returns the number of characters placed in the buffer (0 means no valid data found)
readBytesUntil()
readBytesUntil() reads characters from a stream into a buffer. The function terminates if the terminator character is detected, the determined length has been read, or it times out.
// SYNTAX
stream.readBytesUntil(terminator, buffer, length);
Parameters:
- stream : an instance of a class that inherits from Stream
- terminator : the character to search for (char)
- buffer : pointer to the buffer to store the bytes in (char *)
- length : the number of bytes to read (size_t)
Returns: returns the number of characters placed in the buffer (0 means no valid data found)
readString()
readString() reads characters from a stream into a string. The function terminates if it times out.
// SYNTAX
stream.readString();
Parameters:
- stream : an instance of a class that inherits from Stream
Returns: the entire string read from stream (String)
readStringUntil()
readStringUntil() reads characters from a stream into a string until a terminator character is detected. The function terminates if it times out.
// SYNTAX
stream.readStringUntil(terminator);
Parameters:
- stream : an instance of a class that inherits from Stream
- terminator : the character to search for (char)
Returns: the entire string read from stream, until the terminator character is detected
parseInt()
parseInt() returns the first valid (long) integer value from the current position under the following conditions:
- Initial characters that are not digits or a minus sign, are skipped;
- Parsing stops when no characters have been read for a configurable time-out value, or a non-digit is read;
// SYNTAX
stream.parseInt();
stream.parseInt(skipChar); // allows format characters (typically commas) in values to be ignored
Parameters:
- stream : an instance of a class that inherits from Stream
- skipChar : the character to ignore while parsing (char).
Returns: parsed int value (long). If no valid digits were read when the time-out occurs, 0 is returned.
parseFloat()
parseFloat() as parseInt() but returns the first valid floating point value from the current position.
// SYNTAX
stream.parsetFloat();
stream.parsetFloat(skipChar); // allows format characters (typically commas) in values to be ignored
Parameters:
- stream : an instance of a class that inherits from Stream
- skipChar : the character to ignore while parsing (char).
Returns: parsed float value (float). If no valid digits were read when the time-out occurs, 0 is returned.
Logging
Since 0.6.0:
This library provides various classes for logging.
// EXAMPLE
// Use primary serial over USB interface for logging output
SerialLogHandler logHandler;
void setup() {
// Log some messages with different logging levels
Log.info("This is info message");
Log.warn("This is warning message");
Log.error("This is error message");
// Format text message
Log.info("System version: %s", (const char*)System.version());
}
void loop() {
}
At higher level, the logging framework consists of two parts represented by their respective classes: loggers and log handlers. Most of the logging operations, such as generating a log message, are done through logger instances, while log handlers act as sinks for the overall logging output generated by the system and application modules.
The library provides default logger instance named Log, which can be used for all typical logging operations. Note that applications still need to instantiate at least one log handler in order to enable logging, otherwise most of the logging operations will have no effect. In the provided example, the application uses SerialLogHandler which sends the logging output to the primary serial over USB interface.
Consider the following logging output as generated by the example application:
0000000047 [app] INFO: This is info message0000000050 [app] WARN: This is warning message0000000100 [app] ERROR: This is error message0000000149 [app] INFO: System version: 0.6.0
Here, each line starts with a timestamp (a number of milliseconds since the system startup), app is a default logging category, and INFO, WARN and ERROR are logging levels of the respective log messages.
Logging Levels
Every log message is always associated with some logging level that describes severity of the message. Supported logging levels are defined by the LogLevel enum (from lowest to highest level):
LOG_LEVEL_ALL: special value that can be used to enable logging of all messagesLOG_LEVEL_TRACE: verbose output for debugging purposesLOG_LEVEL_INFO: regular information messagesLOG_LEVEL_WARN: warnings and non-critical errorsLOG_LEVEL_ERROR: error messagesLOG_LEVEL_NONE: special value that can be used to disable logging of any messages
// EXAMPLE - message logging
Log.trace("This is trace message");
Log.info("This is info message");
Log.warn("This is warning message");
Log.error("This is error message");
// Specify logging level directly
Log(LOG_LEVEL_INFO, "This is info message");
// Log message with the default logging level (LOG_LEVEL_INFO)
Log("This is info message");
For convenience, Logger class (and its default Log instance) provides separate logging method for each of the defined logging levels.
Log handlers can be configured to filter out messages that are below a certain logging level. By default, any messages below the LOG_LEVEL_INFO level are filtered out.
// EXAMPLE - basic filtering
// Log handler processing only warning and error messages
SerialLogHandler logHandler(LOG_LEVEL_WARN);
void setup() {
Log.trace("This is trace message"); // Ignored by the handler
Log.info("This is info message"); // Ignored by the handler
Log.warn("This is warning message");
Log.error("This is error message");
}
void loop() {
}
In the provided example, the trace and info messages will be filtered out according to the log handler settings, which prevent log messages below the LOG_LEVEL_WARN level from being logged:
0000000050 [app] WARN: This is warning message0000000100 [app] ERROR: This is error message
Logging Categories
In addition to logging level, log messages can also be associated with some category name. Categories allow to organize system and application modules into namespaces, and are used for more selective filtering of the logging output.
One of the typical use cases for category filtering is suppressing of non-critical system messages while preserving application messages at lower logging levels. In the provided example, a message that is not associated with the app category will be logged only if its logging level is at or above the warning level (LOG_LEVEL_WARN).
// EXAMPLE - filtering out system messages
SerialLogHandler logHandler(LOG_LEVEL_WARN, { // Logging level for non-application messages
{ "app", LOG_LEVEL_ALL } // Logging level for application messages
});
Default Log logger uses app category for all messages generated via its logging methods. In order to log messages with different category name it is necessary to instantiate another logger, passing category name to its constructor.
// EXAMPLE - using custom loggers
void connect() {
Logger log("app.network");
log.trace("Connecting to server"); // Using local logger
}
SerialLogHandler logHandler(LOG_LEVEL_WARN, { // Logging level for non-application messages
{ "app", LOG_LEVEL_INFO }, // Default logging level for all application messages
{ "app.network", LOG_LEVEL_TRACE } // Logging level for networking messages
});
void setup() {
Log.info("System started"); // Using default logger instance
Log.trace("My device ID: %s", (const char*)System.deviceID());
connect();
}
void loop() {
}
Category names are written in all lower case and may contain arbitrary number of subcategories separated by period character. In order to not interfere with the system logging, it is recommended to always add app prefix to all application-specific category names.
The example application generates the following logging output:
0000000044 [app] INFO: System started0000000044 [app.network] TRACE: Connecting to server
Note that the trace message containing device ID has been filtered out according to the log handler settings, which prevent log messages with the app category from being logged if their logging level is below the LOG_LEVEL_INFO level.
Category filters are specified using initializer list syntax with each element of the list containing a filter string and a minimum logging level required for messages with matching category to be logged. Note that filter string matches not only exact category name but any of its subcategory names as well, for example:
a– matchesa,a.b,a.b.cbut notaaaoraaa.bb.c– matchesb.c,b.c.dbut nota.b.corb.ccc
If more than one filter matches a given category name, the most specific filter is used.
Additional Attributes
As described in previous sections, certain log message attributes, such as a timestamp, are automatically added to all generated messages. The library also defines some attributes that can be used for application-specific needs:
code: arbitrary integer value (e.g. error code)details: description string (e.g. error message)
// EXAMPLE - specifying additional attributes
SerialLogHandler logHandler;
int connect() {
return ECONNREFUSED; // Return an error
}
void setup() {
Log.info("Connecting to server");
int error = connect();
if (error) {
// Get error message string
const char *message = strerror(error);
// Log message with additional attributes
Log.code(error).details(message).error("Connection error");
}
}
void loop() {
}
The example application specifies code and details attributes for the error message, generating the following logging output:
0000000084 [app] INFO: Connecting to server0000000087 [app] ERROR: Connection error [code = 111, details = Connection refused]
Log Handlers
In order to enable logging, application needs to instantiate at least one log handler. If necessary, several different log handlers can be instantiated at the same time.
// EXAMPLE - enabling multiple log handlers
SerialLogHandler logHandler1;
Serial1LogHandler logHandler2(57600); // Baud rate
void setup() {
Log.info("This is info message"); // Processed by all handlers
}
void loop() {
}
The library provides the following log handlers:
SerialLogHandler- Additional community-supported log handlers can be found further below.
This handler uses primary serial over USB interface for the logging output (Serial).
SerialLogHandler(LogLevel level, const Filters &filters)
Parameters:
- level : default logging level (default value is
LOG_LEVEL_INFO) - filters : category filters (not specified by default)
Serial1LogHandler
This handler uses the device's TX and RX pins for the logging output (Serial1).
Serial1LogHandler(LogLevel level, const Filters &filters)Serial1LogHandler(int baud, LogLevel level, const Filters &filters)
Parameters:
- level : default logging level (default value is
LOG_LEVEL_INFO) - filters : category filters (not specified by default)
- baud : baud rate (default value is 9600)
Community Log Handlers
The log handlers below are written by the community and are not considered "Official" Particle-supported log handlers. If you have any issues with them please raise an issue in the forums or, ideally, in the online repo for the handler.
- Papertrail Log Handler by barakwei. [Particle Web IDE] [GitHub Repo] [Known Issues]
- Web Log Handler by geeksville. [Particle Web IDE] [GitHub Repo] [Known Issues]
- More to come (feel free to add your own by editing the docs on GitHub)
Logger Class
This class is used to generate log messages. The library also provides default instance of this class named Log, which can be used for all typical logging operations.
Logger()Logger(const char *name)
// EXAMPLE
Logger myLogger("app.main");
Construct logger.
Parameters:
- name : category name (default value is
app)
const char* name()
// EXAMPLE
const char *name = Log.name(); // Returns "app"
Returns category name set for this logger.
void trace(const char *format, ...)void info(const char *format, ...)void warn(const char *format, ...)void error(const char *format, ...)
// EXAMPLE
Log.trace("This is trace message");
Log.info("This is info message");
Log.warn("This is warn message");
Log.error("This is error message");
// Format text message
Log.info("The secret of everything is %d", 42);
Generate trace, info, warning or error message respectively.
Parameters:
- format : format string
void log(const char *format, ...)void operator()(const char *format, ...)
// EXAMPLE
Log("The secret of everything is %d", 42); // Generates info message
Generates log message with the default logging level (LOG_LEVEL_INFO).
Parameters:
- format : format string
void log(LogLevel level, const char *format, ...)void operator()(LogLevel level, const char *format, ...)
// EXAMPLE
Log(LOG_LEVEL_INFO, "The secret of everything is %d", 42);
Generates log message with the specified logging level.
Parameters:
- format : format string
- level : logging level (default value is
LOG_LEVEL_INFO)
bool isTraceEnabled()bool isInfoEnabled()bool isWarnEnabled()bool isErrorEnabled()
// EXAMPLE
if (Log.isTraceEnabled()) {
// Do some heavy logging
}
Return true if logging is enabled for trace, info, warning or error messages respectively.
bool isLevelEnabled(LogLevel level)
// EXAMPLE
if (Log.isLevelEnabled(LOG_LEVEL_TRACE)) {
// Do some heavy logging
}
Returns true if logging is enabled for the specified logging level.
Parameters:
- level : logging level
Global Object Constructors
It can be convenient to use C++ objects as global variables. You must be careful about what you do in the constructor, however.
The first code example is the bad example, don't do this.
#include "Particle.h"
SerialLogHandler logHandler;
class MyClass {
public:
MyClass();
virtual ~MyClass();
void subscriptionHandler(const char *eventName, const char *data);
};
MyClass::MyClass() {
// This is generally a bad idea. You should avoid doing this from a constructor.
Particle.subscribe("myEvent", &MyClass::subscriptionHandler, this, MY_DEVICES);
}
MyClass::~MyClass() {
}
void MyClass::subscriptionHandler(const char *eventName, const char *data) {
Log.info("eventName=%s data=%s", eventName, data);
}
// In this example, MyClass is a globally constructed object.
MyClass myClass;
void setup() {
}
void loop() {
}
Making MyClass myClass a global variable is fine, and is a useful technique. However, it contains a Particle.subscribe call in the constructor. This may fail, or crash the device. You should avoid in a global constructor:
- All functions in the Particle class (Particle.subscribe, Particle.variable, etc.)
- Creation of threads
- Hardware initialization including I2C and SPI
- Calls to
delay() - Any class that depends on another globally initialized class instance
The reason is that the order that the compiler initializes global objects varies, and is not predictable. Thus sometimes it may work, but then later it may decide to reorder initialization and may fail.
One solution is to use two-phase setup. Instead of putting the setup code in the constructor, you put it in a setup() method of your class and call the setup() method from the actual setup(). This is the recommended method.
#include "Particle.h"
SerialLogHandler logHandler;
class MyClass {
public:
MyClass();
virtual ~MyClass();
void setup();
void subscriptionHandler(const char *eventName, const char *data);
};
MyClass::MyClass() {
}
MyClass::~MyClass() {
}
void MyClass::setup() {
Particle.subscribe("myEvent", &MyClass::subscriptionHandler, this, MY_DEVICES);
}
void MyClass::subscriptionHandler(const char *eventName, const char *data) {
Log.info("eventName=%s data=%s", eventName, data);
}
// In this example, MyClass is a globally constructed object.
MyClass myClass;
void setup() {
myClass.setup();
}
void loop() {
}
Another option is to allocate the class member using new instead.
#include "Particle.h"
SerialLogHandler logHandler;
class MyClass {
public:
MyClass();
virtual ~MyClass();
void subscriptionHandler(const char *eventName, const char *data);
};
MyClass::MyClass() {
// This is OK as long as MyClass is allocated with new from setup
Particle.subscribe("myEvent", &MyClass::subscriptionHandler, this, MY_DEVICES);
}
MyClass::~MyClass() {
}
void MyClass::subscriptionHandler(const char *eventName, const char *data) {
Log.info("eventName=%s data=%s", eventName, data);
}
// In this example, MyClass is allocated in setup() using new, and is safe because
// the constructor is called during setup() time.
MyClass *myClass;
void setup() {
myClass = new MyClass();
}
void loop() {
}
Language Syntax
Particle devices are programmed in C/C++. While the Arduino compatibility features are available as described below, you can also write programs in plain C or C++, specifically:
| Device OS Version | C++ (.cpp and .ino) | C (.c) |
|---|---|---|
| 1.2.1 and later | gcc C++14 | gcc C11 |
| earlier versions | gcc C++11 | gcc C11 |
The following documentation is based on the Arduino reference which can be found here.
Structure
setup()
The setup() function is called when an application starts. Use it to initialize variables, pin modes, start using libraries, etc. The setup function will only run once, after each powerup or device reset.
// EXAMPLE USAGE
int button = D0;
int LED = D1;
//setup initializes D0 as input and D1 as output
void setup()
{
pinMode(button, INPUT_PULLDOWN);
pinMode(LED, OUTPUT);
}
void loop()
{
// ...
}
loop()
After creating a setup() function, which initializes and sets the initial values, the loop() function does precisely what its name suggests, and loops consecutively, allowing your program to change and respond. Use it to actively control the device. A return may be used to exit the loop() before it completely finishes.
// EXAMPLE USAGE
int button = D0;
int LED = D1;
//setup initializes D0 as input and D1 as output
void setup()
{
pinMode(button, INPUT_PULLDOWN);
pinMode(LED, OUTPUT);
}
//loops to check if button was pressed,
//if it was, then it turns ON the LED,
//else the LED remains OFF
void loop()
{
if (digitalRead(button) == HIGH)
digitalWrite(LED,HIGH);
else
digitalWrite(LED,LOW);
}
Control structures
if
if, which is used in conjunction with a comparison operator, tests whether a certain condition has been reached, such as an input being above a certain number.
// SYNTAX
if (someVariable > 50)
{
// do something here
}
The program tests to see if someVariable is greater than 50. If it is, the program takes a particular action. Put another way, if the statement in parentheses is true, the statements inside the brackets are run. If not, the program skips over the code.
The brackets may be omitted after an if statement. If this is done, the next line (defined by the semicolon) becomes the only conditional statement.
if (x > 120) digitalWrite(LEDpin, HIGH);
if (x > 120)
digitalWrite(LEDpin, HIGH);
if (x > 120){ digitalWrite(LEDpin, HIGH); }
if (x > 120)
{
digitalWrite(LEDpin1, HIGH);
digitalWrite(LEDpin2, HIGH);
} // all are correct
The statements being evaluated inside the parentheses require the use of one or more operators:
Comparison Operators
x == y (x is equal to y)
x != y (x is not equal to y)
x < y (x is less than y)
x > y (x is greater than y)
x <= y (x is less than or equal to y)
x >= y (x is greater than or equal to y)
WARNING:
Beware of accidentally using the single equal sign (e.g. if (x = 10) ). The single equal sign is the assignment operator, and sets x to 10 (puts the value 10 into the variable x). Instead use the double equal sign (e.g. if (x == 10) ), which is the comparison operator, and tests whether x is equal to 10 or not. The latter statement is only true if x equals 10, but the former statement will always be true.
This is because C evaluates the statement if (x=10) as follows: 10 is assigned to x (remember that the single equal sign is the assignment operator), so x now contains 10. Then the 'if' conditional evaluates 10, which always evaluates to TRUE, since any non-zero number evaluates to TRUE. Consequently, if (x = 10) will always evaluate to TRUE, which is not the desired result when using an 'if' statement. Additionally, the variable x will be set to 10, which is also not a desired action.
if can also be part of a branching control structure using the if...else] construction.
if...else
if/else allows greater control over the flow of code than the basic if statement, by allowing multiple tests to be grouped together. For example, an analog input could be tested and one action taken if the input was less than 500, and another action taken if the input was 500 or greater. The code would look like this:
// SYNTAX
if (pinFiveInput < 500)
{
// action A
}
else
{
// action B
}
else can proceed another if test, so that multiple, mutually exclusive tests can be run at the same time.
Each test will proceed to the next one until a true test is encountered. When a true test is found, its associated block of code is run, and the program then skips to the line following the entire if/else construction. If no test proves to be true, the default else block is executed, if one is present, and sets the default behavior.
Note that an else if block may be used with or without a terminating else block and vice versa. An unlimited number of such else if branches is allowed.
if (pinFiveInput < 500)
{
// do Thing A
}
else if (pinFiveInput >= 1000)
{
// do Thing B
}
else
{
// do Thing C
}
Another way to express branching, mutually exclusive tests, is with the switch case statement.
for
The for statement is used to repeat a block of statements enclosed in curly braces. An increment counter is usually used to increment and terminate the loop. The for statement is useful for any repetitive operation, and is often used in combination with arrays to operate on collections of data/pins.
There are three parts to the for loop header:
// SYNTAX
for (initialization; condition; increment)
{
//statement(s);
}
The initialization happens first and exactly once. Each time through the loop, the condition is tested; if it's true, the statement block, and the increment is executed, then the condition is tested again. When the condition becomes false, the loop ends.
// EXAMPLE USAGE
// slowy make the LED glow brighter
int ledPin = D1; // LED in series with 470 ohm resistor on pin D1
void setup()
{
// set ledPin as an output
pinMode(ledPin,OUTPUT);
}
void loop()
{
for (int i=0; i <= 255; i++){
analogWrite(ledPin, i);
delay(10);
}
}
The C for loop is much more flexible than for loops found in some other computer languages, including BASIC. Any or all of the three header elements may be omitted, although the semicolons are required. Also the statements for initialization, condition, and increment can be any valid C statements with unrelated variables, and use any C datatypes including floats. These types of unusual for statements may provide solutions to some rare programming problems.
For example, using a multiplication in the increment line will generate a logarithmic progression:
for(int x = 2; x < 100; x = x * 1.5)
{
Serial.print(x);
}
//Generates: 2,3,4,6,9,13,19,28,42,63,94
Another example, fade an LED up and down with one for loop:
// slowy make the LED glow brighter
int ledPin = D1; // LED in series with 470 ohm resistor on pin D1
void setup()
{
// set ledPin as an output
pinMode(ledPin,OUTPUT);
}
void loop()
{
int x = 1;
for (int i = 0; i > -1; i = i + x)
{
analogWrite(ledPin, i);
if (i == 255) x = -1; // switch direction at peak
delay(10);
}
}
switch case
Like if statements, switch...case controls the flow of programs by allowing programmers to specify different code that should be executed in various conditions. In particular, a switch statement compares the value of a variable to the values specified in case statements. When a case statement is found whose value matches that of the variable, the code in that case statement is run.
The break keyword exits the switch statement, and is typically used at the end of each case. Without a break statement, the switch statement will continue executing the following expressions ("falling-through") until a break, or the end of the switch statement is reached.
// SYNTAX
switch (var)
{
case label:
// statements
break;
case label:
// statements
break;
default:
// statements
}
var is the variable whose value to compare to the various cases
label is a value to compare the variable to
// EXAMPLE USAGE
switch (var)
{
case 1:
// do something when var equals 1
break;
case 2:
// do something when var equals 2
break;
default:
// if nothing else matches, do the
// default (which is optional)
}
while
while loops will loop continuously, and infinitely, until the expression inside the parenthesis, () becomes false. Something must change the tested variable, or the while loop will never exit. This could be in your code, such as an incremented variable, or an external condition, such as testing a sensor.
// SYNTAX
while(expression)
{
// statement(s)
}
expression is a (boolean) C statement that evaluates to true or false.
// EXAMPLE USAGE
var = 0;
while(var < 200)
{
// do something repetitive 200 times
var++;
}
do... while
The do loop works in the same manner as the while loop, with the exception that the condition is tested at the end of the loop, so the do loop will always run at least once.
// SYNTAX
do
{
// statement block
} while (test condition);
// EXAMPLE USAGE
do
{
delay(50); // wait for sensors to stabilize
x = readSensors(); // check the sensors
} while (x < 100);
break
break is used to exit from a do, for, or while loop, bypassing the normal loop condition. It is also used to exit from a switch statement.
// EXAMPLE USAGE
for (int x = 0; x < 255; x++)
{
digitalWrite(ledPin, x);
sens = analogRead(sensorPin);
if (sens > threshold)
{
x = 0;
break; // exit for() loop on sensor detect
}
delay(50);
}
continue
The continue statement skips the rest of the current iteration of a loop (do, for, or while). It continues by checking the conditional expression of the loop, and proceeding with any subsequent iterations.
// EXAMPLE USAGE
for (x = 0; x < 255; x++)
{
if (x > 40 && x < 120) continue; // create jump in values
digitalWrite(PWMpin, x);
delay(50);
}
return
Terminate a function and return a value from a function to the calling function, if desired.
//EXAMPLE USAGE
// A function to compare a sensor input to a threshold
int checkSensor()
{
if (analogRead(0) > 400) return 1;
else return 0;
}
The return keyword is handy to test a section of code without having to "comment out" large sections of possibly buggy code.
void loop()
{
// brilliant code idea to test here
return;
// the rest of a dysfunctional sketch here
// this code will never be executed
}
goto
Transfers program flow to a labeled point in the program
// SYNTAX
label:
goto label; // sends program flow to the label
TIP:
The use of goto is discouraged in C programming, and some authors of C programming books claim that the goto statement is never necessary, but used judiciously, it can simplify certain programs. The reason that many programmers frown upon the use of goto is that with the unrestrained use of goto statements, it is easy to create a program with undefined program flow, which can never be debugged.
With that said, there are instances where a goto statement can come in handy, and simplify coding. One of these situations is to break out of deeply nested for loops, or if logic blocks, on a certain condition.
// EXAMPLE USAGE
for(byte r = 0; r < 255; r++) {
for(byte g = 255; g > -1; g--) {
for(byte b = 0; b < 255; b++) {
if (analogRead(0) > 250) {
goto bailout;
}
// more statements ...
}
}
}
bailout:
// Code execution jumps here from
// goto bailout; statement
Further syntax
; (semicolon)
Used to end a statement.
int a = 13;
Tip: Forgetting to end a line in a semicolon will result in a compiler error. The error text may be obvious, and refer to a missing semicolon, or it may not. If an impenetrable or seemingly illogical compiler error comes up, one of the first things to check is a missing semicolon, in the immediate vicinity, preceding the line at which the compiler complained.
{} (curly braces)
Curly braces (also referred to as just "braces" or as "curly brackets") are a major part of the C programming language. They are used in several different constructs, outlined below, and this can sometimes be confusing for beginners.
//The main uses of curly braces
//Functions
void myfunction(datatype argument){
statements(s)
}
//Loops
while (boolean expression)
{
statement(s)
}
do
{
statement(s)
} while (boolean expression);
for (initialisation; termination condition; incrementing expr)
{
statement(s)
}
//Conditional statements
if (boolean expression)
{
statement(s)
}
else if (boolean expression)
{
statement(s)
}
else
{
statement(s)
}
An opening curly brace "{" must always be followed by a closing curly brace "}". This is a condition that is often referred to as the braces being balanced.
Beginning programmers, and programmers coming to C from the BASIC language often find using braces confusing or daunting. After all, the same curly braces replace the RETURN statement in a subroutine (function), the ENDIF statement in a conditional and the NEXT statement in a FOR loop.
Because the use of the curly brace is so varied, it is good programming practice to type the closing brace immediately after typing the opening brace when inserting a construct which requires curly braces. Then insert some carriage returns between your braces and begin inserting statements. Your braces, and your attitude, will never become unbalanced.
Unbalanced braces can often lead to cryptic, impenetrable compiler errors that can sometimes be hard to track down in a large program. Because of their varied usages, braces are also incredibly important to the syntax of a program and moving a brace one or two lines will often dramatically affect the meaning of a program.
// (single line comment)
/* */ (multi-line comment)
Comments are lines in the program that are used to inform yourself or others about the way the program works. They are ignored by the compiler, and not exported to the processor, so they don't take up any space on the device.
Comments only purpose are to help you understand (or remember) how your program works or to inform others how your program works. There are two different ways of marking a line as a comment:
// EXAMPLE USAGE
x = 5; // This is a single line comment. Anything after the slashes is a comment
// to the end of the line
/* this is multiline comment - use it to comment out whole blocks of code
if (gwb == 0) { // single line comment is OK inside a multiline comment
x = 3; /* but not another multiline comment - this is invalid */
}
// don't forget the "closing" comment - they have to be balanced!
*/
TIP: When experimenting with code, "commenting out" parts of your program is a convenient way to remove lines that may be buggy. This leaves the lines in the code, but turns them into comments, so the compiler just ignores them. This can be especially useful when trying to locate a problem, or when a program refuses to compile and the compiler error is cryptic or unhelpful.
#define
#define is a useful C component that allows the programmer to give a name to a constant value before the program is compiled. Defined constants don't take up any program memory space on the chip. The compiler will replace references to these constants with the defined value at compile time.
#define constantName value
Note that the # is necessary.
This can have some unwanted side effects if the constant name in a #define is used in some other constant or variable name. In that case the text would be replaced by the #define value.
// EXAMPLE USAGE
#define ledPin 3
// The compiler will replace any mention of ledPin with the value 3 at compile time.
In general, the const keyword is preferred for defining constants and should be used instead of #define.
TIP: There is no semicolon after the #define statement. If you include one, the compiler will throw cryptic errors further down the page.
#define ledPin 3; // this is an error
Similarly, including an equal sign after the #define statement will also generate a cryptic compiler error further down the page.
#define ledPin = 3 // this is also an error
#include
#include is used to include outside libraries in your application code. This gives the programmer access to a large group of standard C libraries (groups of pre-made functions), and also libraries written especially for your device.
Note that #include, similar to #define, has no semicolon terminator, and the compiler will yield cryptic error messages if you add one.
Arithmetic operators
= (assignment operator)
Stores the value to the right of the equal sign in the variable to the left of the equal sign.
The single equal sign in the C programming language is called the assignment operator. It has a different meaning than in algebra class where it indicated an equation or equality. The assignment operator tells the microcontroller to evaluate whatever value or expression is on the right side of the equal sign, and store it in the variable to the left of the equal sign.
// EXAMPLE USAGE
int sensVal; // declare an integer variable named sensVal
senVal = analogRead(A0); // store the (digitized) input voltage at analog pin A0 in SensVal
TIP: The variable on the left side of the assignment operator ( = sign ) needs to be able to hold the value stored in it. If it is not large enough to hold a value, the value stored in the variable will be incorrect.
Don't confuse the assignment operator = (single equal sign) with the comparison operator == (double equal signs), which evaluates whether two expressions are equal.
+ - * / (addition subtraction multiplication division)
These operators return the sum, difference, product, or quotient (respectively) of the two operands. The operation is conducted using the data type of the operands, so, for example,9 / 4 gives 2 since 9 and 4 are ints. This also means that the operation can overflow if the result is larger than that which can be stored in the data type (e.g. adding 1 to an int with the value 2,147,483,647 gives -2,147,483,648). If the operands are of different types, the "larger" type is used for the calculation.
If one of the numbers (operands) are of the type float or of type double, floating point math will be used for the calculation.
// EXAMPLE USAGES
y = y + 3;
x = x - 7;
i = j * 6;
r = r / 5;
// SYNTAX
result = value1 + value2;
result = value1 - value2;
result = value1 * value2;
result = value1 / value2;
value1 and value2 can be any variable or constant.
TIPS:
- Know that integer constants default to int, so some constant calculations may overflow (e.g. 50 * 50,000,000 will yield a negative result).
- Choose variable sizes that are large enough to hold the largest results from your calculations
- Know at what point your variable will "roll over" and also what happens in the other direction e.g. (0 - 1) OR (0 + 2147483648)
- For math that requires fractions, use float variables, but be aware of their drawbacks: large size, slow computation speeds
- Use the cast operator e.g. (int)myFloat to convert one variable type to another on the fly.
% (modulo)
Calculates the remainder when one integer is divided by another. It is useful for keeping a variable within a particular range (e.g. the size of an array). It is defined so that a % b == a - ((a / b) * b).
result = dividend % divisor
dividend is the number to be divided and
divisor is the number to divide by.
result is the remainder
The remainder function can have unexpected behavior when some of the operands are negative. If the dividend is negative, then the result will be the smallest negative equivalency class. In other words, when a is negative, (a % b) == (a mod b) - b where (a mod b) follows the standard mathematical definition of mod. When the divisor is negative, the result is the same as it would be if it was positive.
// EXAMPLE USAGES
x = 9 % 5; // x now contains 4
x = 5 % 5; // x now contains 0
x = 4 % 5; // x now contains 4
x = 7 % 5; // x now contains 2
x = -7 % 5; // x now contains -2
x = 7 % -5; // x now contains 2
x = -7 % -5; // x now contains -2
EXAMPLE CODE
//update one value in an array each time through a loop
int values[10];
int i = 0;
void setup() {}
void loop()
{
values[i] = analogRead(A0);
i = (i + 1) % 10; // modulo operator rolls over variable
}
TIP:
The modulo operator does not work on floats. For floats, an equivalent expression to a % b is a - (b * ((int)(a / b)))
Boolean operators
These can be used inside the condition of an if statement.
&& (and)
True only if both operands are true, e.g.
if (digitalRead(D2) == HIGH && digitalRead(D3) == HIGH)
{
// read two switches
// ...
}
//is true only if both inputs are high.
|| (or)
True if either operand is true, e.g.
if (x > 0 || y > 0)
{
// ...
}
//is true if either x or y is greater than 0.
! (not)
True if the operand is false, e.g.
if (!x)
{
// ...
}
//is true if x is false (i.e. if x equals 0).
WARNING: Make sure you don't mistake the boolean AND operator, && (double ampersand) for the bitwise AND operator & (single ampersand). They are entirely different beasts.
Similarly, do not confuse the boolean || (double pipe) operator with the bitwise OR operator | (single pipe).
The bitwise not ~ (tilde) looks much different than the boolean not ! (exclamation point or "bang" as the programmers say) but you still have to be sure which one you want where.
if (a >= 10 && a <= 20){} // true if a is between 10 and 20
Bitwise operators
& (bitwise and)
The bitwise AND operator in C++ is a single ampersand, &, used between two other integer expressions. Bitwise AND operates on each bit position of the surrounding expressions independently, according to this rule: if both input bits are 1, the resulting output is 1, otherwise the output is 0. Another way of expressing this is:
0 0 1 1 operand1
0 1 0 1 operand2
----------
0 0 0 1 (operand1 & operand2) - returned result
// EXAMPLE USAGE
int a = 92; // in binary: 0000000001011100
int b = 101; // in binary: 0000000001100101
int c = a & b; // result: 0000000001000100, or 68 in decimal.
One of the most common uses of bitwise AND is to select a particular bit (or bits) from an integer value, often called masking.
| (bitwise or)
The bitwise OR operator in C++ is the vertical bar symbol, |. Like the & operator, | operates independently each bit in its two surrounding integer expressions, but what it does is different (of course). The bitwise OR of two bits is 1 if either or both of the input bits is 1, otherwise it is 0. In other words:
0 0 1 1 operand1
0 1 0 1 operand2
----------
0 1 1 1 (operand1 | operand2) - returned result
// EXAMPLE USAGE
int a = 92; // in binary: 0000000001011100
int b = 101; // in binary: 0000000001100101
int c = a | b; // result: 0000000001111101, or 125 in decimal.
^ (bitwise xor)
There is a somewhat unusual operator in C++ called bitwise EXCLUSIVE OR, also known as bitwise XOR. (In English this is usually pronounced "eks-or".) The bitwise XOR operator is written using the caret symbol ^. This operator is very similar to the bitwise OR operator |, only it evaluates to 0 for a given bit position when both of the input bits for that position are 1:
0 0 1 1 operand1
0 1 0 1 operand2
----------
0 1 1 0 (operand1 ^ operand2) - returned result
Another way to look at bitwise XOR is that each bit in the result is a 1 if the input bits are different, or 0 if they are the same.
// EXAMPLE USAGE
int x = 12; // binary: 1100
int y = 10; // binary: 1010
int z = x ^ y; // binary: 0110, or decimal 6
The ^ operator is often used to toggle (i.e. change from 0 to 1, or 1 to 0) some of the bits in an integer expression. In a bitwise OR operation if there is a 1 in the mask bit, that bit is inverted; if there is a 0, the bit is not inverted and stays the same.
~ (bitwise not)
The bitwise NOT operator in C++ is the tilde character ~. Unlike & and |, the bitwise NOT operator is applied to a single operand to its right. Bitwise NOT changes each bit to its opposite: 0 becomes 1, and 1 becomes 0. For example:
0 1 operand1
----------
1 0 ~ operand1
int a = 103; // binary: 0000000001100111
int b = ~a; // binary: 1111111110011000 = -104
You might be surprised to see a negative number like -104 as the result of this operation. This is because the highest bit in an int variable is the so-called sign bit. If the highest bit is 1, the number is interpreted as negative. This encoding of positive and negative numbers is referred to as two's complement. For more information, see the Wikipedia article on two's complement.
As an aside, it is interesting to note that for any integer x, ~x is the same as -x-1.
At times, the sign bit in a signed integer expression can cause some unwanted surprises.
<< (bitwise left shift), >> (bitwise right shift)
There are two bit shift operators in C++: the left shift operator << and the right shift operator >>. These operators cause the bits in the left operand to be shifted left or right by the number of positions specified by the right operand.
More on bitwise math may be found here.
variable << number_of_bits
variable >> number_of_bits
variable can be byte, int, long
number_of_bits and integer <= 32
// EXAMPLE USAGE
int a = 5; // binary: 0000000000000101
int b = a << 3; // binary: 0000000000101000, or 40 in decimal
int c = b >> 3; // binary: 0000000000000101, or back to 5 like we started with
When you shift a value x by y bits (x << y), the leftmost y bits in x are lost, literally shifted out of existence:
int a = 5; // binary: 0000000000000101
int b = a << 14; // binary: 0100000000000000 - the first 1 in 101 was discarded
If you are certain that none of the ones in a value are being shifted into oblivion, a simple way to think of the left-shift operator is that it multiplies the left operand by 2 raised to the right operand power. For example, to generate powers of 2, the following expressions can be employed:
1 << 0 == 1
1 << 1 == 2
1 << 2 == 4
1 << 3 == 8
...
1 << 8 == 256
1 << 9 == 512
1 << 10 == 1024
...
When you shift x right by y bits (x >> y), and the highest bit in x is a 1, the behavior depends on the exact data type of x. If x is of type int, the highest bit is the sign bit, determining whether x is negative or not, as we have discussed above. In that case, the sign bit is copied into lower bits, for esoteric historical reasons:
int x = -16; // binary: 1111111111110000
int y = x >> 3; // binary: 1111111111111110
This behavior, called sign extension, is often not the behavior you want. Instead, you may wish zeros to be shifted in from the left. It turns out that the right shift rules are different for unsigned int expressions, so you can use a typecast to suppress ones being copied from the left:
int x = -16; // binary: 1111111111110000
int y = (unsigned int)x >> 3; // binary: 0001111111111110
If you are careful to avoid sign extension, you can use the right-shift operator >> as a way to divide by powers of 2. For example:
int x = 1000;
int y = x >> 3; // integer division of 1000 by 8, causing y = 125
Compound operators
++ (increment), -- (decrement)
Increment or decrement a variable
// SYNTAX
x++; // increment x by one and returns the old value of x
++x; // increment x by one and returns the new value of x
x-- ; // decrement x by one and returns the old value of x
--x ; // decrement x by one and returns the new value of x
where x is an integer or long (possibly unsigned)
// EXAMPLE USAGE
x = 2;
y = ++x; // x now contains 3, y contains 3
y = x--; // x contains 2 again, y still contains 3
compound arithmetic
- += (compound addition)
- -= (compound subtraction)
- *= (compound multiplication)
- /= (compound division)
Perform a mathematical operation on a variable with another constant or variable. The += (et al) operators are just a convenient shorthand for the expanded syntax.
// SYNTAX
x += y; // equivalent to the expression x = x + y;
x -= y; // equivalent to the expression x = x - y;
x *= y; // equivalent to the expression x = x * y;
x /= y; // equivalent to the expression x = x / y;
x can be any variable type
y can be any variable type or constant
// EXAMPLE USAGE
x = 2;
x += 4; // x now contains 6
x -= 3; // x now contains 3
x *= 10; // x now contains 30
x /= 2; // x now contains 15
&= (compound bitwise and)
The compound bitwise AND operator (&=) is often used with a variable and a constant to force particular bits in a variable to the LOW state (to 0). This is often referred to in programming guides as "clearing" or "resetting" bits.
x &= y; // equivalent to x = x & y;
x can be a char, int or long variable
y can be an integer constant, char, int, or long
0 0 1 1 operand1
0 1 0 1 operand2
----------
0 0 0 1 (operand1 & operand2) - returned result
Bits that are "bitwise ANDed" with 0 are cleared to 0 so, if myByte is a byte variable,
myByte & B00000000 = 0;
Bits that are "bitwise ANDed" with 1 are unchanged so,
myByte & B11111111 = myByte;
Note: because we are dealing with bits in a bitwise operator - it is convenient to use the binary formatter with constants. The numbers are still the same value in other representations, they are just not as easy to understand. Also, B00000000 is shown for clarity, but zero in any number format is zero (hmmm something philosophical there?)
Consequently - to clear (set to zero) bits 0 & 1 of a variable, while leaving the rest of the variable unchanged, use the compound bitwise AND operator (&=) with the constant B11111100
1 0 1 0 1 0 1 0 variable
1 1 1 1 1 1 0 0 mask
----------------------
1 0 1 0 1 0 0 0
variable unchanged
bits cleared
Here is the same representation with the variable's bits replaced with the symbol x
x x x x x x x x variable
1 1 1 1 1 1 0 0 mask
----------------------
x x x x x x 0 0
variable unchanged
bits cleared
So if:
myByte = 10101010;
myByte &= B1111100 == B10101000;
|= (compound bitwise or)
The compound bitwise OR operator (|=) is often used with a variable and a constant to "set" (set to 1) particular bits in a variable.
// SYNTAX
x |= y; // equivalent to x = x | y;
x can be a char, int or long variable
y can be an integer constant or char, int or long
0 0 1 1 operand1
0 1 0 1 operand2
----------
0 1 1 1 (operand1 | operand2) - returned result
Bits that are "bitwise ORed" with 0 are unchanged, so if myByte is a byte variable,
myByte | B00000000 = myByte;
Bits that are "bitwise ORed" with 1 are set to 1 so:
myByte | B11111111 = B11111111;
Consequently - to set bits 0 & 1 of a variable, while leaving the rest of the variable unchanged, use the compound bitwise OR operator (|=) with the constant B00000011
1 0 1 0 1 0 1 0 variable
0 0 0 0 0 0 1 1 mask
----------------------
1 0 1 0 1 0 1 1
variable unchanged
bits set
Here is the same representation with the variables bits replaced with the symbol x
x x x x x x x x variable
0 0 0 0 0 0 1 1 mask
----------------------
x x x x x x 1 1
variable unchanged
bits set
So if:
myByte = B10101010;
myByte |= B00000011 == B10101011;
Variables
HIGH | LOW
When reading or writing to a digital pin there are only two possible values a pin can take/be-set-to: HIGH and LOW.
HIGH
The meaning of HIGH (in reference to a pin) is somewhat different depending on whether a pin is set to an INPUT or OUTPUT. When a pin is configured as an INPUT with pinMode, and read with digitalRead, the microcontroller will report HIGH if a voltage of 3 volts or more is present at the pin.
A pin may also be configured as an INPUT with pinMode, and subsequently made HIGH with digitalWrite, this will set the internal 40K pullup resistors, which will steer the input pin to a HIGH reading unless it is pulled LOW by external circuitry. This is how INPUT_PULLUP works as well
When a pin is configured to OUTPUT with pinMode, and set to HIGH with digitalWrite, the pin is at 3.3 volts. In this state it can source current, e.g. light an LED that is connected through a series resistor to ground, or to another pin configured as an output, and set to LOW.
LOW
The meaning of LOW also has a different meaning depending on whether a pin is set to INPUT or OUTPUT. When a pin is configured as an INPUT with pinMode, and read with digitalRead, the microcontroller will report LOW if a voltage of 1.5 volts or less is present at the pin.
When a pin is configured to OUTPUT with pinMode, and set to LOW with digitalWrite, the pin is at 0 volts. In this state it can sink current, e.g. light an LED that is connected through a series resistor to, +3.3 volts, or to another pin configured as an output, and set to HIGH.
INPUT, OUTPUT, INPUT_PULLUP, INPUT_PULLDOWN
Digital pins can be used as INPUT, INPUT_PULLUP, INPUT_PULLDOWN or OUTPUT. Changing a pin with pinMode() changes the electrical behavior of the pin.
Pins Configured as INPUT
The device's pins configured as INPUT with pinMode() are said to be in a high-impedance state. Pins configured as INPUT make extremely small demands on the circuit that they are sampling, equivalent to a series resistor of 100 Megohms in front of the pin. This makes them useful for reading a sensor, but not powering an LED.
If you have your pin configured as an INPUT, you will want the pin to have a reference to ground, often accomplished with a pull-down resistor (a resistor going to ground).
Pins Configured as INPUT_PULLUP or INPUT_PULLDOWN
The STM32 microcontroller has internal pull-up resistors (resistors that connect to power internally) and pull-down resistors (resistors that connect to ground internally) that you can access. If you prefer to use these instead of external resistors, you can use these argument in pinMode().
Pins Configured as OUTPUT
Pins configured as OUTPUT with pinMode() are said to be in a low-impedance state. This means that they can provide a substantial amount of current to other circuits. STM32 pins can source (provide positive current) or sink (provide negative current) up to 20 mA (milliamps) of current to other devices/circuits. This makes them useful for powering LED's but useless for reading sensors. Pins configured as outputs can also be damaged or destroyed if short circuited to either ground or 3.3 volt power rails. The amount of current provided by the pin is also not enough to power most relays or motors, and some interface circuitry will be required.
true | false
There are two constants used to represent truth and falsity in the Arduino language: true, and false.
false
false is the easier of the two to define. false is defined as 0 (zero).
true
true is often said to be defined as 1, which is correct, but true has a wider definition. Any integer which is non-zero is true, in a Boolean sense. So -1, 2 and -200 are all defined as true, too, in a Boolean sense.
Note that the true and false constants are typed in lowercase unlike HIGH, LOW, INPUT, & OUTPUT.
Data Types
Note: The Core/Photon/Electron uses a 32-bit ARM based microcontroller and hence the datatype lengths are different from a standard 8-bit system (for e.g. Arduino Uno).
void
The void keyword is used only in function declarations. It indicates that the function is expected to return no information to the function from which it was called.
//EXAMPLE
// actions are performed in the functions "setup" and "loop"
// but no information is reported to the larger program
void setup()
{
// ...
}
void loop()
{
// ...
}
boolean
A boolean holds one of two values, true or false. (Each boolean variable occupies one byte of memory.)
//EXAMPLE
int LEDpin = D0; // LED on D0
int switchPin = A0; // momentary switch on A0, other side connected to ground
boolean running = false;
void setup()
{
pinMode(LEDpin, OUTPUT);
pinMode(switchPin, INPUT_PULLUP);
}
void loop()
{
if (digitalRead(switchPin) == LOW)
{ // switch is pressed - pullup keeps pin high normally
delay(100); // delay to debounce switch
running = !running; // toggle running variable
digitalWrite(LEDpin, running) // indicate via LED
}
}
char
A data type that takes up 1 byte of memory that stores a character value. Character literals are written in single quotes, like this: 'A' (for multiple characters - strings - use double quotes: "ABC").
Characters are stored as numbers however. You can see the specific encoding in the ASCII chart. This means that it is possible to do arithmetic on characters, in which the ASCII value of the character is used (e.g. 'A' + 1 has the value 66, since the ASCII value of the capital letter A is 65). See Serial.println reference for more on how characters are translated to numbers.
The char datatype is a signed type, meaning that it encodes numbers from -128 to 127. For an unsigned, one-byte (8 bit) data type, use the byte data type.
//EXAMPLE
char myChar = 'A';
char myChar = 65; // both are equivalent
unsigned char
An unsigned data type that occupies 1 byte of memory. Same as the byte datatype.
The unsigned char datatype encodes numbers from 0 to 255.
For consistency of Arduino programming style, the byte data type is to be preferred.
//EXAMPLE
unsigned char myChar = 240;
byte
A byte stores an 8-bit unsigned number, from 0 to 255.
//EXAMPLE
byte b = 0x11;
int
Integers are your primary data-type for number storage. On the Core/Photon/Electron, an int stores a 32-bit (4-byte) value. This yields a range of -2,147,483,648 to 2,147,483,647 (minimum value of -2^31 and a maximum value of (2^31) - 1). int's store negative numbers with a technique called 2's complement math. The highest bit, sometimes referred to as the "sign" bit, flags the number as a negative number. The rest of the bits are inverted and 1 is added.
Other variations:
int32_t: 32 bit signed integerint16_t: 16 bit signed integerint8_t: 8 bit signed integer
unsigned int
The Core/Photon/Electron stores a 4 byte (32-bit) value, ranging from 0 to 4,294,967,295 (2^32 - 1). The difference between unsigned ints and (signed) ints, lies in the way the highest bit, sometimes referred to as the "sign" bit, is interpreted.
Other variations:
uint32_t: 32 bit unsigned integeruint16_t: 16 bit unsigned integeruint8_t: 8 bit unsigned integer
word
word stores a 32-bit unsigned number, from 0 to 4,294,967,295.
long
Long variables are extended size variables for number storage, and store 32 bits (4 bytes), from -2,147,483,648 to 2,147,483,647.
unsigned long
Unsigned long variables are extended size variables for number storage, and store 32 bits (4 bytes). Unlike standard longs unsigned longs won't store negative numbers, making their range from 0 to 4,294,967,295 (2^32 - 1).
short
A short is a 16-bit data-type. This yields a range of -32,768 to 32,767 (minimum value of -2^15 and a maximum value of (2^15) - 1).
float
Datatype for floating-point numbers, a number that has a decimal point. Floating-point numbers are often used to approximate analog and continuous values because they have greater resolution than integers. Floating-point numbers can be as large as 3.4028235E+38 and as low as -3.4028235E+38. They are stored as 32 bits (4 bytes) of information.
Floating point numbers are not exact, and may yield strange results when compared. For example 6.0 / 3.0 may not equal 2.0. You should instead check that the absolute value of the difference between the numbers is less than some small number. Floating point math is also much slower than integer math in performing calculations, so should be avoided if, for example, a loop has to run at top speed for a critical timing function. Programmers often go to some lengths to convert floating point calculations to integer math to increase speed.
double
Double precision floating point number. On the Core/Photon/Electron, doubles have 8-byte (64 bit) precision.
string - char array
A string can be made out of an array of type char and null-terminated.
// EXAMPLES
char Str1[15];
char Str2[8] = {'a', 'r', 'd', 'u', 'i', 'n', 'o'};
char Str3[8] = {'a', 'r', 'd', 'u', 'i', 'n', 'o', '\0'};
char Str4[ ] = "arduino";
char Str5[8] = "arduino";
char Str6[15] = "arduino";
Possibilities for declaring strings:
- Declare an array of chars without initializing it as in Str1
- Declare an array of chars (with one extra char) and the compiler will add the required null character, as in Str2
- Explicitly add the null character, Str3
- Initialize with a string constant in quotation marks; the compiler will size the array to fit the string constant and a terminating null character, Str4
- Initialize the array with an explicit size and string constant, Str5
- Initialize the array, leaving extra space for a larger string, Str6
Null termination: Generally, strings are terminated with a null character (ASCII code 0). This allows functions (like Serial.print()) to tell where the end of a string is. Otherwise, they would continue reading subsequent bytes of memory that aren't actually part of the string. This means that your string needs to have space for one more character than the text you want it to contain. That is why Str2 and Str5 need to be eight characters, even though "arduino" is only seven - the last position is automatically filled with a null character. Str4 will be automatically sized to eight characters, one for the extra null. In Str3, we've explicitly included the null character (written '\0') ourselves. Note that it's possible to have a string without a final null character (e.g. if you had specified the length of Str2 as seven instead of eight). This will break most functions that use strings, so you shouldn't do it intentionally. If you notice something behaving strangely (operating on characters not in the string), however, this could be the problem.
Single quotes or double quotes? Strings are always defined inside double quotes ("Abc") and characters are always defined inside single quotes('A').
Wrapping long strings
//You can wrap long strings like this:
char myString[] = "This is the first line"
" this is the second line"
" etcetera";
Arrays of strings: It is often convenient, when working with large amounts of text, such as a project with an LCD display, to setup an array of strings. Because strings themselves are arrays, this is in actually an example of a two-dimensional array. In the code below, the asterisk after the datatype char "char*" indicates that this is an array of "pointers". All array names are actually pointers, so this is required to make an array of arrays. Pointers are one of the more esoteric parts of C for beginners to understand, but it isn't necessary to understand pointers in detail to use them effectively here.
//EXAMPLE
char* myStrings[] = {"This is string 1", "This is string 2",
"This is string 3", "This is string 4", "This is string 5",
"This is string 6"};
void setup(){
Serial.begin(9600);
}
void loop(){
for (int i = 0; i < 6; i++) {
Serial.println(myStrings[i]);
delay(500);
}
}
String - object
More info can be found here.
array
An array is a collection of variables that are accessed with an index number.
Creating (Declaring) an Array: All of the methods below are valid ways to create (declare) an array.
int myInts[6];
int myPins[] = {2, 4, 8, 3, 6};
int mySensVals[6] = {2, 4, -8, 3, 2};
char message[6] = "hello";
You can declare an array without initializing it as in myInts.
In myPins we declare an array without explicitly choosing a size. The compiler counts the elements and creates an array of the appropriate size. Finally you can both initialize and size your array, as in mySensVals. Note that when declaring an array of type char, one more element than your initialization is required, to hold the required null character.
Accessing an Array: Arrays are zero indexed, that is, referring to the array initialization above, the first element of the array is at index 0, hence
mySensVals[0] == 2, mySensVals[1] == 4, and so forth.
It also means that in an array with ten elements, index nine is the last element. Hence:
int myArray[10] = {9,3,2,4,3,2,7,8,9,11};
// myArray[9] contains the value 11
// myArray[10] is invalid and contains random information (other memory address)
For this reason you should be careful in accessing arrays. Accessing past the end of an array (using an index number greater than your declared array size - 1) is reading from memory that is in use for other purposes. Reading from these locations is probably not going to do much except yield invalid data. Writing to random memory locations is definitely a bad idea and can often lead to unhappy results such as crashes or program malfunction. This can also be a difficult bug to track down. Unlike BASIC or JAVA, the C compiler does no checking to see if array access is within legal bounds of the array size that you have declared.
To assign a value to an array:
mySensVals[0] = 10;
To retrieve a value from an array:
x = mySensVals[4];
Arrays and FOR Loops:
Arrays are often manipulated inside for loops, where the loop counter is used as the index for each array element. To print the elements of an array over the serial port, you could do something like the following code example. Take special note to a MACRO called arraySize() which is used to determine the number of elements in myPins. In this case, arraySize() returns 5, which causes our for loop to terminate after 5 iterations. Also note that arraySize() will not return the correct answer if passed a pointer to an array.
int myPins[] = {2, 4, 8, 3, 6};
for (int i = 0; i < arraySize(myPins); i++) {
Serial.println(myPins[i]);
}
Other Functions
The C standard library used on the Core is called newlib and is described at https://sourceware.org/newlib/libc.html
For advanced use cases, those functions are available for use in addition to the functions outlined above.
Preprocessor
When you are using the Particle Device Cloud to compile your .ino source code, a preprocessor comes in to modify the code into C++ requirements before producing the binary file used to flash onto your devices.
// EXAMPLE
/* This is my awesome app! */
#include "TinyGPS++.h"
TinyGPSPlus gps;
enum State { GPS_START, GPS_STOP };
void updateState(State st); // You must add this prototype
void setup() {
updateState(GPS_START);
}
void updateState(State st) {
// ...
}
void loop() {
displayPosition(gps);
}
void displayPosition(TinyGPSPlus &gps) {
// ...
}
// AFTER PREPROCESSOR
#include "Particle.h" // <-- added by preprocessor
/* This is my awesome app! */
#include "TinyGPS++.h"
void setup(); // <-- added by preprocessor
void loop(); // <-- added by preprocessor
void displayPosition(TinyGPSPlus &gps); // <-- added by preprocessor
TinyGPSPlus gps;
enum State { GPS_START, GPS_STOP };
void updateState(State st); // You must add this prototype
void setup() {
updateState(GPS_START);
}
void updateState(State st) {
// ...
}
void loop() {
displayPosition(gps);
}
void displayPosition(TinyGPSPlus &gps) {
// ...
}
The preprocessor automatically adds the line #include "Particle.h" to the top of the file, unless your file already includes "Particle.h", "Arduino.h" or "application.h".
The preprocessor adds prototypes for your functions so your code can call functions declared later in the source code. The function prototypes are added at the top of the file, below #include statements.
If you define custom classes, structs or enums in your code, the preprocessor will not add prototypes for functions with those custom types as arguments. This is to avoid putting the prototype before the type definition. This doesn't apply to functions with types defined in libraries. Those functions will get a prototype.
If you need to include another file or define constants before Particle.h gets included, define PARTICLE_NO_ARDUINO_COMPATIBILITY to 1 to disable Arduino compatibility macros, be sure to include Particle.h manually in the right place.
If you are getting unexpected errors when compiling valid code, it could be the preprocessor causing issues in your code. You can disable the preprocessor by adding this pragma line. Be sure to add #include "Particle.h" and the function prototypes to your code.
#pragma PARTICLE_NO_PREPROCESSOR
//
#pragma SPARK_NO_PREPROCESSOR
Device OS Versions
Particle Device OS firmware is open source and stored here on GitHub.
New versions are published here on GitHub as they are created, tested and deployed.
New version release process
The process in place for releasing all Device OS versions as prerelease or default release versions can be found here on GitHub.
GitHub Release Notes
Please go to GitHub to read the Changelog for your desired firmware version (Click a version below).
| Firmware Version | |||||||
|---|---|---|---|---|---|---|---|
| v1.4.x default releases | v1.4.0 | v1.4.1 | v1.4.2 | v1.4.3 | v1.4.4 | - | - |
| v1.4.x prereleases | v1.4.0-rc.1 | v1.4.1-rc.1 | - | - | - | - | - |
| v1.3.x default releases | v1.3.1 | - | - | - | - | - | - |
| v1.3.x prereleases | v1.3.0-rc.1 | v1.3.1-rc.1 | - | - | - | - | - |
| v1.2.x default releases | v1.2.1 | - | - | - | - | - | - |
| v1.2.x prereleases | v1.2.0-beta.1 | v1.2.0-rc.1 | v1.2.1-rc.1 | v1.2.1-rc.2 | v1.2.1-rc.3 | - | - |
| v1.1.x default releases | v1.1.0 | v1.1.1 | - | - | - | - | - |
| v1.1.x prereleases | v1.1.0-rc.1 | v1.1.0-rc.2 | v1.1.1-rc.1 | - | - | - | - |
| v1.0.x default releases | v1.0.0 | v1.0.1 | - | - | - | - | - |
| v1.0.x prereleases | v1.0.1-rc.1 | - | - | - | - | - | - |
| v0.8.x-rc.x prereleases | v0.8.0-rc.10 | v0.8.0-rc.11 | v0.8.0-rc.12 | v0.8.0-rc.14 | - | - | - |
| v0.8.x-rc.x prereleases | v0.8.0-rc.1 | v0.8.0-rc.2 | v0.8.0-rc.3 | v0.8.0-rc.4 | v0.8.0-rc.7 | v0.8.0-rc.8 | v0.8.0-rc.9 |
| v0.7.x default releases | v0.7.0 | - | - | - | - | - | - |
| v0.7.x-rc.x prereleases | v0.7.0-rc.1 | v0.7.0-rc.2 | v0.7.0-rc.3 | v0.7.0-rc.4 | v0.7.0-rc.5 | v0.7.0-rc.6 | v0.7.0-rc.7 |
| v0.6.x default releases | v0.6.0 | v0.6.1 | v0.6.2 | v0.6.3 | v0.6.4 | - | - |
| v0.6.x-rc.x prereleases | v0.6.2-rc.1 | v0.6.2-rc.2 | - | - | - | - | - |
| - | v0.6.0-rc.1 | v0.6.0-rc.2 | v0.6.1-rc.1 | v0.6.1-rc.2 | - | - | - |
| v0.5.x default releases | v0.5.0 | v0.5.1 | v0.5.2 | v0.5.3 | v0.5.4 | v0.5.5 | - |
| v0.5.x-rc.x prereleases | v0.5.3-rc.1 | v0.5.3-rc.2 | v0.5.3-rc.3 | - | - | - | - |
Programming and Debugging Notes
If you don't see any notes below the table or if they are the wrong version, please select your Firmware Version in the table below to reload the page with the correct notes. Otherwise, you must have come here from a firmware release page on GitHub and your version's notes will be found below the table :)
| Firmware Version | |||||||
|---|---|---|---|---|---|---|---|
| v1.4.x default releases | v1.4.0 | v1.4.1 | v1.4.2 | v1.4.3 | v1.4.4 | - | - |
| v1.4.x prereleases | v1.4.0-rc.1 | v1.4.1-rc.1 | - | - | - | - | |
| v1.3.x default releases | v1.3.1 | - | - | - | - | - | - |
| v1.3.x prereleases | v1.3.0-rc.1 | v1.3.1-rc.1 | - | - | - | - | |
| v1.2.x default releases | v1.2.1 | - | - | - | - | - | - |
| v1.2.x prereleases | v1.2.0-beta.1 | v1.2.0-rc.1 | v1.2.1-rc.1 | v1.2.1-rc.2 | v1.2.1-rc.3 | - | |
| v1.1.x default releases | v1.1.0 | v1.1.1 | - | - | - | - | - |
| v1.0.x prereleases | v1.0.1-rc.1 | - | - | - | - | - | - |
| v1.1.x prereleases | v1.1.0-rc.1 | v1.1.0-rc.2 | v1.1.1-rc.1 | - | - | ||
| v1.0.x default releases | v1.0.0 | v1.0.1 | - | - | - | - | - |
| v1.0.x prereleases | v1.0.1-rc.1 | - | - | - | - | - | - |
| v0.8.x-rc.x prereleases | v0.8.0-rc.10 | v0.8.0-rc.11 | v0.8.0-rc.12 | v0.8.0-rc.14 | - | - | - |
| v0.8.x-rc.x prereleases | v0.8.0-rc.1 | v0.8.0-rc.2 | v0.8.0-rc.3 | v0.8.0-rc.4 | v0.8.0-rc.7 | v0.8.0-rc.8 | v0.8.0-rc.9 |
| v0.7.x default releases | v0.7.0 | - | - | - | - | - | - |
| v0.7.x-rc.x prereleases | v0.7.0-rc.1 | v0.7.0-rc.2 | v0.7.0-rc.3 | v0.7.0-rc.4 | v0.7.0-rc.5 | v0.7.0-rc.6 | v0.7.0-rc.7 |
| v0.6.x default releases | v0.6.0 | v0.6.1 | v0.6.2 | v0.6.3 | v0.6.4 | - | - |
| v0.6.x-rc.x prereleases | v0.6.2-rc.1 | v0.6.2-rc.2 | - | - | - | - | - |
| - | v0.6.0-rc.1 | v0.6.0-rc.2 | v0.6.1-rc.1 | v0.6.1-rc.2 | - | - | - |
| v0.5.x default releases | v0.5.0 | v0.5.1 | v0.5.2 | v0.5.3 | v0.5.4 | v0.5.5 | - |
| v0.5.x-rc.x prereleases | v0.5.3-rc.1 | v0.5.3-rc.2 | v0.5.3-rc.3 | - | - | - | - |
release-notes-wrapper
@FW_VER@0.5.0if
@FW_VER@0.5.0endif
@FW_VER@0.5.1if
@FW_VER@0.5.1endif
@FW_VER@0.5.2if
@FW_VER@0.5.2endif
@FW_VER@0.5.3if
@FW_VER@0.5.3endif
@FW_VER@0.5.4if
@FW_VER@0.5.4endif
@FW_VER@0.5.5if
@FW_VER@0.5.5endif
@FW_VER@0.6.0if
@FW_VER@0.6.0endif
@FW_VER@0.6.1if
@FW_VER@0.6.1endif
@FW_VER@0.6.2if
@FW_VER@0.6.2endif
@FW_VER@0.6.3if
@FW_VER@0.6.3endif
@FW_VER@0.6.4if
@FW_VER@0.6.4endif
@FW_VER@0.7.0if
@FW_VER@0.7.0endif
@FW_VER@1.1.1if
@FW_VER@1.1.1endif
@FW_VER@1.2.1if
@FW_VER@1.2.1endif
@FW_VER@1.3.1if
@FW_VER@1.3.1endif
@FW_VER@1.4.0if
@FW_VER@1.4.0endif
@FW_VER@1.4.1if
@FW_VER@1.4.1endif
@FW_VER@1.4.2if
@FW_VER@1.4.2endif
@FW_VER@1.4.3if
@FW_VER@1.4.3endif
@FW_VER@1.4.4if
@FW_VER@1.4.4endif
@CLI_VER@1.15.0if
@CLI_VER@1.15.0endif
@CLI_VER@1.17.0if
@CLI_VER@1.17.0endif
@CLI_VER@1.18.0if
@CLI_VER@1.18.0endif
@CLI_VER@1.20.1if
@CLI_VER@1.20.1endif
@CLI_VER@1.21.0if
@CLI_VER@1.21.0endif
@CLI_VER@1.22.0if
@CLI_VER@1.22.0endif
@CLI_VER@1.23.1if
@CLI_VER@1.23.1endif
@CLI_VER@1.24.1if
@CLI_VER@1.24.1endif
@CLI_VER@1.25.0if
@CLI_VER@1.25.0endif
@CLI_VER@1.26.2if
@CLI_VER@1.26.2endif
@CLI_VER@1.29.0if
@CLI_VER@1.29.0endif
@CLI_VER@1.32.1if
@CLI_VER@1.32.1endif
@CLI_VER@1.32.4if
@CLI_VER@1.32.4endif
@CLI_VER@1.33.0if
@CLI_VER@1.33.0endif
@CLI_VER@1.35.0if
@CLI_VER@1.35.0endif
@CLI_VER@1.36.3if
@CLI_VER@1.36.3endif
@CLI_VER@1.37.0if
@CLI_VER@1.37.0endif
@CLI_VER@1.38.0if
@CLI_VER@1.38.0endif
@CLI_VER@1.39.0if
@CLI_VER@1.39.0endif
@CLI_VER@1.40.0if
@CLI_VER@1.40.0endif
@CLI_VER@1.41.0if
@CLI_VER@1.41.0endif
@CLI_VER@1.41.1if
@CLI_VER@1.41.1endif
@CLI_VER@1.41.2if
@CLI_VER@1.41.2endif
@CLI_VER@1.42.0if
@CLI_VER@1.42.0endif
@CLI_VER@1.43.0if
@CLI_VER@1.43.0endif
@CLI_VER@1.43.1if
@CLI_VER@1.43.1endif
@CLI_VER@1.43.3if
@CLI_VER@1.43.3endif
@CLI_VER@1.46.1if
@CLI_VER@1.46.1endif
@CLI_VER@1.47.0if
@CLI_VER@1.47.0endif
@CLI_VER@1.48.0if
@CLI_VER@1.48.0endif
@CLI_VER@1.49.0if
@CLI_VER@1.49.0endif
@CLI_VER@1.52.0if
@CLI_VER@1.52.0endif
@CLI_VER@1.53.0if
@CLI_VER@1.53.0endif
@ELECTRON_PARTS@2if
@ELECTRON_PARTS@2endif
@ELECTRON_PARTS@3if
@ELECTRON_PARTS@3endif
The following instructions are for upgrading to Device OS v@FW_VER@ which requires Particle CLI v@CLI_VER@.
Updating Device OS Automatically
To update your Photon, P1 or Core Device OS version automatically, compile and flash your application in the Web IDE, selecting version @FW_VER@ in the devices drawer. The app will be flashed, following by the system part1 and part2 firmware for Photon and P1. Other update instructions for Core, Photon, P1 and Electron can be found below.
The easy local method using Particle CLI
@FW_VER@0.5.4if
Note: There is no version of the Particle CLI released that supports the particle update command for firmware version @FW_VER@. Please download the binaries and use one of the other supported programming methods.
@FW_VER@0.5.4endif
@FW_VER@0.5.5if
Note: There is no version of the Particle CLI released that supports the particle update command for firmware version @FW_VER@. Please download the binaries and use one of the other supported programming methods.
@FW_VER@0.5.5endif
The easiest way to upgrade to Device OS Version @FW_VER@ is to use the
Particle CLI with a single command. You will first upgrade the Device
OS, then optionally program Tinker on the device. This requires CLI version @CLI_VER@. You can check with particle --version.
If you have the Particle CLI installed already, you can update it with the following command sudo npm update -g particle-cli@v@CLI_VER@ (note: you can try without sudo first if you wish).
To upgrade Device OS, make sure the device is in DFU mode (flashing yellow LED) and run these commands in order:
The easy local method using Particle CLI
1) Make sure the device is in DFU mode and run:
particle update
2) Optionally add Tinker as the user firmware instead of an app that you may currently have running on your device. Have the device in DFU mode and run:
particle flash --usb tinker
The OTA method using Particle CLI
@FW_VER@0.6.0if
Note: You must update your Electron to (v0.5.3, v0.5.3-rc.2, or v0.5.3-rc.3) first before attempting to use OTA or YModem transfer to update to v0.6.0. If you use DFU over USB, you can update to v0.6.0 directly, but make sure you have installed v1.18.0 of the CLI first.
@FW_VER@0.6.0endif
@FW_VER@0.7.0if
Note: The following update sequence is required!
- First Update to 0.5.3 (if the current version is less than that)
- Then update to 0.6.3(Photon/P1) or 0.6.4(Electron) (if the current version is less than that)
- Then update to 0.7.0
@FW_VER@0.7.0endif
@FW_VER@1.1.1if
Note: The following update sequence is required!
- First Update to 0.5.3 (if the current version is less than that)
- Then update to 0.6.3(Photon/P1) or 0.6.4(Electron) (if the current version is less than that)
- Then update to 0.7.0
- Then update to 1.1.1
@FW_VER@1.1.1endif
@FW_VER@1.2.1if
Note: The following update sequence is required!
- First Update to 0.5.3 (if the current version is less than that)
- Then update to 0.6.3(Photon/P1) or 0.6.4(Electron) (if the current version is less than that)
- Then update to 0.7.0
- Then update to 1.2.1
@FW_VER@1.2.1endif
@FW_VER@1.3.1if
Note: The following update sequence is required!
- First Update to 0.5.3 (if the current version is less than that)
- Then update to 0.6.3(Photon/P1) or 0.6.4(Electron) (if the current version is less than that)
- Then update to 0.7.0
- Then update to 1.2.1
- Then update to 1.3.1
@FW_VER@1.3.1endif
@FW_VER@1.4.0if
Note: The following update sequence is required!
- First Update to 0.5.3 (if the current version is less than that)
- Then update to 0.6.3(Photon/P1) or 0.6.4(Electron) (if the current version is less than that)
- Then update to 0.7.0
- Then update to 1.2.1
- Then update to 1.4.0
@FW_VER@1.4.0endif
@FW_VER@1.4.1if
Note: The following update sequence is required!
- First Update to 0.5.3 (if the current version is less than that)
- Then update to 0.6.3(Photon/P1) or 0.6.4(Electron) (if the current version is less than that)
- Then update to 0.7.0
- Then update to 1.2.1
- Then update to 1.4.1
@FW_VER@1.4.1endif
@FW_VER@1.4.2if
Note: The following update sequence is required!
- First Update to 0.5.3 (if the current version is less than that)
- Then update to 0.6.3(Photon/P1) or 0.6.4(Electron) (if the current version is less than that)
- Then update to 0.7.0
- Then update to 1.2.1
- Then update to 1.4.2
@FW_VER@1.4.2endif
@FW_VER@1.4.3if
Note: The following update sequence is required!
- First Update to 0.5.3 (if the current version is less than that)
- Then update to 0.6.3(Photon/P1) or 0.6.4(Electron) (if the current version is less than that)
- Then update to 0.7.0
- Then update to 1.2.1
- Then update to 1.4.3
@FW_VER@1.4.3endif
@FW_VER@1.4.4if
Note: The following update sequence is required!
- First Update to 0.5.3 (if the current version is less than that)
- Then update to 0.6.3(Photon/P1) or 0.6.4(Electron) (if the current version is less than that)
- Then update to 0.7.0
- Then update to 1.2.1
- Then update to 1.4.4
@FW_VER@1.4.4endif
Note: As a Product in the Console, when flashing a >= 0.6.0 user app, Electrons can now Safe Mode Heal from < 0.5.3 to >= 0.6.0 firmware. This will consume about 500KB of data as it has to transfer two 0.5.3 system parts and three >= 0.6.0 system parts. Devices will not automatically update Device OS if not added as a Product in Console.
Note: You must download system binaries to a local directory on your machine for this to work. Binaries are attached to the bottom of the GitHub Release Notes.
If your device is online, you can attempt to OTA (Over The Air) update these system parts as well with the Particle CLI. Run the following commands in order for your device type:
@ELECTRON_PARTS@2if
The OTA method using Particle CLI
// Core
particle flash YOUR_DEVICE_NAME tinker-@FW_VER@-core.bin
// Photon
particle flash YOUR_DEVICE_NAME system-part1-@FW_VER@-photon.bin
particle flash YOUR_DEVICE_NAME system-part2-@FW_VER@-photon.bin
particle flash YOUR_DEVICE_NAME tinker (optional)
// P1
particle flash YOUR_DEVICE_NAME system-part1-@FW_VER@-p1.bin
particle flash YOUR_DEVICE_NAME system-part2-@FW_VER@-p1.bin
particle flash YOUR_DEVICE_NAME tinker (optional)
// Electron
particle flash YOUR_DEVICE_NAME system-part1-@FW_VER@-electron.bin
particle flash YOUR_DEVICE_NAME system-part2-@FW_VER@-electron.bin
particle flash YOUR_DEVICE_NAME tinker (optional)
@ELECTRON_PARTS@2endif
@ELECTRON_PARTS@3if
The OTA method using Particle CLI
// Core
particle flash YOUR_DEVICE_NAME tinker-@FW_VER@-core.bin
// Photon
particle flash YOUR_DEVICE_NAME system-part1-@FW_VER@-photon.bin
particle flash YOUR_DEVICE_NAME system-part2-@FW_VER@-photon.bin
particle flash YOUR_DEVICE_NAME tinker (optional)
// P1
particle flash YOUR_DEVICE_NAME system-part1-@FW_VER@-p1.bin
particle flash YOUR_DEVICE_NAME system-part2-@FW_VER@-p1.bin
particle flash YOUR_DEVICE_NAME tinker (optional)
// Electron
particle flash YOUR_DEVICE_NAME system-part1-@FW_VER@-electron.bin
particle flash YOUR_DEVICE_NAME system-part2-@FW_VER@-electron.bin
particle flash YOUR_DEVICE_NAME system-part3-@FW_VER@-electron.bin
particle flash YOUR_DEVICE_NAME tinker (optional)
@ELECTRON_PARTS@3endif
The local method over USB using Particle CLI
This requires CLI version @CLI_VER@ or newer. You can check with particle --version.
If you have the Particle CLI installed already, you can update it with the following command sudo npm update -g particle-cli (note: you can try without sudo first if you wish).
To upgrade Device OS, make sure the device is in DFU mode (flashing yellow LED) and run these commands in order for your device type:
@ELECTRON_PARTS@2if
The local method over USB using Particle CLI
// Core
particle flash --usb tinker-@FW_VER@-core.bin
// Photon
particle flash --usb system-part1-@FW_VER@-photon.bin
particle flash --usb system-part2-@FW_VER@-photon.bin
particle flash --usb tinker (optional)
// P1
particle flash --usb system-part1-@FW_VER@-p1.bin
particle flash --usb system-part2-@FW_VER@-p1.bin
particle flash --usb tinker (optional)
// Electron
particle flash --usb system-part1-@FW_VER@-electron.bin
particle flash --usb system-part2-@FW_VER@-electron.bin
particle flash --usb tinker (optional)
@ELECTRON_PARTS@2endif
@ELECTRON_PARTS@3if
The local method over USB using Particle CLI
// Core
particle flash --usb tinker-@FW_VER@-core.bin
// Photon
particle flash --usb system-part1-@FW_VER@-photon.bin
particle flash --usb system-part2-@FW_VER@-photon.bin
particle flash --usb tinker (optional)
// P1
particle flash --usb system-part1-@FW_VER@-p1.bin
particle flash --usb system-part2-@FW_VER@-p1.bin
particle flash --usb tinker (optional)
// Electron
particle flash --usb system-part1-@FW_VER@-electron.bin
particle flash --usb system-part2-@FW_VER@-electron.bin
particle flash --usb system-part3-@FW_VER@-electron.bin
particle flash --usb tinker (optional)
@ELECTRON_PARTS@3endif
The local DFU-UTIL method
can be applied to offline devices locally over USB using dfu-util
- Put the device in DFU mode (flashing yellow LED)
- open a terminal window, change to the directory where you downloaded the files above, and run these commands in order for your device type:
@ELECTRON_PARTS@2if
The local DFU-UTIL method
// Core
dfu-util -d 1d50:607f -a 0 -s 0x8005000:leave -D tinker-@FW_VER@-core.bin
// Photon
dfu-util -d 2b04:d006 -a 0 -s 0x8020000 -D system-part1-@FW_VER@-photon.bin
dfu-util -d 2b04:d006 -a 0 -s 0x8060000:leave -D system-part2-@FW_VER@-photon.bin
// P1
dfu-util -d 2b04:d008 -a 0 -s 0x8020000 -D system-part1-@FW_VER@-p1.bin
dfu-util -d 2b04:d008 -a 0 -s 0x8060000:leave -D system-part2-@FW_VER@-p1.bin
// Electron
dfu-util -d 2b04:d00a -a 0 -s 0x8020000 -D system-part1-@FW_VER@-electron.bin
dfu-util -d 2b04:d00a -a 0 -s 0x8040000:leave -D system-part2-@FW_VER@-electron.bin
@ELECTRON_PARTS@2endif
@ELECTRON_PARTS@3if
The local DFU-UTIL method
// Core
dfu-util -d 1d50:607f -a 0 -s 0x8005000:leave -D tinker-@FW_VER@-core.bin
// Photon
dfu-util -d 2b04:d006 -a 0 -s 0x8020000 -D system-part1-@FW_VER@-photon.bin
dfu-util -d 2b04:d006 -a 0 -s 0x8060000:leave -D system-part2-@FW_VER@-photon.bin
// P1
dfu-util -d 2b04:d008 -a 0 -s 0x8020000 -D system-part1-@FW_VER@-p1.bin
dfu-util -d 2b04:d008 -a 0 -s 0x8060000:leave -D system-part2-@FW_VER@-p1.bin
// Electron
dfu-util -d 2b04:d00a -a 0 -s 0x8060000 -D system-part1-@FW_VER@-electron.bin
dfu-util -d 2b04:d00a -a 0 -s 0x8020000 -D system-part2-@FW_VER@-electron.bin
dfu-util -d 2b04:d00a -a 0 -s 0x8040000:leave -D system-part3-@FW_VER@-electron.bin
@ELECTRON_PARTS@3endif
Downgrading from @FW_VER@ to current default firmware
Current default Device OS would be the latest non-rc.x firmware version. E.g. if the current list of default releases was 0.5.3, 0.6.0, 0.6.1 (would be the latest).
@FW_VER@0.5.1if
Caution: After upgrading to 0.5.1, DO NOT downgrade Device OS via OTA remotely! This will cause Wi-Fi credentials to be erased on the Photon and P1. This does not affect the Core or Electron. Feel free to downgrade locally with the understanding that you will have to re-enter Wi-Fi credentials. Also note that 0.5.1 fixes several important bugs, so there should be no reason you'd normally want to downgrade.
@FW_VER@0.5.1endif
@FW_VER@0.5.2if
Note: Upgrading to 0.5.2 will now allow you to downgrade remotely OTA to v0.5.0 or earlier without erasing Wi-Fi credentials. There are still some cases where a downgrade will erase credentials, but only if you have explicitly set the country code to something other than the default or JP2. For example, if you set the country code to GB0 or US4, if you downgrade to v0.5.0 your Wi-Fi credentials will be erased. Leaving the country code at default or set to JP2 will not erase credentials when downgrading to v0.5.0. Do not downgrade to v0.5.1 first, and then v0.5.0... this will erase credentials in all cases.
@FW_VER@0.5.2endif
@FW_VER@0.7.0if
Note: If you need to downgrade, you must downgrade to 0.6.3(Photon/P1) or 0.6.4(Electron) to ensure that the bootloader downgrades automatically. When downgrading to older versions, downgrade to 0.6.3(Photon/P1) or 0.6.4(Electron) first, then to an older version such as 0.5.3. You will have to manually downgrade the bootloader as well (see release notes in 0.7.0-rc.3 release)
@FW_VER@0.7.0endif
@FW_VER@0.7.0if
Note: The following is not applicable for 0.7.0, please see above.
@FW_VER@0.7.0endif
The easiest way to downgrade from a Device OS Version @FW_VER@ is to use the Particle CLI with a single command. You will first put the Tinker back on the device, then downgrade the Device OS. Running the commands in this order prevents the device from automatically re-upgrading (based on user app version dependencies) after downgrading. This will require a CLI version associated with your desired default firmware. To determine which version to use, click on the default version desired in the table under Programming and Debugging Notes and refer to the CLI version required in The easy local method using Particle CLI section.
If you have the Particle CLI installed already, you can install a specific version like v1.16.0 with the following command sudo npm update -g particle-cli@v1.16.0 (note: you can try without sudo first if you wish). Replace v1.16.0 with your desired version.
To downgrade Device OS, make sure the device is in DFU mode (flashing yellow LED) and run these commands in order:
Downgrading from @FW_VER@ to current default firmware
1) Make sure Tinker is installed, instead of a @FW_VER@ app that you may currently have running on your device. Have the device in DFU mode and run:
particle flash --usb tinker
2) Make sure the device is in DFU mode and run:
particle update
Note: The CLI and particle update command is only updated when default firmware versions are released. This is why we install a specific version of the CLI to get a specific older version of default firmware.