
Debugger Adapter
The Particle Debugger is the no longer sold. Many CMSIS-DAP debuggers are also compatible with Particle hardware, however. This document describes using the NanoDAP debugger, however there are many nearly identical debuggers available. If have the option of getting it with or without file system support, get it with the file system, though on many models it won't even be mentioned since file system support should be standard for a CMSIS-DAP debugger.
The CMSIS-DAP debuggers work with Gen 3 (Argon, Boron, B-Series SoM, Tracker SoM), Gen 2 (Photon, P1, Electron, E-Series), and Gen 4 (M-SoM, P2, and Photon 2) devices. The ST-LINK/V2 adapter only works with Gen 2 devices.
| Debugger | Gen 2 | Gen 3 | Gen 4 |
|---|---|---|---|
| Particle Debugger | ✓ | ✓ | ✓ |
| CMSIS-DAP Debugger | ✓ | ✓ | ✓ |
| ST-LINK/V2 | ✓ |
NanoDAP
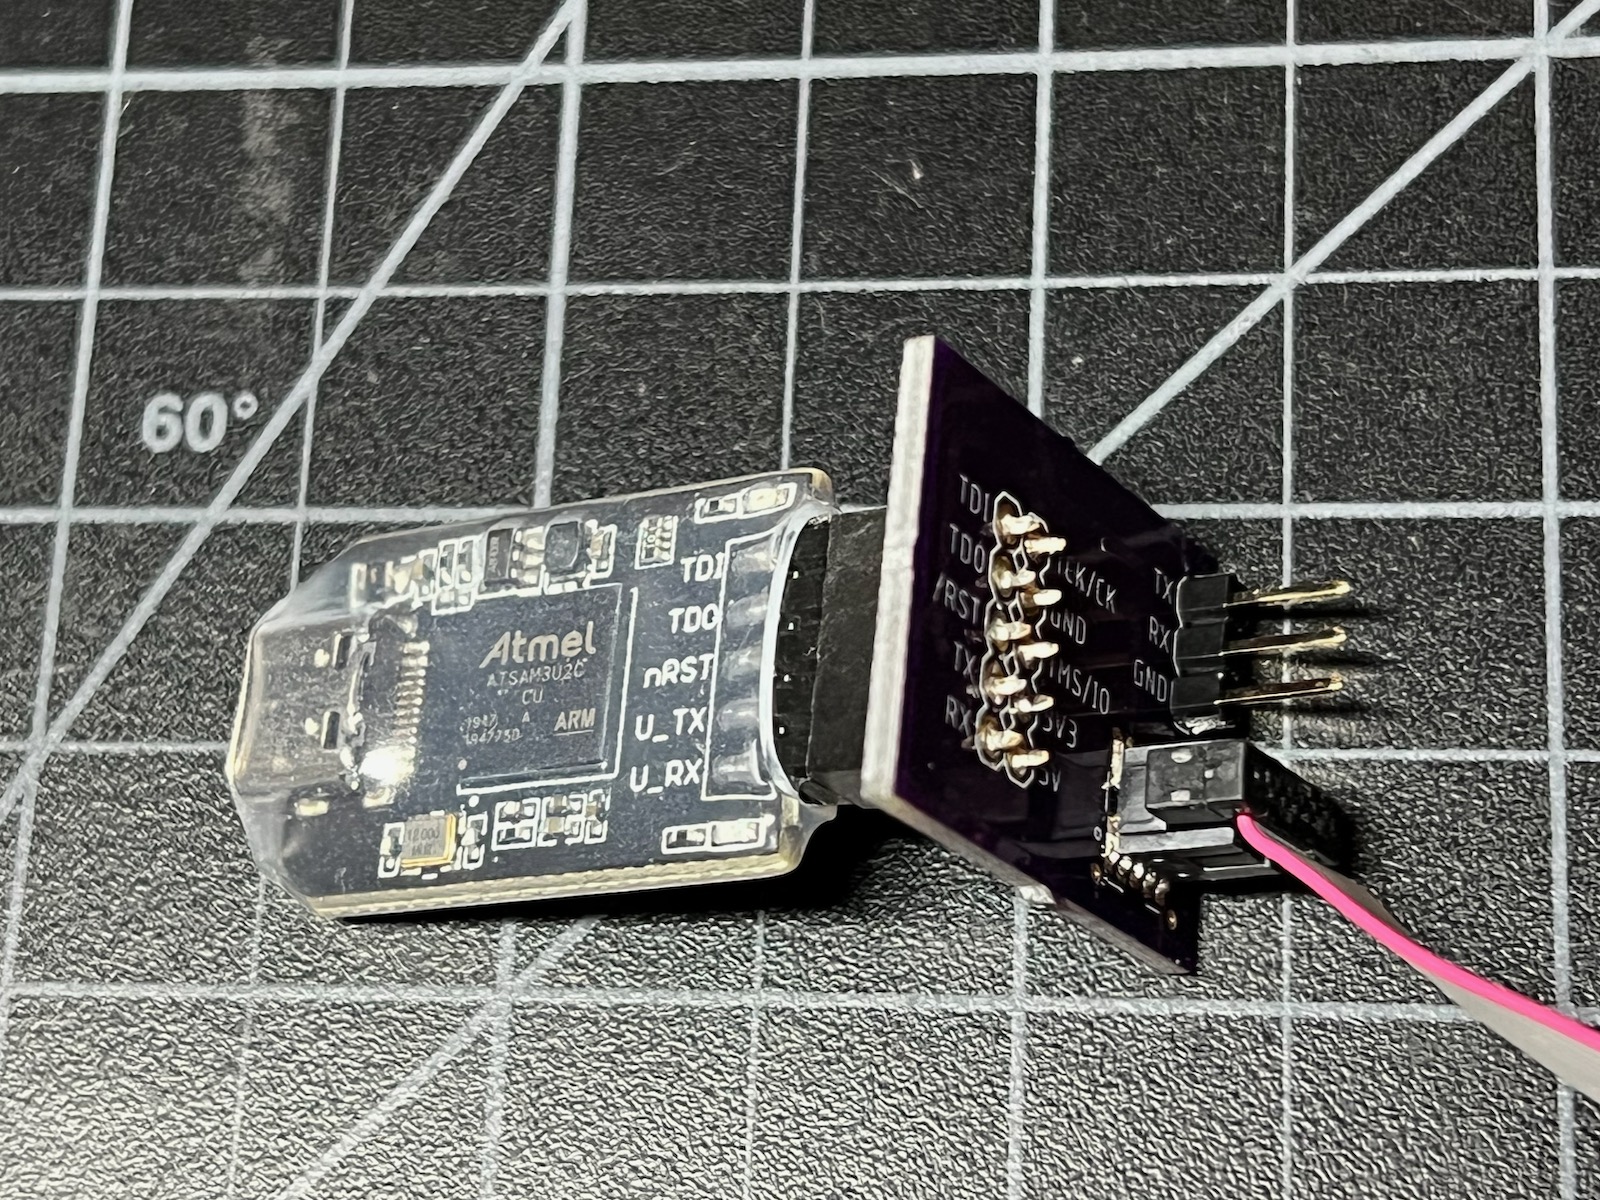
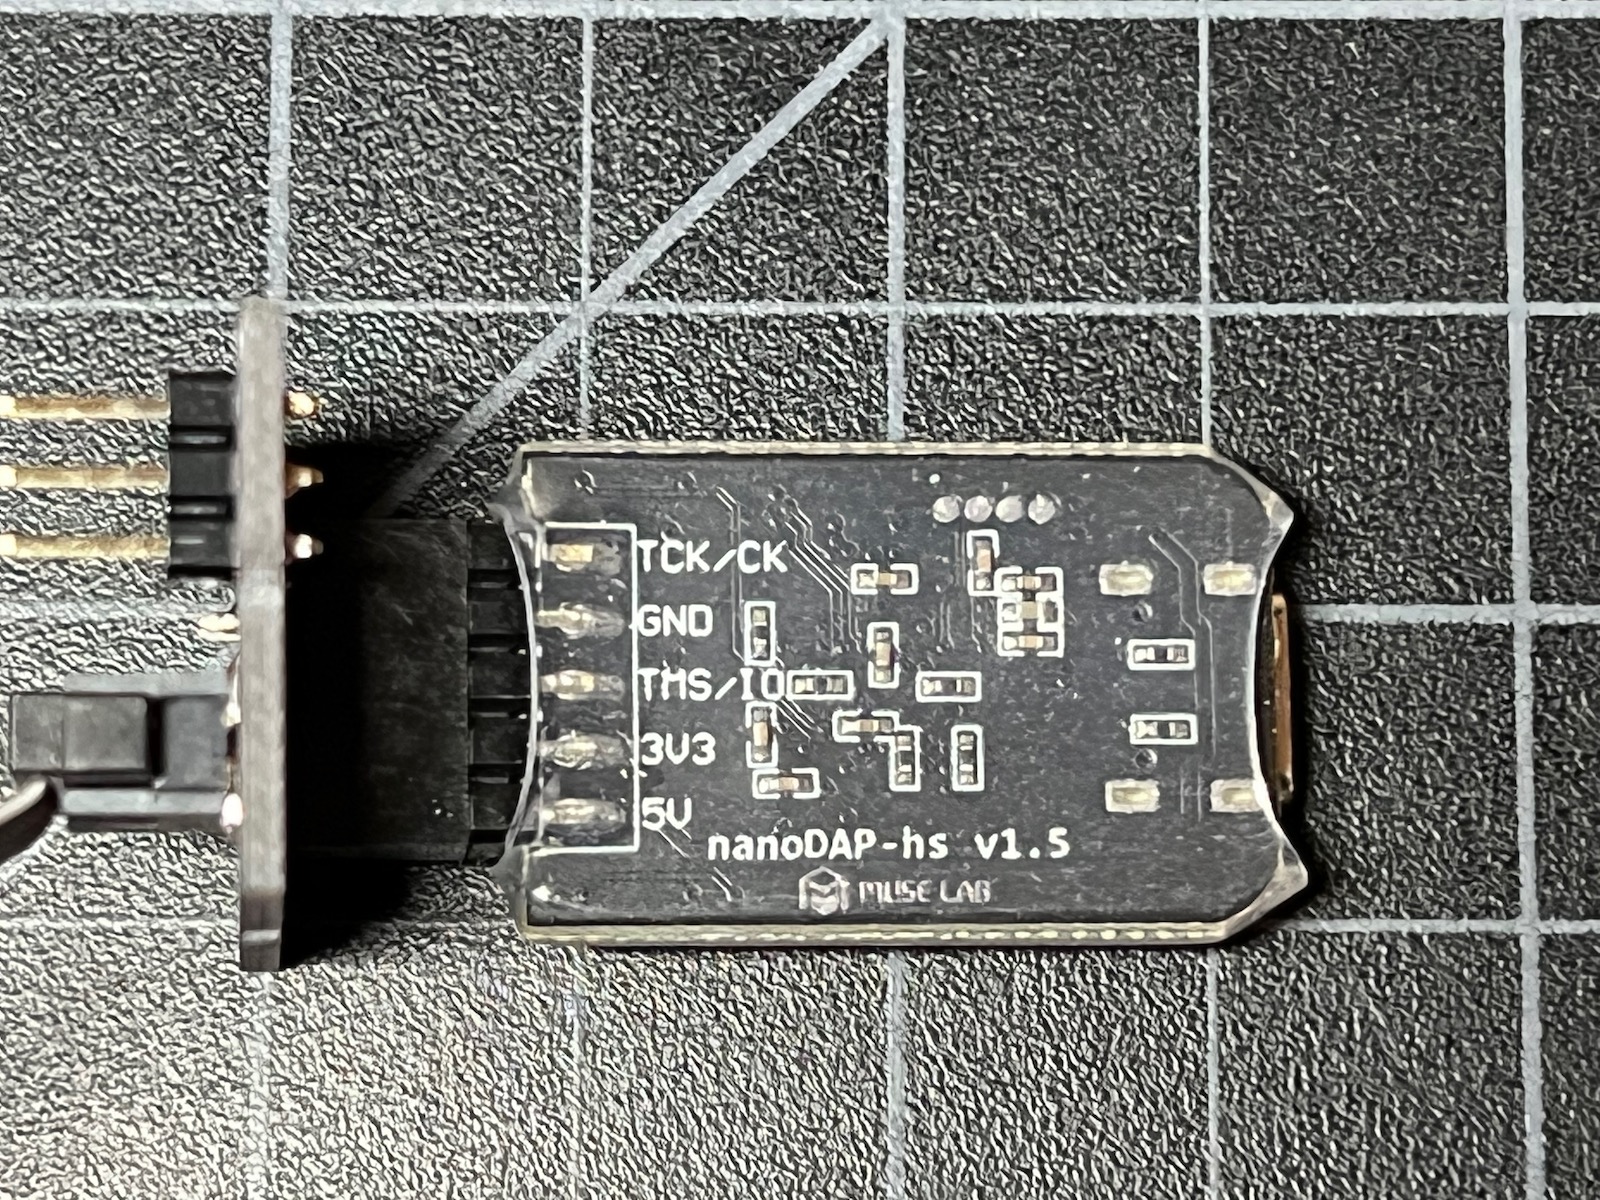
The NanoDAP debugger is tiny. It has a USB-C connector on one end to attach to your computer, and a 2x5 0.1" male header on the other side for attaching to your Particle device.
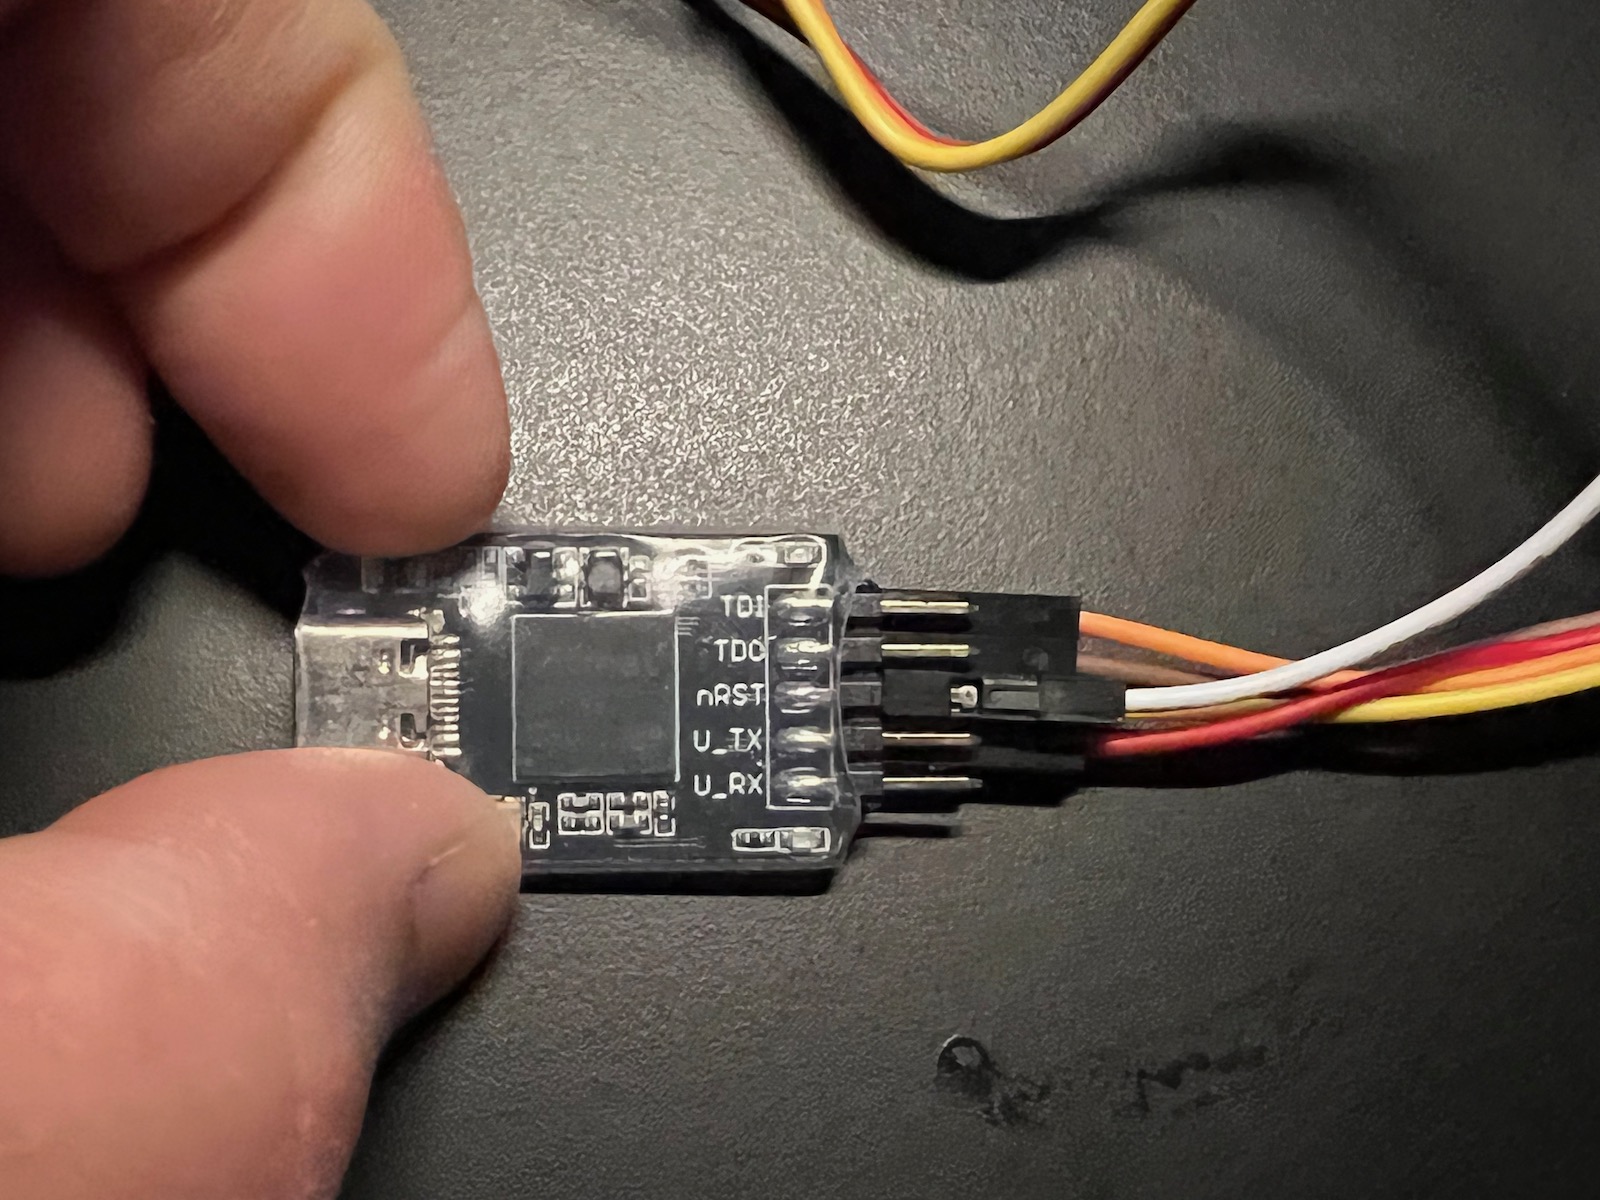
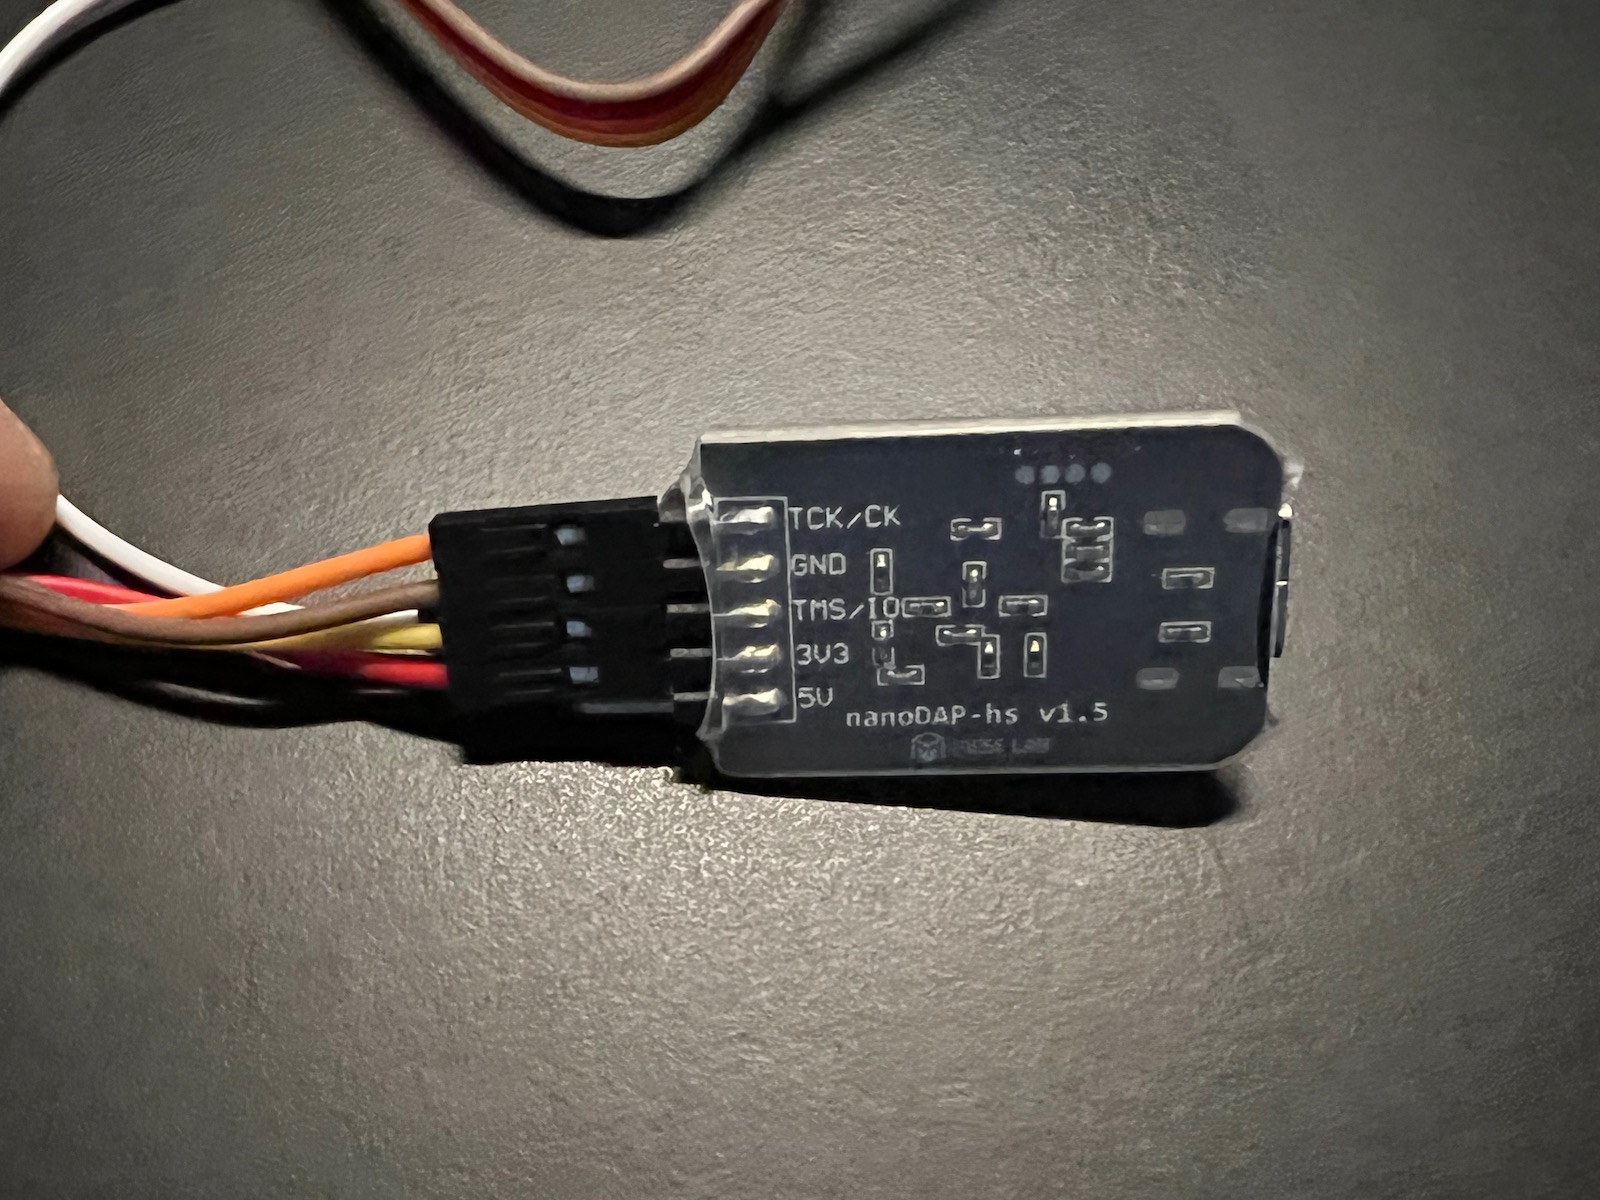
The pinouts are:
| Top | Bottom |
|---|---|
| TDI | TCK/CK |
| TDO | GND |
| nRST | TMS/IO |
| U_TX | 3V3 |
| U_RX | 5V |
If you are using Mac or Linux you can probably use it without a device driver. If you are using the Web-based JTAG programmer you may also be able to avoid using a device driver, even on Windows. The web-based programmer also works on Chromebooks.
If you are using Windows and want to use the source-level debugger or OpenOCD, you will likely need to install a device driver; the manufacturer of your debugger should provide a link to download a compatible one.
Gen 2
If you are connecting to a Gen 2 device (Photon, P1, Electron, or E-Series), you should connect:
| Debugger | Particle Device |
|---|---|
| TMS/IO | D7 (SWDIO) |
| TCK/CK | D6 (SWCLK) |
| nRST | RST |
| GND | GND |
The female-to-make Dupont wires are ideal when connecting from the debugger (male header pins) to a solderless breadboard.
Gen 3
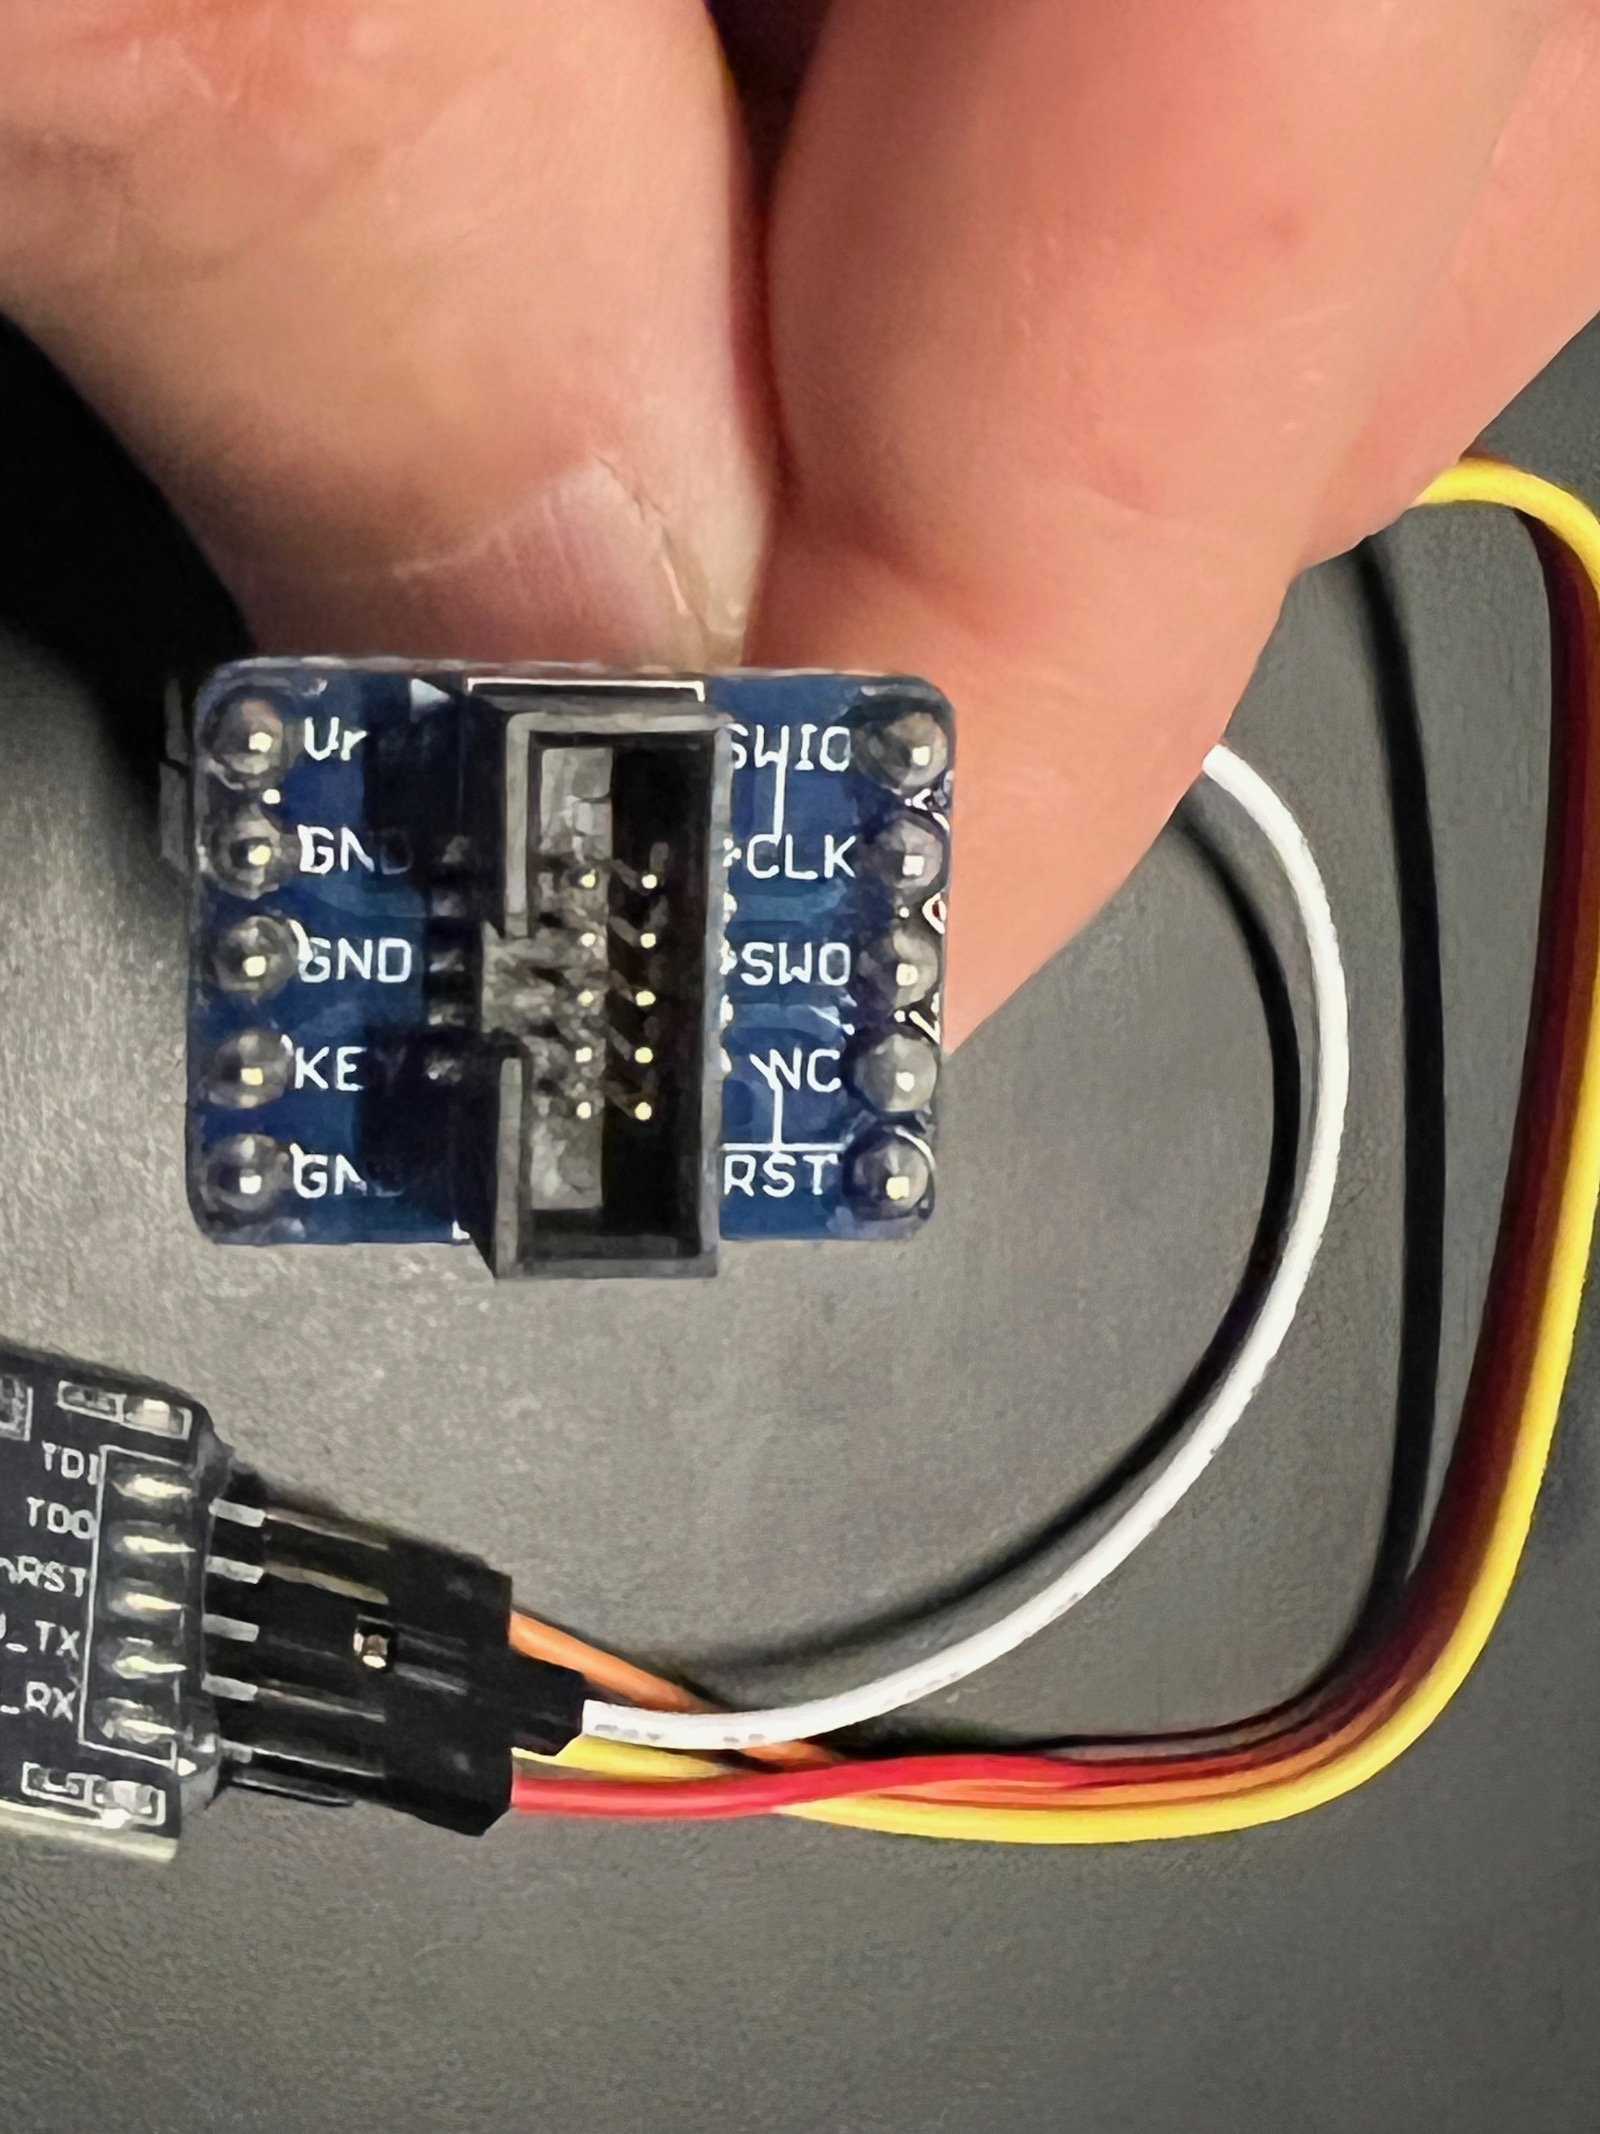
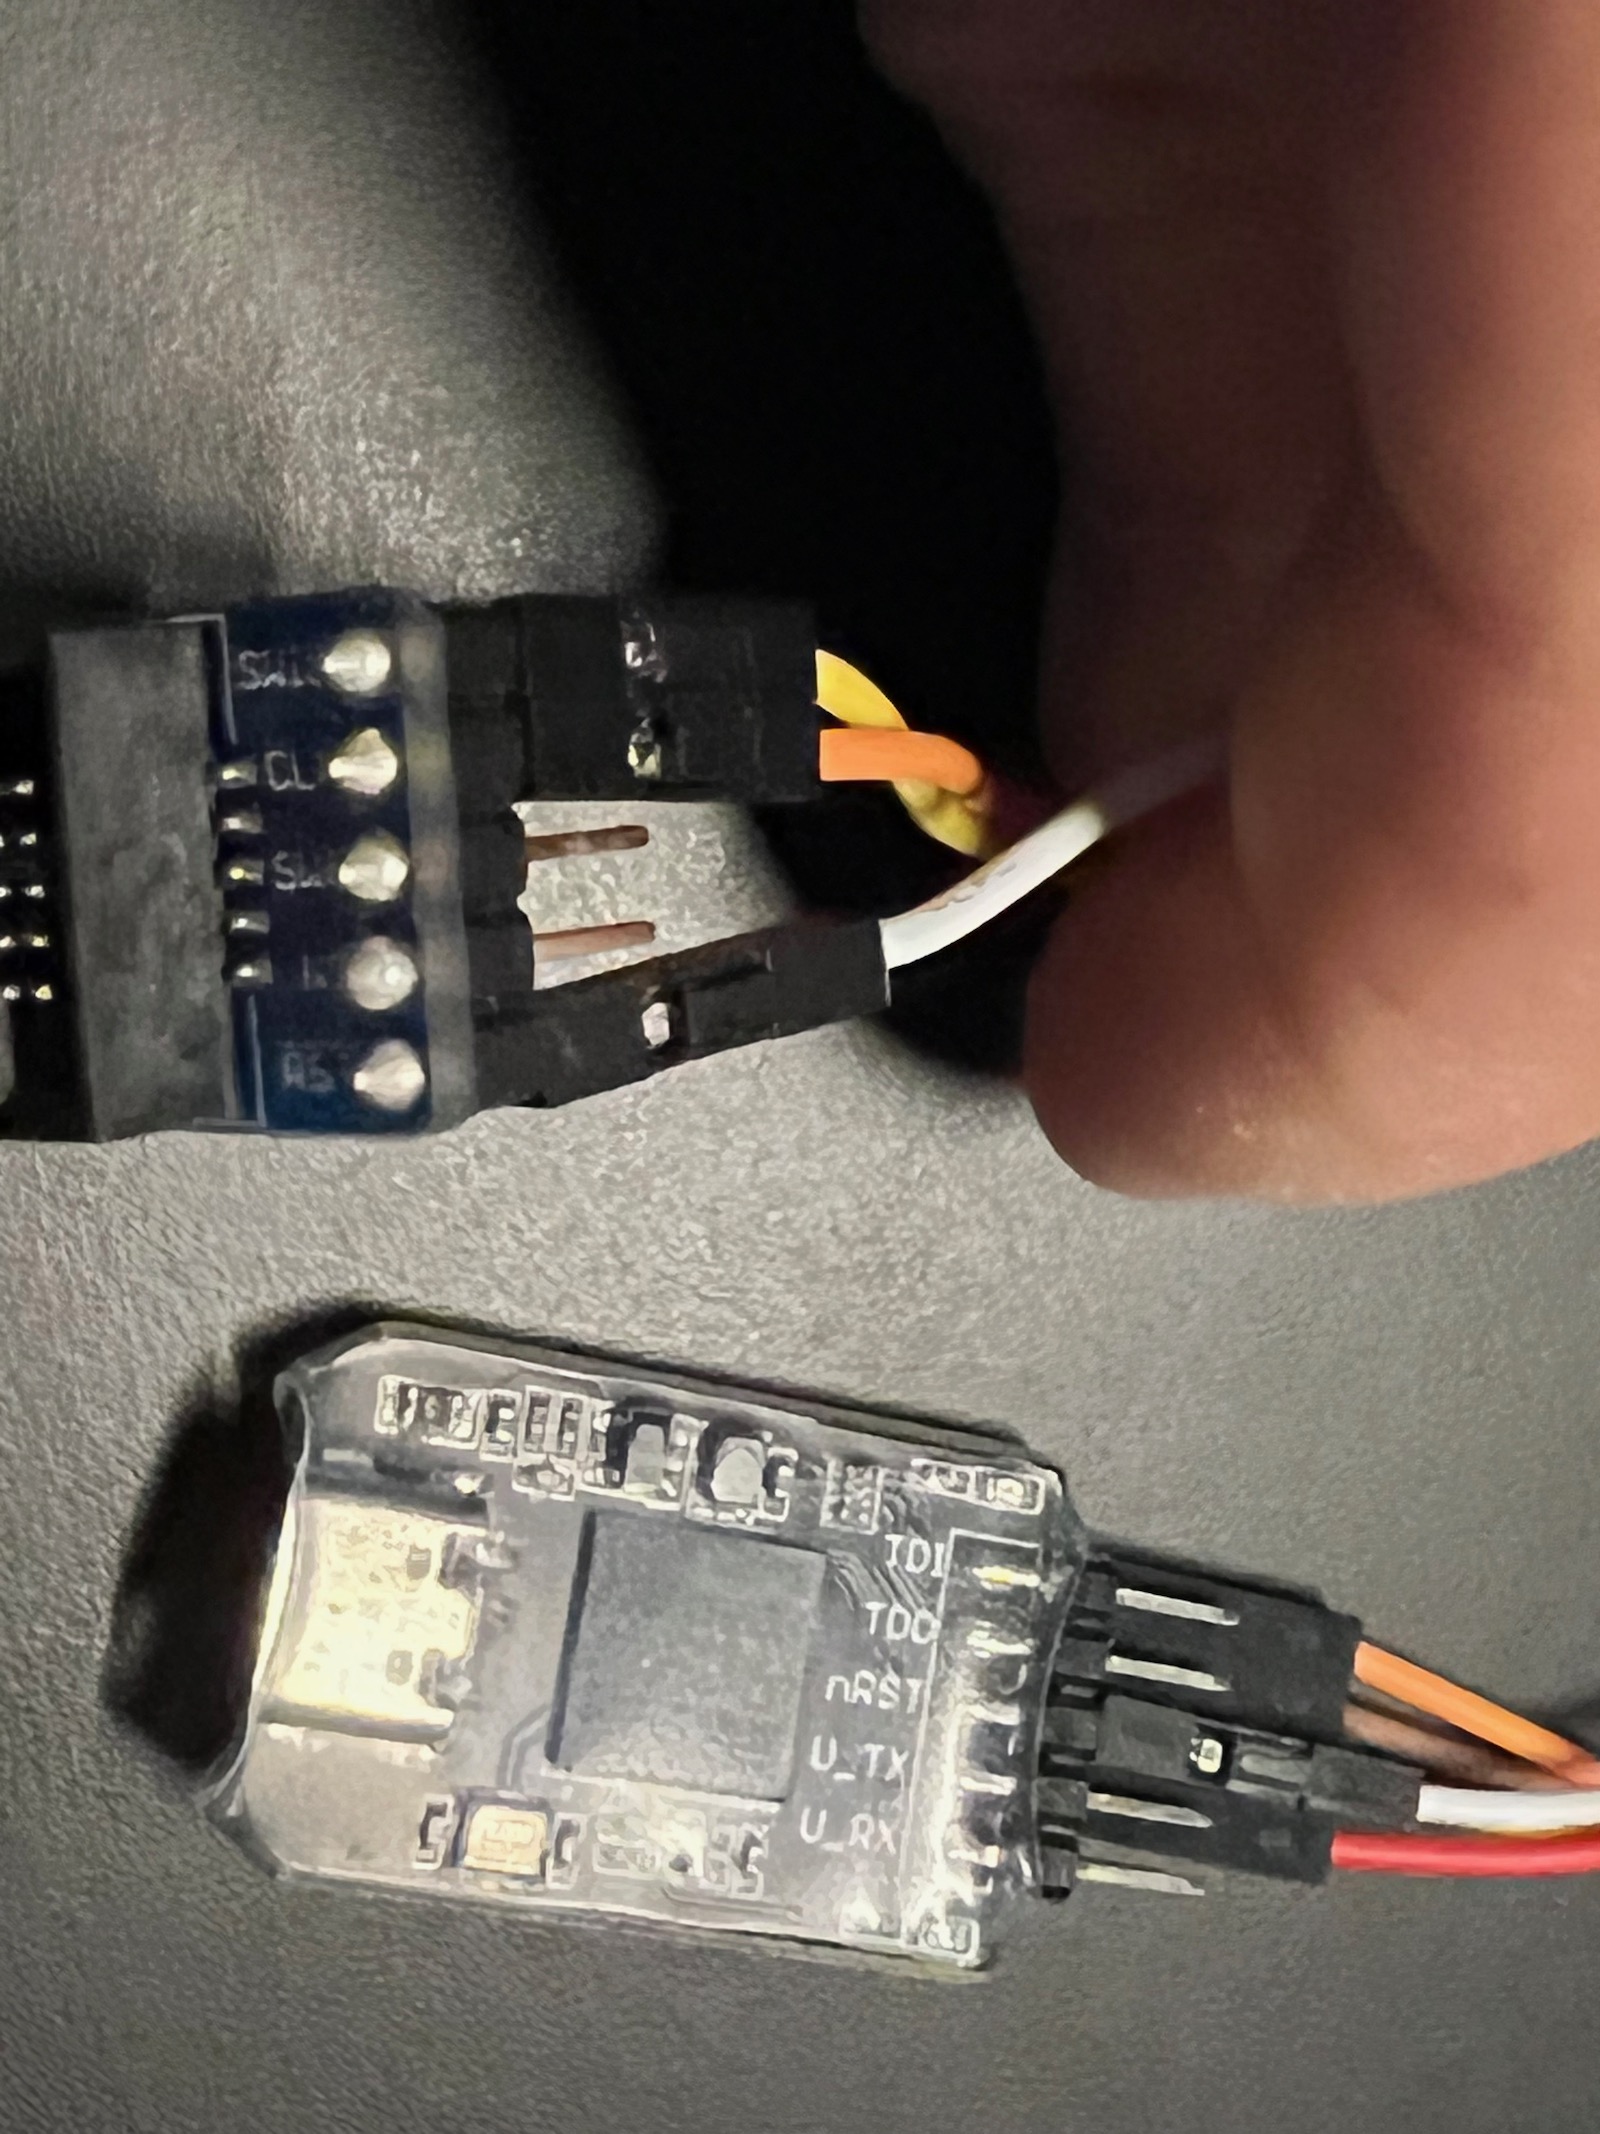
If you are connecting the debugger to a Gen 3 device it's easiest to use a SWD (2x5 1.27mm) breakout board. This one from Adafruit can be used with this cable to easily connect the debugger to your Particle Gen 3 device.
| Debugger | SWD Connector | Color |
|---|---|---|
| TCK | CLK | Orange |
| GND | GND | Brown |
| TMS | SWIO | Yellow |
| 3V3 | VREF | Red |
| nRST | /RST | White |
Of course the colors don't matter, but are included in the table to help if your looking at the pictures.

Gen 4
If you are using the Photon 2 or M-SoM in the M.2 breakout board, follow the Gen 3 instructions as these have the 5x2 debug connector.
If you are using a P2 or M-SoM on a custom board without a debug connector, follow the Gen 2 instructions to connect to D6 and D7.
Building an adapter
Instead of the wires and the generic SWD adapter, you could also build your own! This is completely optional and you can just use wires to connect the debugger directly to your device.
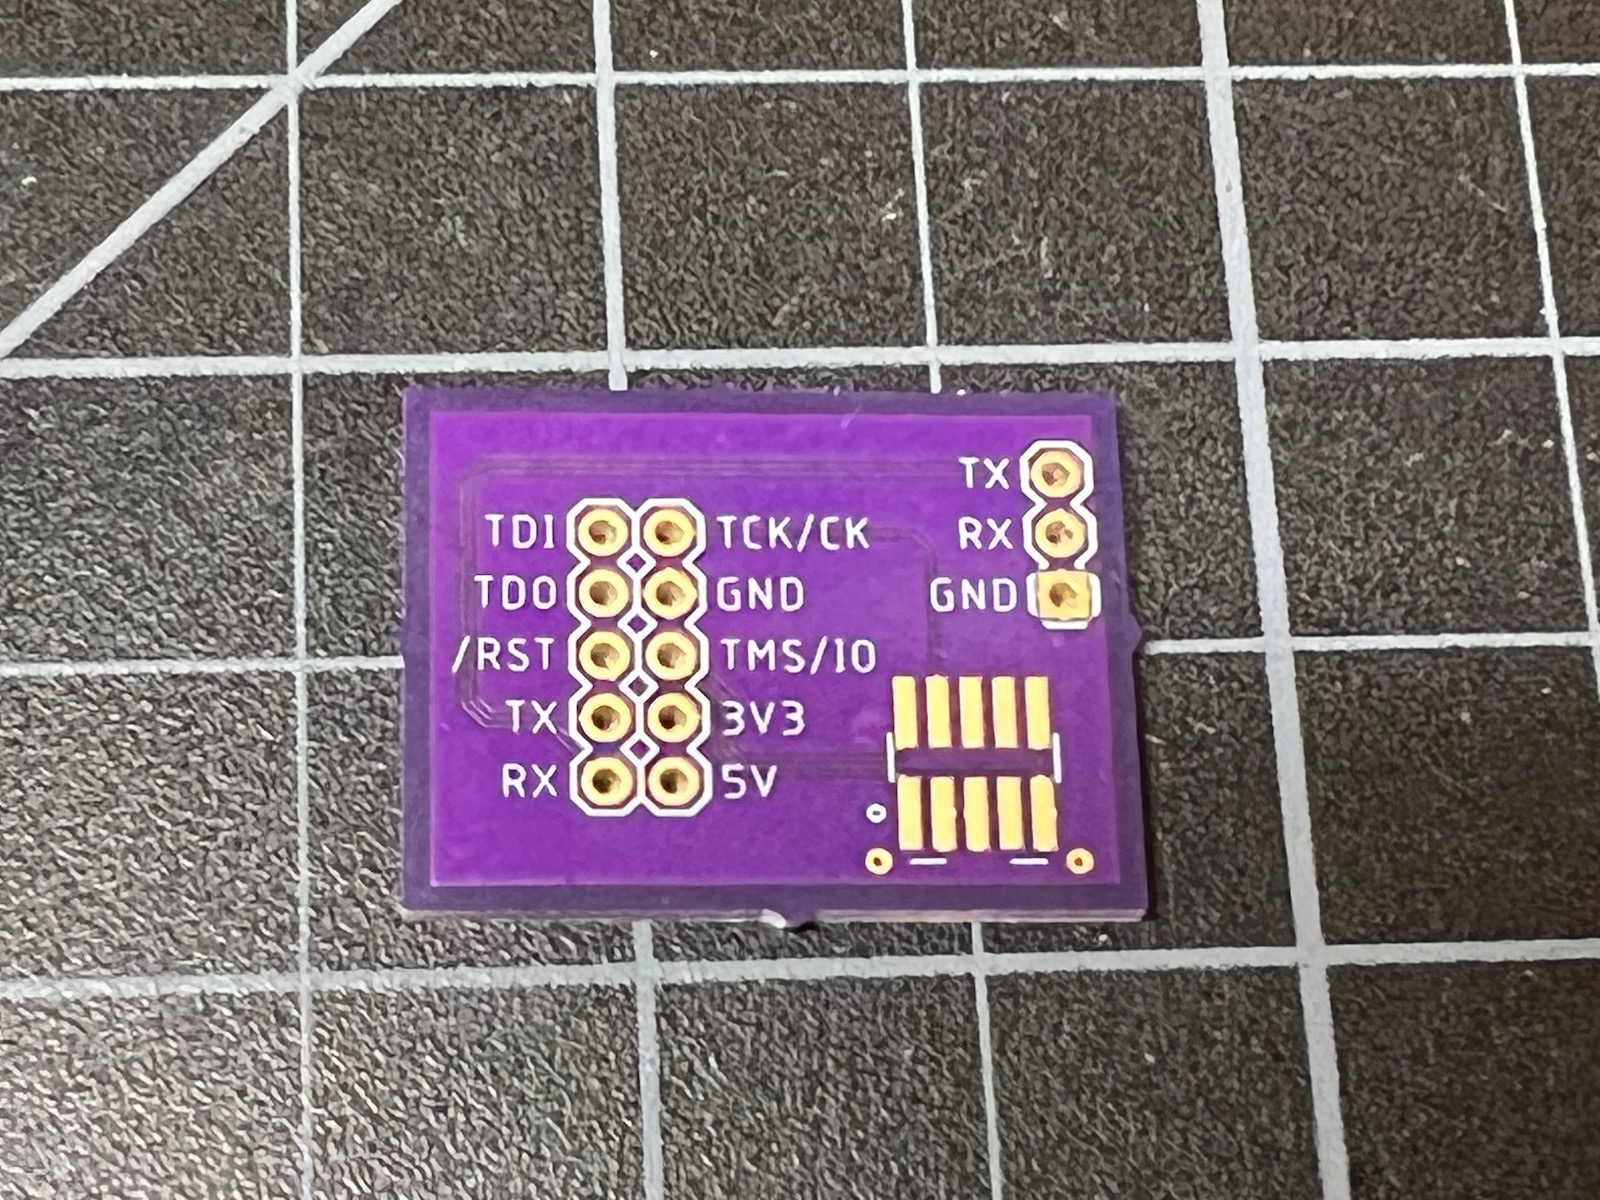
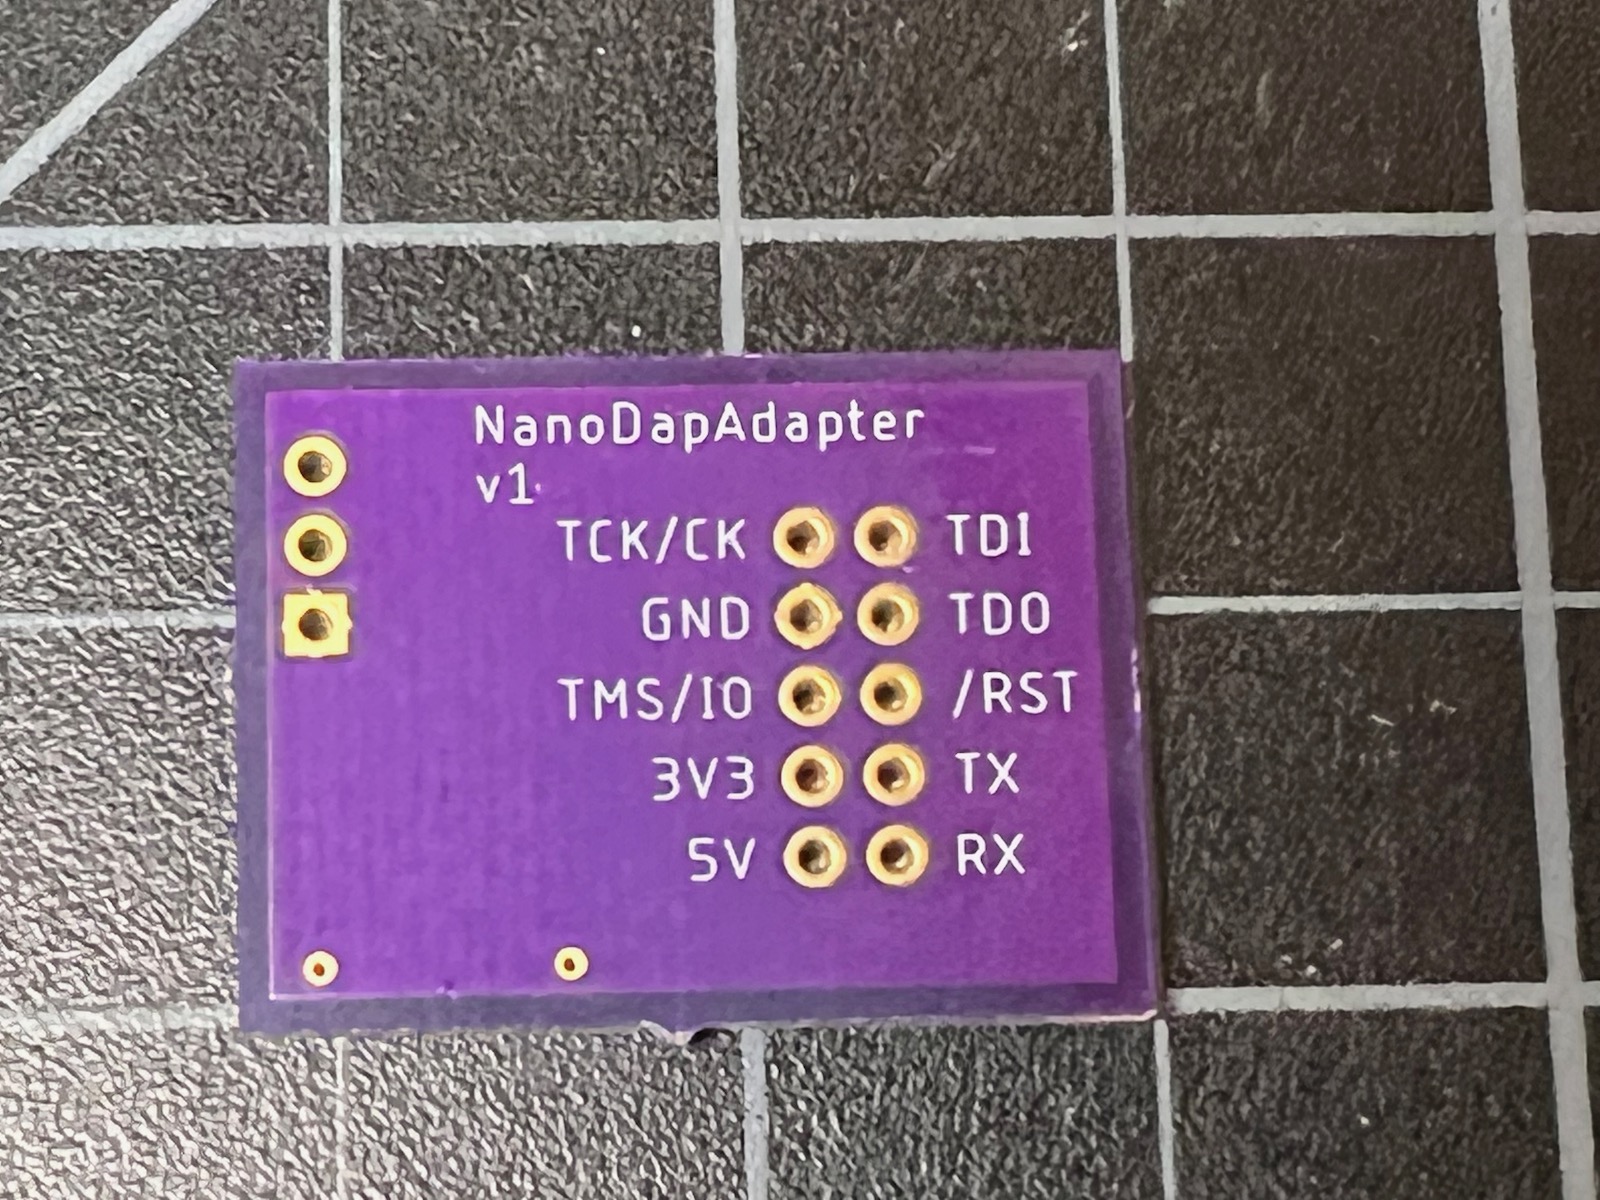
The board is passive, with just a few connectors on it:
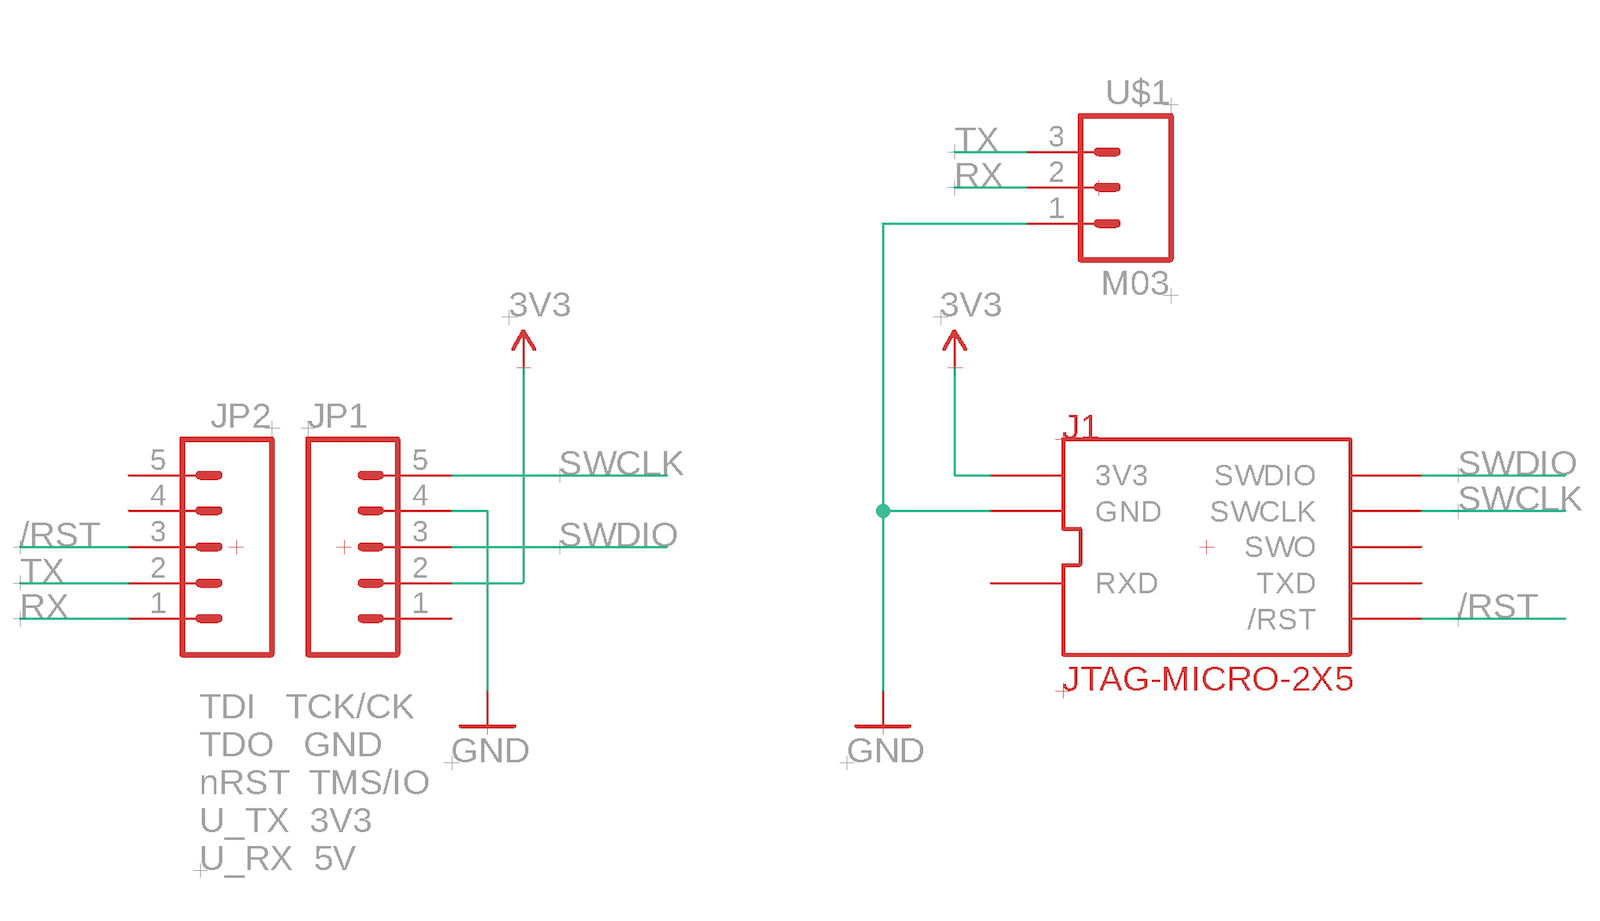
The schematic, board layout, and Gerber files are open source and available here:
| File | Description |
|---|---|
| NanoDapAdapter.sch | EagleCAD Schematic |
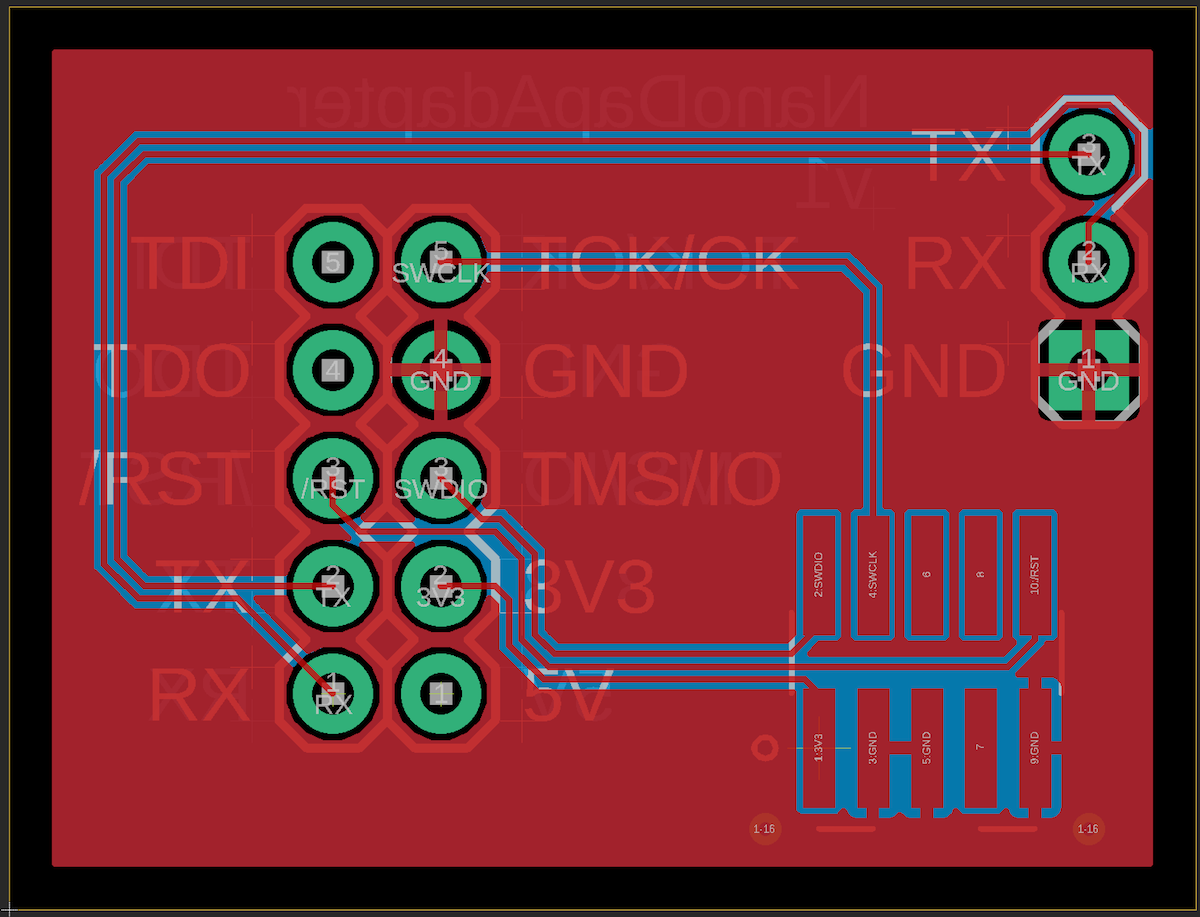
| NanoDapAdapter.brd | EagleCAD Board Layout |
| NanoDapAdapterV1.zip | Gerber Files |
I manufactured the board shown here at OshPark however any manufacturer will be able to make this simple board.
BoM (Bill of Materials)
| Description | Example | Price |
|---|---|---|
| RECEPTACLE, THR, DUAL ROW, .100" | METZ CONNECT USA Inc. FR20205VBDN | $0.80 |
| CONN HEADER SMD 10POS 1.27MM | Samtec FTSH-105-01-F-DV-K | $3.91 |
| 10-PIN 2X5 SOCKET-SOCKET 1.27MM Cable | Adafruit 1675 | $2.95 |
| Male header pins 0.1" | Sullins PRPC040SAAN-RC |
Assembly
The board is tiny and very simple:
It helps if you have solder paste, but enough of the connector pins are exposed that you can just solder it with regular solder if that's all you have.
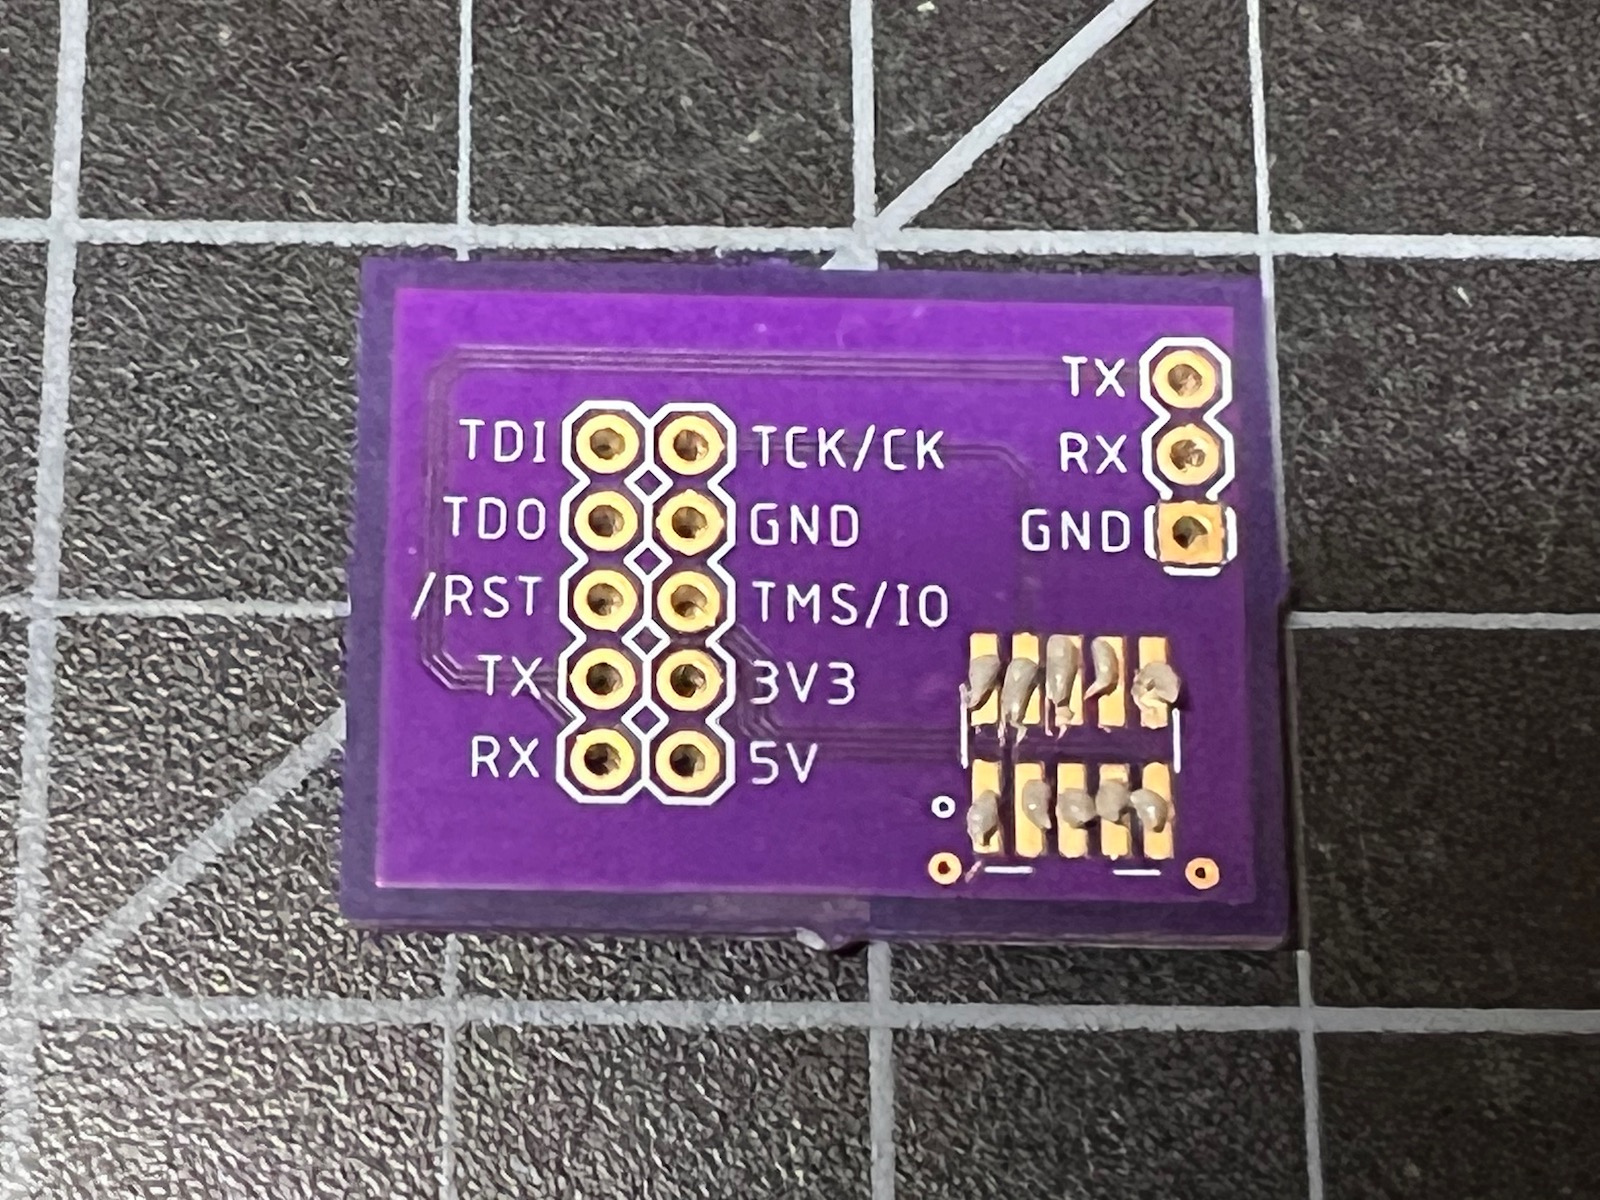
I reflowed this in a T962 reflow oven, but you can use a hot air rework gun, hot plate, or even a regular soldering iron for this project. I used Sn42/Bi57/Ag1 low-temperature solder paste so I used the Wave 1 preset on the T962.
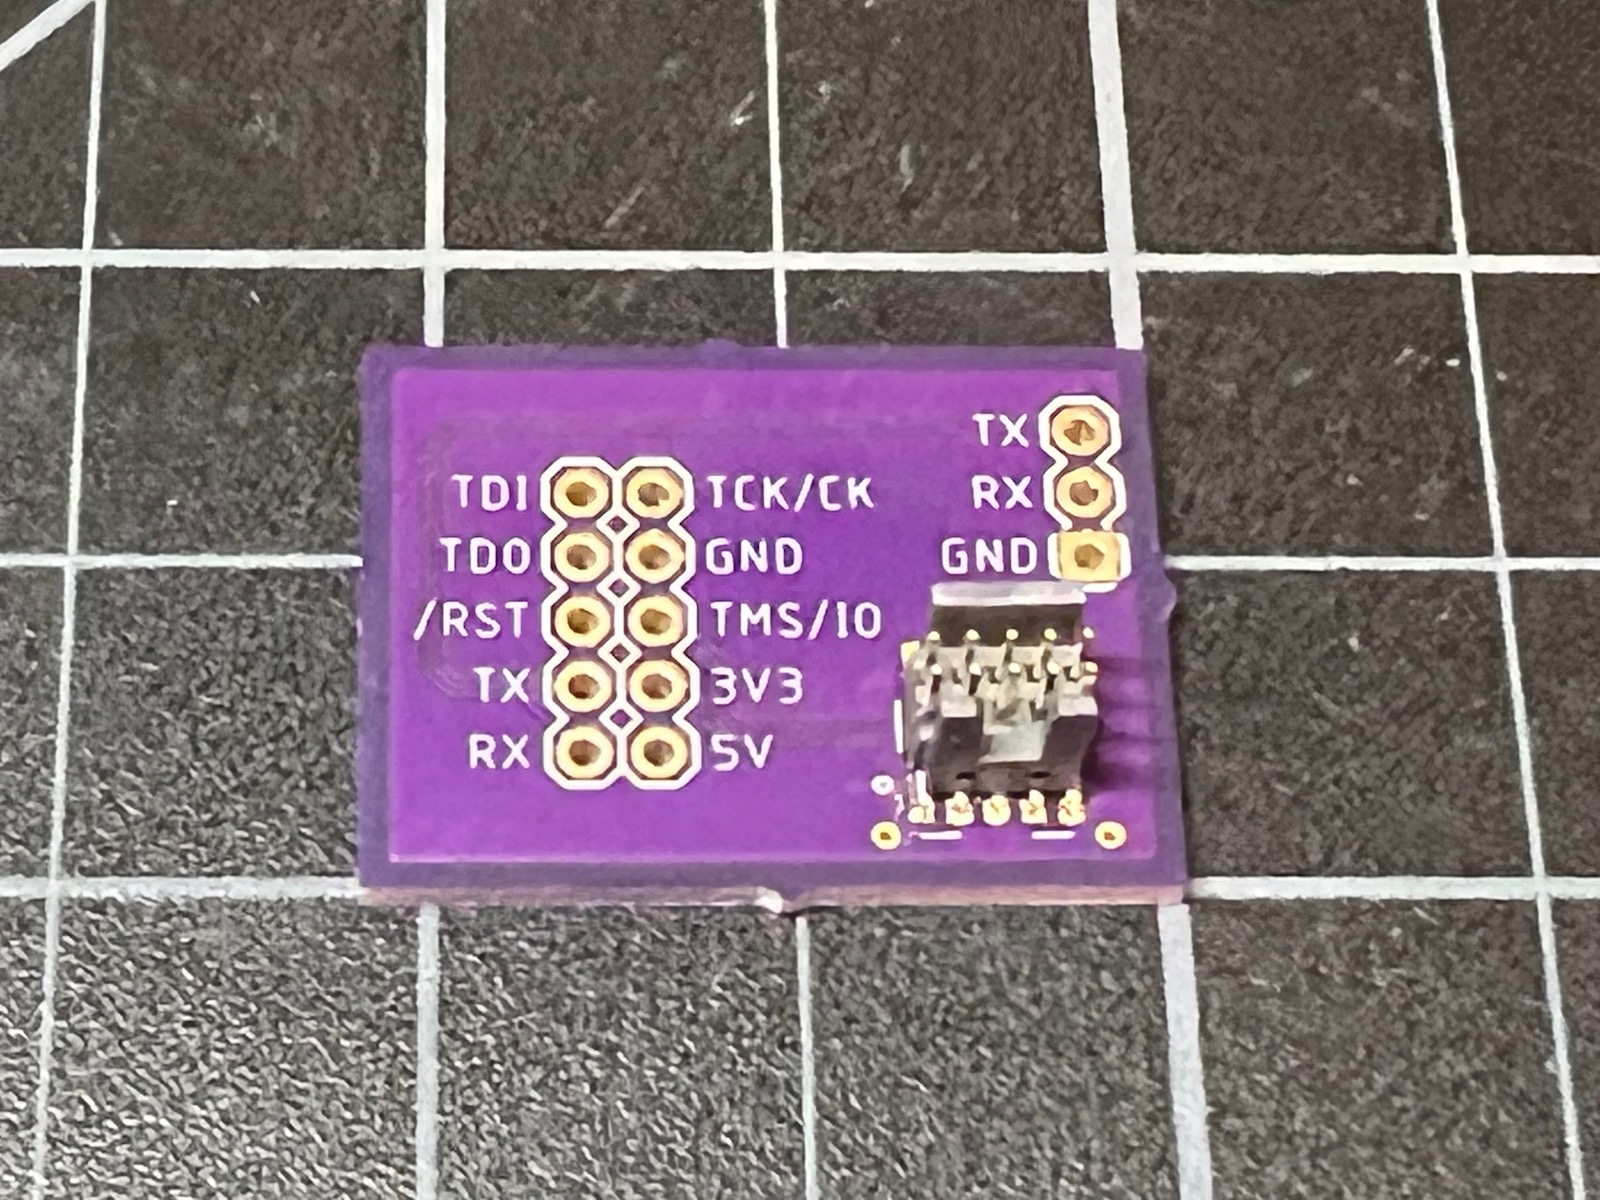
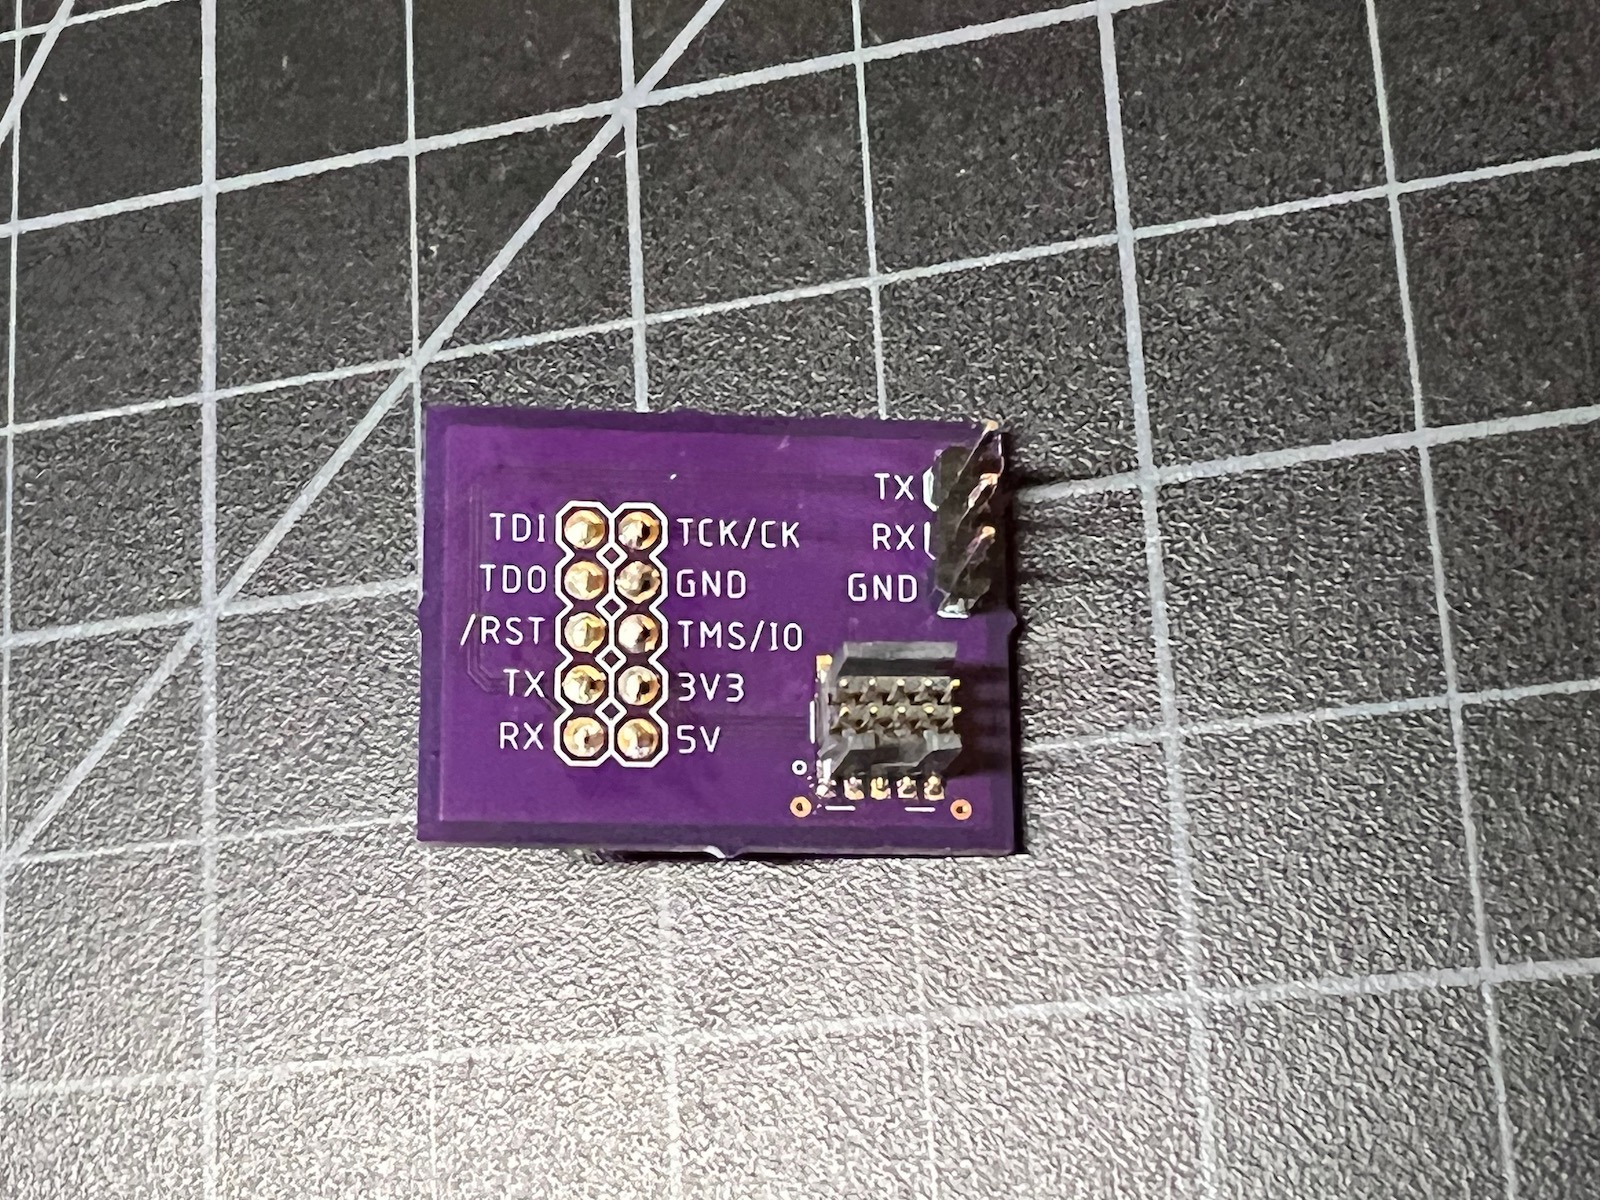
Here's the board with the SMD SWD connector soldered to the board and the optional 3-pin male header pins for the serial output from the debugger.
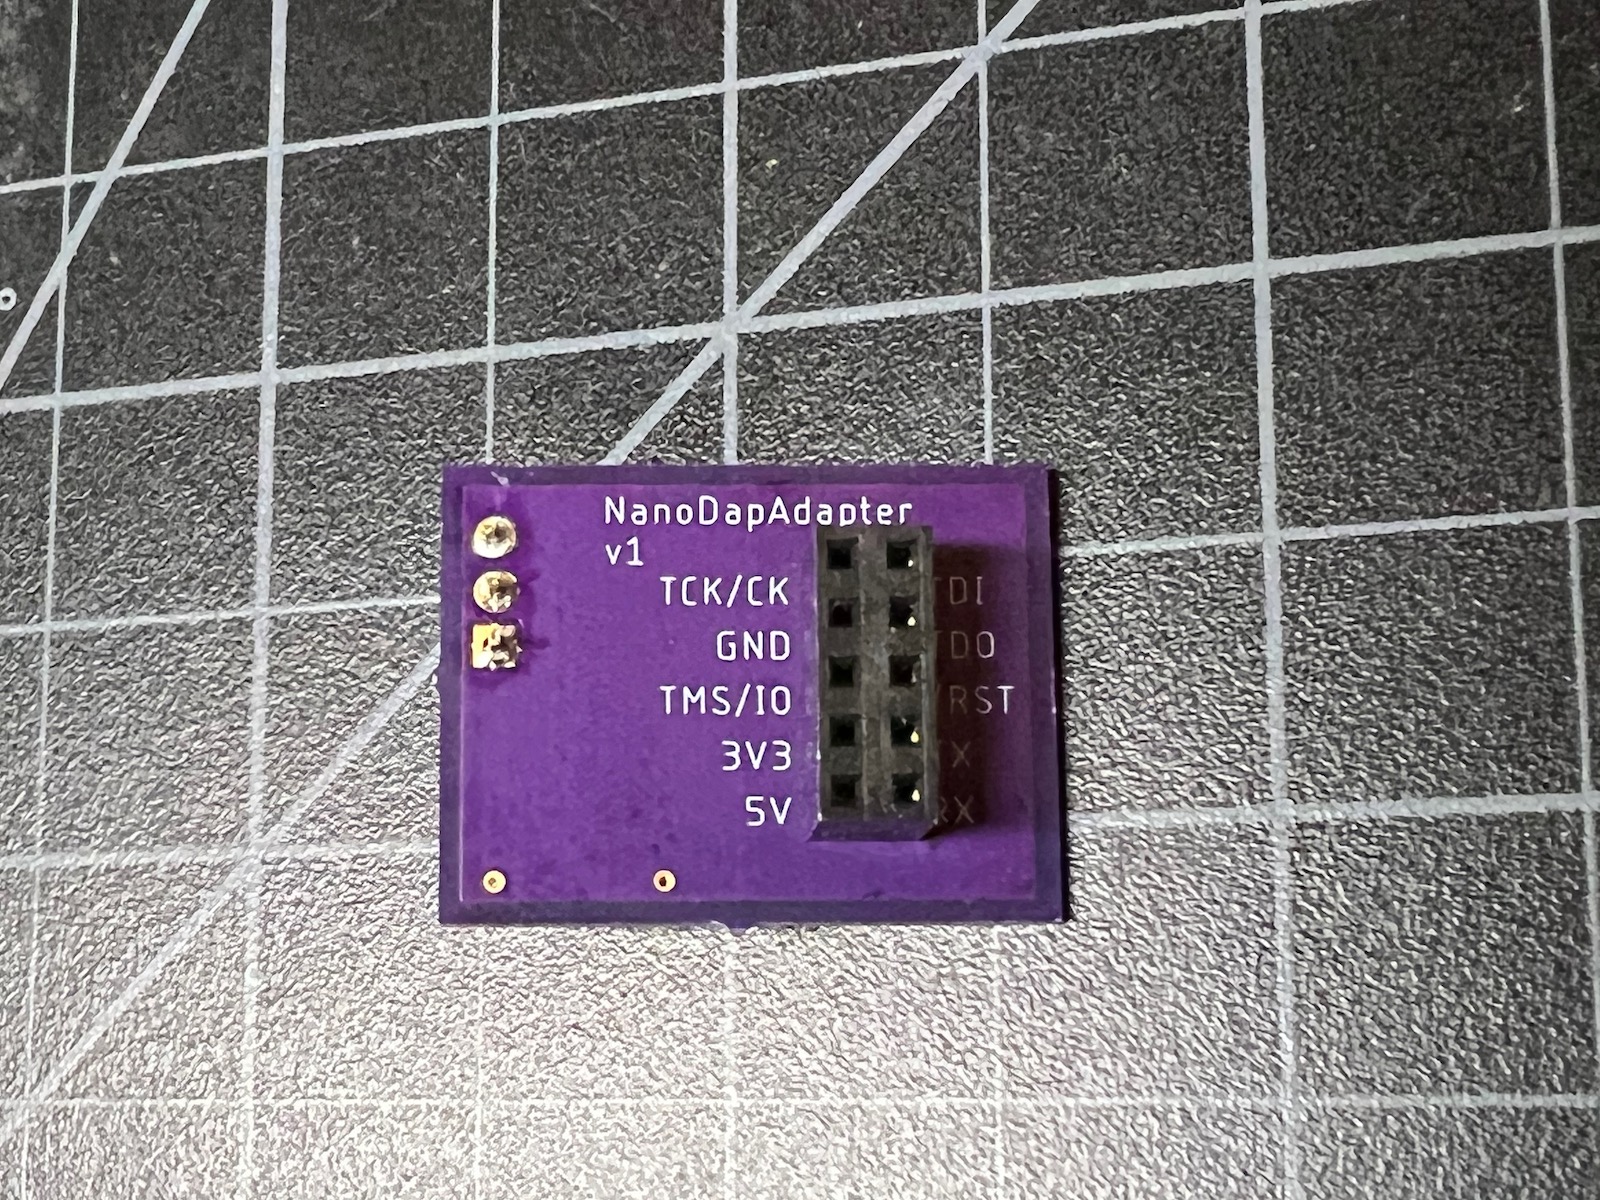
The board is intended be assembled with the 10-pin 0.1" socket mounted on the bottom of the board:
Use the socket-socket 1.27mm cable to connect the adapter to your Particle Gen 3 devices and it will work the same as the Particle Debugger examples!