Installing curl (for Windows)
The curl command, used in the Particle cloud examples is generally built-in on the Mac and Linux, but not Windows. These instructions explain how to install it.
Installation
Download
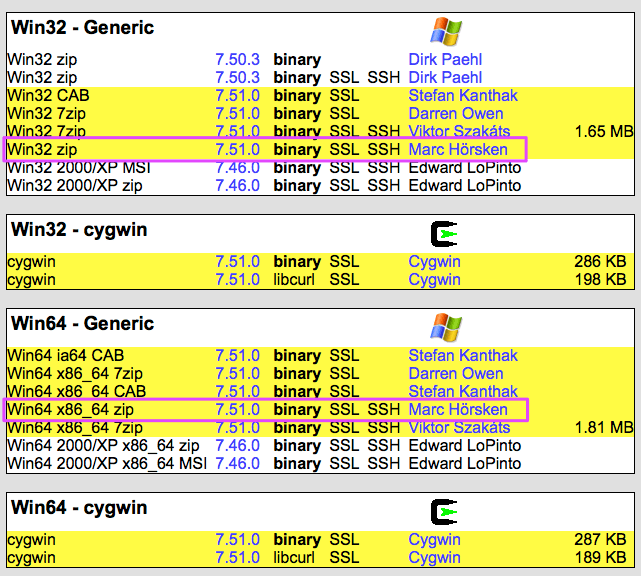
Download the files from https://curl.haxx.se/download.html. You generally want one of the two highlighted files, depending on whether you have 32-bit or 64-bit Windows:
- Win32 Generic - Win32 zip 7.51.0 binary SSL SSH
- Win64 Generic - Win64 x86_64 zip 7.51.0 binary SSL SSH
Click on the version number (7.51.0, for example) to download the file.
If you are unsure, this Microsoft knowledge base article on how to tell whether you have a 32-bit or 64-bit Windows installation may be helpful.
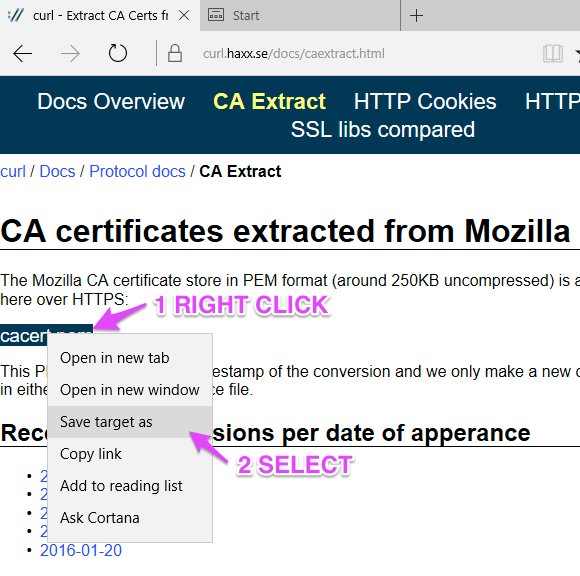
You should also go to the page http://curl.haxx.se/docs/caextract.html. Right click on the link to cacert.pem and select Save Target to save the file to your Downloads folder.
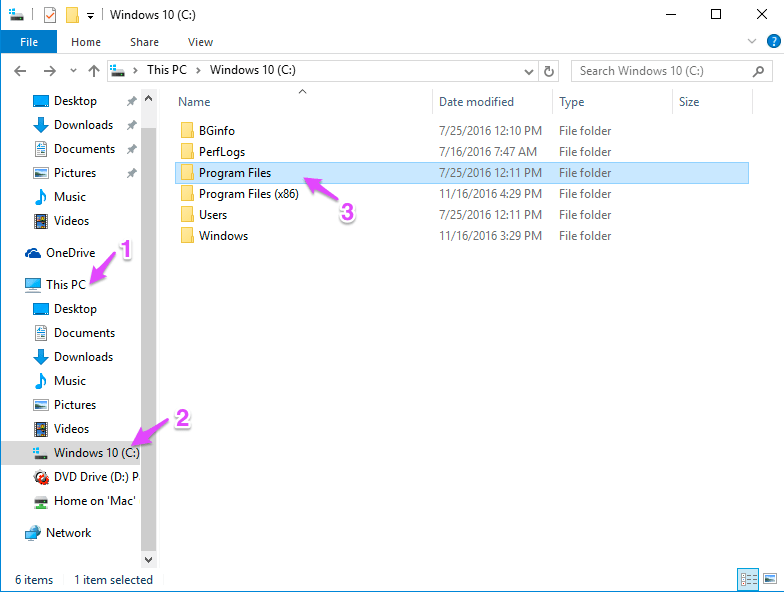
You first need to create a place to save your curl installation. I like to put the files in C:\Program Files\curl. In the Windows File Explorer:
- Select This PC
- Select your C: drive, called Windows 10 (C:) in this example, but your may be different.
- Double click Program Files
Right click on the right side of the window, select New then Folder.
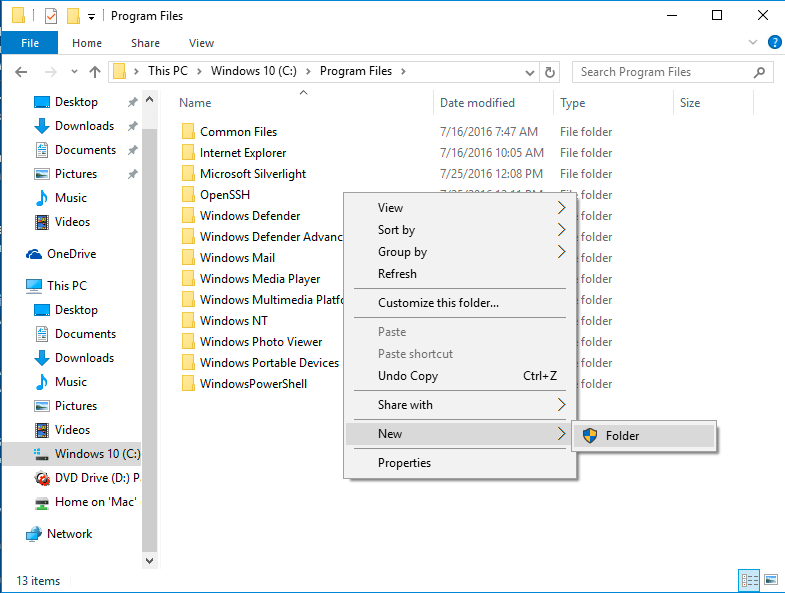
Name the new folder curl. Then moved the files you downloaded into this directory.
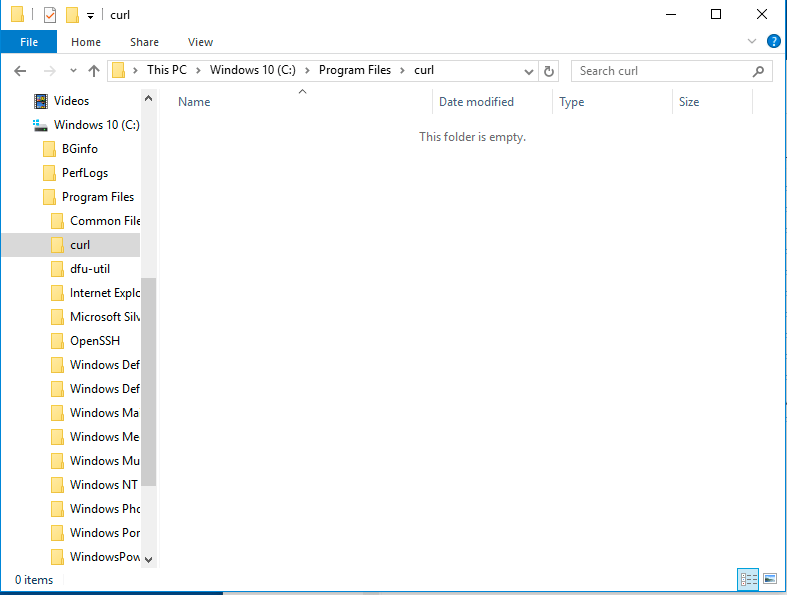
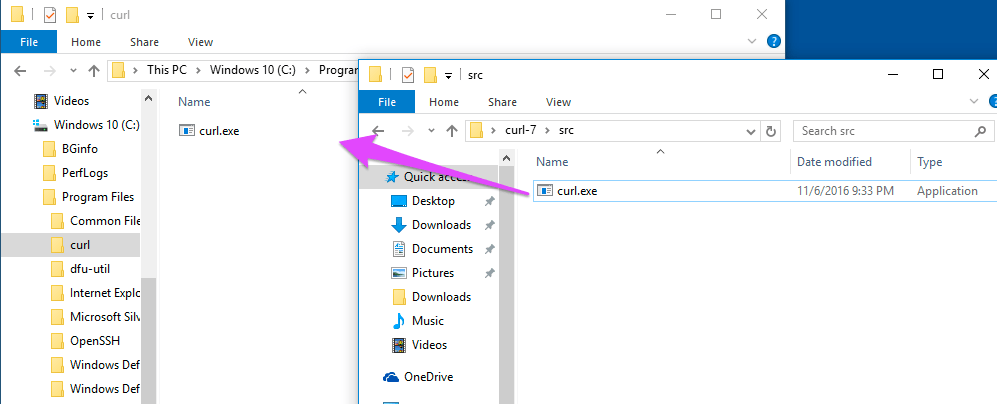
Open the .zip file that you downloaded earlier. Inside the src folder should be the file curl.exe. Copy this into the new directory that you just created.
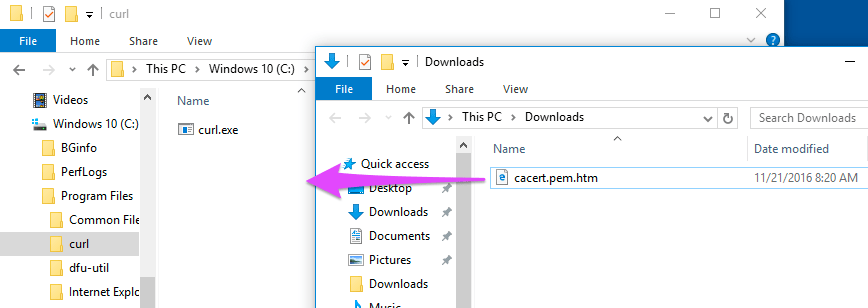
Also copy the cacert.pem.htm file into the curl directory.
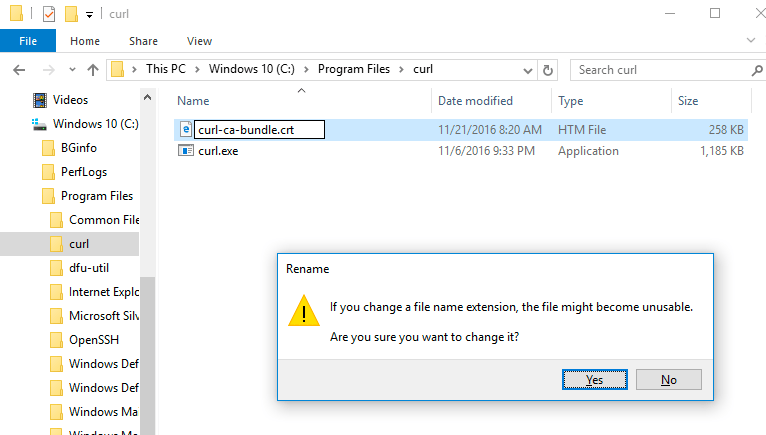
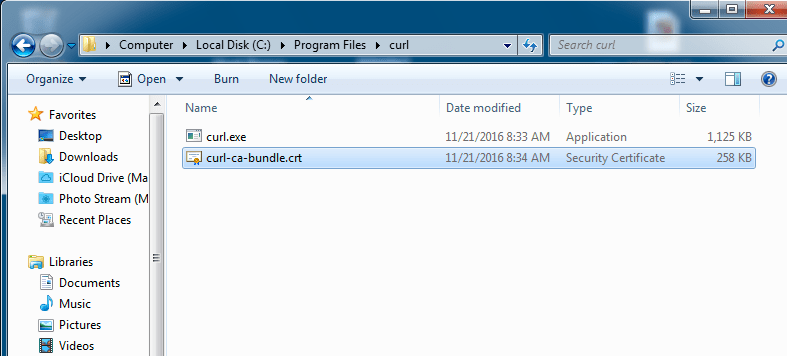
Rename the cacert.pem.htm file to curl-ca-bundle.crt. You should get a warning about changing the filename extension. Click Yes.
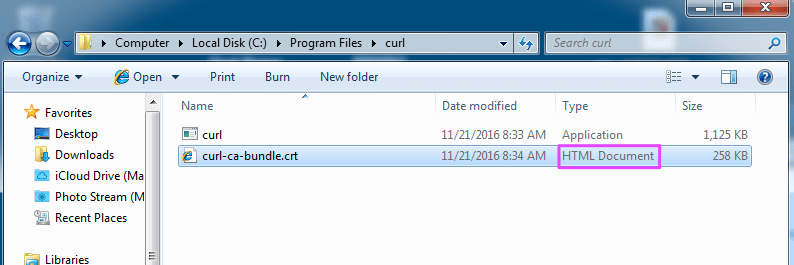
Depending on your system settings, the filename extension may be hidden. This will cause some problems. You can tell because the the curl program is just curl not curl.exe and also cacert.pem is of type HTML Document.
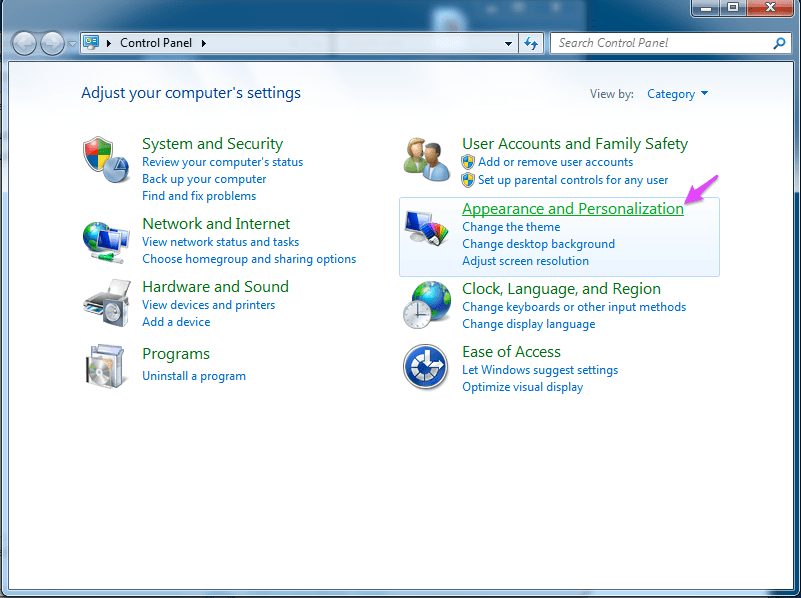
One way to fix this is to just turn on filename extension viewing. Open the Control Panel and select Appearance and Personalization.
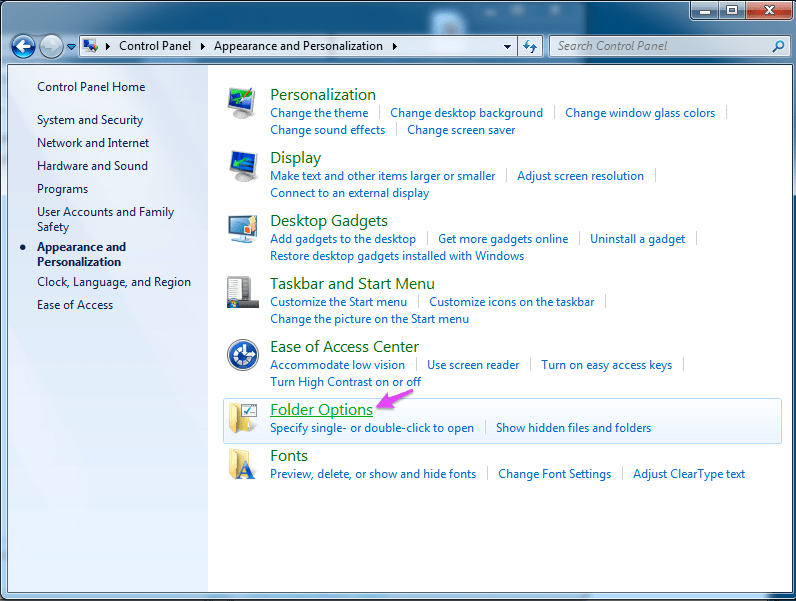
Then Folder Options.
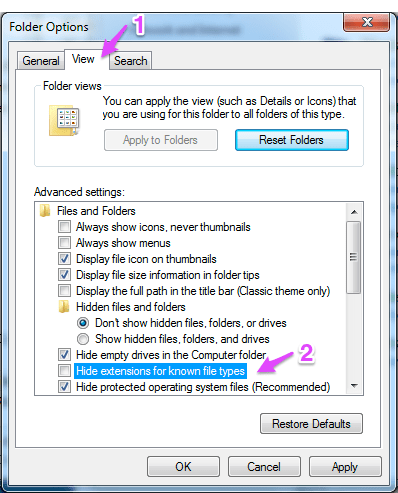
Click the View tab (1) and then deselect the checkbox for Hide extensions for known file types (2).
Then you can finally rename the file curl-ca-bundle.crt and have it show up as type Security Certificate.
Editing the path - Windows 10
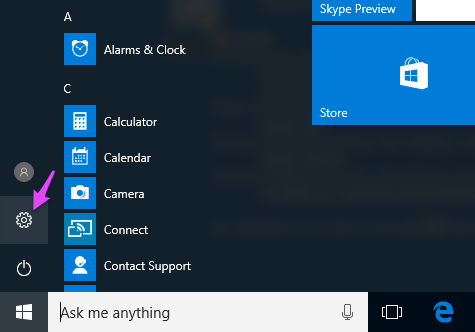
Click on the Windows Start menu, then the Settings (gear icon).
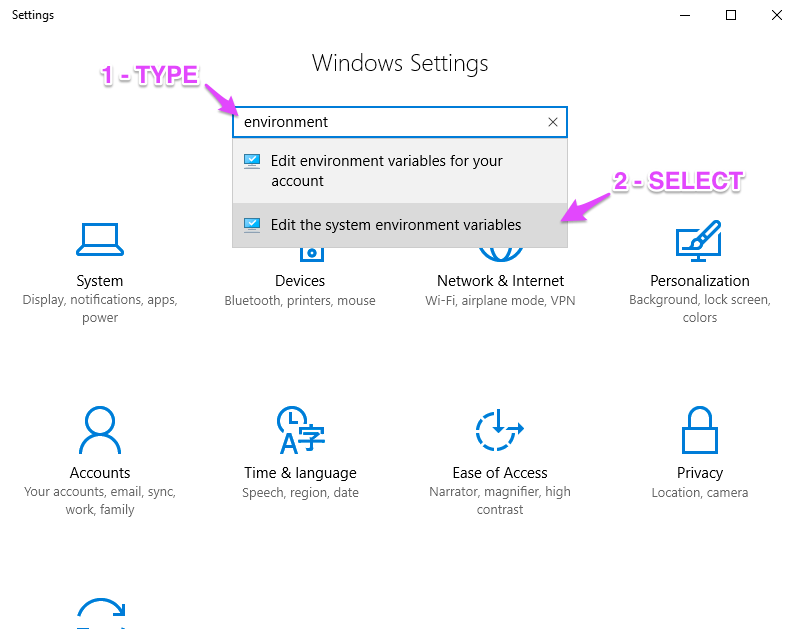
In the Windows 10 Settings window, type environment into the box at the top and select Edit the system environment variables.
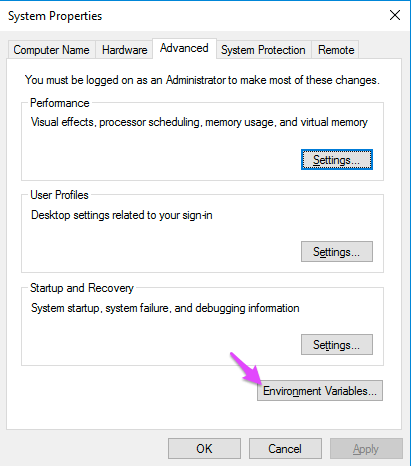
Click the Environment Variables button at the bottom of the page.
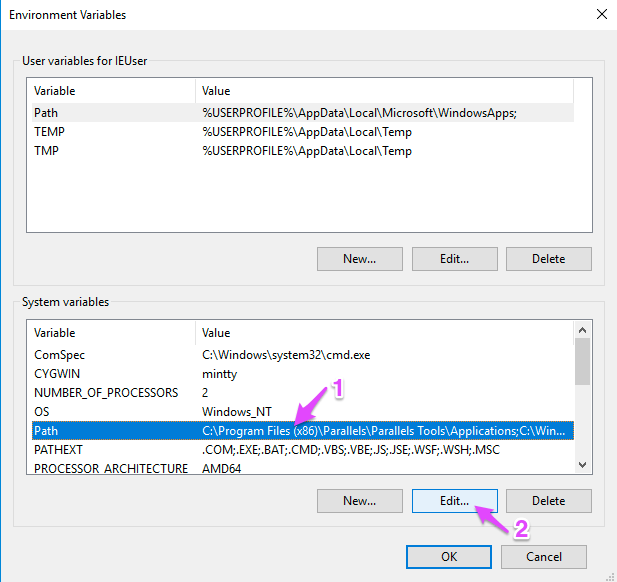
In the Environment Variables window, select Path in the bottom list (System variables) and click Edit.
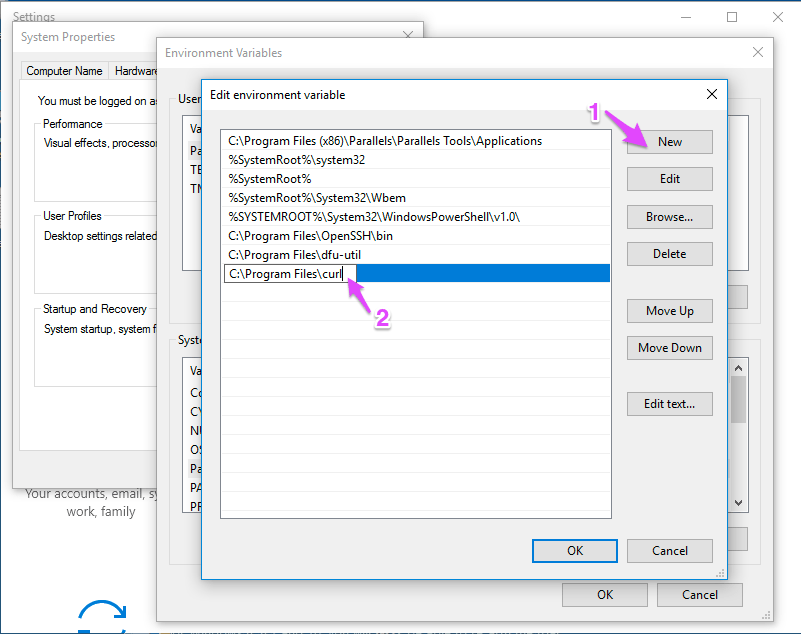
In the Edit environment variable window, click New then enter a new row in the table, C:\Program Files\curl.
After editing the system path environment variable you'll need to restart the computer.
Editing the path - Windows 7 and 8
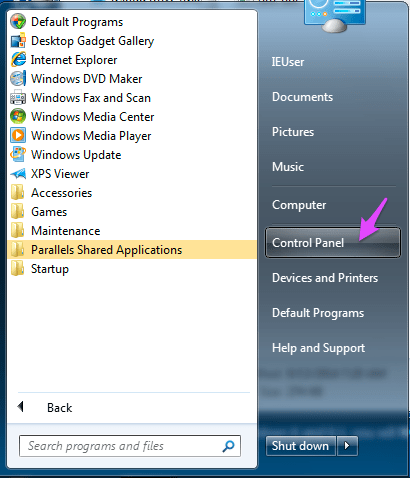
You need to open the Control Panel.
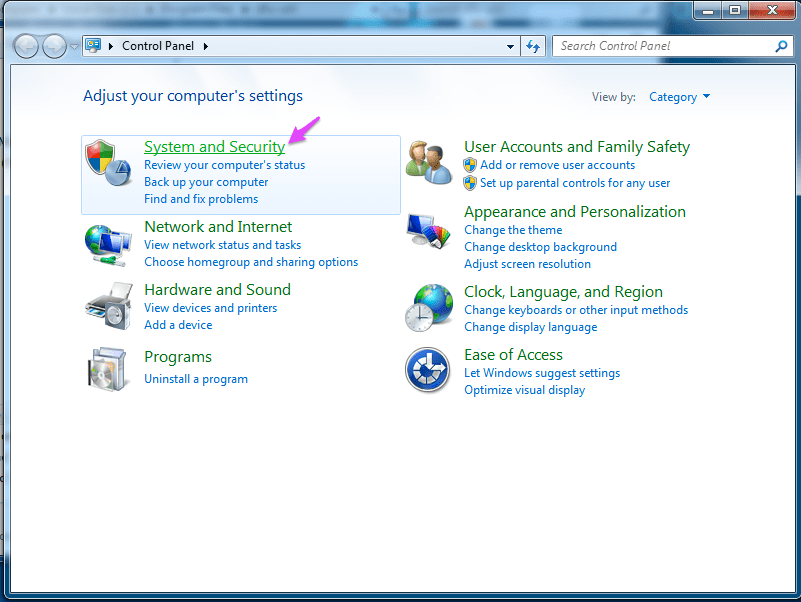
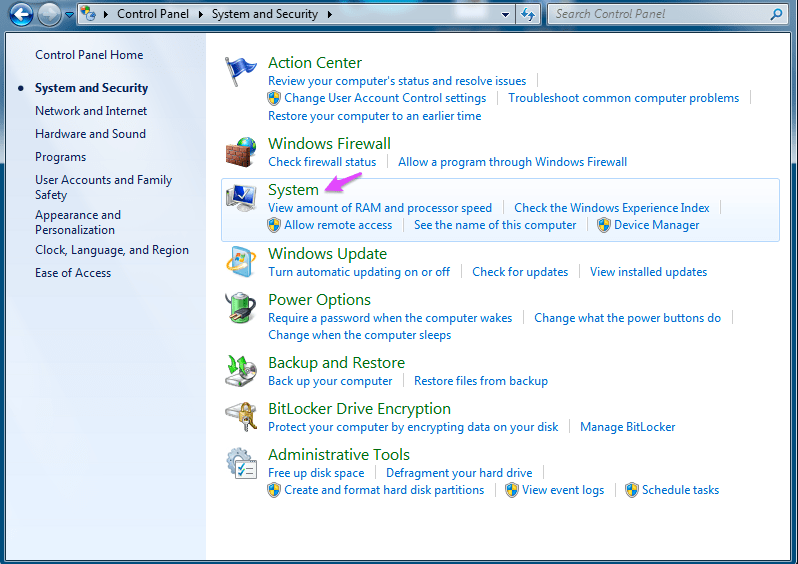
And then click on System and Security.
Then click System.
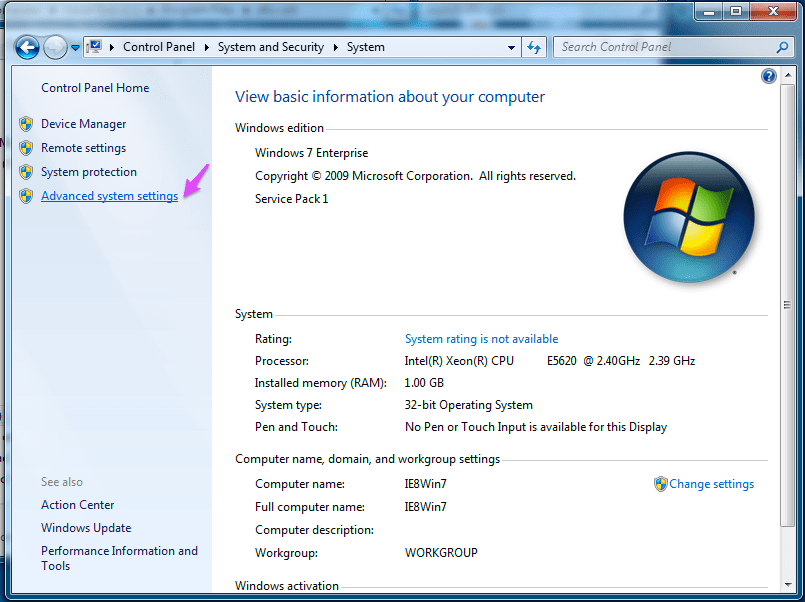
Then click on the Advanced System Settings link on the left side of the window.
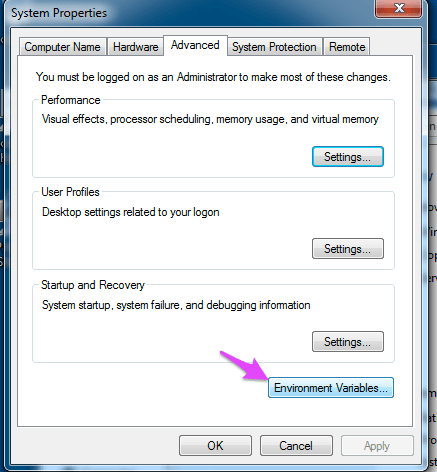
Then click on Environment Variables...
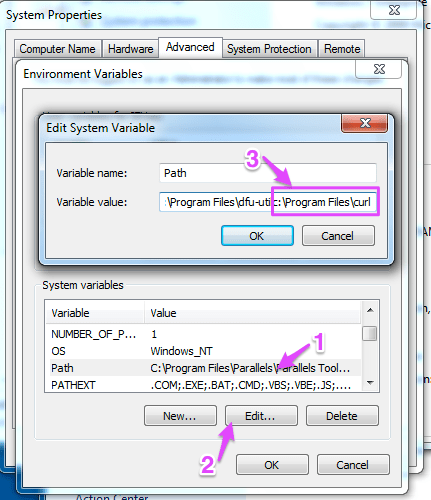
Click on Path in the bottom list (System variables) and click Edit.
Finally, position the cursor at the end of the box and add to the end:
;C:\Program Files\curl
There must be a semicolon separating the new item from the previous last item, and then the path to the directory we just created.
After editing the system path environment variable you'll need to restart the computer or log out and log back in.
Testing
Most calls require an access token. At CLI, you can create by using
particle token create
Make sure you keep your token secret, because it allows access and control over all of your devices.
You should now be able to open a Command Prompt window and type in a command like:
curl https://api.particle.io/v1/devices -H "Authorization: Bearer f8a4d380cb6ffffffffffffffffffaf5e496ddf0c0"
Replace the access token with a valid access token, such as from particle token create.
Also note: Many of the examples show a command that continues across lines with a backslash (\) at the end of the line. This is the correct character for Mac and Linux, but using the Windows Command Prompt you should use the carat (^) instead.
