
Ledger configuration
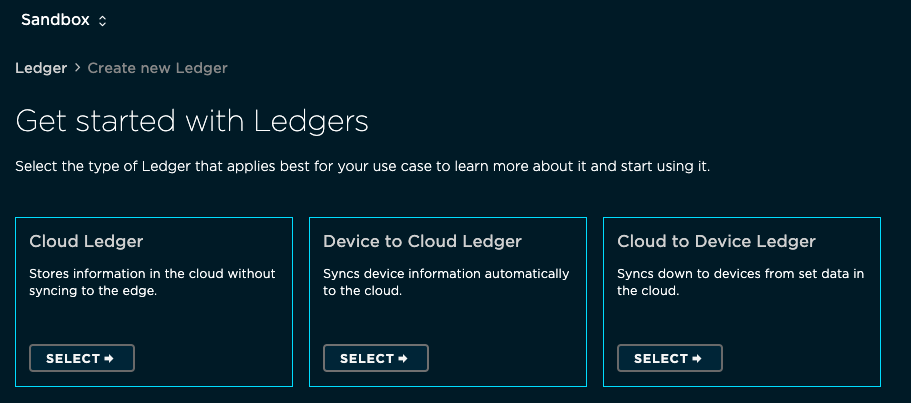
One use case of a Cloud to Device ledger is storing configuration parameters. You can store data per organization, owner, product, or device. You can implement your own hierarchy (product with device overrides, for example). If ledger values are changed while the device is online, it will generally receive the update quickly, within 30 seconds. If the device is offline, it will receive the updates when the device connects to the cloud again.
Ledger requires Device OS 6.1.0 or later.
Sandbox product
In order to use Ledger, you will need to:
- Create a product for testing in your developer sandbox. There is no additional charge for this.
- Add one or more devices to the product.
Ledger can only be used with devices in products; it cannot be used with individual developer devices.
Create a ledger
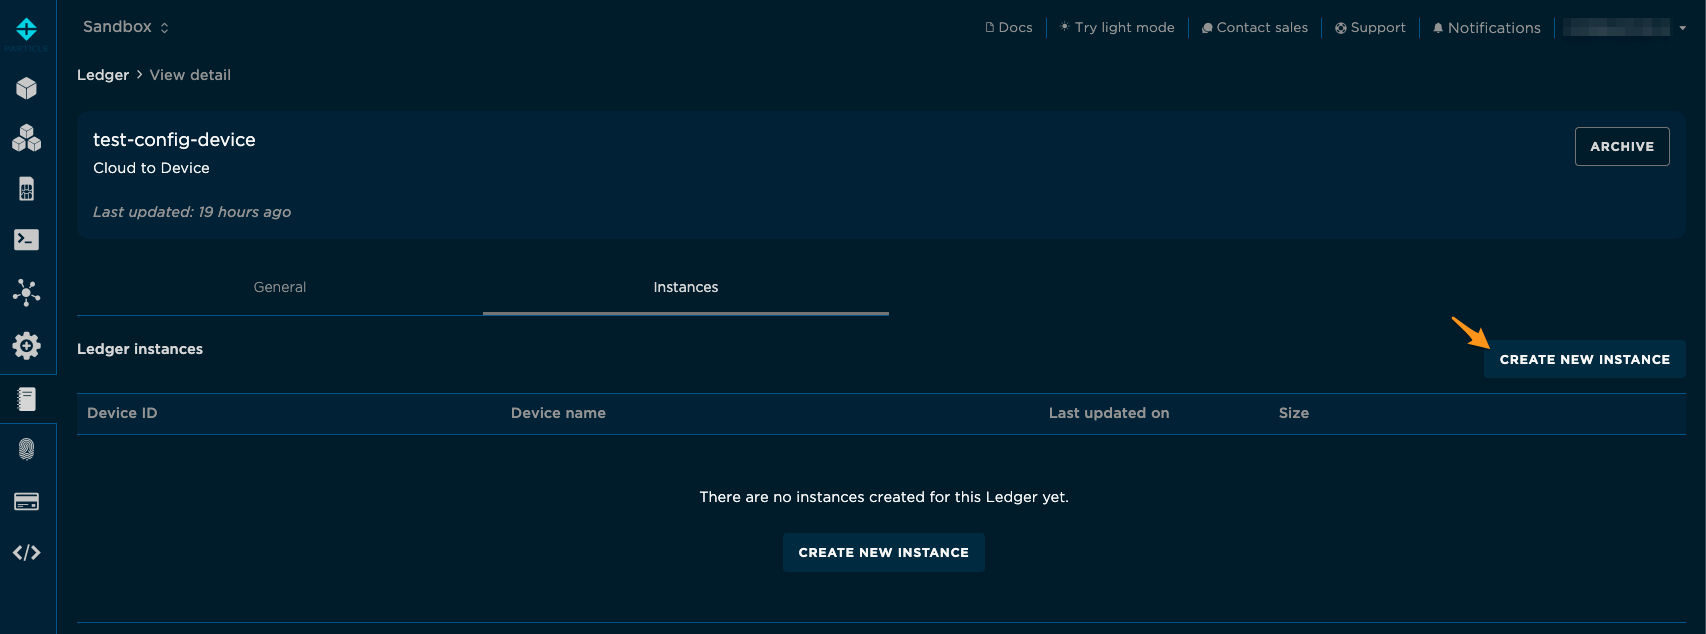
Create a new Cloud to Device ledger for your configuration data. Go to the Particle console and select the Ledger icon in your developer sandbox.
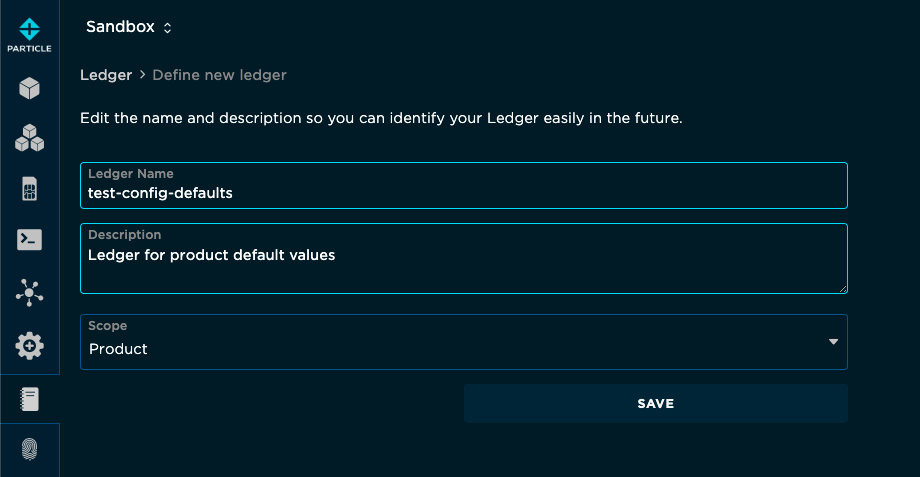
Create a new device to cloud ledger named test-config-defaults. You may need to rename it if the name is already in use; if you do, you will need to update the device firmware so the names match. This should be a Product scoped ledger.
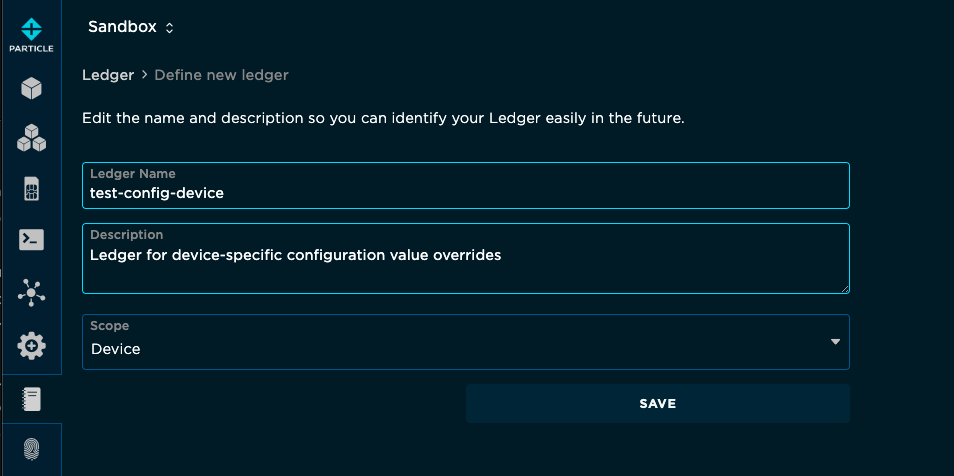
Create a new device to cloud ledger named test-config-device. You may need to rename it if the name is already in use; if you do, you will need to update the device firmware so the names match. This should be a Device scoped ledger.
Create product ledger instance
This example uses structured data to hold more complex configuration parameters. First set product default values. In the test-config-defaults ledger create a new instance for the product your devices are in.
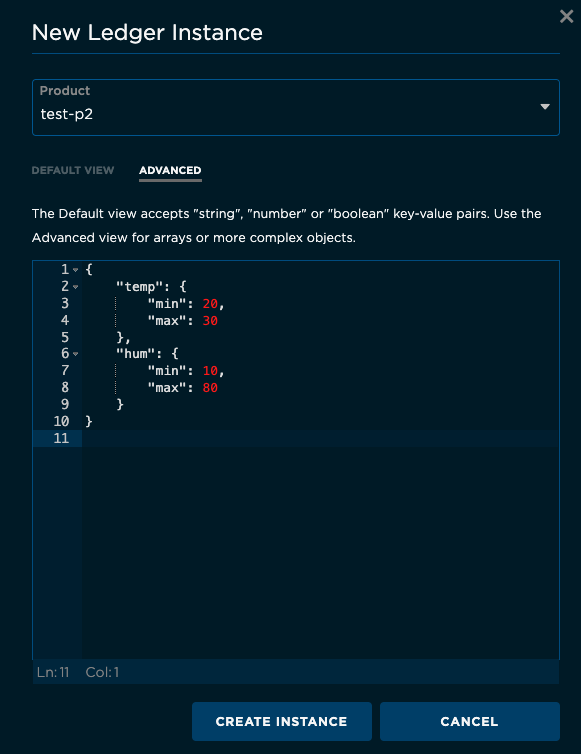
Using the Advanced tab, enter this JSON data:
{
    "temp": {
        "min": 20,
        "max": 30
    },
    "hum": {
        "min": 10,
        "max": 80
    }
}
Device firmware
This is the test device firmware. It requires Device OS 6.1.0 or later.
Walking through the code:
This example uses three ledgers:
sensorsfor send sensor values from the device to the cloud, same as the Ledger Sensor example.defaultConfigfor the product default configuration (cloud to device).deviceConfigfor the device-specific overrides (cloud to device).
Ledger sensors;            // Device to cloud
Ledger defaultConfig;      // Cloud to device, product defaults
Ledger deviceConfig;       // Cloud to device, device-specific overrides
This example updated the ledger once per minute. You can change this here. For example, to update every 5 minutes, change 60s to 5min.
const std::chrono::milliseconds sensorCheckPeriod = 60s;
In setup() this code waits for the USB serial debug terminal to connect for 10 seconds before proceeding. This is useful for debugging but you will remove this from a real application.
void setup() {
    // The next line is for debugging and waits for USB serial debug to connect for 10 seconds so you can see more early log messages
    waitFor(Serial.isConnected, 10000);
This initializes the ledgers. You can either register a synchronization callback, or just read the ledger when you need to use it. This example does both, however the sync callback doesn't really do anything.
The sensors ledger is device to cloud, so there is no synchronization callback.
// Start ledger synchronization
defaultConfig = Particle.ledger("test-config-defaults");
defaultConfig.onSync(syncCallback);

deviceConfig = Particle.ledger("test-config-device");
deviceConfig.onSync(syncCallback);

sensors = Particle.ledger("sensors");
This is where we write the fake sensor data (temperature and humidity) to the ledger. The data variable is a local copy of the structured ledger data, though in this case it only consists of two number (double) keys, temp and hum, and a String timestamps time.
// Save the value to the ledger
Variant data;
data.set("temp", temp);
data.set("hum", hum);
if (Time.isValid()) {
    data.set("time", Time.format(TIME_FORMAT_ISO8601_FULL)); // Time.format returns a String
}
To save this data to the cloud, we use the set() method of Ledger. This call is asynchronous.
// Save in ledger and output to serial debug log
sensors.set(data);
Log.info("set ledger %s", data.toJSON().c_str());
In the getValue() function you can see one pattern for reading values from a ledger.
bool getValue(const char *group, const char *key, Variant &value) {
    bool hasKey = false;

    LedgerData defaultData = defaultConfig.get();
    if (defaultData.has(group)) {
        if (defaultData[group].has(key)) {
            value = defaultData[group].get(key);
            hasKey = true;
        }
    }
This example is reading this JSON:
{
    "temp": {
        "min": 20,
        "max": 30
    },
    "hum": {
        "min": 10,
        "max": 80
    }
}
The group parameter is temp or hum and is the outer JSON key.
The key parameter is the inner object key, min or max.
Use the get() method in your global Ledger object to get a LedgerData object.
Use the has() method to check if a key exists.
operator[] is used to get a reference to a Variant in the data, for example: defaultData[group]. Be sure to check if the key exists before using this operator, however!
Then the has() method can be used to see if the inner key exists (such as min or max),
To get the value as a Variant, use the get() method. Then use a method like toInt(), toDouble(), or toString() to convert it to the actual type you want.
Logs from running the code will typically look like this:
0000022048 [app] INFO: set ledger {"hum":21.1,"temp":43.9,"time":"2024-01-17T12:00:56Z"}
The first time you request the ledgers you may also see logs like this:
0000021784 [system.ledger] INFO: Requesting ledger info
0000022178 [system.ledger] INFO: Received ledger info
0000022470 [system.ledger] INFO: Subscribing to ledger updates
0000022775 [system.ledger] INFO: Subscribed to ledger updates
Configuration
The configuration in *test-config-defaults was set above. If you edit this ledger in the console, you'll see this message in the logs.
0000237165 [app] INFO: syncCallback called
If the temp or hum is not within the min to max range, the ledger will include an alarm key:
0000141147 [app] INFO: temp value=19.600000 not in bounds, min=20.000000 max=30.000000
0000141163 [app] INFO: hum value=32.200000 in bounds, min=10.000000 max=80.000000
0000141428 [app] INFO: set ledger {"alarm":["temp"],"hum":32.2,"temp":19.6,"time":"2024-01-17T13:50:51Z"}
This is generated from checkLimits() by this line of code. That this does is get a reference to the alarm key in the data object, which is what we'll store in the ledger. If the key does not exist, it will be created. Then the append() method of Variant is called. If the parent element is not an array, it will be converted to a VariantArray. Then the new element (group) is appended to the array.
data["alarm"].append(group);
Device-specific overrides
The code supports product defaults with device-specific overrides. A device-scoped cloud to device ledger was created earlier, but now we'll test it.
You'll need the device ID (24 character hex) for the device you want to override.
Open Ledger, then test-config-device. Click Instances then Create new instance.
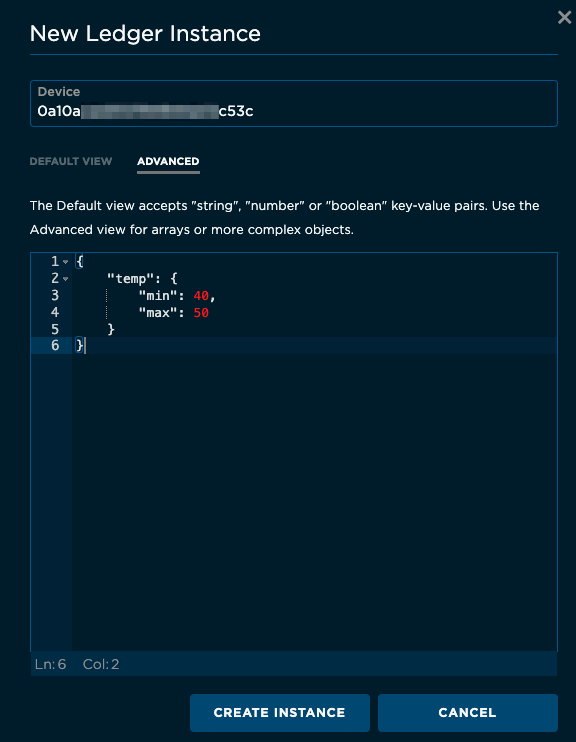
Enter the Device ID and click Advanced and enter this JSON:
{
    "temp": {
        "min": 40,
        "max": 50
    }
}
Then, in the USB serial debug log, you should see something like this:
0000022797 [system.ledger] INFO: Subscribed to ledger updates
0000080121 [app] INFO: syncCallback called
0000082388 [app] INFO: temp value=4.800000 not in bounds, min=40.000000 max=50.000000
0000082405 [app] INFO: hum value=19.500000 in bounds, min=10.000000 max=80.000000
0000082664 [app] INFO: set ledger {"alarm":["temp"],"hum":19.5,"temp":4.8,"time":"2024-01-17T14:29:22Z"}
Note that for temp (temperature), the min and max values have changed from 20 - 30 to 40 - 50.
Push notification
This example is part of a pair of examples illustrating how to do push notification alerts using two different techniques:
- Configuration via Ledger, device generates alerts (this example)
- Device generates data, Logic generates alerts in the cloud
One option for alerting is to use a push notification service. This example uses Pushover. Follow the instructions in that page to create an integration that trigger from the event push-notification. It's recommended that you create the integration in the product you are testing with.
Then, in the device firmware, uncomment the Particle.publish() command:
void alertUser(const char *msg) {
    if (Particle.connected()) {
        // Uncomment the following line to enable push notification alerts
        Particle.publish("push-notification", msg);
    }
    Log.info("alertUser %s", msg);
}
Flash your device and in an alert condition it should send a push notification.
The USB serial debug log will show something like this:
0000441154 [app] INFO: alertUser temp 9.400000 not in range 20.000000 to 30.000000 0a10aced202194944a02c53c
Cleanup
Ledger information is kept on the device even after you remove the firmware that uses Ledger. To clean up this data see the documentation for Ledger::removeAll() in the Device OS firmware API reference.
Next steps
In this simple demo, we're viewing the data in the console, but you might want to do additional processing using Logic.
You could also read the data using the Particle Cloud API from a web page or external application.
For an example of a device to cloud Ledger and writing data to a Ledger, see the Ledger Sensor example.