
Using SWD/JTAG
JTAG ("Joint Test Action Group") is a standard for testing and verifying electronic circuit boards. It can be used with Particle devices and this document will describe using it for tasks like programming the device flash.
JTAG can also be used with a source-level debugger, which is a feature of Particle Workbench.
There is a variation known as Serial Wire Debug (SWD). This is an option for Gen 2 devices (STM32, Photon, P1, Electron, and E-Series), and the normal method of connection for Gen 3 devices (Argon, Boron, B-Series SoM, Tracker SoM). It uses only two signal wires plus ground.
All of the JTAG/SWD debuggers can accept an Intel Hex file (.hex). One nice thing about .hex files, which are different than the .bin files Particle binaries are distributed in, is that hex files include the address they are to be flashed to. Also, you can combine multiple disjoint binaries into a single hex file, so you only need to flash one file, even on Gen 2 where you must leave a "hole" for the configuration sectors.
Using SWD
On Gen 3 devices (Argon, Boron, B-Series SoM, Tracker SoM) you can communicate with the device by SWD/JTAG at any time including normal operating modes.
On the P2 and Gen 2 devices (E-Series, Electron, P1, Photon), SWD/JTAG shares pins D6 and D7 which can also be used as GPIO pins. The SWD functionality can be used while user firmware is operating by using compile-time options, however most commonly you will want to put the device in DFU mode first. DFU mode prevents Device OS from booting, and while in the bootloader, SWD will be active.
To put your Particle device in DFU mode (blinking yellow) by holding down MODE and tapping RESET. Continue to hold down MODE while the status LED blinks magenta (red and blue at the same time) until it blinks yellow, then release MODE. If the device is non-responsive with no LED or a dim D7 blue LED, you may still be able to flash it, even though it's not in DFU mode because if there is no valid bootloader SWD is also enabled.
Restore binaries
To make it easy to restore a device to a completely known state, we've provided .hex files for several device platforms and Device OS versions.
- Make sure you select the right one! Note that there are two different B-Series SoM images, one for the B4xx and different one for the B5xx. Also note that Photon and P1 are different, but Electron and E-Series are the same.
- The flash procedure described here does not erase configuration. The following are not erased:
- Emulated EEPROM contents
- Device Keys
- Gen 2 Wi-Fi credentials, 6-character identifier used in the default SSID, and antenna configuration
- Gen 3 Wi-Fi credentials, APN settings, antenna, and SIM selection configuration
- Anything else in the DCT
- Gen 3 flash file system contents
- On the Argon and Tracker SoM, the NCP (network coprocessor) image for the ESP32 Wi-Fi module cannot be flashed using SWD/JTAG. See Argon and Tracker NCP below for more information.
- On Gen 3 devices the Bootloader, Soft Device, UICR bytes, Device OS, and Tinker are restored.
- On the Tracker, Tracker Edge is restored instead of Tinker. However since the 5x2 SWD connector is not populated on the Tracker One, and the pins are not exposed through the M8, it may not be practical to flash a Tracker One by SWD/JTAG.
- On the Tracker, with 5.4.0 and later and 4.2.0 and later, UICR bytes are not set for compatibility with the Monitor One
- On Gen 2 devices the Bootloader, Device OS, and Tinker are restored.
The general procedure is:
- Download the .hex file.
- Use one of the techniques below to flash it to your device.
- You can both upgrade and downgrade using restore images.
Special notes for downgrading
Boron LTE BRN402 and B-Series SoM B402
If you are downgrading a Boron LTE (BRN402) or B-Series SoM B402 from Device OS 2.0.0 or later, to 1.5.1 or earlier, you must first install 1.5.2, allow the device to boot and connect to cellular before downgrading again to an earlier version. The reason is that 2.0.0 and later use a higher baud rate for the cellular modem, and on the SARA-R410M only, this setting is persistent. Older versions of Device OS assume the modem is using the default of 115200 and will fail to communicate with the modem since it will be using 460800. Device OS 1.5.2 uses 115200, however it knows it can be 460800 and will try resetting the baud rate if it can't communicate with the modem.
Custom hex files
Using the Hex File Generator, you can take one of the base restore images, replace Tinker with your own user firmware, and download the resulting hex file. This makes it easy to flash devices with known firmware quickly and easily.
This is an excellent option if your contract manufacturer will be programming your devices as they will likely be able to use the .hex files and a SWD/JTAG programmer to easily reprogram your devices. This can be done with the standard JTAG programmer software and does not require the Particle toolchains or Particle CLI be installed.
Chip erase
Depending on the device, the behavior of chip erase of the internal flash from SWD/JTAG is very different:
Boron, B-Series SoM, Tracker SoM (Gen 3, nRF52840): Chip erase is safe and fast. You will not lose data. You can also copy the entire internal flash from one device (of the same type) to another.
P1, Photon, E-Series, Electron (Gen 2, STM32F205): Chip erase is not recommended. You will lose all device settings including EEPROM settings, the prefix for the Photon/P1 Wi-Fi network printed on the box, and device keys. The device will not be able to connect to the cloud until the keys are updated in the cloud after chip erase.
P2, Photon 2 (RTL8721) and M-SoM (RTL8722): Do not chip erase the RTL872x under any circumstances! Also do not flash anything to address 0 (prebootloader-mbr). The prebootloader-mbr is factory configured for your specific device with the private keys necessary for secure boot. If you erase or overwrite this portion of the flash you will not be able to program or use the device again.
Particle Debugger with OpenOCD (via Particle Workbench)
Installing Particle Workbench installs a copy of OpenOCD ("on-chip-Debugger") which works well with the Particle Debugger as well as the ST-LINK/v2 and clones on both Gen 2 and Gen 3. It does not require updating the Particle Debugger firmware.
The only catch is that it's command line, and the commands are very long and somewhat complicated.
- Download a .hex file above.
- Connect the Particle device by USB to your computer, USB power supply, or battery.
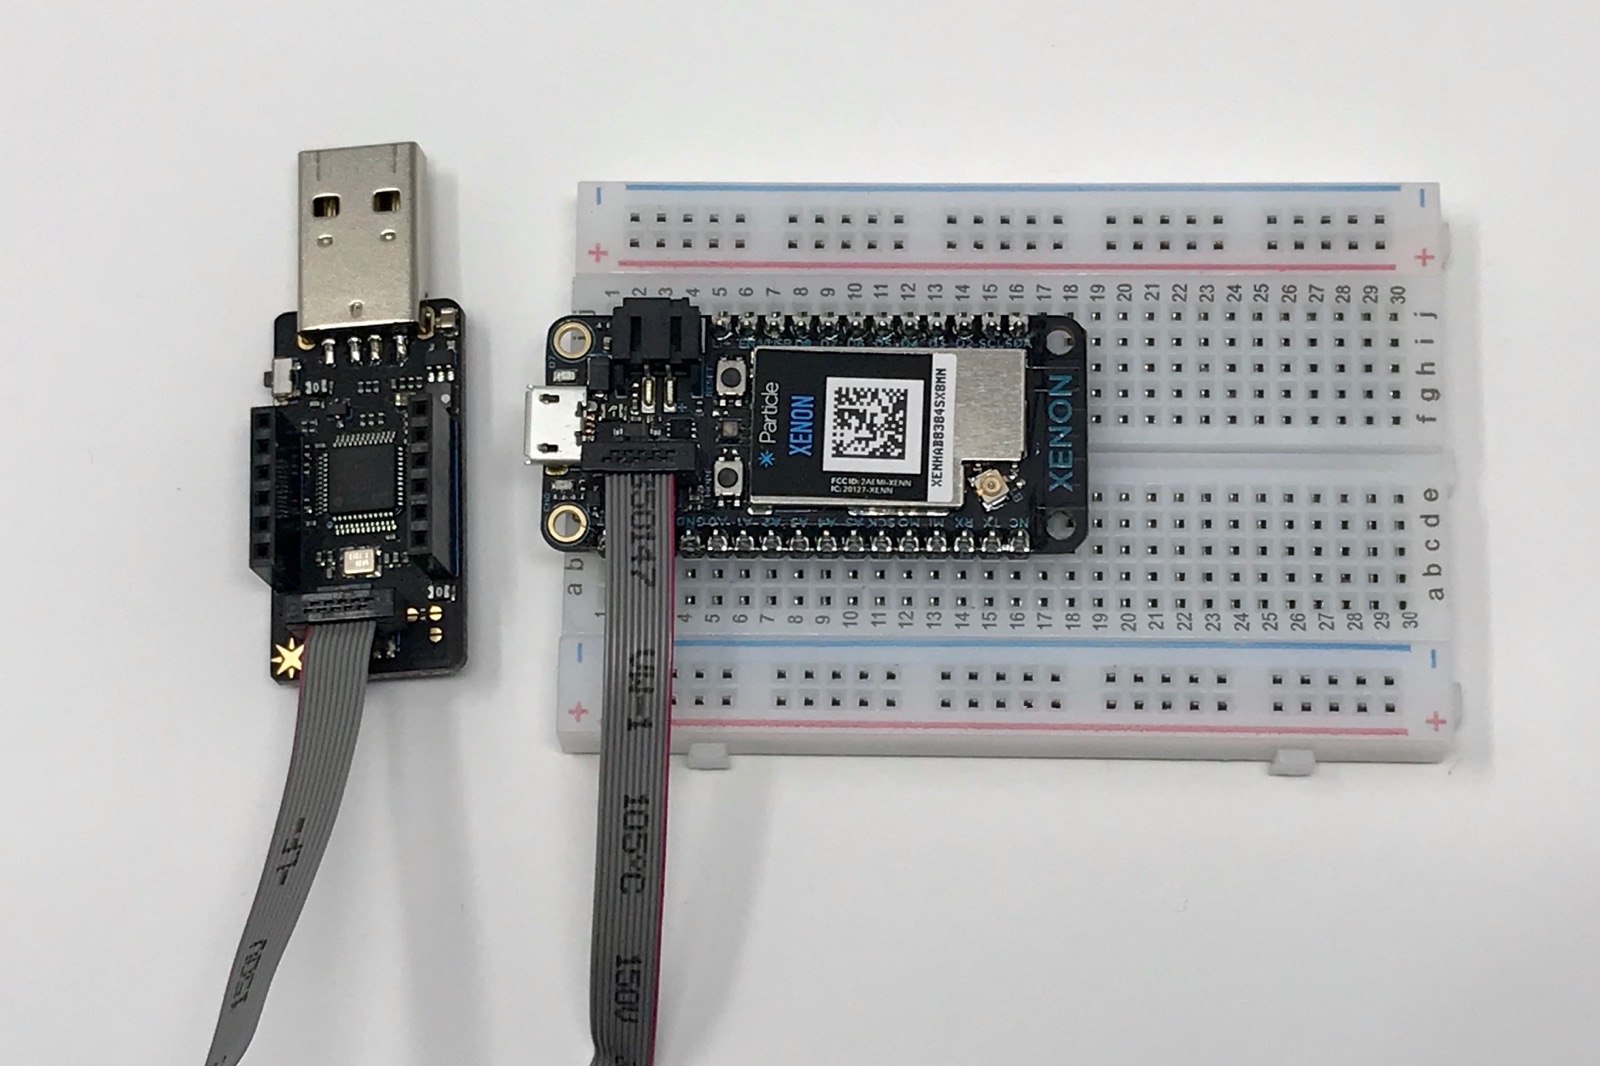
- Connect the Particle device to the Debugger with the included 10-pin ribbon cable.
- Connect the Particle Debugger to your computer via another USB port.
- Put the Particle device in DFU mode (blinking yellow).
- Run one of the commands below.
Find openocd
In your home directory there is a hidden directory .particle, which contains toolchains, then openocd, then a version directory. At the time of writing this was 0.11.2-adhoc6ea4372.0 but this may change in future Workbench updates.
For example:
$ cd ~/.particle/toolchains/openocd/0.11.2-adhoc6ea4372.0
The commands below assume you will be in that directory to execute the command. For example:
$ bin/openocd -f share/openocd/scripts/interface/cmsis-dap.cfg -f share/openocd/scripts/target/nrf52-particle.cfg -c "adapter_khz 1000" -c "transport select swd" -c "init" -c "flash list" -c "exit"
Gen 3
When positioned in the openocd version directory above, this command will flash a Gen 3 device with a restore image.
% bin/openocd -f share/openocd/scripts/interface/cmsis-dap.cfg -f share/openocd/scripts/target/nrf52-particle.cfg -c "adapter_khz 1000" -c "transport select swd" -c "init" -c "soft_reset_halt" -c "nrf5 mass_erase" -c "flash write_image /Users/rick/Downloads/boron.hex" -c "reset" -c "exit"
Make sure you replace /Users/rick/Downloads/boron.hex with the actual path to your file. It must be an absolute path, because of the way the parameter is passed to openocd.
What this does:
| Command | Notes |
|---|---|
bin/openocd |
Runs openocd |
-f share/openocd/scripts/interface/cmsis-dap.cfg |
Debugger configuration file for Particle Debugger |
-f share/openocd/scripts/target/nrf52-particle.cfg |
Configuration file for MCU (nRF52) |
-c "adapter_khz 1000" |
Adapter speed |
-c "transport select swd" |
Use SWD mode |
-c "init" |
Initialize adapter |
-c "soft_reset_halt" |
Reset and halt the MCU |
-c "nrf5 mass_erase" |
Erase the entire MCU internal flash! |
-c "flash write_image /Users/rick/Downloads/boron.hex" |
Write the hex file to the Particle device |
-c "reset" |
Reset the Particle device after flashing |
-c "exit" |
Exit openocd |
Gen 2
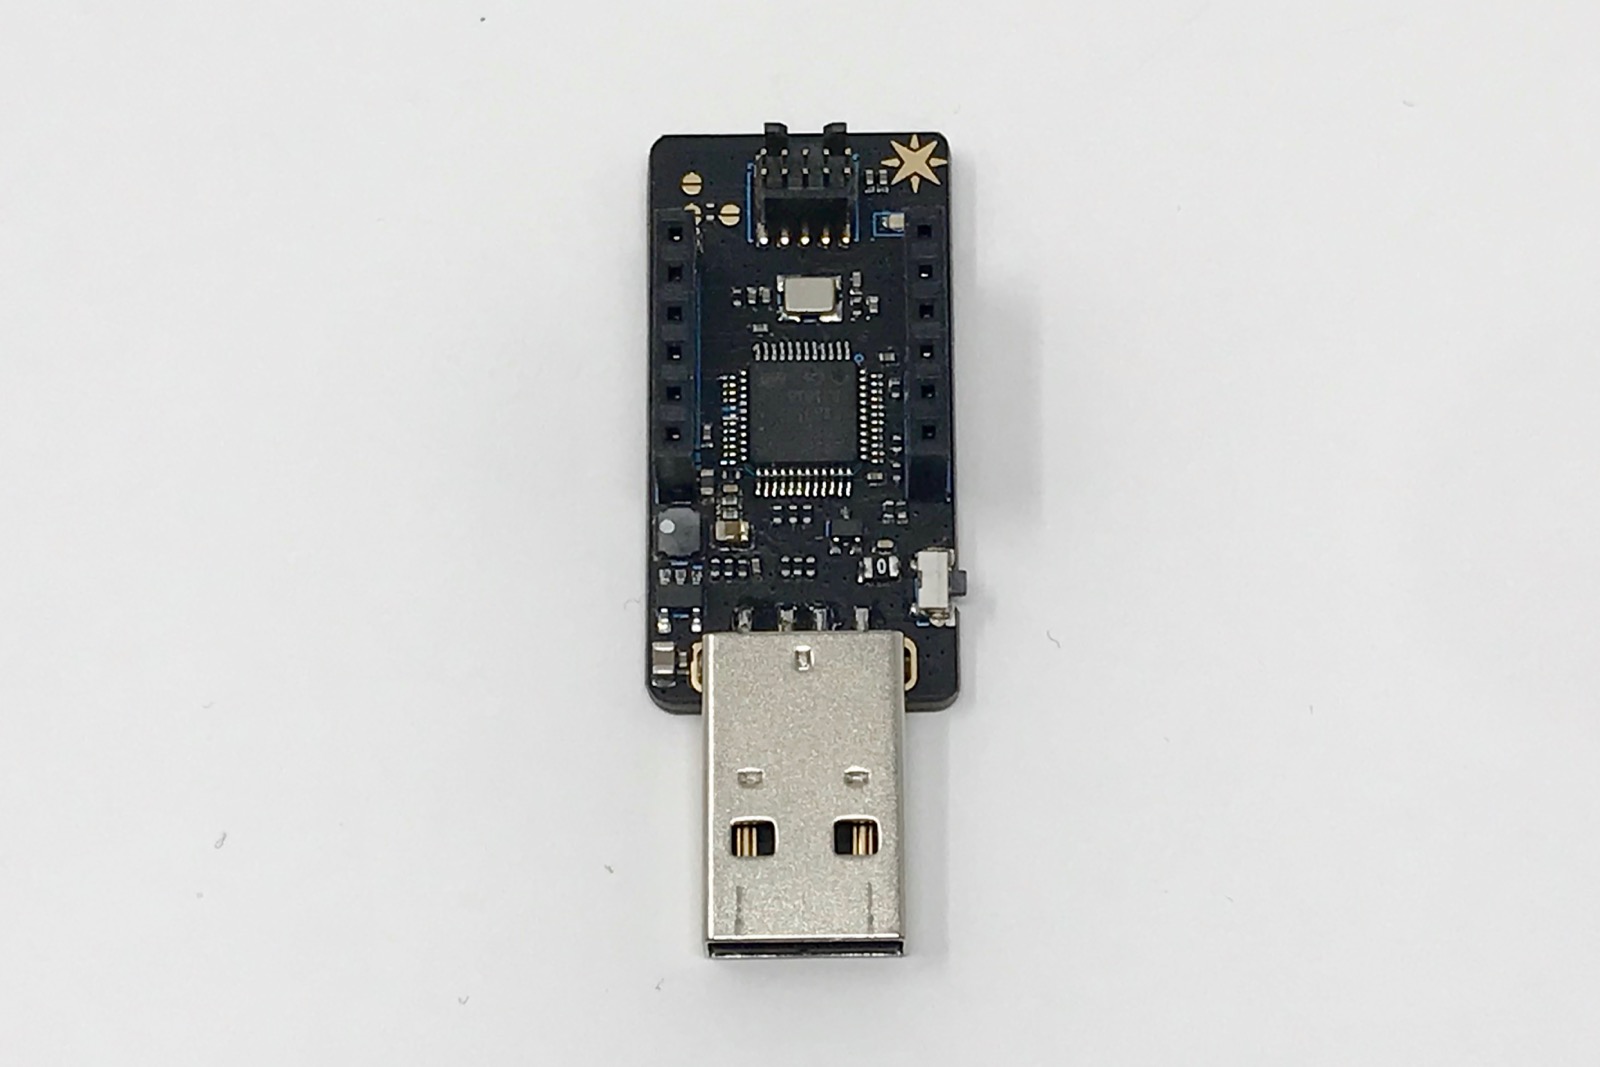
With the Debugger positioned as in the picture above (USB connector toward you):
| Left Header | Right Header |
|---|---|
| VDD | SWCLK |
| RTS | SWDIO |
| RX | NC |
| TX | NC |
| CTS | GND |
| GND | VUSB |
Note: Hardware flow control is not supported, so RTS and CTS are essentially NC.
In order to use SWD you need to connect:
| Device Pin | SWD |
|---|---|
| D7 | SWDIO |
| D6 | SWCLK |
| GND | GND |
When positioned in the openocd version directory above, this command will flash a Gen 2 device:
$ bin/openocd -f share/openocd/scripts/interface/cmsis-dap.cfg -f share/openocd/scripts/target/stm32f2x.cfg -c "adapter_khz 1000" -c "transport select swd" -c "init" -c "reset halt" -c "flash protect 0 0 8 off" -c "program /Users/rick/Downloads/photon.hex" -c "flash protect 0 0 0 on" -c "flash protect 0 5 8 on" -c "reset" -c "exit"
Make sure you replace /Users/rick/Downloads/photon.hex with the actual path to your file. It must be an absolute path, because of the way the parameter is passed to openocd.
What this does:
| Command | Notes |
|---|---|
bin/openocd |
Runs openocd |
-f share/openocd/scripts/interface/cmsis-dap.cfg |
Debugger configuration file for Particle Debugger |
-f share/openocd/scripts/target/stm32f2x.cfg |
Configuration file for MCU (STM32F2xx) |
-c "adapter_khz 1000" |
Adapter speed |
-c "transport select swd" |
Use SWD mode |
-c "init" |
Initialize adapter |
-c "reset halt" |
Reset and halt the MCU |
-c "flash protect 0 0 8 off" |
Disable write protection on bootloader and system |
-c "program /Users/rick/Downloads/photon.hex" |
Write the hex file to the Particle device |
-c "flash protect 0 0 0 on" |
Enable write protection on bootloader |
-c "flash protect 0 5 8 on" |
Enable write protection on the Device OS |
-c "reset" |
Reset the Particle device after flashing |
-c "exit" |
Exit openocd |
Gen 2 device security bit error
If you get a Device Security Bit Error when reprogramming a device, you will need to issue the following command, then flash the hex file as above.
$ bin/openocd -f share/openocd/scripts/interface/cmsis-dap.cfg -f share/openocd/scripts/target/stm32f2x.cfg -c "adapter_khz 1000" -c "transport select swd" -c "init" -c "reset halt" -c "stm32f2x unlock 0" \ -c "reset halt" -c "exit"
What this does:
| Command | Notes |
|---|---|
bin/openocd |
Runs openocd |
-f share/openocd/scripts/interface/cmsis-dap.cfg |
Debugger configuration file for Particle Debugger |
-f share/openocd/scripts/target/stm32f2x.cfg |
Configuration file for MCU (STM32F2xx) |
-c "adapter_khz 1000" |
Adapter speed |
-c "transport select swd" |
Use SWD mode |
-c "init" |
Initialize adapter |
-c "reset halt" |
Reset and halt the MCU |
-c "stm32f2x unlock 0" |
Set the STM32 RDP (readout protection level) to 0 |
-c "reset halt" |
Reset and halt the MCU |
-c "exit" |
Exit openocd |
After setting the RDP level you will have to flash the firmware restore above, as well as reset the device keys. The easiest way to do that is to use particle keys doctor.
Particle Debugger with drag-and-drop
With the Particle Debugger (CMSIS-DAP), it can expose what looks like a USB thumb drive volume on your computer. This can be used to program Particle Gen 3 devices. It requires no extra software on Windows, Mac, or Linux!
The caveats are:
- You must first upgrade the Particle Debugger firmware .
- You should only use it with Gen 3 devices (Argon, Boron, B-Series SoM, Tracker SoM)
- Drag-and-drop does not work with the P2 or Gen 2 devices (E-Series, Electron, Photon, P1)
- It takes about 1 minute to restore a device.
All you need to do is:
- Download a .hex restore file or custom firmware binary, above.
- Connect the Particle device by USB to your computer, USB power supply, or battery.
- Connect the Particle device to the Debugger with the included 10-pin ribbon cable.
- Connect the Particle Debugger to your computer via another USB port.
- Put the Particle device in DFU mode (blinking yellow).
- Drag the .hex file on the DAPLINK volume created by the Debugger.
Particle Debugger with web-browser flash
You can try the experimental web browser based Particle Debugger interface. This experimental feature has numerous caveats, but it's pretty neat.
- This tool is experimental, and may not work properly. It could leave your device in a bad state (but you can fix it with one of the other techniques if it happens).
- You must upgrade the firmware on your Particle Debugger as the version from the factory does not have this functionality.
- There is limited browser support on desktop: Chrome, Edge, and Opera. It does not work with Firefox or Safari.
- It should work on Mac, Windows, Linux, and Chromebook on supported browsers that support WebUSB.
- It should work on some Android phones that support USB OTG when using Chrome or Opera browsers that support WebUSB.
- It does not work on iOS (iPhone or iPad) as the hardware does not support USB OTG.
- It is only recommended for Gen 3 devices (Argon, Boron, B-Series SoM, Tracker SoM). It does not work reliably on the P2 or Gen 2.
- It takes about 3 minutes to restore a device.
Particle Debugger with OpenOCD (standalone)
It's also possible to install OpenOCD standalone, without Particle Workbench. This is useful if you have a contract manufacturer or your own manufacturing station that you don't want to or can't install the entire Particle Workbench tool chain on.
Just follow the instructions above to install OpenOCD for Windows, Mac, or Linux, then follow the command line instructions above as for Workbench.
Segger J-Link with Nordic tools (nrfjprog)
If you have the Nordic command line tools installed you can use nrfjprog with the Segger J-Link to program Gen 3 (nRF52) devices. The Nordic tools are available for Windows, Linux, and Mac.
The Segger J-Link is really fast. It takes about 7 seconds for a full device restore of a Gen 3 device using nrfjprog!
The links below are from Adafruit but you can buy them many other source. One advantage of using Adafruit is that they have a handy adapter board which you will probably need.
| Product | Price |
|---|---|
| SEGGER J-Link EDU Mini | $19.95 |
| SEGGER J-Link EDU | $69.95 |
| SEGGER J-Link BASE | $399.95 |
For educational use and home use for non-commercial projects you can use the less expensive EDU version. For commercial projects you'll need the BASE version.
If you use either non-mini version you'll also need two adapters. The second cable is the same as the one with the Particle Debugger, so you can use the cable from that if you have one available.
| Product | Price |
|---|---|
| JTAG (2x10 2.54mm) to SWD (2x5 1.27mm) Cable Adapter Board | $4.95 |
| 10-pin 2x5 Socket-Socket 1.27mm IDC (SWD) Cable - 150mm long | $2.95 |
- Download a .hex file above.
- Connect the Particle device by USB to your computer, USB power supply, or battery.
- Connect the Particle device to the Segger J-Link
- Connect the Segger J-Link to your computer via another USB port.
- Put the Particle device in DFU mode (blinking yellow).
- Run this command:
nrfjprog -f NRF52 --program boron.hex --chiperase --reset
This technique cannot be used to program the P2 (RTL8271D) or Gen 2 (STM32F205) devices, but you can use the Segger tools like J-Flash instead of nrfjprog to program Gen 2 devices with the Segger J-Link.
Segger J-Link with Segger tools
The Segger J-Link is by far the fastest SWD/JTAG programmer available. If you are mass-flashing a large number of devices it will likely be worth the cost, even for the expensive commercial model ("BASE") or higher. The Segger Flasher is a standalone programmer that does not require a computer at all.
You can download the standalone J-Link tools for Windows, Mac, or here. A license is required to flash devices using the Segger tools.
The Segger tools can be used to program Gen 2, Gen 3, and P2 devices. The J-Flash is a graphical user interface application that makes it easy flash.
Connecting the Segger J-Link
With the Segger J-Link upright, the notch on the 20-pin JTAG connector will be on the top. The pins are numbered as follows on the debugger:
| notch | |||||||||
| 19 | 17 | 15 | 13 | 11 | 9 | 7 | 5 | 3 | 1 |
| 20 | 18 | 16 | 14 | 12 | 10 | 8 | 6 | 4 | 2 |
Connect them to your P2 or Gen 2 devices as follows:
| Pin | Function | Particle Pin |
|---|---|---|
| 4 | GND | GND |
| 7 | SWDIO | D7 |
| 9 | SWCLK | D6 |
If your board as a 10-pin micro debugging connector, as most Gen 3 devices do, you can use a JTAG (2x10 2.54mm) to SWD (2x5 1.27mm) Cable Adapter Board instead of individual wires.
ST-LINK/v2 with ST-LINK software for Windows
The ST-LINK can only be used with Gen 2 devices (Photon, P1, Electron, and E-Series) that use a STM32 processor.
On Windows, with the ST-LINK/v2 you can use the ST-Link Windows software which provides an easy-to-use graphical interface. It can only be used with Gen 2 devices.
However because it runs on Windows and accepts an easy to use .hex file, some contract manufacturers that frequently work with STM32-based microcontrollers may like this option.
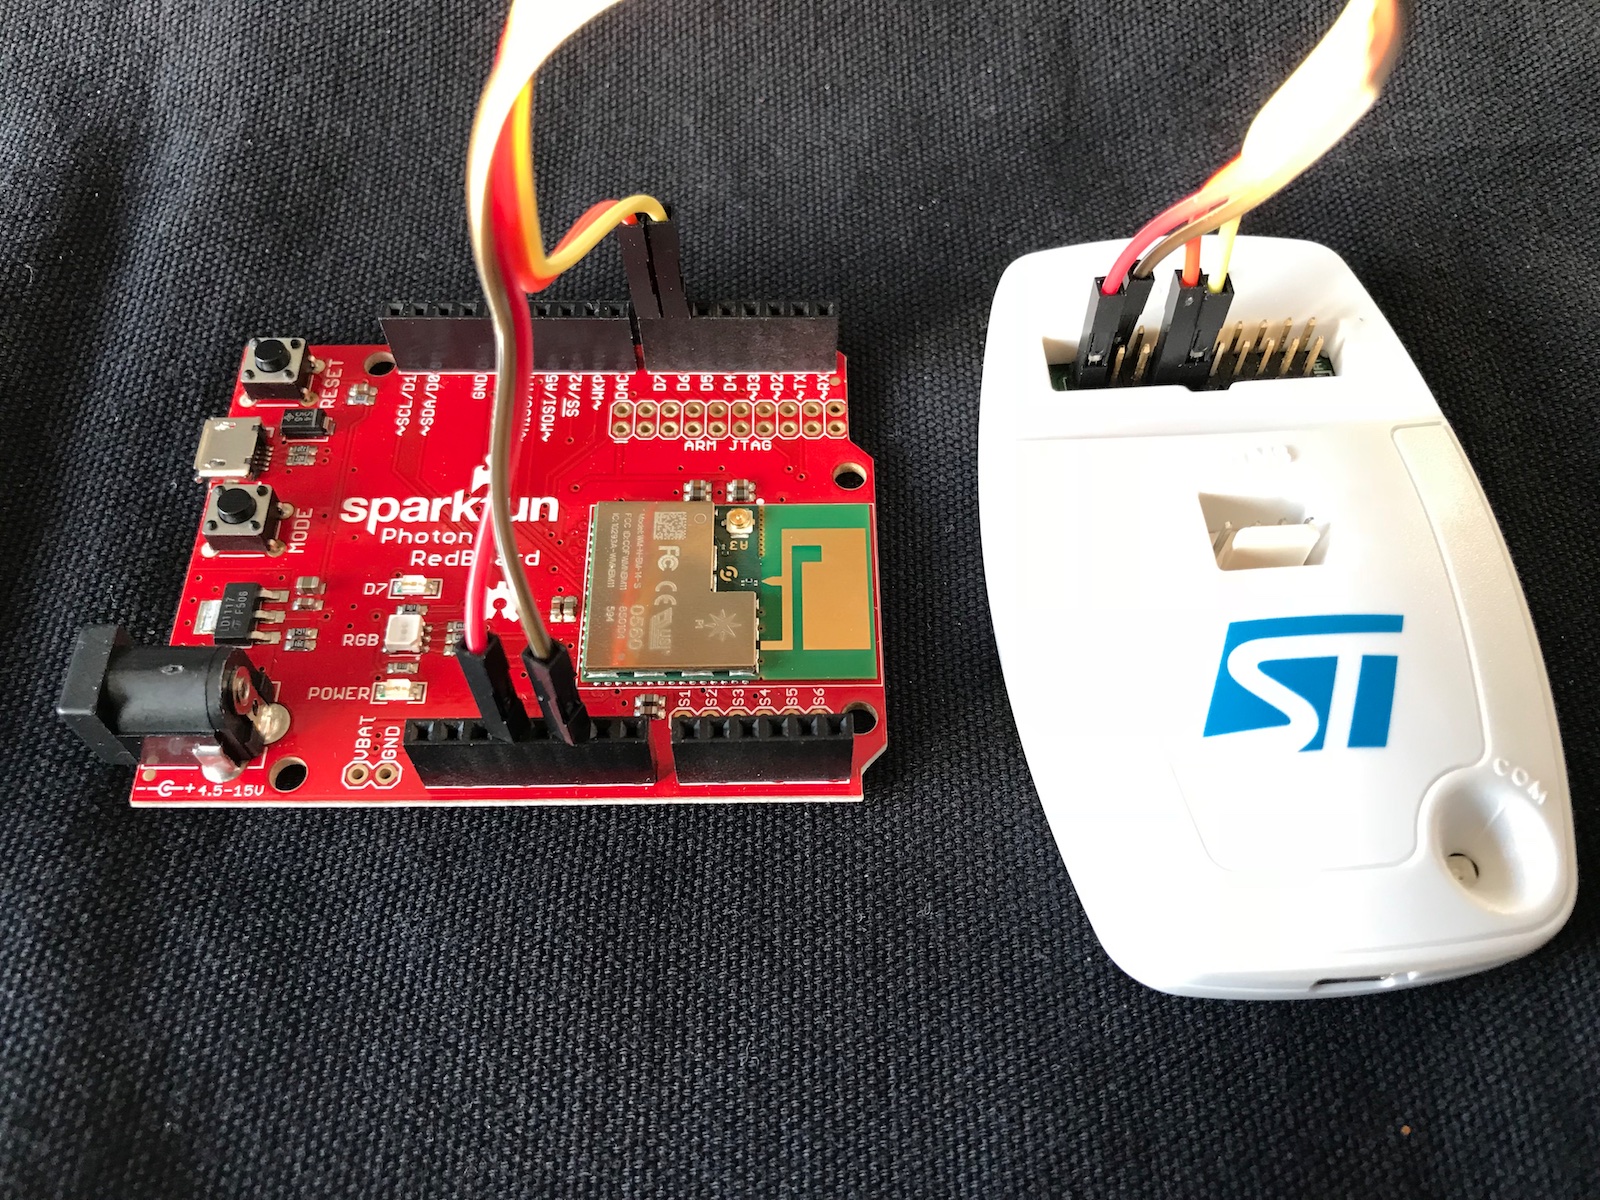
With the ST-LINK positioned as the picture above (ST logo right-side-up) and the notch at the bottom of the 20-pin header:
| 2 | 4 | 6 | 8 | 10 | 12 | 14 | 16 | 18 | 20 |
| 1 | 3 | 5 | 7 | 9 | 11 | 13 | 15 | 17 | 19 |
| notch | |||||||||
| Pin | Function | Color | Particle Pin |
|---|---|---|---|
| 1 | VCC | Red | 3V3 |
| 4 | GND | Brown | GND |
| 7 | SWDIO | Orange | D7 |
| 9 | SWCLK | Yellow | D6 |
Note that you must connect VCC to 3V3 with the real ST-LINK because it uses that pin to sense the MCU voltage.
ST-LINK clone USB stick with OpenOCD
The ST-LINK can only be used with Gen 2 devices (Photon, P1, Electron, and E-Series) that use a STM32 processor.
In order to use SWD you need to connect:
| Device Pin | SWD |
|---|---|
| D7 | SWDIO |
| D6 | SWCLK |
| GND | GND |
Find your openocd binary for Workbench or a standalone install.
$ bin/openocd -f share/openocd/scripts/interface/stlink-v2.cfg -f share/openocd/scripts/target/stm32f2x.cfg -c "adapter_khz 1000" -c "transport select swd" -c "init" -c "reset halt" -c "flash protect 0 0 8 off" -c "program /Users/rick/Downloads/photon.hex" -c "flash protect 0 0 0 on" -c "flash protect 0 5 8 on" -c "reset" -c "exit"
Make sure you replace /Users/rick/Downloads/photon.hex with the actual path to your file. It must be an absolute path, because of the way the parameter is passed to openocd.
What this does:
| Command | Notes |
|---|---|
bin/openocd |
Runs openocd |
-f share/openocd/scripts/interface/cmsis-dap.cfg |
Debugger configuration file for Particle Debugger |
-f share/openocd/scripts/target/stm32f2x.cfg |
Configuration file for MCU (STM32F2xx) |
-c "adapter_khz 1000" |
Adapter speed |
-c "transport select swd" |
Use SWD mode |
-c "init" |
Initialize adapter |
-c "reset halt" |
Reset and halt the MCU |
-c "flash protect 0 0 8 off" |
Disable write protection on bootloader and system |
-c "program /Users/rick/Downloads/photon.hex" |
Write the hex file to the Particle device |
-c "flash protect 0 0 0 on" |
Enable write protection on bootloader |
-c "flash protect 0 5 8 on" |
Enable write protection on the Device OS |
-c "reset" |
Reset the Particle device after flashing |
-c "exit" |
Exit openocd |
P2/Photon 2/M-SoM Flashing
The P2/Photon 2 (RTL8721D) and M-SoM (RTL8722DM) software consists of five parts:
| File | Description | Address |
|---|---|---|
| p2-tinker | Tinker user application binary, can substitute your own | |
| p2-system-part1 | Device OS system firmware | 0x60000 |
| p2-bootloader | Bootloader | 0x4000 |
| p2-prebootloader-part1 | Pre-bootloader | 0x14000 |
| p2-prebootloader-mbr | Do not flash this file! | 0x0 |
- Do not chip erase your P2/M-SoM or flash the p2-prebootloader-mbr binary! The p2-prebootloader-mbr is encrypted and is unique for every device as part of the Secure Boot system. If this file is erased you will not be able to boot Device OS on the device. Since the prebootloader-mbr is at address 0x0, make sure you don't accidentally flash a different part to that address, as well.
- The user firmware binary address will vary. The hex generator will find the appropriate address, as will flashing the firmware by USB.
- You must always power the P2/M-SoM externally. Even though it may turn on only connected via the SWD debugger, there will not be sufficient power to successfully program the device.
P2 with OpenOCD
The P2 requires OpenOCD 0.11.0 or later. Make sure you've updated your Particle Workbench software to the current version to make sure you have the correct version of OpenOCD installed. On the Mac, Homebrew also includes an appropriate version of OpenOCD.
Download the flashing scripts:
Download the P2 binary zip file that contains the system, bootloader, etc.. Extract it in the p2-flash directory.
cd p2-flash
sh flash.sh rtl872x.tcl p2/system-part1.bin 0x60000
sh flash.sh rtl872x.tcl p2/bootloader.bin 0x4000
sh flash.sh rtl872x.tcl p2/prebootloader-part1.bin 0x14000
At this point, the device will reboot, but the user firmware binary (tinker) has not been flashed. Since the address varies, it's often easier to flash this using USB in DFU mode:
particle usb dfu
particle flash --local p2/tinker.bin
M-SoM with OpenOCD
The process is the same for the P2, but the binaries are different.
Argon and Tracker NCP
The Argon and Tracker NCP (Network Coprocessor) is an ESP32, used for Wi-Fi communication only.
- It is rarely updated
- It can be upgraded OTA
- It can be upgraded using --serial mode with the device in listening mode (blinking dark blue)
- It cannot be upgraded in DFU (blinking yellow) or by SWD/JTAG
- The
particle updatecommand does not update the NCP
Releases can be found on the GitHub release site.
- Download the appropriate .bin file
- Connect the device by USB to your computer
- Put the device in listening mode (blinking dark blue) by
- Holding down the MODE button until the status LED blinks dark blue
- Or by using
particle usb start-listening
- Flash the NCP image:
particle flash --serial tracker-esp32-ncp@0.0.7.bin
Argon
| Version | Release Date | Notes |
|---|---|---|
| 0.0.5 | 2018-10-22 | Initial Release for Argon |
As there has only been one Argon NCP image you should not need to upgrade it for new devices from the factory.
Tracker
| Version | Release Date | Notes |
|---|---|---|
| 0.0.6 | 2020-04-29 | Initial Release for Tracker |
| 0.0.7 | 2020-12-22 | Required with Device OS 3.0.0-rc.1 and later, works with earlier Device OS |
The 0.0.7 version is required to is 3.0.0-rc.1 and later. It will be upgraded OTA if required. Prior to Device OS 3.0.0, the NCP was not used on the Tracker, so it is not necessary to downgrade, even when going back to Device OS 2.x or 1.5.4.