
Datacake
Integrate Particle with Datacake using webhooks
Datacake is a low-code IoT dashboarding tool that makes it easy to visualize data from Particle devices. With Datacake, you can create rich dashboards that can be passed down to your end customer. Particle paired with Datacake can be a powerful configuration when developing connected devices.
But, Datacake recently adjusted the way they integrate with Particle devices. In this post, we’ll explore how to set up a Particle integration using Datacake’s new webhook paradigm.
Configuring Datacake
The following steps will heavily reference documentation from Datacake, this is worth reviewing.
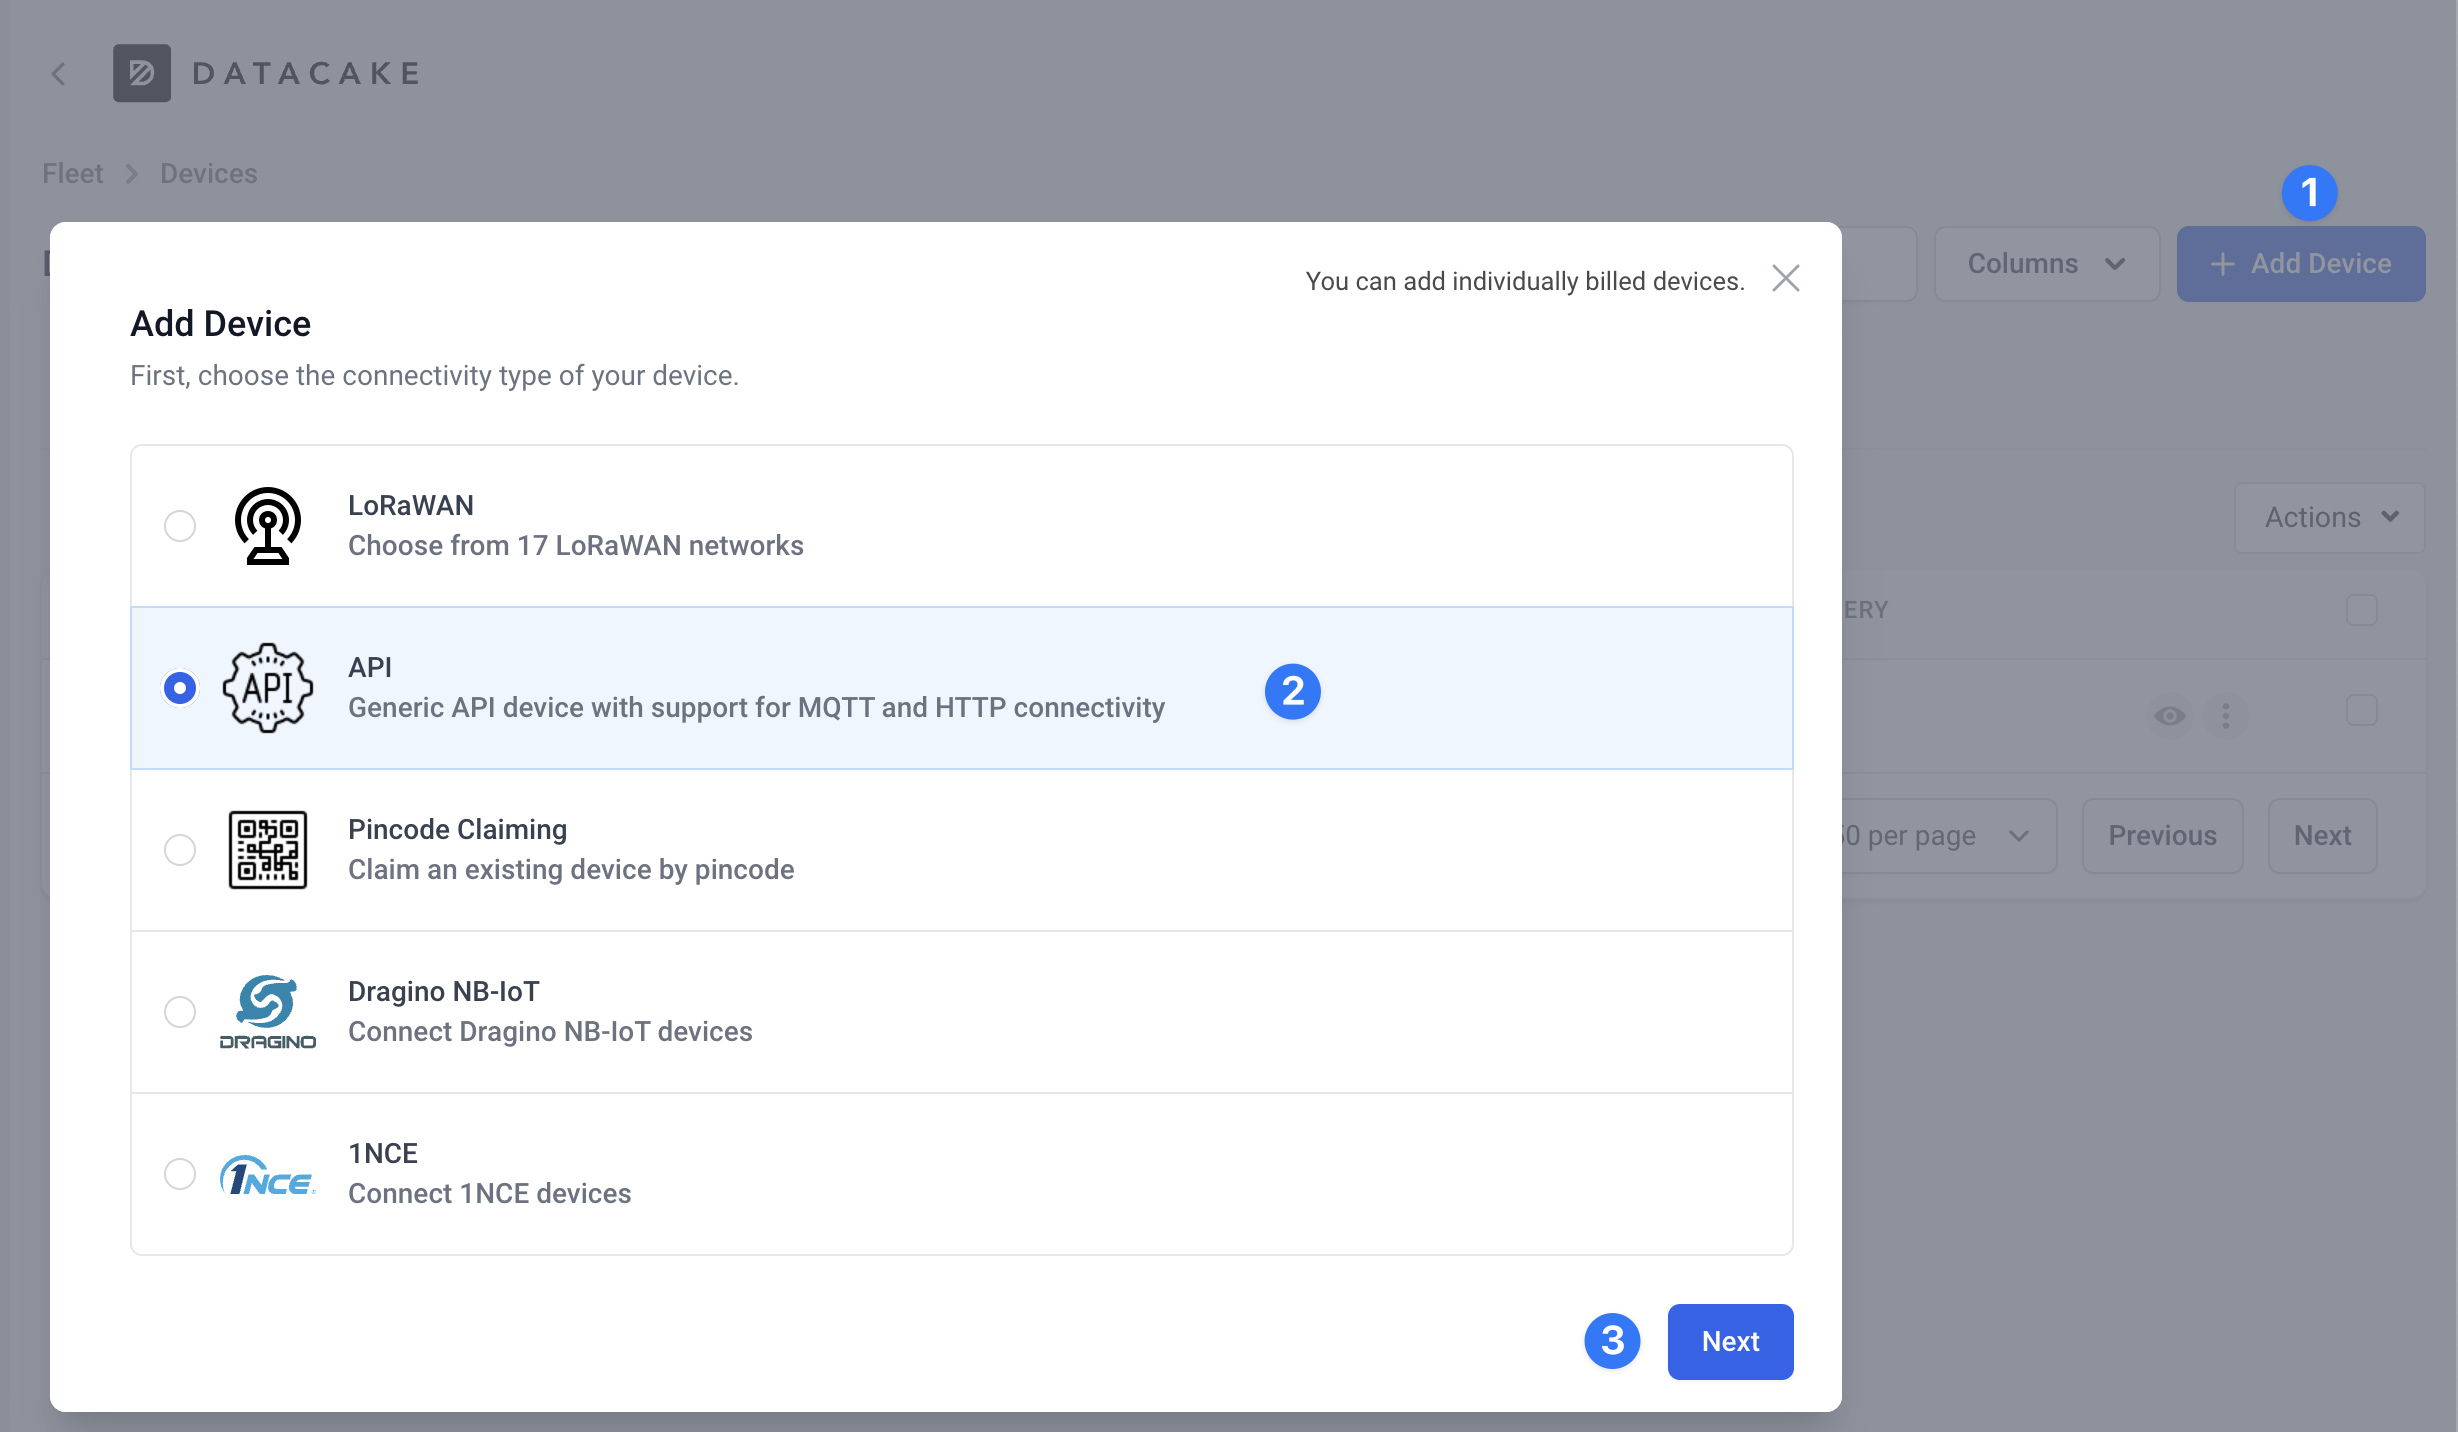
First, Navigate to the dashboard and create a new API device.
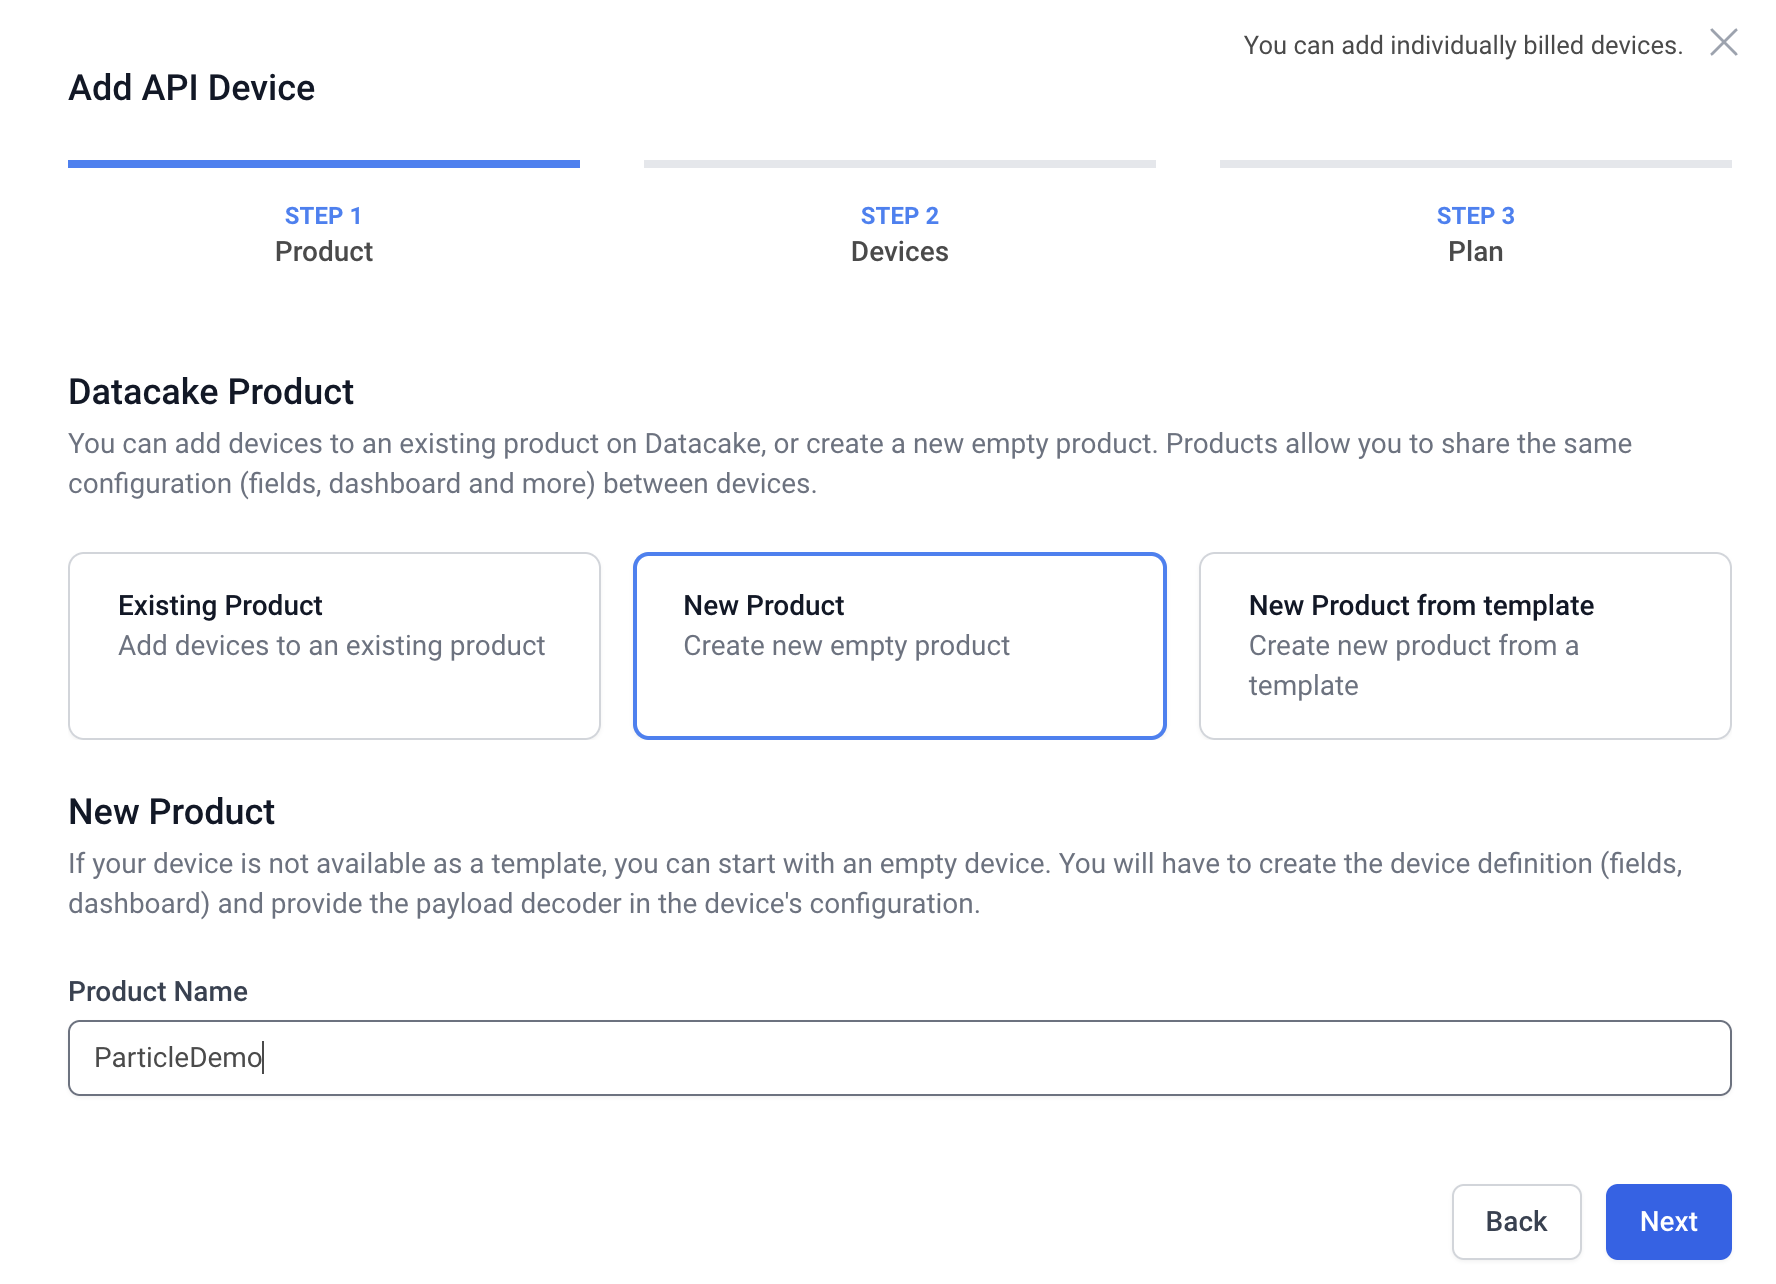
Create a new product for this device, or use an existing product if you’ve used Datacake in the past.
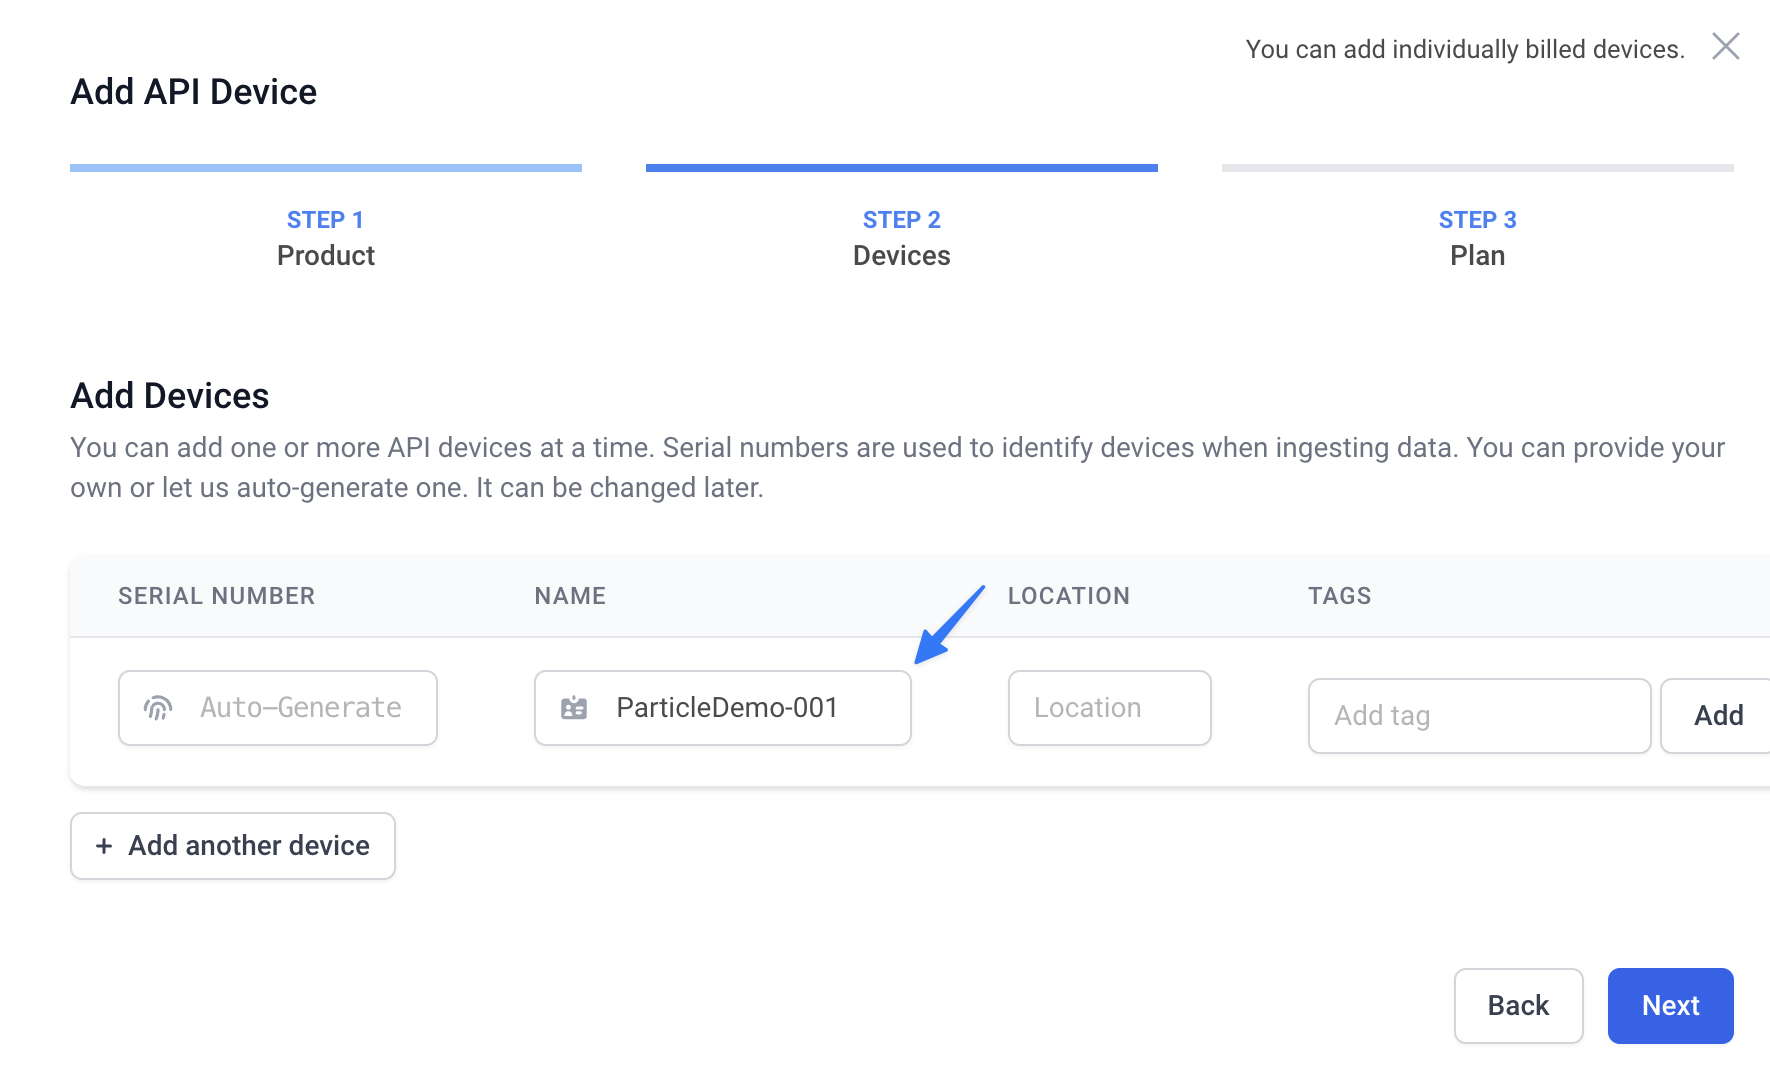
Next, you’ll be prompted to create a new device. In this example, we’ll let Datacake auto generate the serial number and name the device ParticleDemo-001.
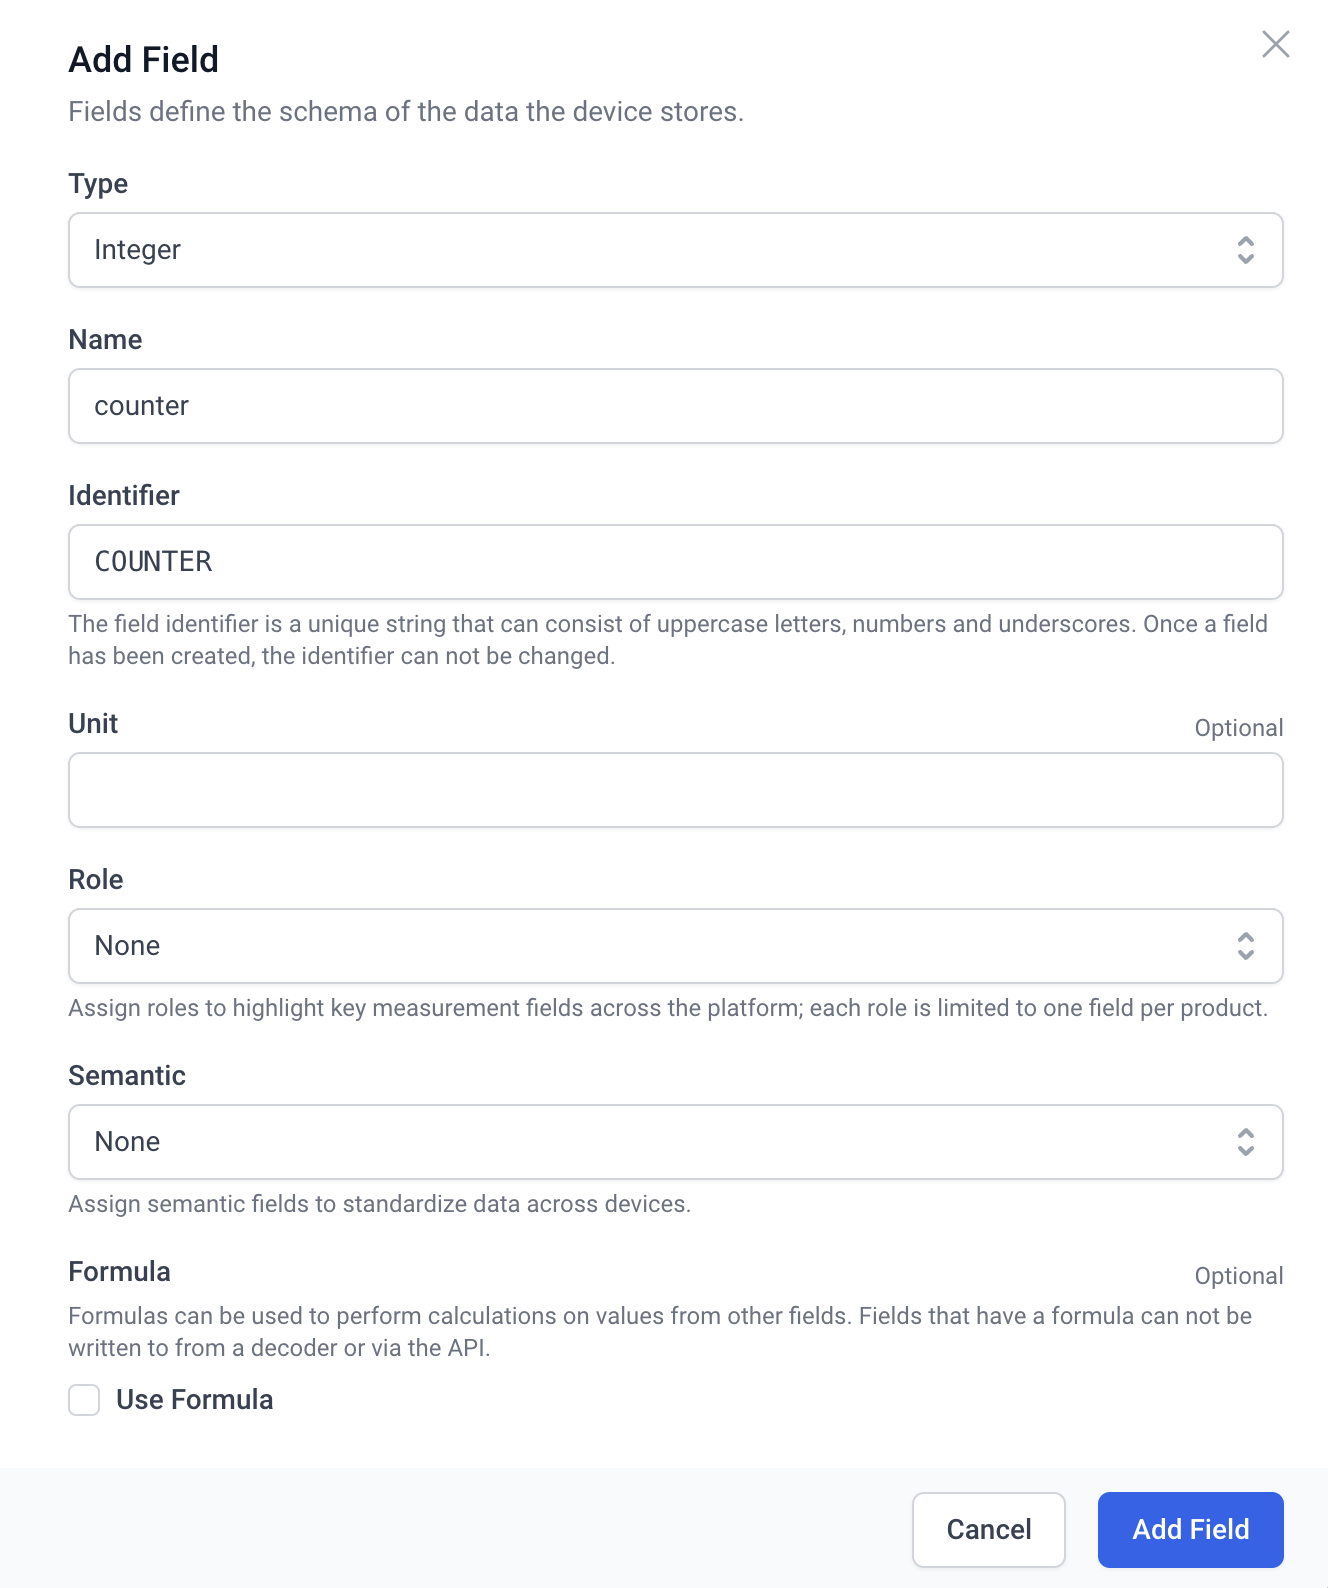
Choose the free tier and continue. From the “all devices” view, select the device that you’ve just created. Navigate to configuration > fields > add a field.
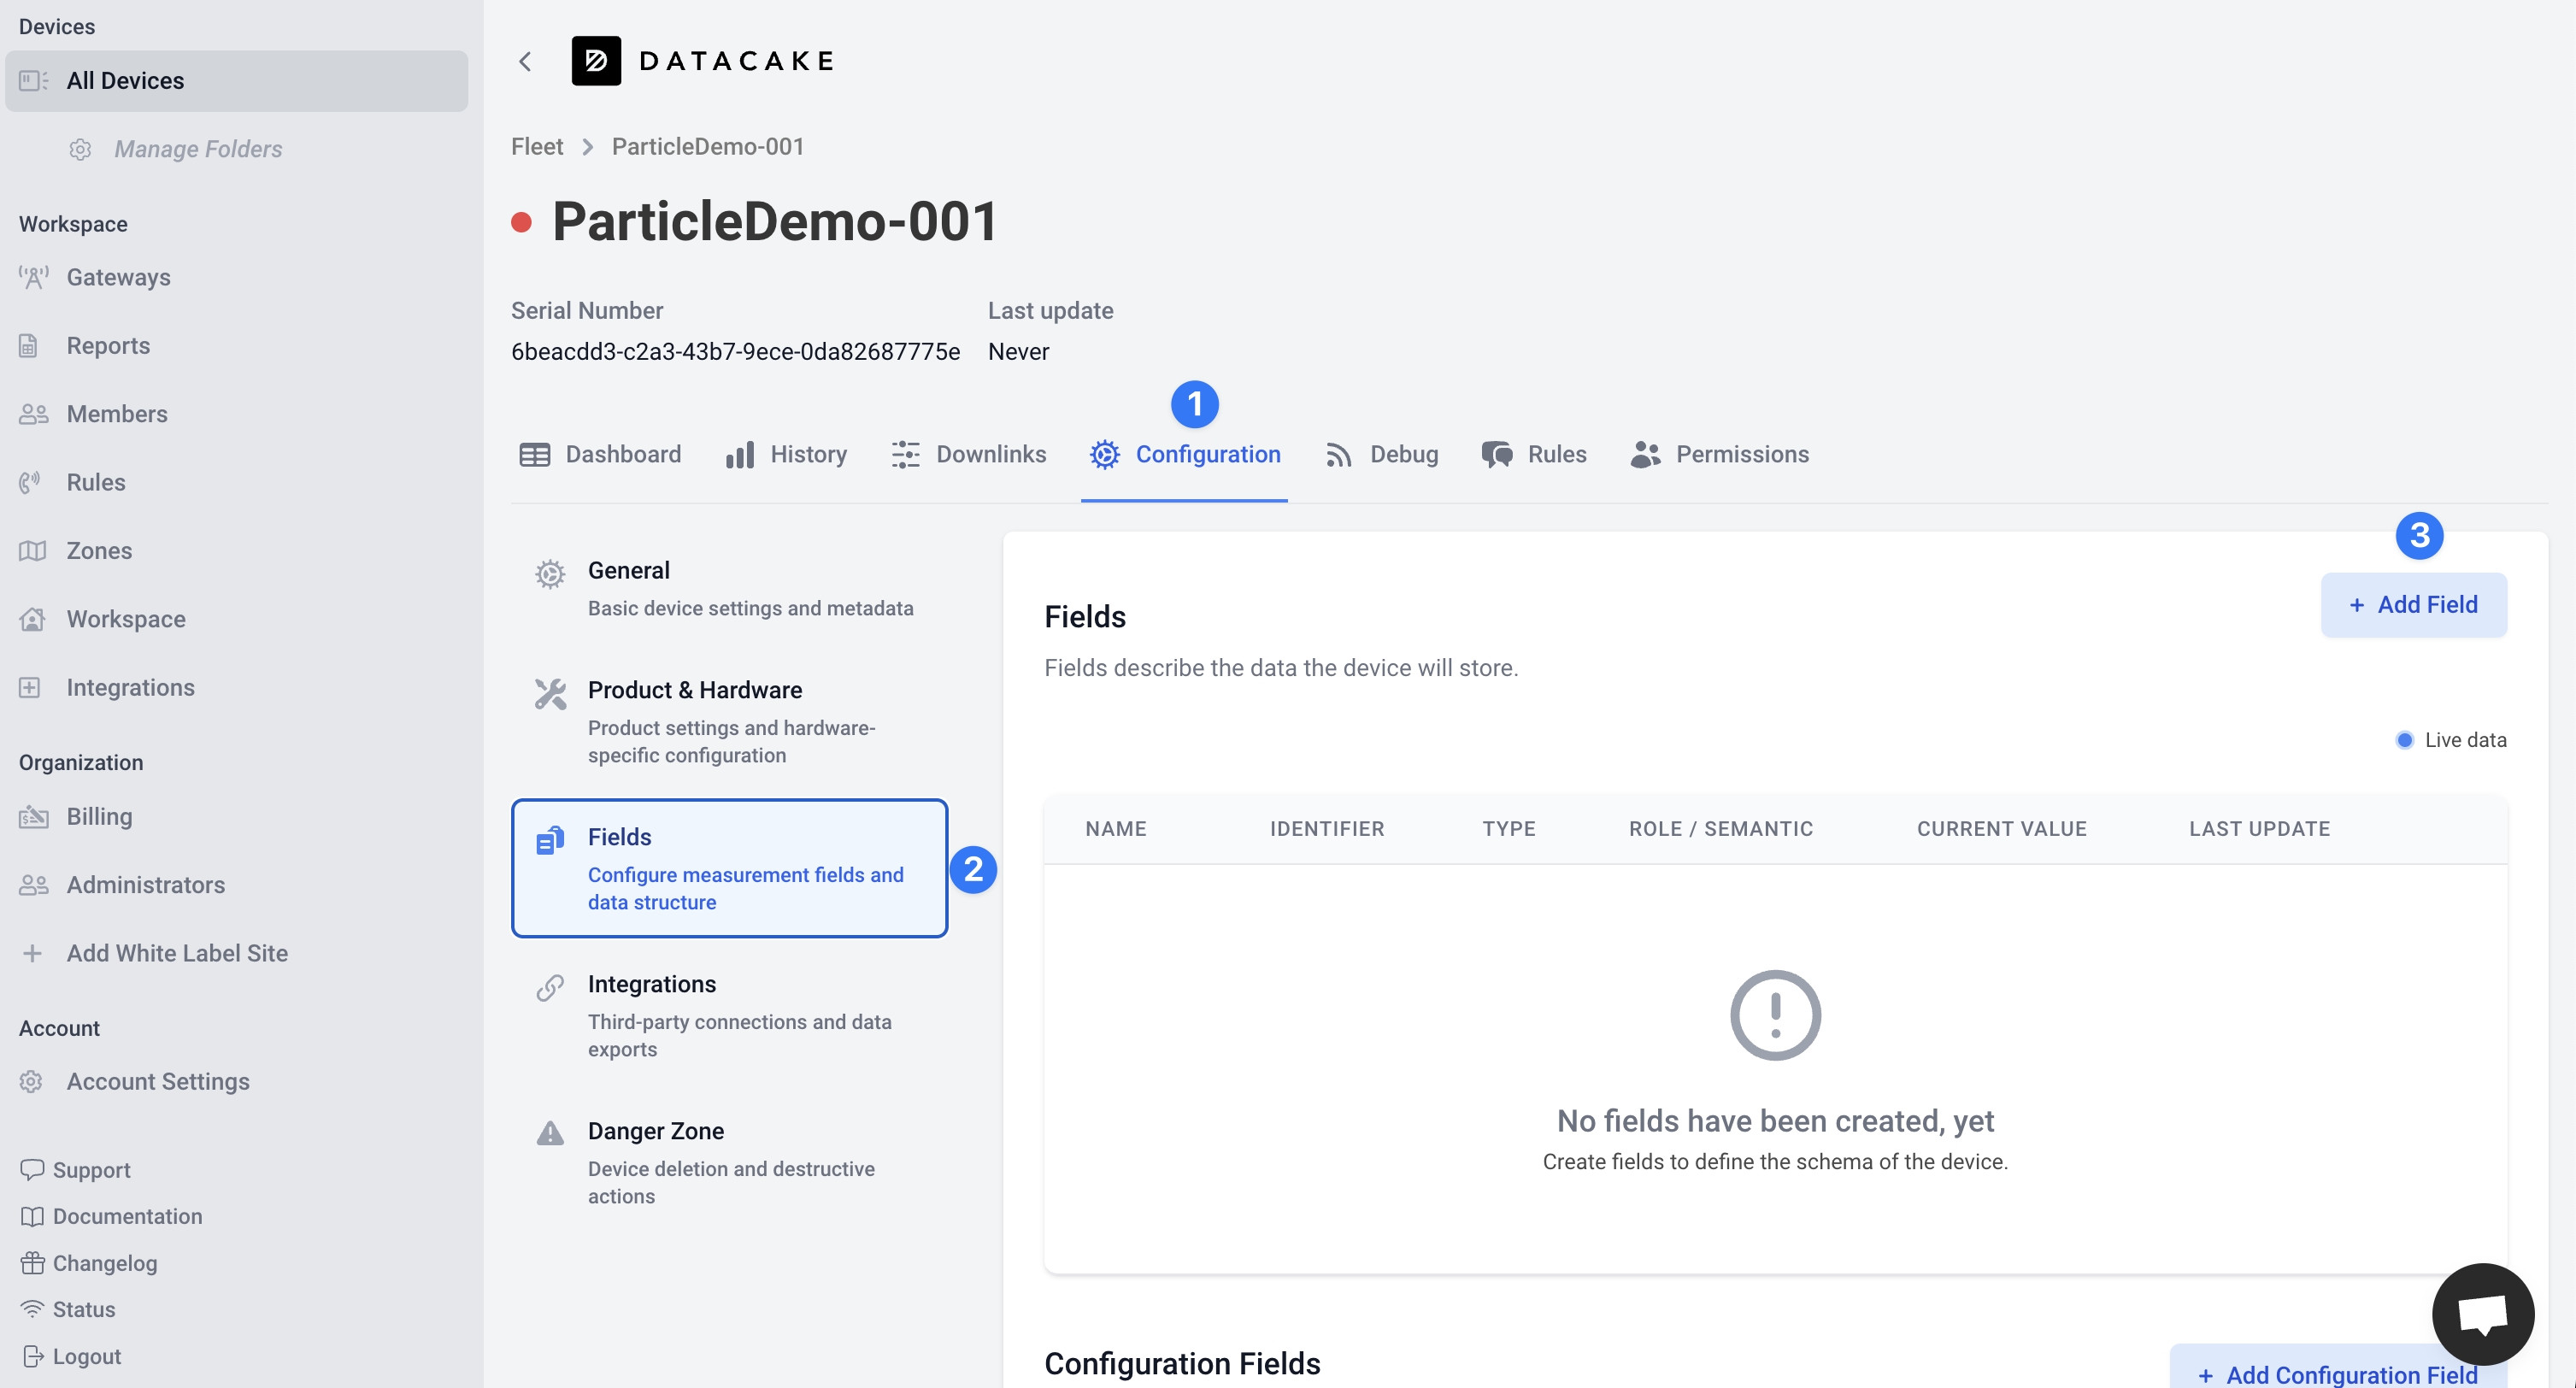
In this example, we’ll publish a counter from the Particle device for a simple demonstration. So we’ll select the integer type, give it a name of counter and leave the remaining settings as the default.
While still in the “configuration” tab, select the “Product & Hardware” submenu.
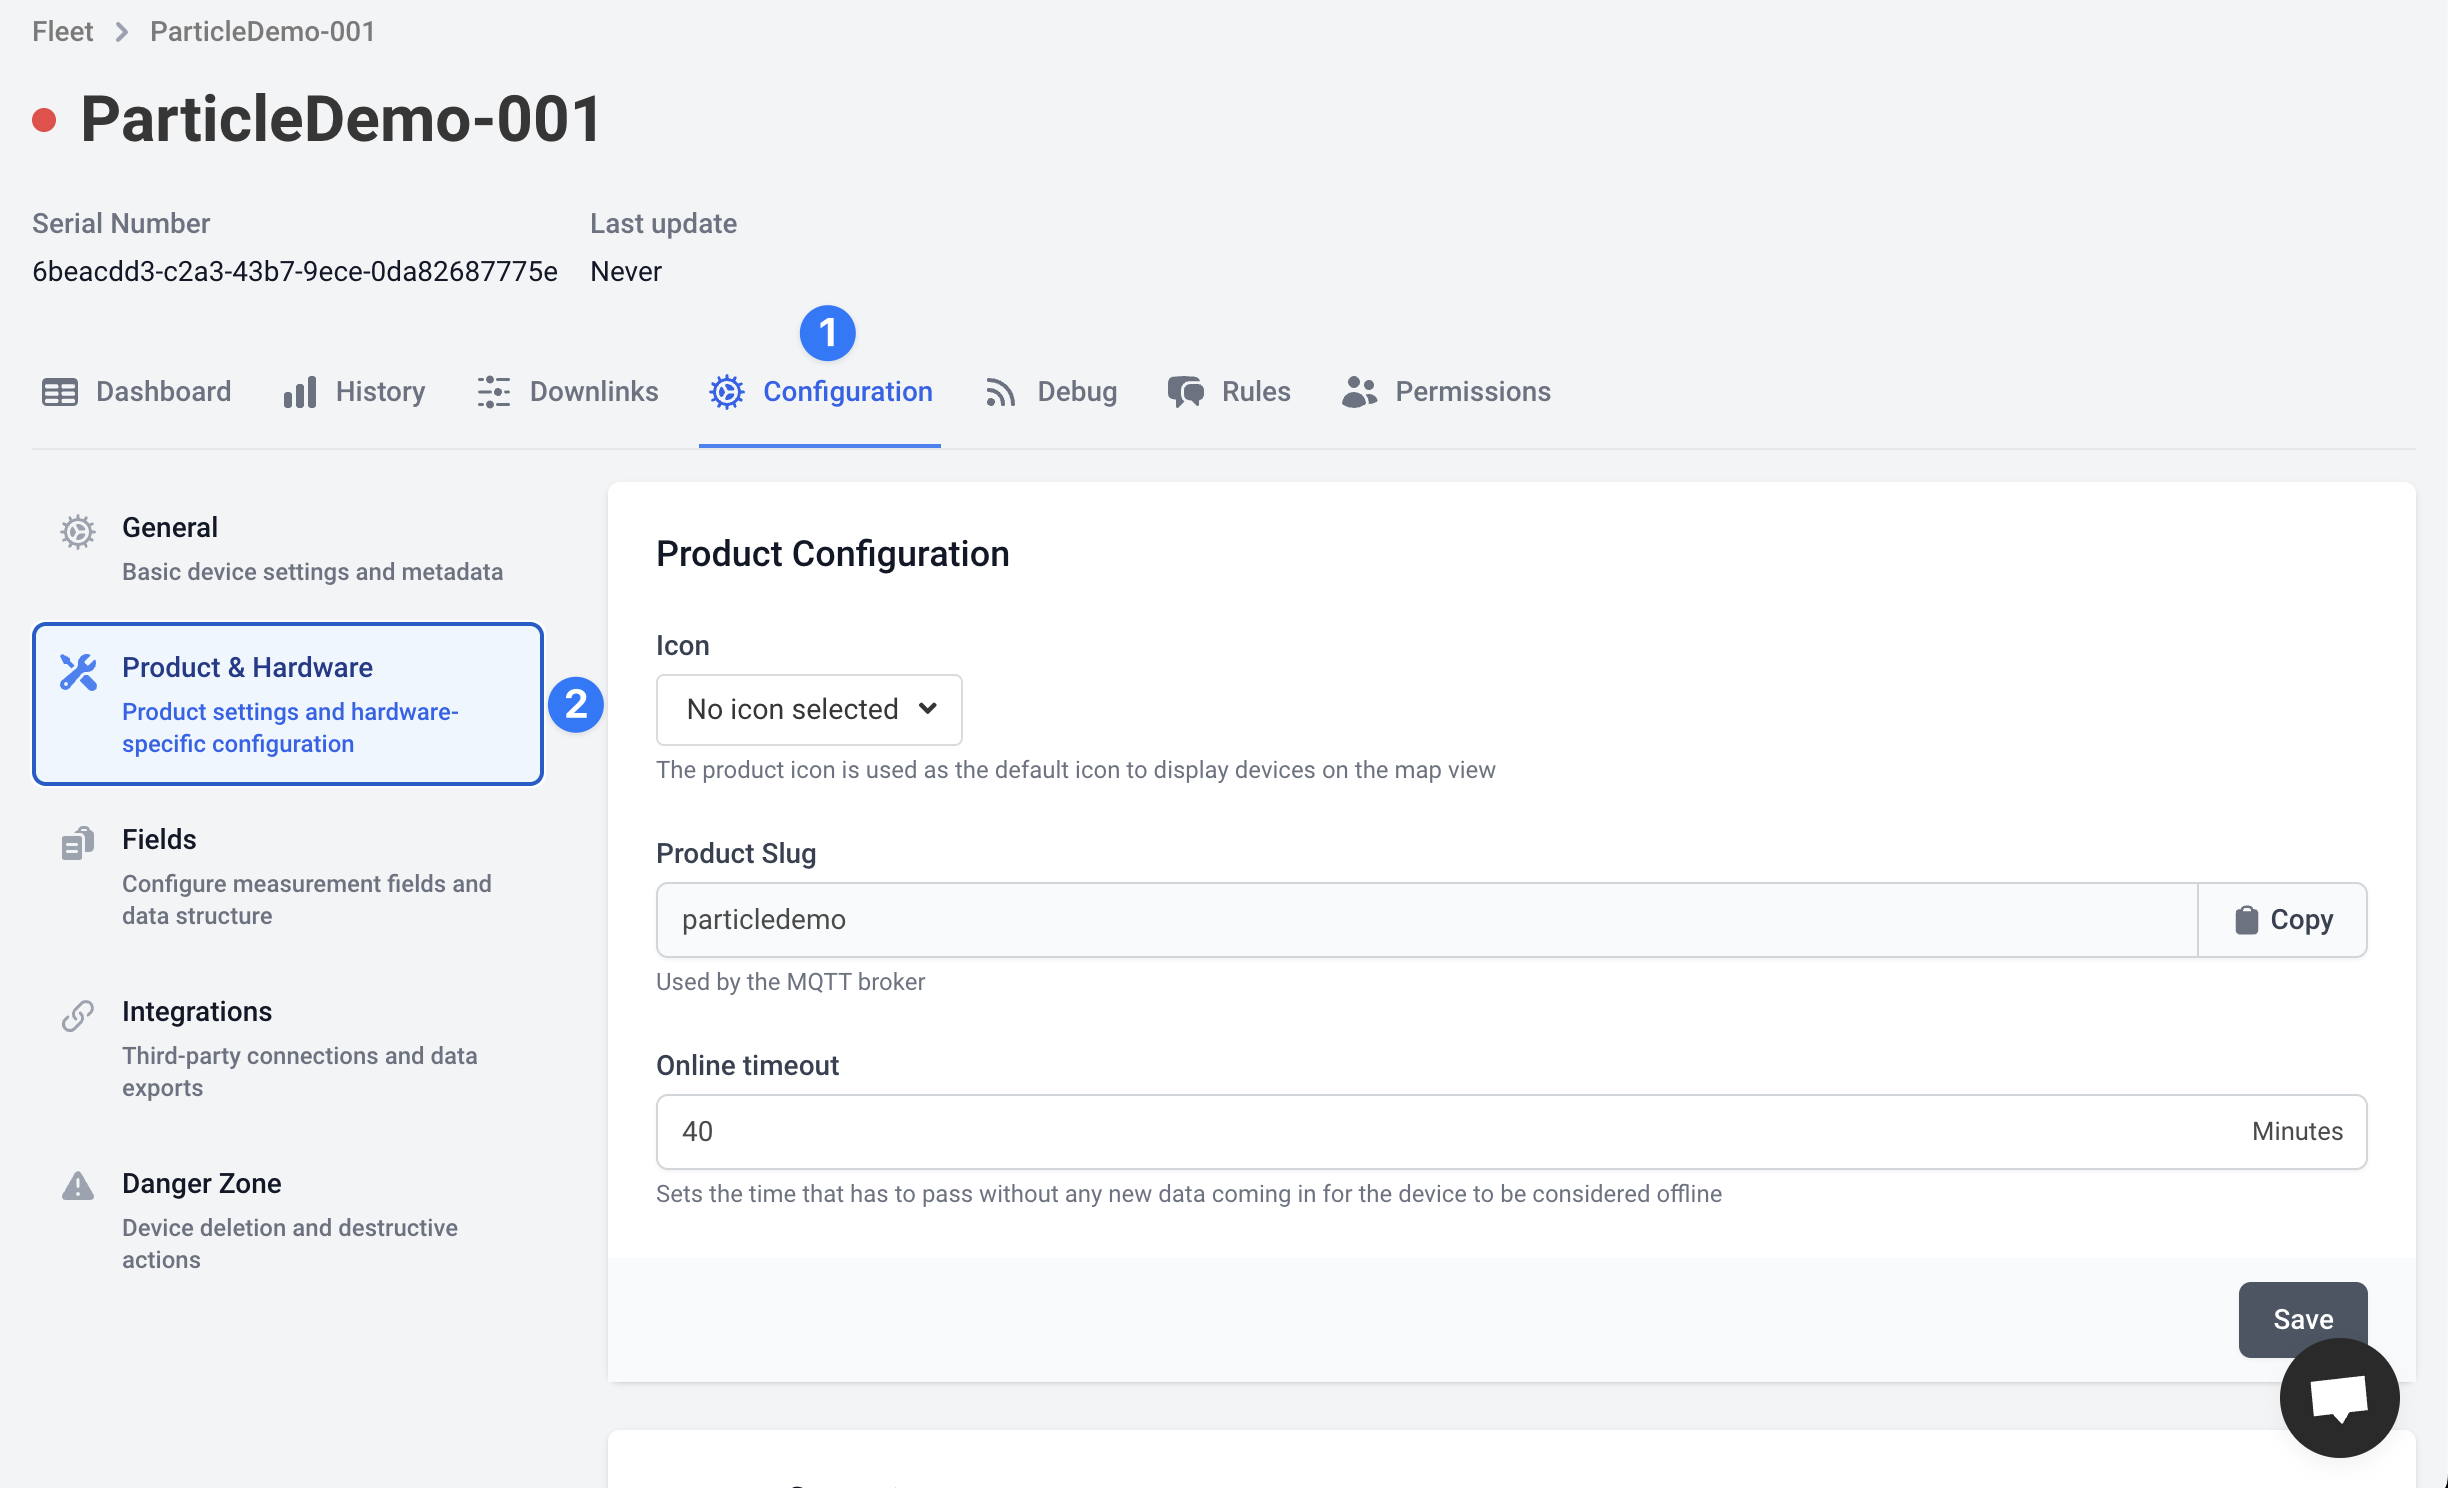
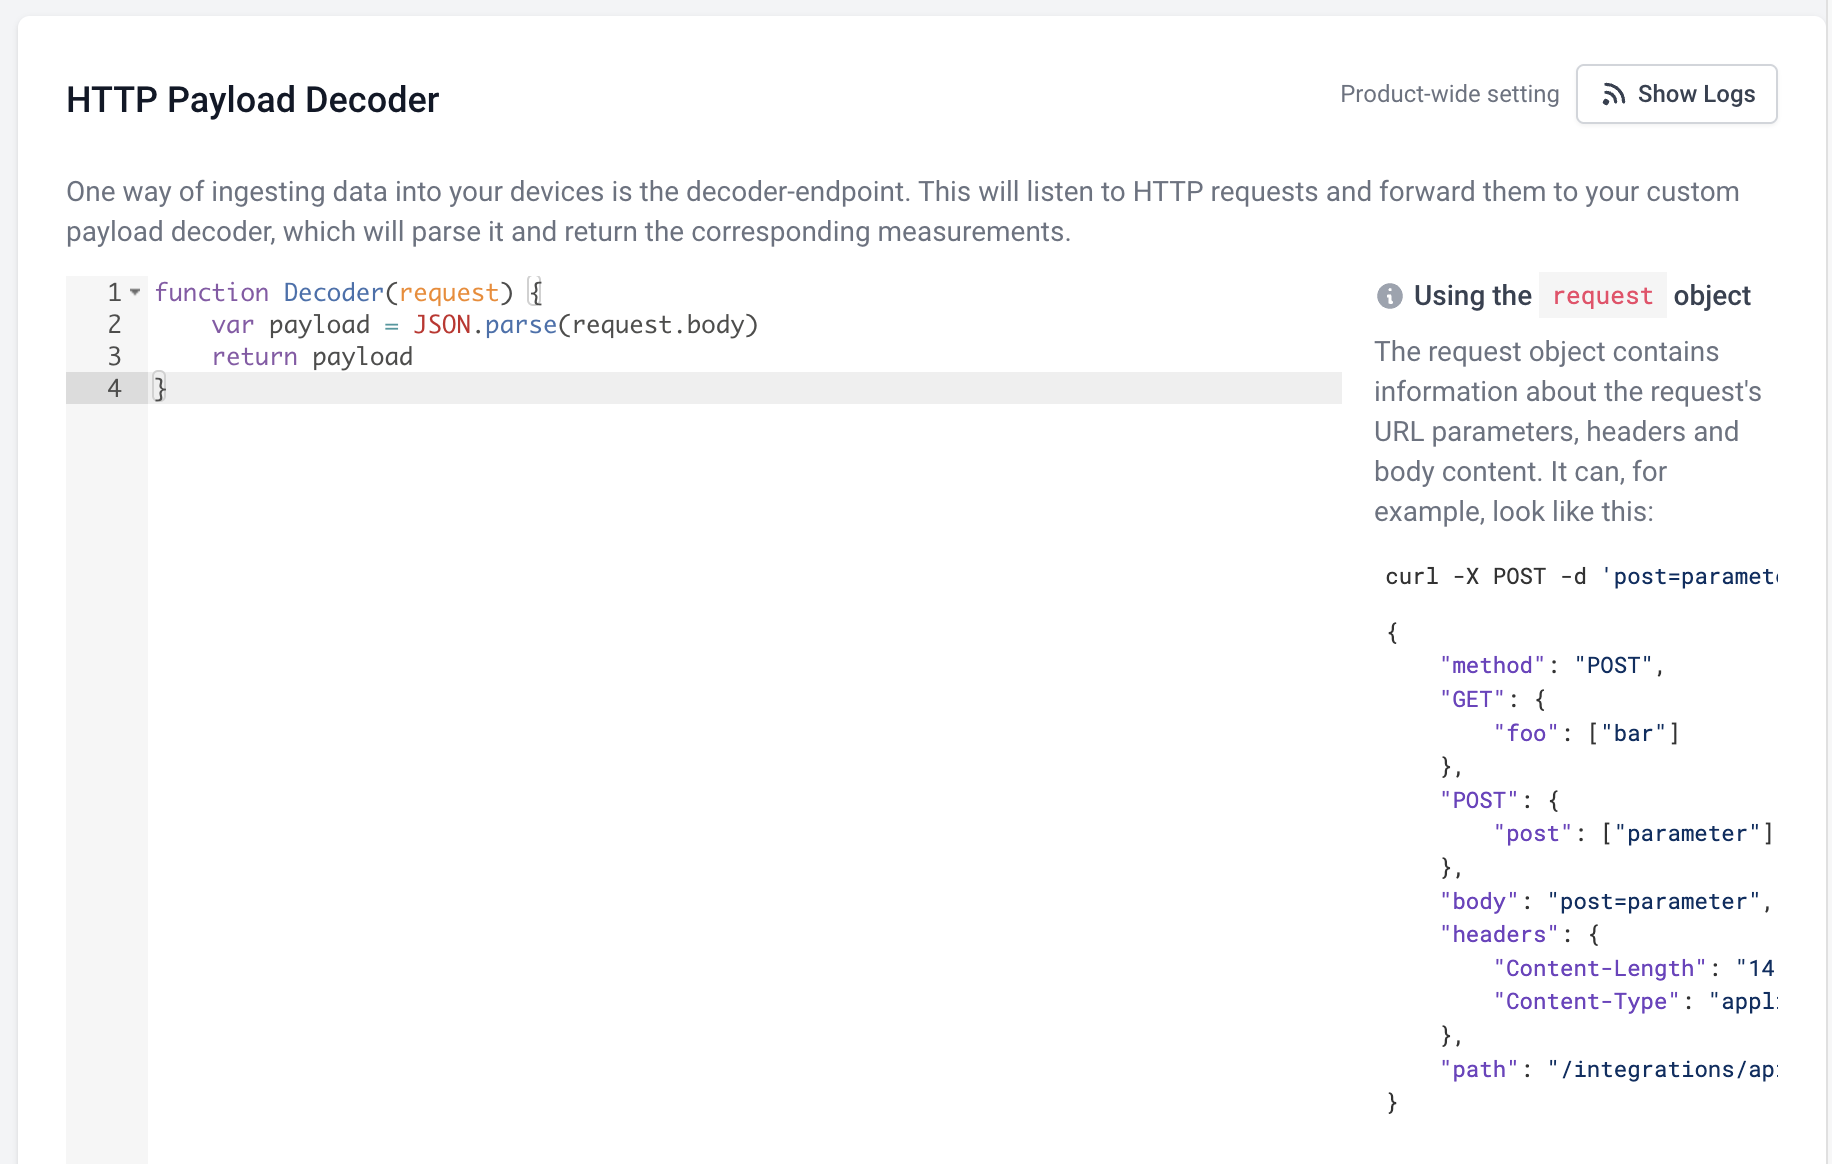
Scroll down until you see the “HTTP Payload Decoder” section. Replace the context of the text box with the following.
Before doing so, it might be worth reading through the sample code to get a better understanding what is possible with the decoder.
function Decoder(request) {
    var payload = JSON.parse(request.body)
    console.log(payload.device)
    return payload
}
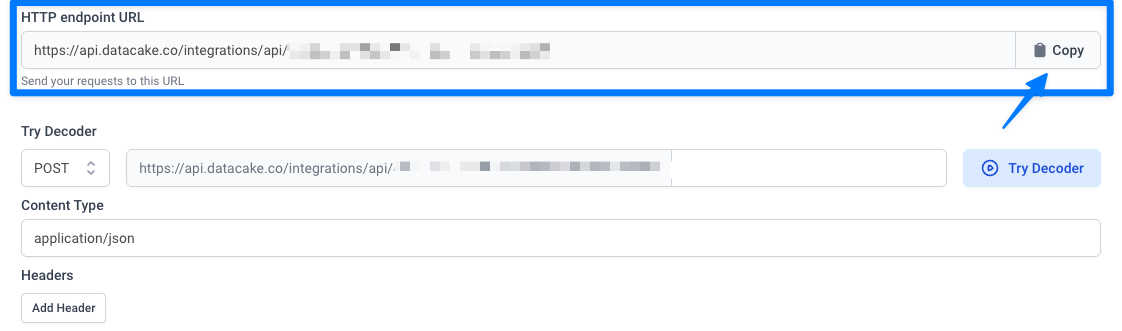
Scroll down a bit more to the “HTTP endpoint URL” subsection and copy this value, we’ll need it for the Particle configuration.
Particle webhook configuration
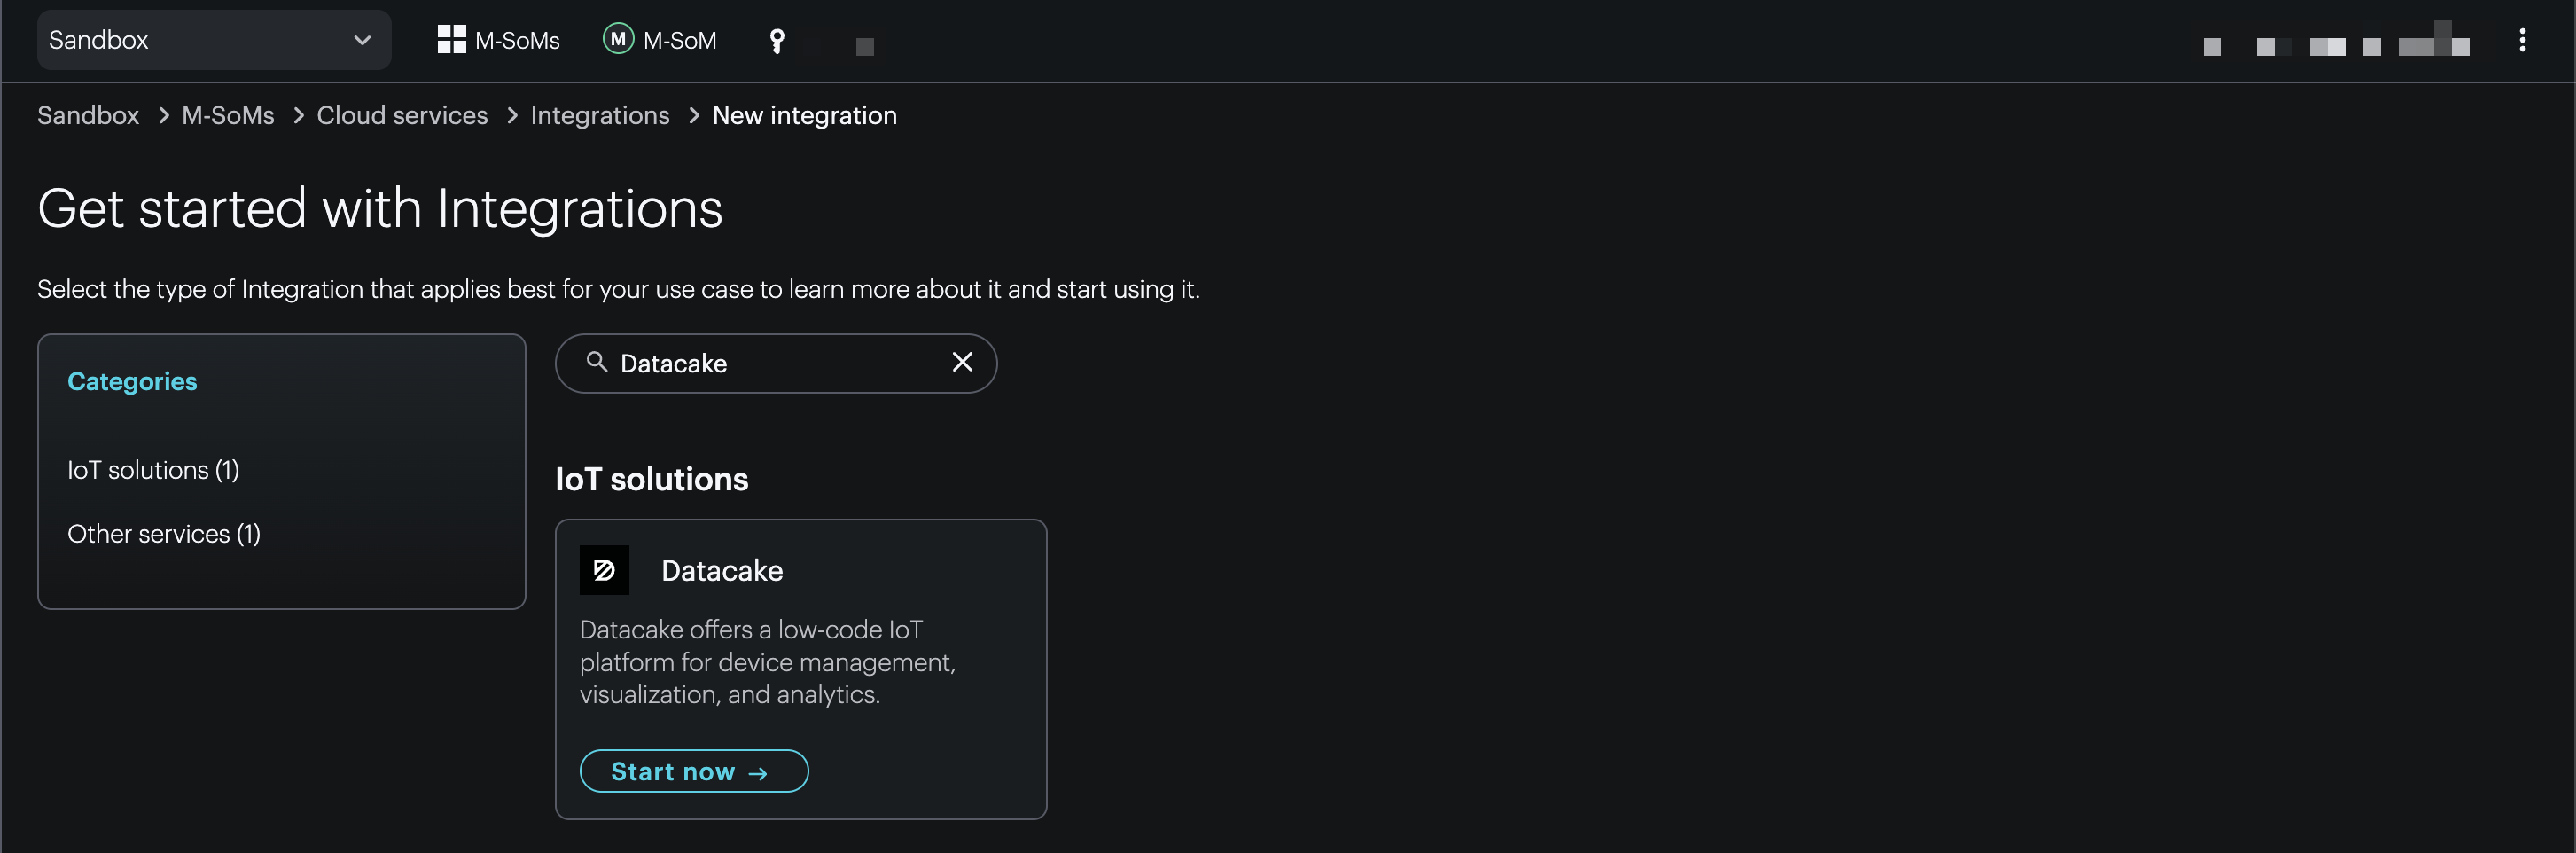
Navigate to the Particle console and set up a new device if you haven’t already. Once your device is activated and associated with a product, we can configure our new webhook. From your product level view navigate to Cloud services > Integrations. Search for “Datacake” and choose “Start now”.
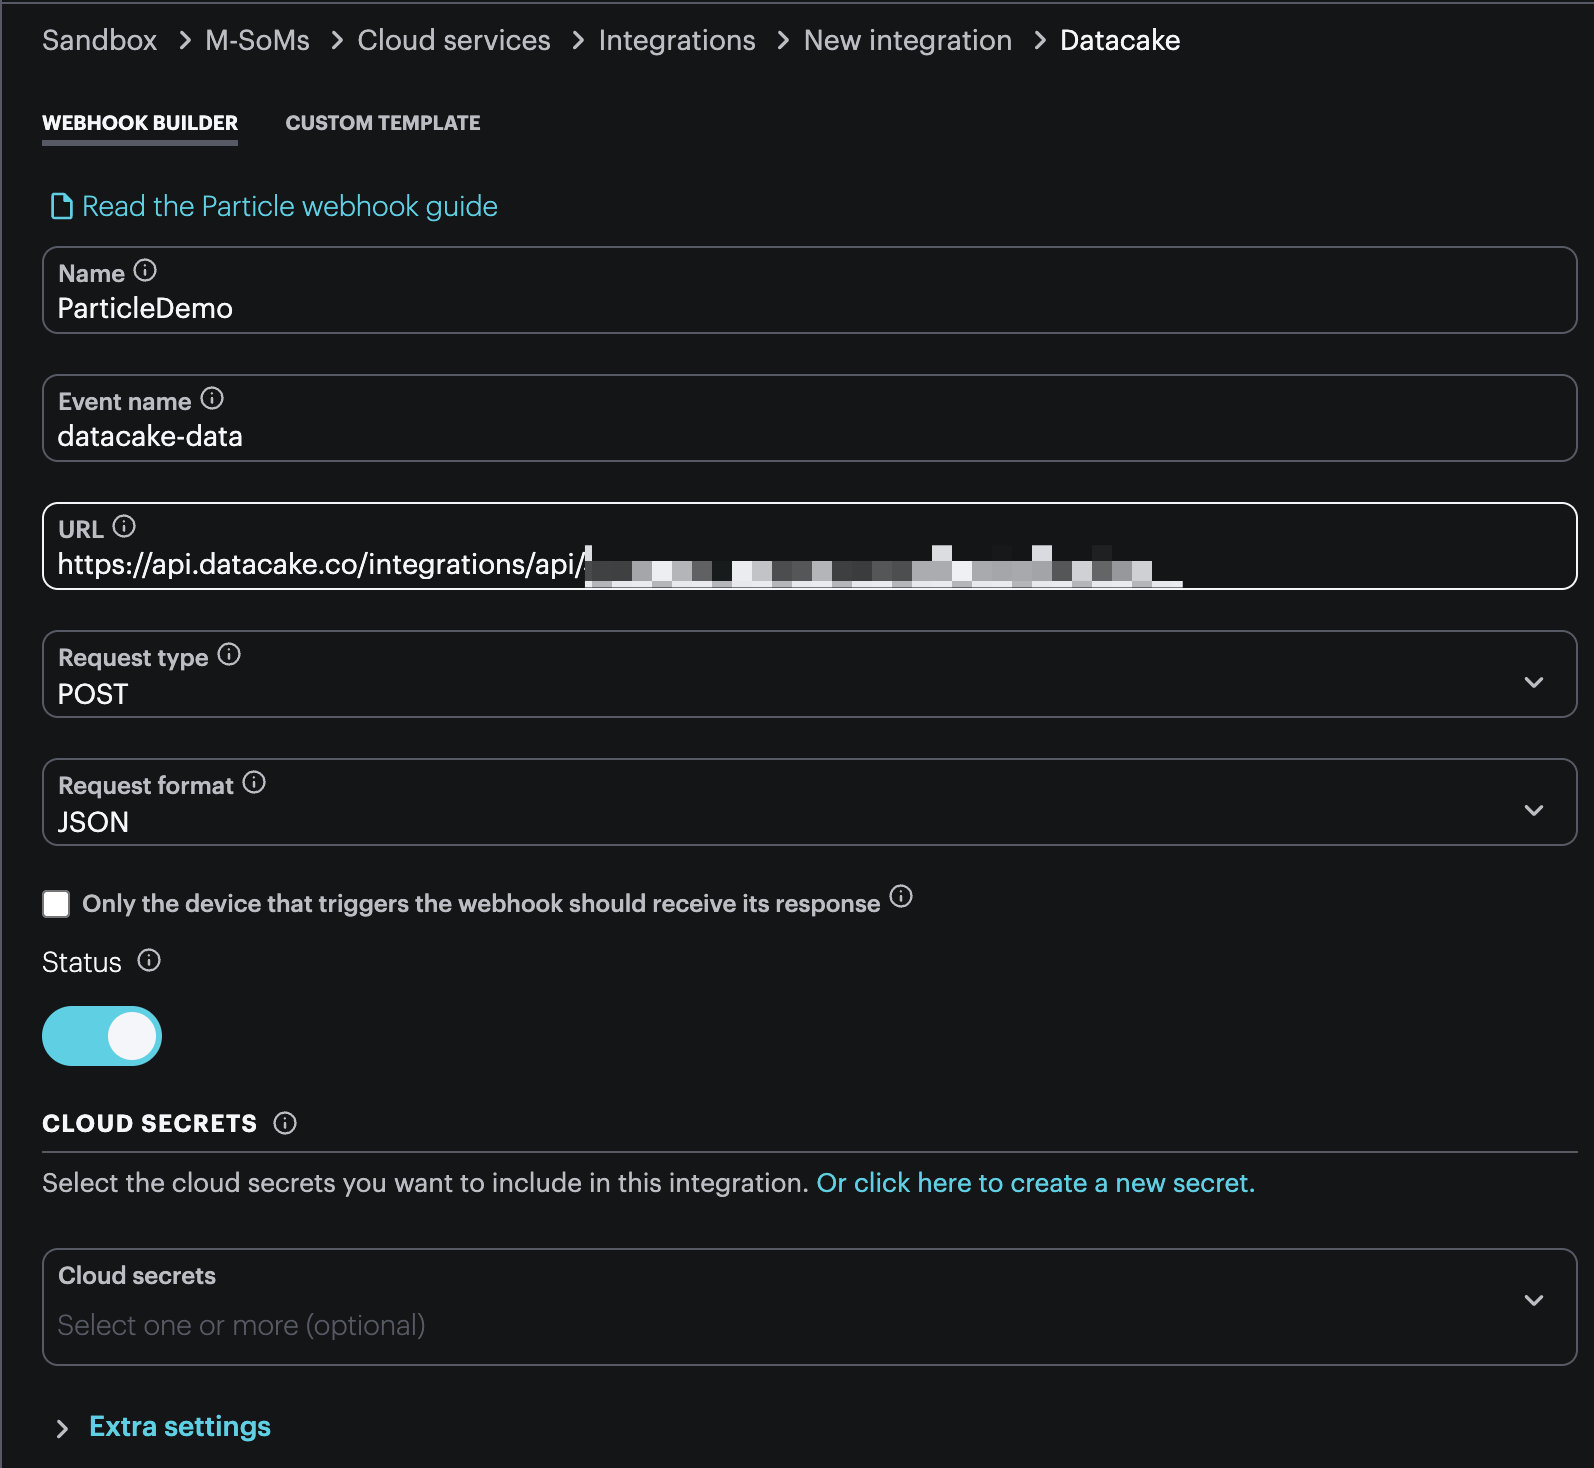
In the webhook builder, give the integration a name, and replace the URL with the value you copied in the previous step.
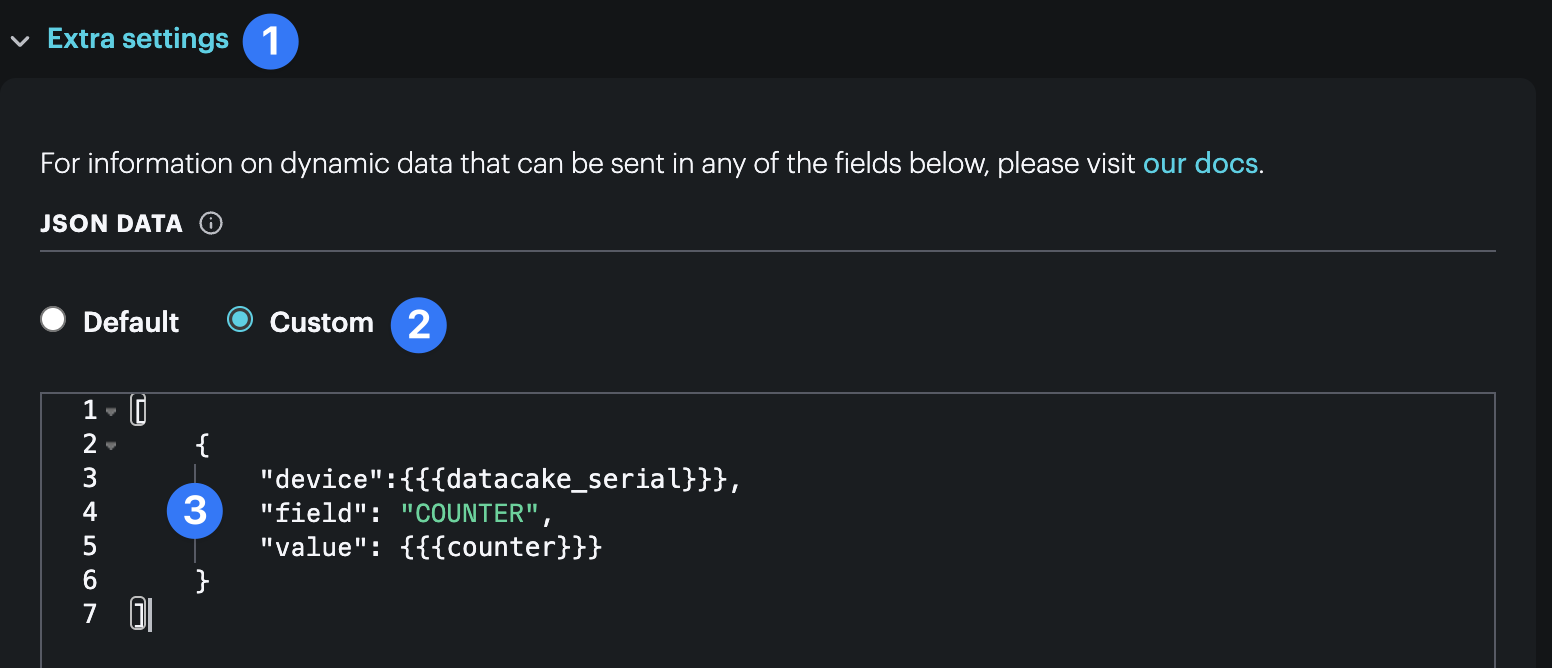
Expand the “Extra settings” submenu and select the “Custom” option under “JSON DATA”. Paste in the following. Notice that the “field” key has the matching uppercase value from the previous step in the Datacake console.
[
    {
        "device":"{{{datacake_serial}}}",
        "field": "COUNTER",
        "value": {{{counter}}}
    }
]
Scroll all the way down and save the new webhook.
Firmware
The firmware for this example is straight forward, but we’ll use it as an opportunity to introduce the typed and extended publish features available in Device OS 6.3+. Notice how the publish is non-blocking! With this configuration can go about doing other operations in the firmware (such as monitor sensors) while the cloud publish resolves.
With a device that has been already assigned to the product that contains your Datacake integration, flash the following sample code with the latest Device OS available:
#include "Particle.h"

SYSTEM_MODE(AUTOMATIC);

#define DATACAKE_SERIAL_NO "6beacdd3-c2a3-43b7-9ece-0da82687775e"

SerialLogHandler logHandler(LOG_LEVEL_INFO);

const std::chrono::milliseconds publishPeriod = 2min;
unsigned long lastPublish;
CloudEvent event;
int globalCount = 1;

void publishCounter();

void setup()
{
}

void loop()
{
    if (Particle.connected())
    {
        if (!event.isSending() && ((lastPublish == 0) || (millis() - lastPublish >= publishPeriod.count())))
        {
            lastPublish = millis();
            publishCounter();
        }
    }

    if (event.isSent())
    {
        Log.info("publish succeeded");
        globalCount++;
        event.clear();
    }
    else if (!event.isOk())
    {
        Log.info("publish failed error=%d", event.error());
        event.clear();
    }
}

void publishCounter()
{
    particle::Variant obj;
    obj.set("counter", globalCount);
    obj.set("datacake_serial", DATACAKE_SERIAL_NO);

    event.name("datacake-data");
    event.data(obj);
    Particle.publish(event);

    Log.info("publishing %s", obj.toJSON().c_str());
}
The above firmware simply publishes a count value once every 2 minutes. Notice, though, that the datacake_serial number is hard coded here. This is not a very scalable way to manage your devices. A better approach would be to use a cloud to device, device scoped Ledger instance.
At scale, you might implement a script that creates a new Ledger instance for each device onboarded to Datacake. Then once the device comes, online it will sync itself with it’s Ledger instance and populate the Datacake serial number.
Testing
With our cloud services wired together, let’s test to make sure we’re properly sending our COUNTER to Datacake.
The first place to look is at the device’s serial output for the “published successfully” log.
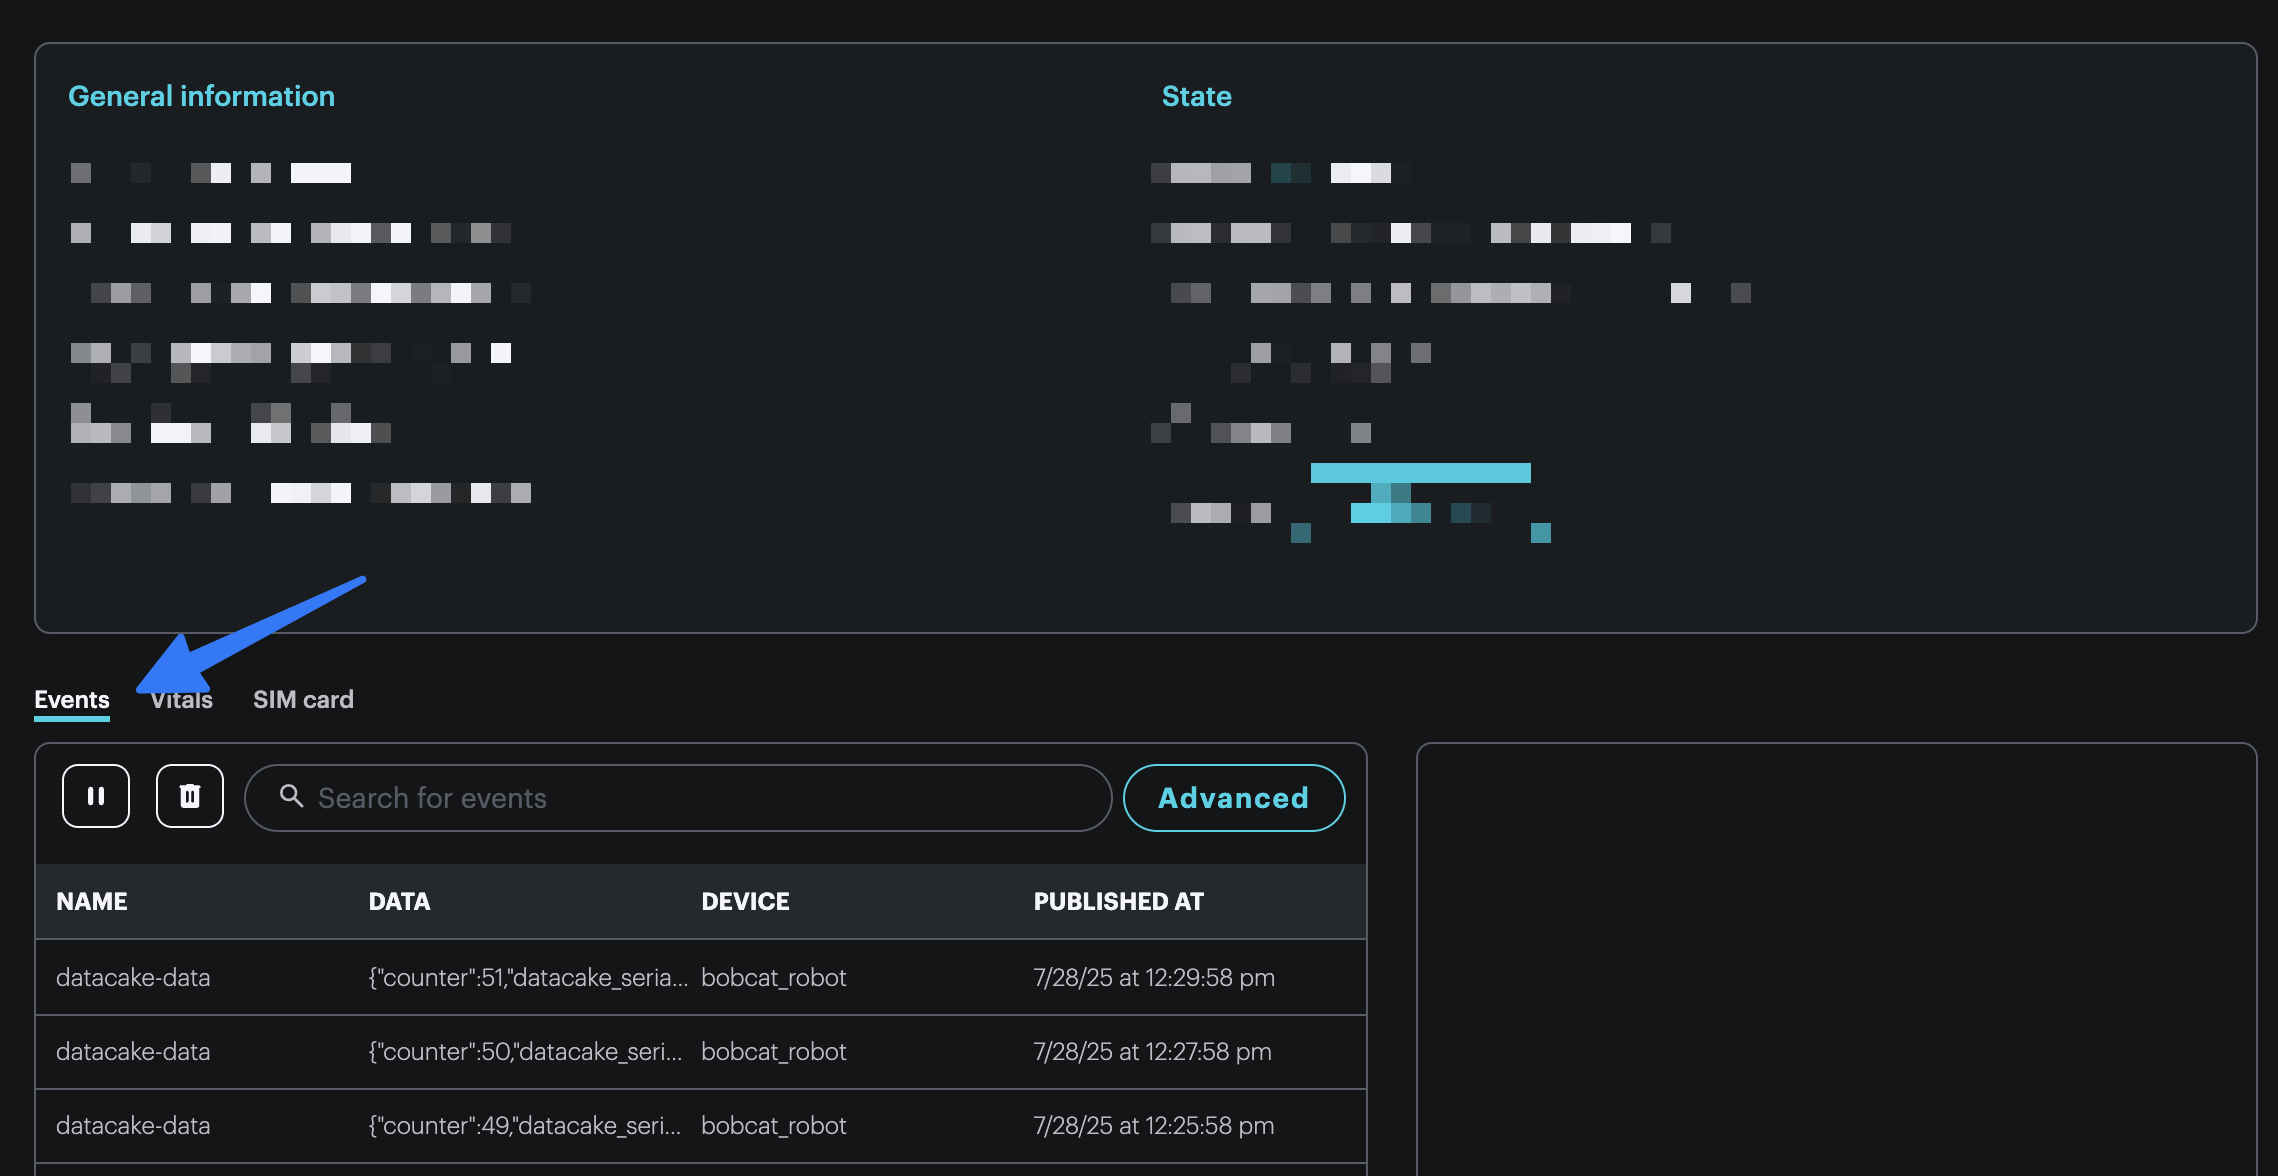
Next, head over to the Particle Console and open the event view in the device details section. Confirm you see messages propagating through.
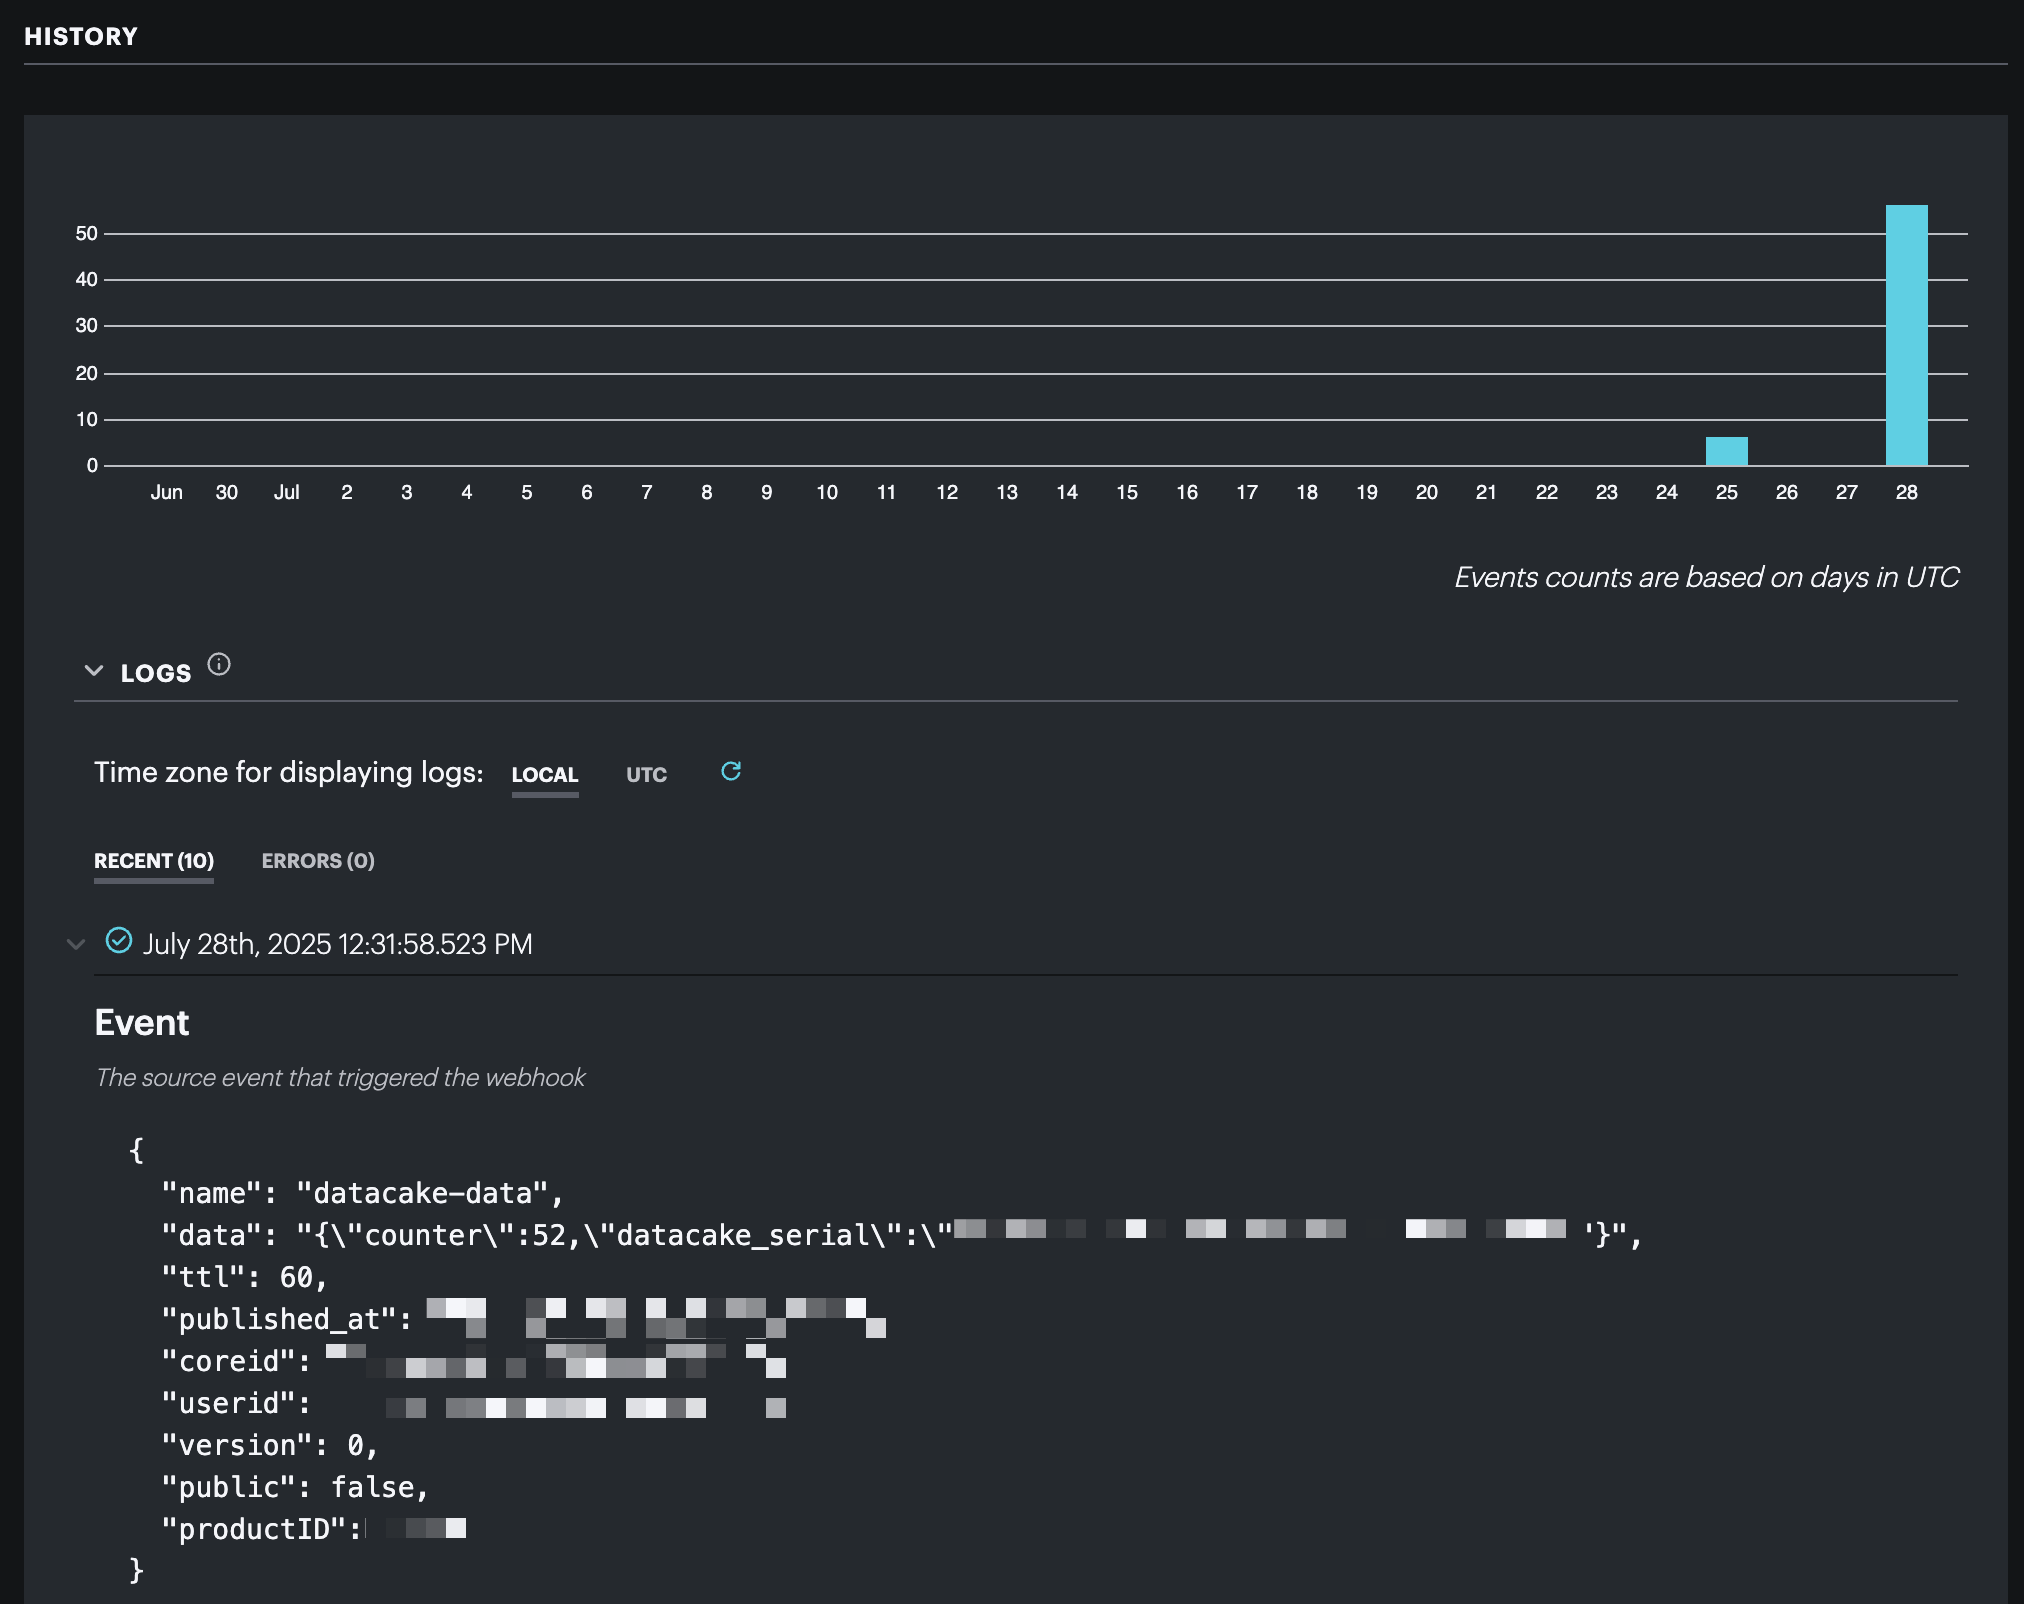
With the events streaming into the Particle Cloud, we can now check on the status of the integration. Navigate to Cloud services > Integrations from the product level view. Click into the newly configured Datacake integration and scroll down to the history section. Confirm that your integration is being triggered without errors and containing the proper data field.
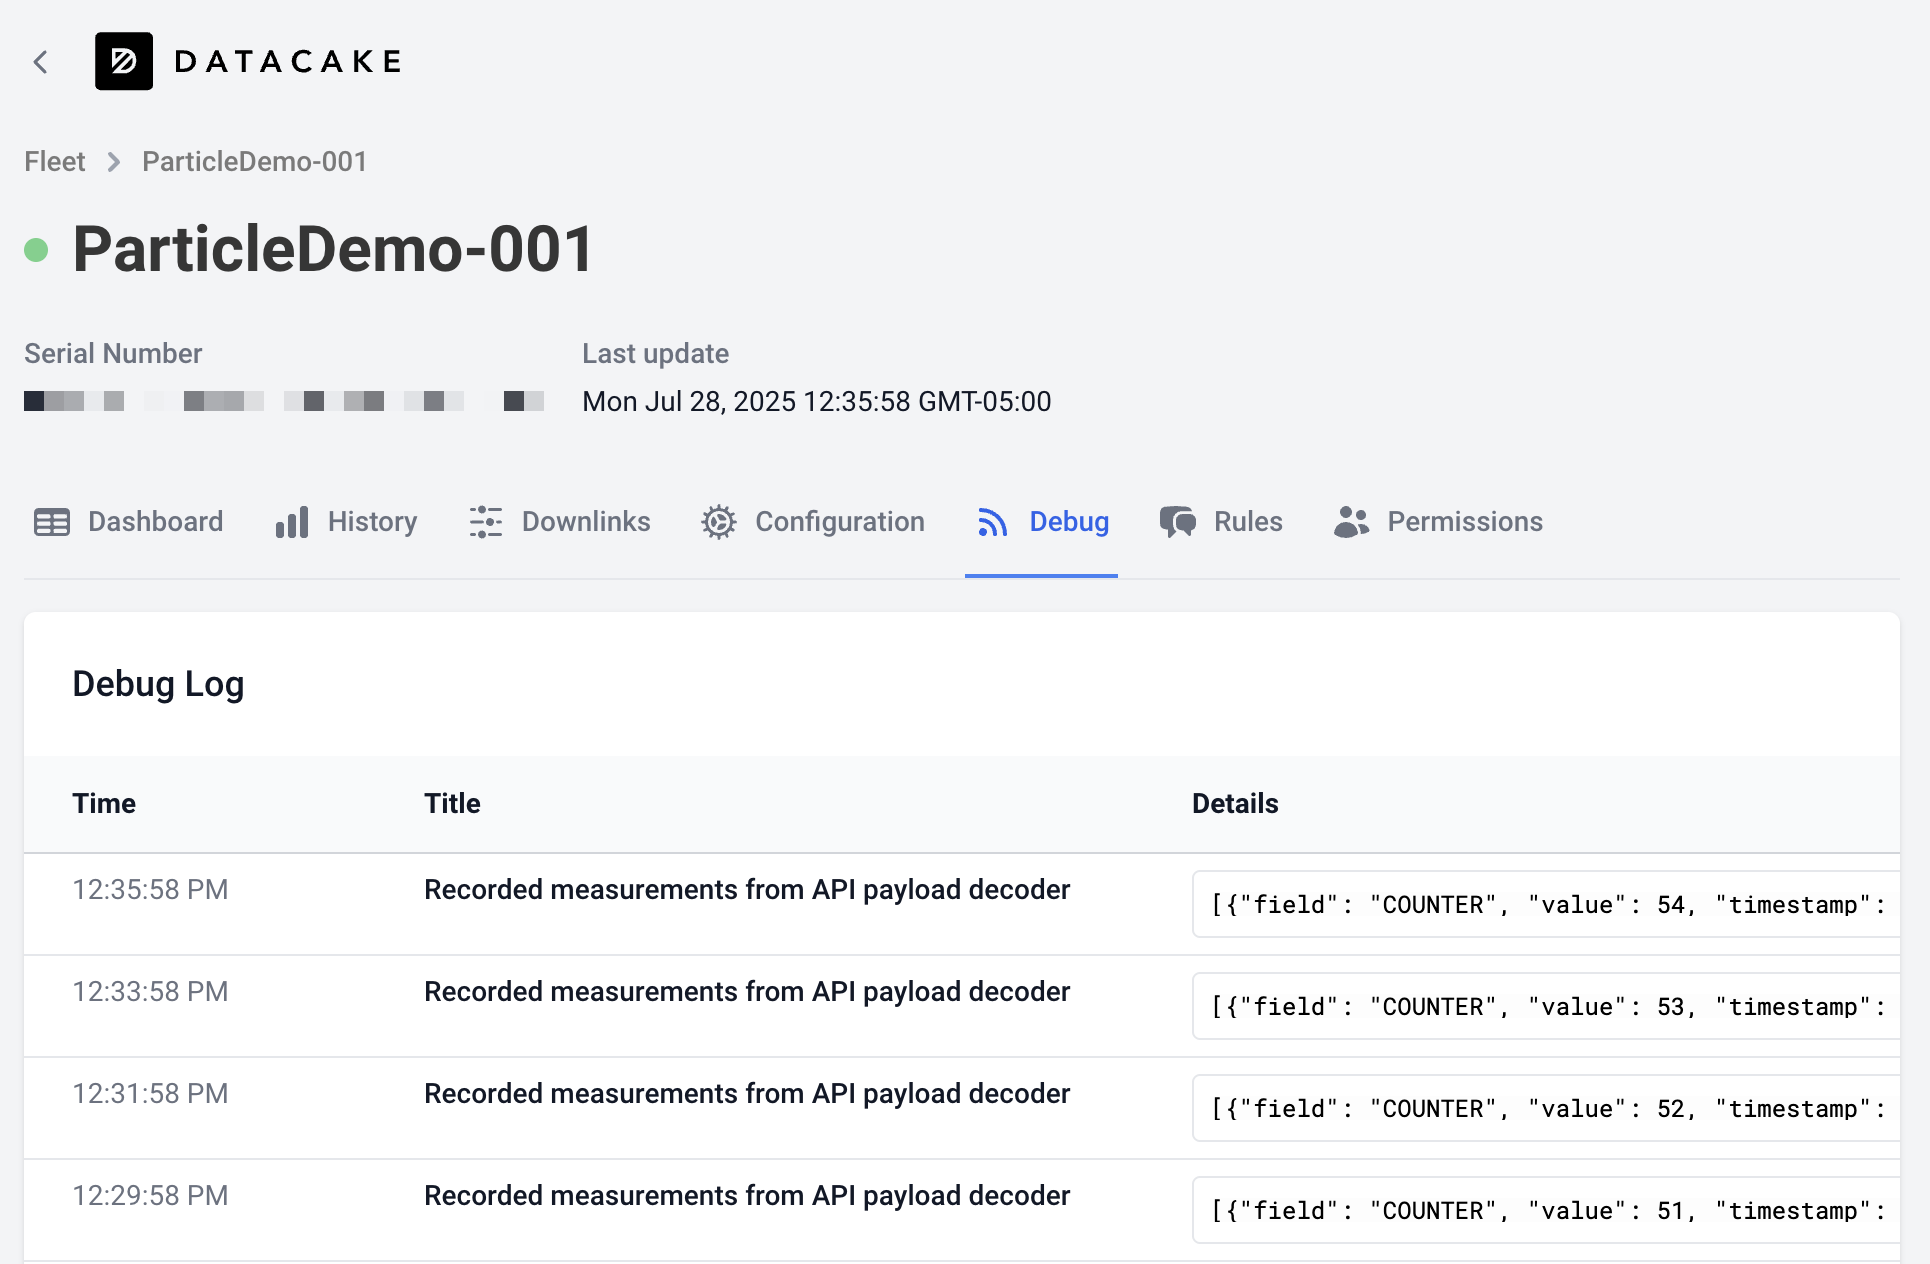
Now, we can confirm that the messages are being received by Datacake. Head back to your Datacake console and open detail view for the newly configured device.
Navigate to the debug tab. You should see a list of recent events with the title: “Recorded measurements from API payload decoder”. Confirm that you’re seeing the expected payload in the “Details” section.
Next steps
With that, you’re ready to start creating more complex dashboards with data sent from your Particle device!