Webhooks
Webhooks are a simple and flexible way to send data from your Particle devices to other apps and services around the Internet. Webhooks bridge the gap between the physical and the digital world, helping you get your data where you need it to be.
You could use a webhook to save valuable information in a database, visualize data being read from a sensor, send the latest weather report to your device, trigger a payment, send a text message, and so much more!
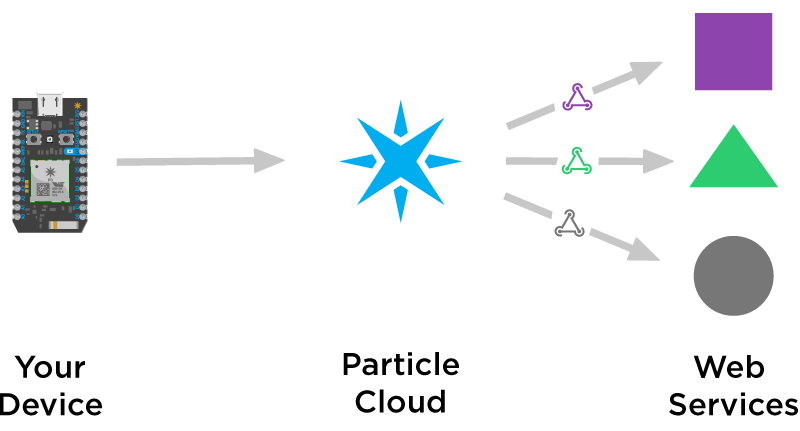
Webhooks allow you to send data from your connected device anywhere on the Internet
In this guide, we'll provide an overview of how you can use webhooks in your connected products, and walk you through a few examples to get you started.
If you are looking for all the juicy details, head over to the webhook reference page.
How webhooks work
Webhooks are tightly integrated with Particle's event system. Devices have the ability to both publish events to the Particle cloud, as well as subscribe to events from the cloud.
A webhook listens for a specific event published by a device. When this event is published, the webhook triggers a web request to a URL on the web. The request sent by the webhook can include information about the event, such as its name as well as any data included when the event was published.
You can configure a webhook to make different types of web requests. The most common type of webhook request is a POST, which is a method of sending data to another web server. In the case of Particle webhooks, this would mean sending data from your devices to a third-party web service. Other types of web requests, like GET and PUT can also be made with webhooks.
Often times, a web server you hit with a webhook will return data to you as a result of the request made. When this happens, your devices can subscribe to a specific event name to receive the response from the web server and use it in your firmware logic.
The combination of webhooks with the Particle cloud's pub/sub event system creates a very efficient way for you to leverage online tools and services and integrate them into your connected product.
Webhooks is one piece of a larger puzzle of Particle Integrations. We want to make it incredibly easy to send data from your devices wherever you need it. In the near future, Particle will offer branded integrations will further simplify the process of sending your data to useful web services.
Your first webhook
Let's get started! For your first webhook, let's try to send some data from your Particle device to a graphing tool. For this example, we'll use ThingSpeak.
Configure ThingSpeak
Create a ThingSpeak account if you don't already have one. Next, create a channel by clicking the "New Channel" button on your ThingSpeak dashboard.
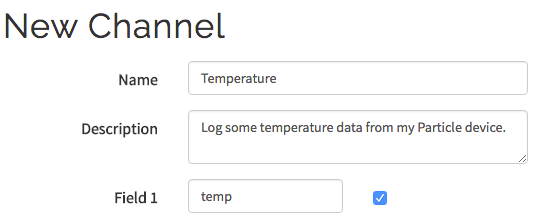
Name your channel "Temperature," add one field called "temp" and create the channel.
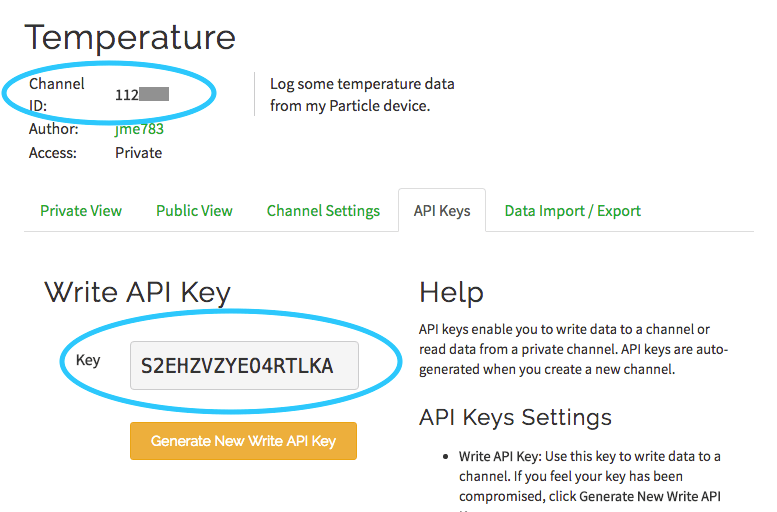
Once you've created the channel, you will need to note the Channel ID as well as your Write API key to use for creating the Particle webhook.
Great! We have what we need from ThingSpeak. Now let's go and create the webhook.
Create the webhook
The hub for managing your webhooks is the Particle Console. Log into your console and click on the Integrations tab.
If you have not yet created any integrations, you'll open into the integration gallery.
If you have created any webhooks in the past, they will appear in the integrations tab and clicking the + ADD NEW INTEGRATION button will open the Integration gallery.
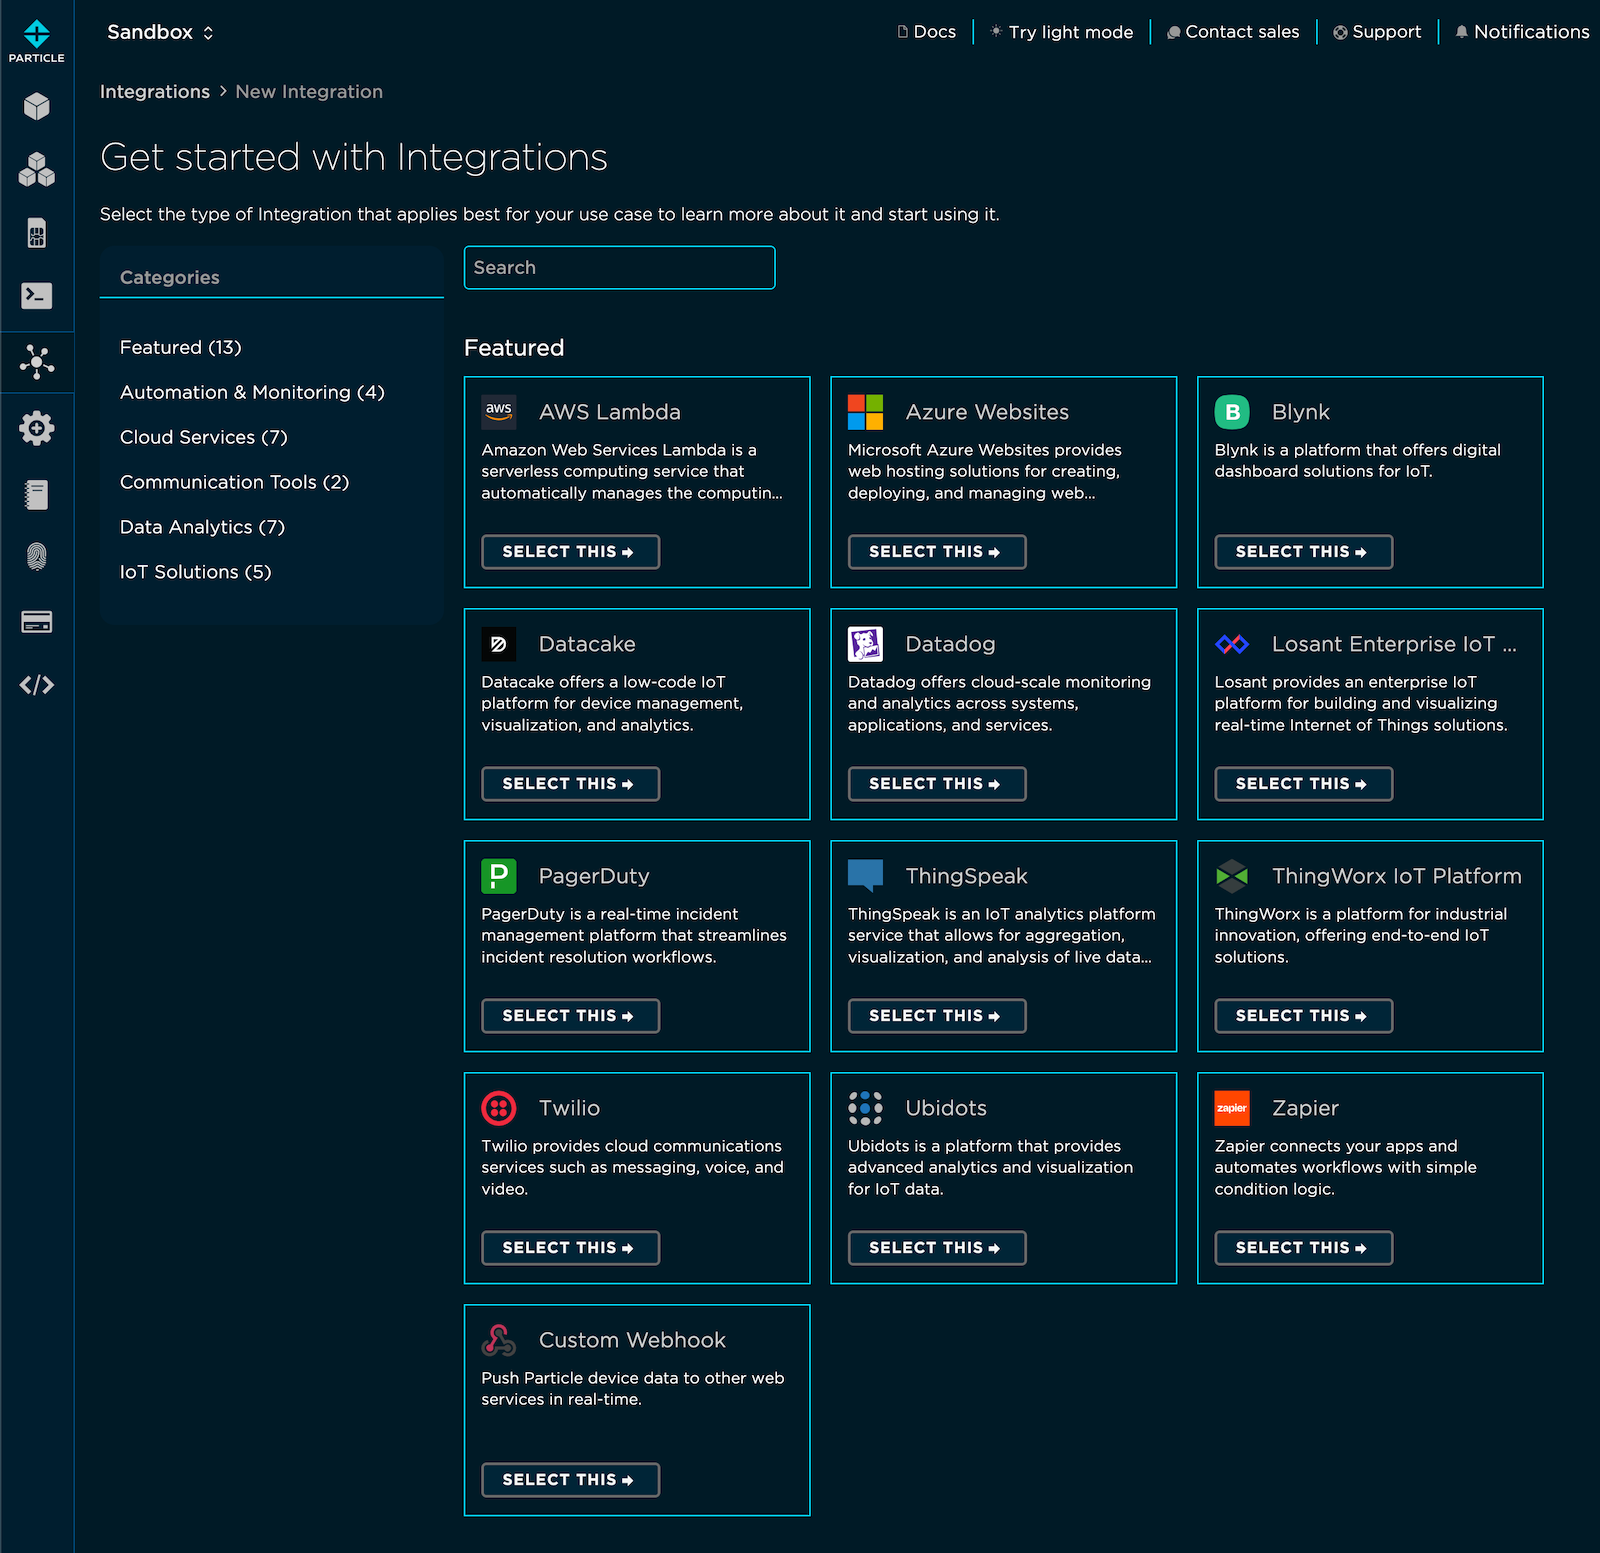
Search for Thingspeak, select this integration, and proceed to edit it.
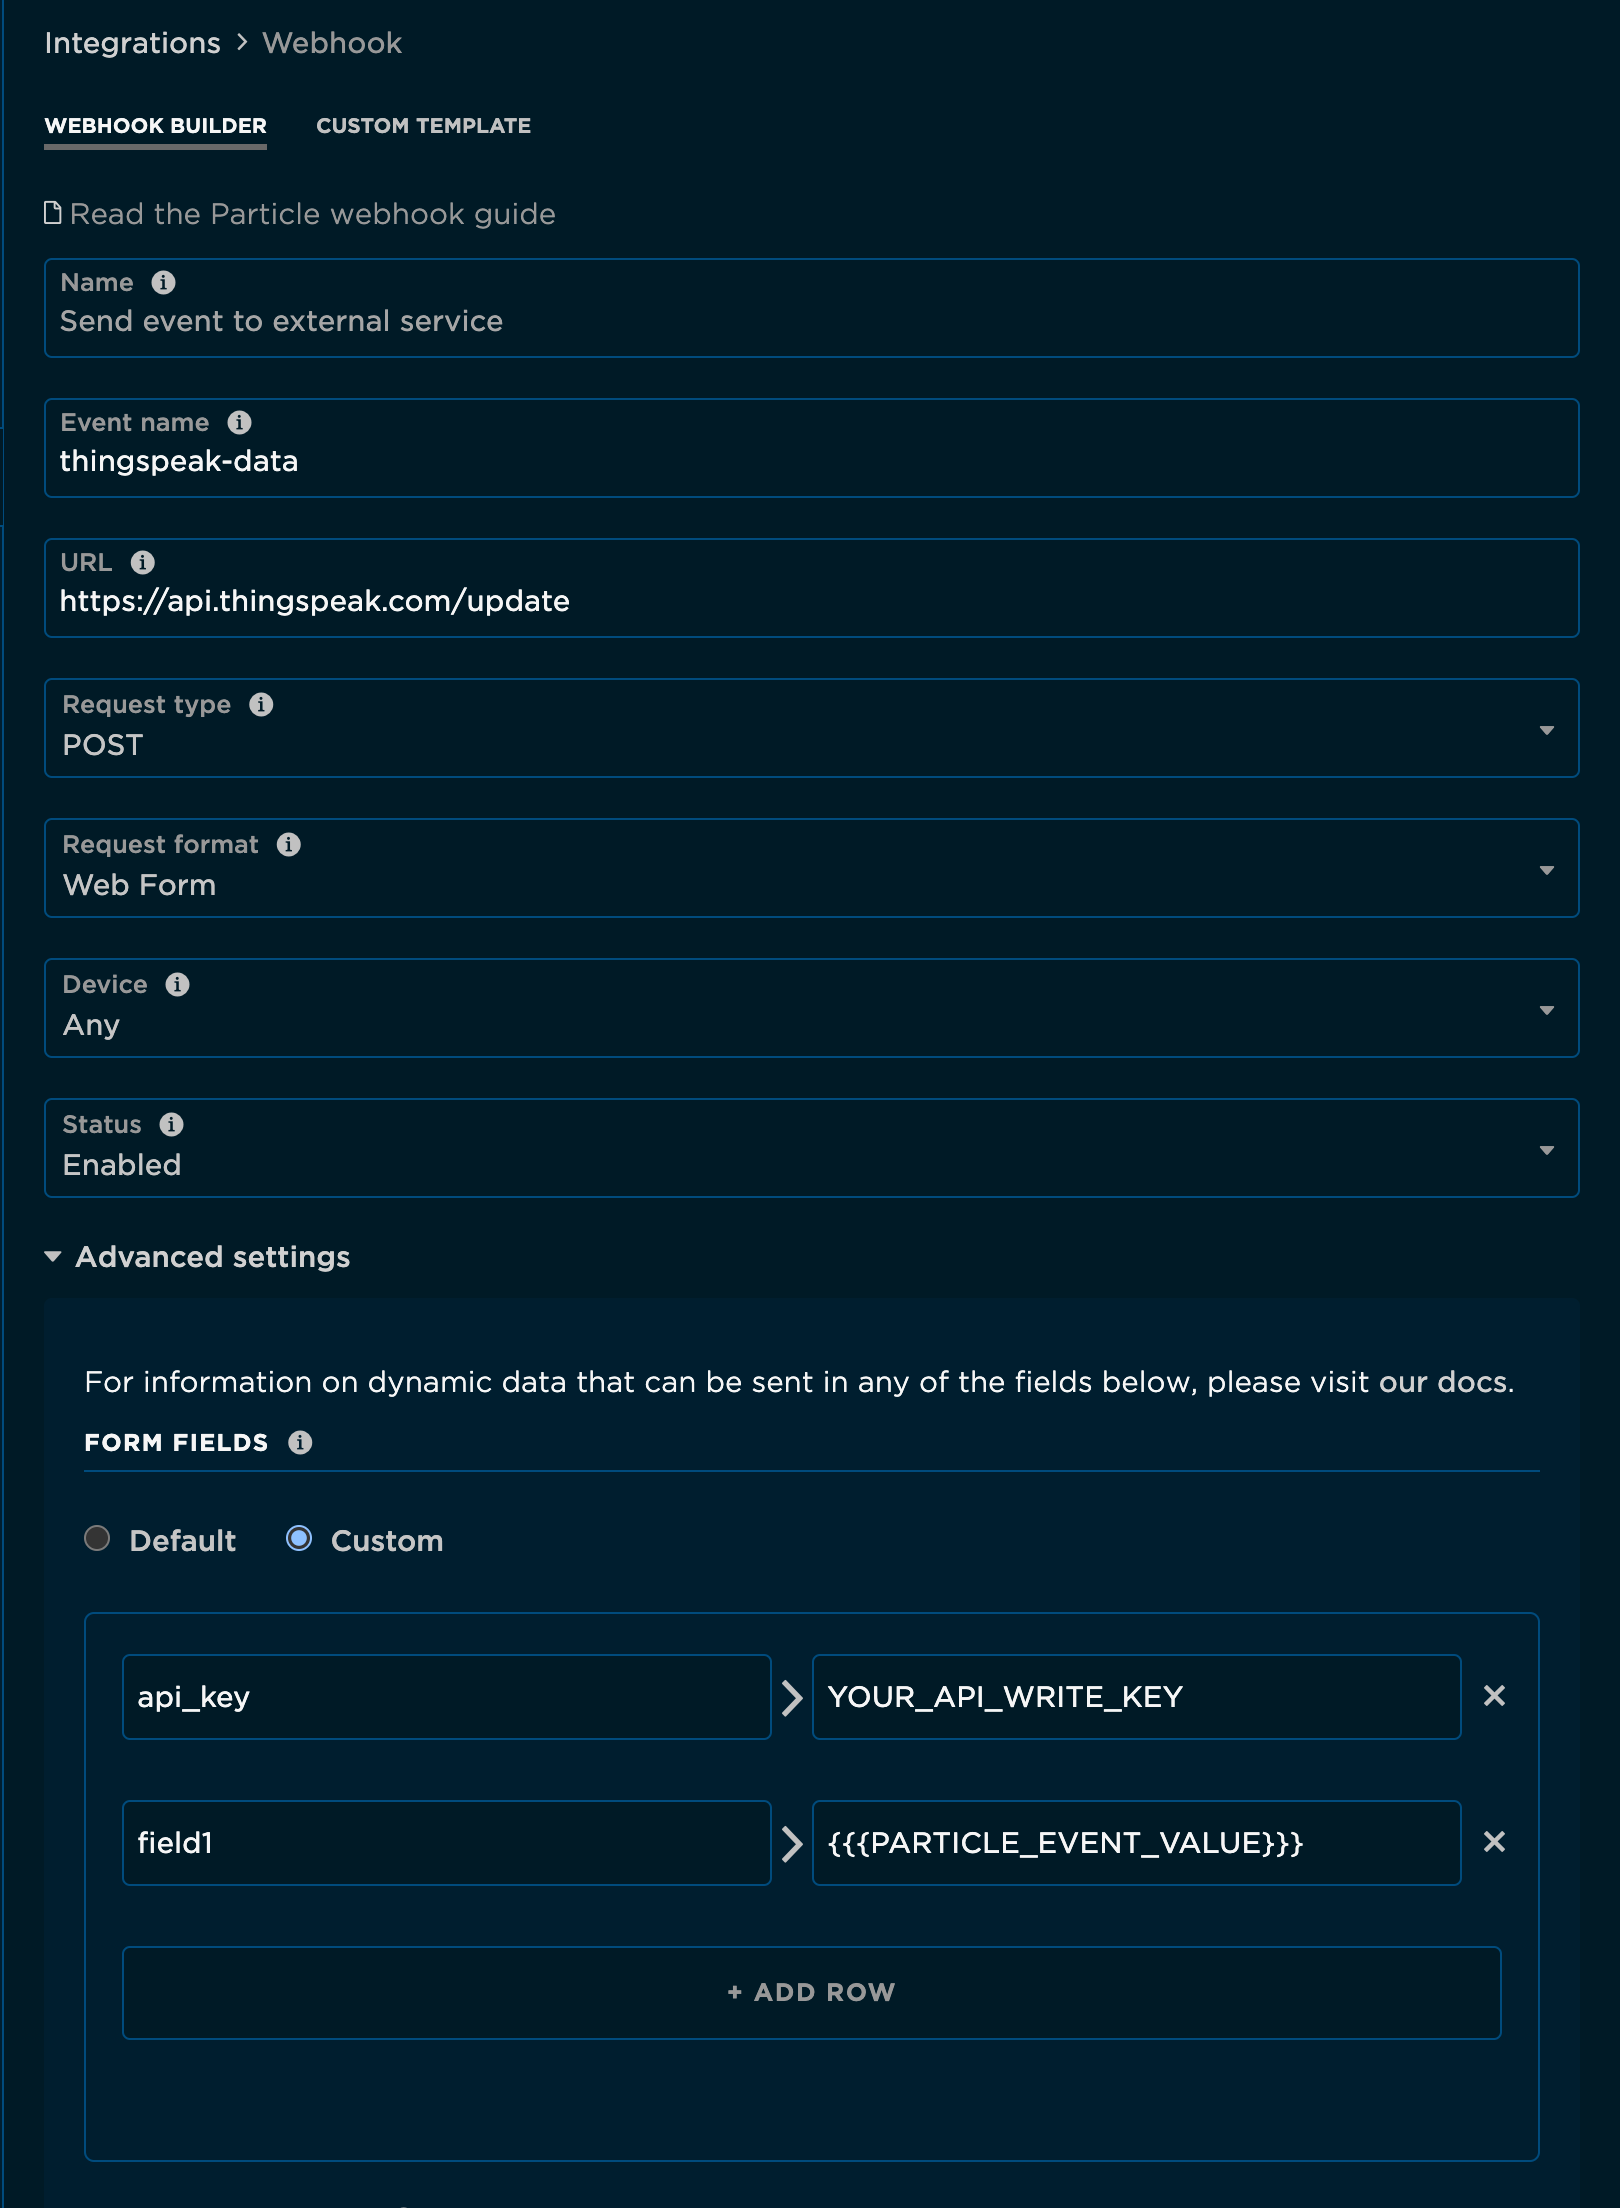
Let's configure our webhook:
- Set the event name to
tempto match the field in ThingSpeak - The URL should already be set to
https://api.thingspeak.com/update - The other settings such as POST, Web Form, should be set to the correct values already.
Note that webhook event name is a prefix filter. If you set a webhook event name of temp the webhook will trigger for events temp, temperature and temperature/basement, but not high_temp.
In the Form Fields you need to set the api_key. field1 should already have the correct default value.
api_key:YOUR_API_KEYfield1:{{{PARTICLE_EVENT_VALUE}}}
Click the "Create Webhook" button, and boom! You've created your first webhook.
Taking a step back, we now have a webhook listening for the temp event from a Particle device, that will publish temperature data to your ThingSpeak channel. Once the data reaches ThingSpeak, it will be displayed as a line graph.
The last step is getting your Particle device to publish the temp event with some temperature information. For this demo, we'll assume that you don't necessarily have a real temperature sensor, so we'll just generate some random data.
Webhook firmware
To get started, go to the Particle Web IDE. Create a new app called "TempWebhook."
Copy/paste the following into your application's code:
int led = D7;  // The on-board LED

void setup() {
  pinMode(led, OUTPUT);
}

void loop() {
  digitalWrite(led, HIGH);   // Turn ON the LED

  String temp = String(random(60, 80));
  Particle.publish("temp", temp, PRIVATE);
  delay(30000);               // Wait for 30 seconds

  digitalWrite(led, LOW);    // Turn OFF the LED
  delay(30000);               // Wait for 30 seconds
}
This code will toggle the on-board LED on and off every 30 seconds. When the LED turns on, the device will generate a random temperature value between 60 and 80 degrees and publish it to the cloud with the event temp. The temperature value is what will be passed on to ThingSpeak and graphed.
Make sure your device is connected and selected in the IDE (Ensure that the appears next to your device in the Devices pane). Flash the code to your device (Click the icon in the sidebar).
Your device should now restart and start publishing the event that will trigger the webhook.
To ensure that everything is working properly, head over to your Logs hub on the console. Every time your webhook triggers, a hook-sent event will appear in your user event stream. If the webhook receives a response from the targeted web server with something in the body, a hook-response event will also appear in your event stream containing the response.
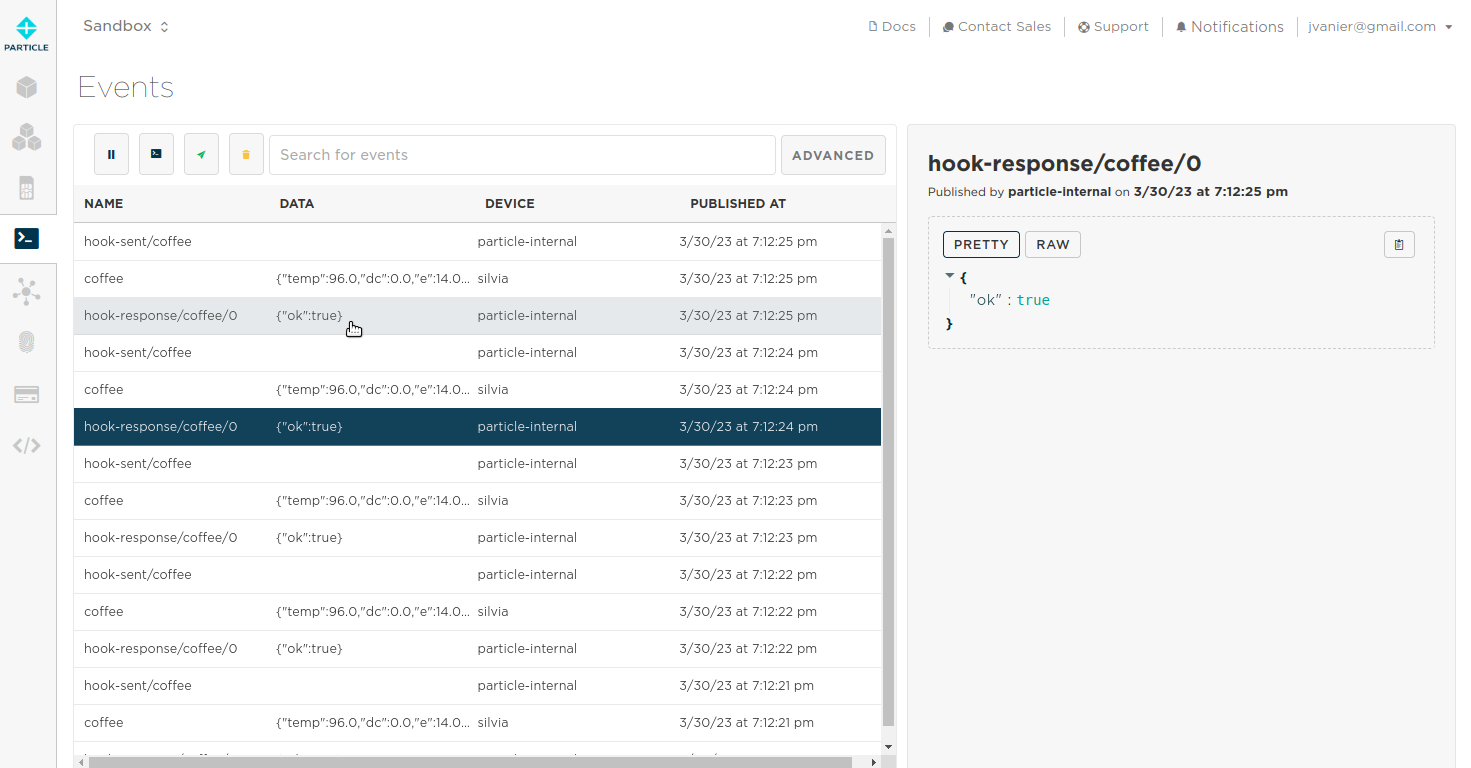
hook-sent and hook-response events will appear in your event stream for an active webhook
You should see three types of events appearing in your stream:
temp: The original event that your device published that contains the temperature data.hook-sent/temp: Confirmation that the webhook was sent to ThingSpeak's servers.hook-response/temp/0: The response that the webhook received from ThingSpeak. According to ThingSpeak's docs, the response is the entry ID of the update. If the update fails, the response is0.
Sweet! Things appear to be working properly. Let's check out ThingSpeak and see how our data looks.
See the results
Back on ThingSpeak, navigate back to your channel. You should see temperature data being graphed over time. Your random temperature graph should look something like this:
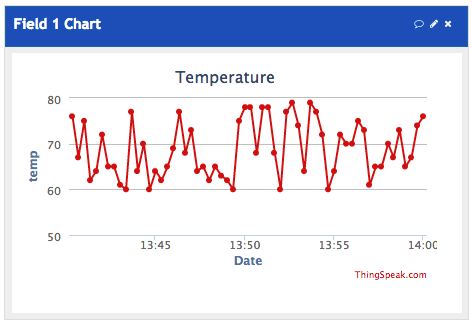
Temperature data from your device being graphed in real-time!
Congratulations! You've created a webhook successfully and gotten data from your connected device into another service. Awesome!
Editing a webhook
To edit a webhook, click on a webhook in the Integrations tab to view the webhook.
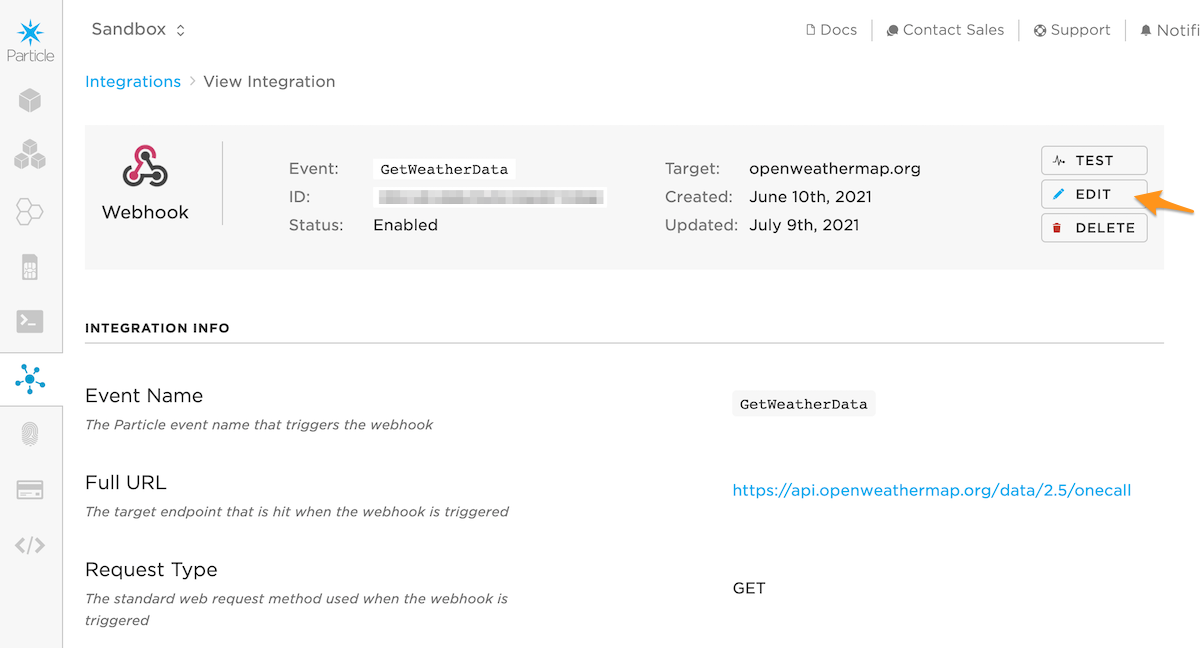
Clicking on the Edit button brings up a form with the same options as the 'Create webhook' page.
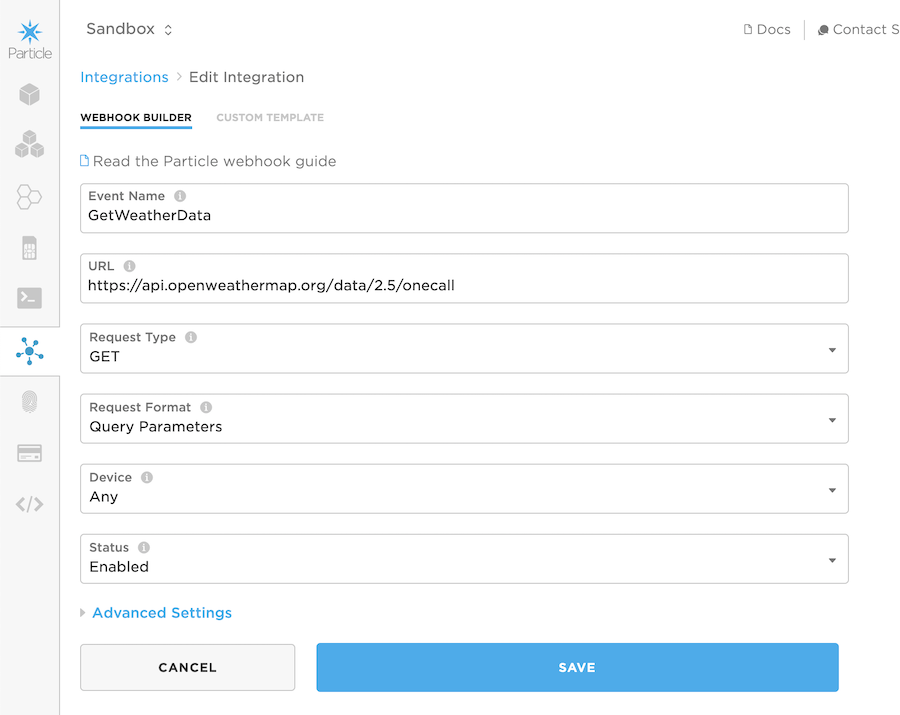
The Status popup can be set to Enabled or Disabled. This can be used to temporarily disable a webhook.
If you press 'Cancel', all the changes you made won't be persisted. Clicking on 'Save' updates the integration. When the webhook is fired, it should contain the new information.
Triggering a webhook
In order to signal to the Particle cloud that the webhook should be triggered, your device must publish an event in its firmware. A webhook that has been configured with the event name temp would trigger with the following firmware:
void loop() {
  // Get some data
  String data = String(10);
  // Trigger the webhook
  Particle.publish("temp", data, PRIVATE);
  // Wait 60 seconds
  delay(60000);
}
Breaking this down:
Particle.publish()is the general command for publishing events to the cloudtempis the name of the event that will trigger the webhookdatais sent along with the event, which will be included with the webhook's HTTP requestPRIVATEensures that the event will only appear on your private event stream
Getting the response
When using webhooks, it's very common that the targeted web service will return a useful response from the HTTP request containing data that should be sent back to a device. An example of this is triggering a GET request to a weather API, and sending the current weather information back to the device that triggered the webhook.
When a web service target by a webhook returns a response with a body, an event is published back to the event stream in the following format:
# format for hook response events
hook-response/[triggering-event-name]/[index]
Breaking this down:
- All webhook response event names will begin with
hook-response/, - Followed by the name of the event that triggered the webhook,
- And finally a numeric index, as the response body is broken into chunks depending on its size before being published to the event stream
You can then subscribe to this event in firmware, if you'd like a device to have access to the webhook response. A snippet of firmware to get a webhook response can look something like this:
void setup() {
  // Subscribe to the webhook response event
  Particle.subscribe("hook-response/get_temp", myHandler);
}

void myHandler(const char *event, const char *data) {
  // Handle the webhook response
}
In this example, the event that triggered the webhook, get_temp, would result in a webhook response event name of hook-response/get_temp. You don't need to worry about the index when subscribing, as the device will receive all events beginning with hook-response/get_temp. You'll also notice that you'll need a function that will handle the hook-response event. This function will receive the event and its data as arguments.
It is worth mentioning that you can override the default response event name if you'd like. This is useful for product webhooks when you'd like to ensure that only the device that triggered the webhook receives its response. More on that here.
See special webhook events for more details about handling multipart responses.
What data gets sent?
When a webhook gets triggered, some data will be sent to the third-party web service by default along with the HTTP request. The default data is:
{
    "event": [event-name],
    "data": [event-data],
    "published_at": [timestamp],
    "coreid": [device-id]
}
This is same data you'd see if you subscribed to your event stream.
These properties will all be strings except for published_at, which is an ISO8601 date formatted string, which tends to be in the form YYYY-MM-DDTHH:mm:ssZ.
You can customize the format of the data sent with the webhook by changing the "Request Format". When the "Request Type" is POST, PUT or DELETE, the data will be in the request body. You can select "Web Form" (similar to submitting a form from a browser), JSON (common for API requests) or write your own "Custom Body" using the webhook template language. When the "Request Type" is GET, the data can only be sent in the "Query Parameters".
You can also customize the structure of the data that gets sent. In the "Advanced Settings" of the Webhook Builder, either keep the "Default" data and add some more fields, or switch to "Custom" and define your own mapping.
Monitoring your webhooks
The easiest way to observe webhook activity is to view the Integrations tab in the Particle Console. You'll see the number of attempts to send events to your webhook for the current day (starting at midnight UTC). Click on the row to expand it to see the 30 day history. See the webhook troubleshooting guide for details on what these numbers mean.
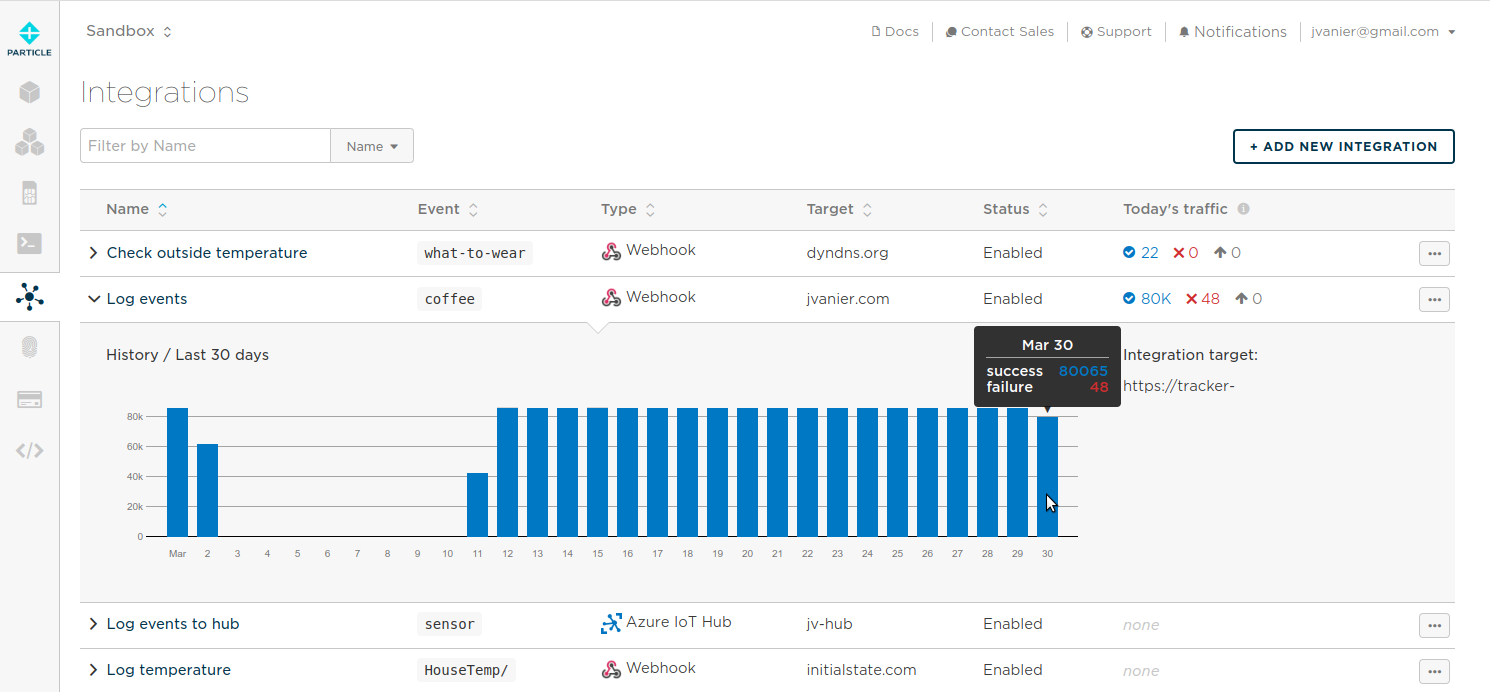
To get more details, click on the name of the integration you want to view and the page shows the history, recent calls, and recent errors.
Timeout indicates that a response was not received within 20 seconds. There are two different but related timeout errors:
ETIMEOUToccurs when the remote web server did not respond to a request to connect, either because it was down or too busy to respond.ESOCKETTIMEDOUToccurs when the remote web server did initially accept the connection, but did not respond to the data we sent it within 20 seconds.
If the webhook server host does not successfully include a response, including timeouts and 5xx (temporary failure) errors, the error count is incremented. If a sufficiently large number of errors occur for a given host name, webhook requests will be slowed down to avoid overloading the server. This is not specific to your account! It the aggregate usage across all users. In this state, requests are counted as "Sleep" and are discarded. These requests will not be retried, as retrying the requests will only increase the load on the server, making it even less likely to succeed. As additional successful requests are made and the ratio of success to failure increases, the number of sleeps will be reduced, eventually to 0.
Additionally, you can view the Events page of your Particle Console. Every time your webhook triggers, a hook-sent event will appear in your user event stream. This is confirmation that the Particle cloud successfully forwarded your event to your webhook's target URL.
If the webhook receives a response from the targeted web server with something in the body, a hook-response event will also appear in your event stream containing the response. This event will only appear in your event stream if the web service returned something in the body of its response to the Particle cloud.

hook-sent and hook-response events will appear in your event stream for an active webhook
Note that this will appears in the Events page for the device owner and the product, but not in the device-specific event log.
Custom template
The "Custom Template" tab of the webhook editor shows the raw configuration for the webhook. The syntax is described in the webhook reference page.
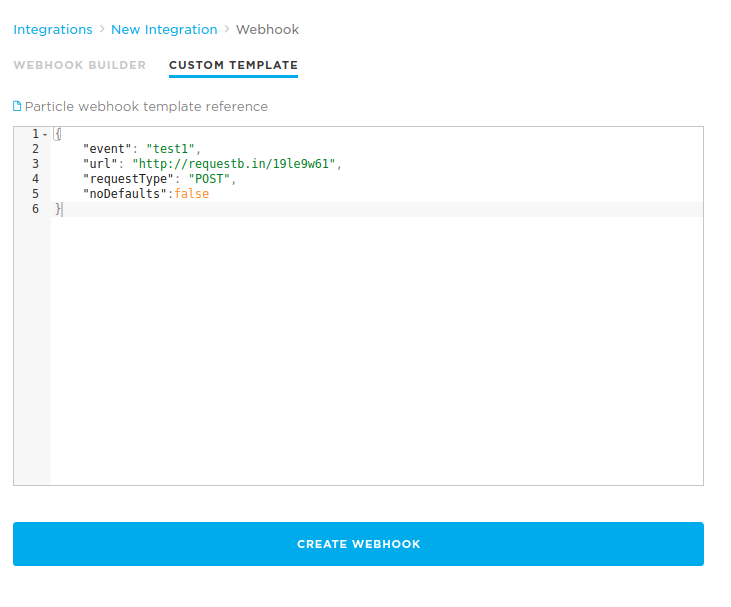
If you want to create a webhook from an existing template, you can switch over to the "Custom Template" tab of the webhook editor and paste in a JSON webhook template. You can even switch back to the "Webhook Builder" and continue making some edits.
You can also copy from the "Custom Template" tab and share the webhook template with others.
Webhook security
Particle strongly recommends using https (TLS/SSL) for all webhook communication for security. It not only protects the contents of your webhook call, but also makes it harder for a bad actor to spoof being your server to intercept data.
Using transport-level security is especially important when sending credentials such as authorization tokens or basic authentication (username/password) to help prevent stealing of credentials.
Product webhooks
If you are building a product using Particle, you now have the ability to create webhooks at the product-level. This will allow you as a product creator to define a single webhook than any of the devices in the product's fleet can trigger.
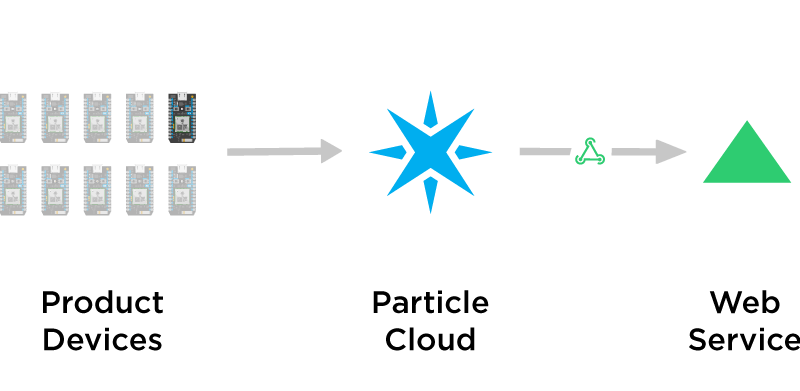
Create a single webhook that any of your product devices can trigger
As devices in your product's fleet will be running the same firmware, product webhooks are a scalable way to integrate with third-party web services. Trigger a product webhook when you'd like to do thing like:
- Sending information about how a customer's device is behaving to an analytics service
- Make an API call to your servers to send personalized content to a device
- Save data to a hosted database in the cloud
Create a product webhook
Start by going to the integrations by clicking on the integrations icon in the sidebar () in the Particle console within your product.
If you already have integrations configured, click the New Integration button to open the integration gallery. If this is your first integration, you will open to the integration gallery automatically. Select Custom webhook.

The view will be very similar to what you would see in your developer console. However, you will notice that the "Devices" dropdown has been replaced by a checkbox. This has to do with responses to product webhooks, which we'll cover in the next section.
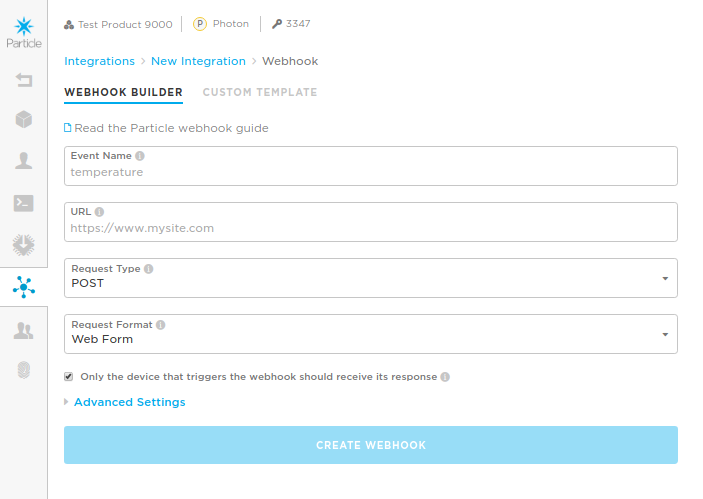
Create a product webhook from the Particle Console
Product webhook responses
For product webhooks, because any device in the fleet can trigger the webhook, how can we ensure that only the device that triggers the webhook will receive its response? After all, we wouldn't want a device in Phoenix receiving weather data that another device asked for in Chicago.
This is where the checkbox discussed in the previous section comes into play. The one that says: "Only the device that triggers the webhook should receive its response." This setting (enabled by default) will individualize the webhook response so that it can be routed correctly to the triggering device.
As discussed earlier, any response from a webhook will result in a hook-response/[event_name] event in the event stream. Normally, if you wanted to get that response on your device, you would add something like this to your firmware: Particle.subscribe("hook-response/weather/", myHandler);
If you used this line of code in product firmware, however, a given device listening for a webhook response could receive it from any device in the fleet, not just the webhook that it triggered.
Ensuring that the "Only the device that triggers the webhook should receive its response" checkbox is checked will prepend the device ID of the triggering webhook to the hook-response event. This will allow you to write firmware that will listen to only webhook responses for that particular device, like this:
void setup() {
  // Subscribe to the response event, scoped to webhooks triggered by this device
  Particle.subscribe(System.deviceID() + "/hook-response/weather/", myHandler);
}

void myHandler(const char *event, const char *data) {
  // Handle the webhook response
}
At any time, you can see some sample firmware for both triggering and getting responses from webhooks on your Particle Console. To do this, simply click on one of your product webhooks and scroll down to "Example Device Firmware."
Product vs. sandbox integrations
Integrations can either be in your developer sandbox or in your product. As a general rule, we recommend using product integrations, however:
Sandbox integrations
- Requires devices to be claimed to a specific team member account, which adds a step to device onboarding
- Does allow a single integration to be used across multiple products, but organization integrations should be used instead
Product integrations
- Works with unclaimed product devices, which is the recommended mode of operation
- Keep things related to the product associated with the product
- Allows developers to claim devices to their own account, which makes development easier
Also see organization integrations. They are a special class of product integration that is automatically synchronized across multiple products.
Moving or copying an integration
If you have created an integration in your sandbox and want to move it to your product, or if you want to include an integration in multiple products:
- Open the integration in the Particle console.
- Use Edit Integration then click Custom Template. Copy the JSON data to your clipboard.
- Open or create the new integration.
- Click Custom Template then paste in the JSON data you previously copied.
If you copy an integration from sandbox to product, you should disable the sandbox integration, otherwise it can trigger twice, once for the sandbox and once for the product if the device is claimed.
If you have a large number of integrations you should investigate why. The event trigger is a prefix, so any event beginning with that string will trigger the integration. Using a combination of the prefix filter and mustache templates in many cases you can use a single integration for multiple tasks, eliminating the need to keep them in sync.
Advanced topics
See the webhook reference for more details on customizing webhooks with variables, examples of different webhook configurations as well as community guides on setting up webhooks with external services.
As a quick reference, these are the pre-defined webhook variables available for you to use (use triple braces to avoid HTML escaping of the values):
{{{PARTICLE_DEVICE_ID}}}: The ID of the device that triggered the webhook{{{PARTICLE_EVENT_NAME}}}: The name of the event that triggers the webhook{{{PARTICLE_EVENT_VALUE}}}: The data associated with the webhook event{{{PARTICLE_PUBLISHED_AT}}}: When the webhook was sent{{{PARTICLE_EVENT_ID}}}: A unique ID generated for this event{{{PRODUCT_ID}}}: The Product ID of the device that triggered the webhook{{{PRODUCT_USER_ID}}}: The user id of the device owner{{{PRODUCT_VERSION}}}: The firmware version that published the event: The entire event (name, value, published at, etc) as a JSON string.: The entire event (name, value, published at, etc) as a Base64-encoded JSON string.
