
Webhook reference
Webhooks lets you connect Particle events to other services on the Internet.
- A number of popular services are in the integration gallery. These pre-configure many of the webhook settings for you.
- If you're new to webhooks, you can start at the guide for webhooks which is more of a tutorial.
You can create and administer webhooks with the console and the Command Line Interface (CLI).
Overview
Where to configure
Webhooks can be configured:
- In your developer sandbox
- In a product within your sandbox
- In an organization
- In a product within your organization
In your sandbox
If you are working with developer devices within your account and have not set up a product you can set up an integration here. It will work for all devices claimed to your account.
In a product within your sandbox
A product groups together devices with common firmware. This is recommended for anything more than experimenting as a developer. There is no charge for setting up new products, so you can do so even for testing and experimentation.
If you are using a product, you should create integrations within the product, not directly in your sandbox. It will greatly simplify migrating to the basic plan later, if necessary, and also allows the integration to work with unclaimed product devices, which is the recommended way of using product devices.
In an organization
If you have access to an organization via the popup at the top of the console window, you can create integrations within an organization. This is recommend because it allows a webhook to be used across multiple products in your organization easily.
In a product within your organization
However, you can still make an integration that is specific to a single organization product if you need to.
Sidebar
Select Cloud Services then Integrations in the sidebar for your sandbox, sandbox product, organization, or organization product.
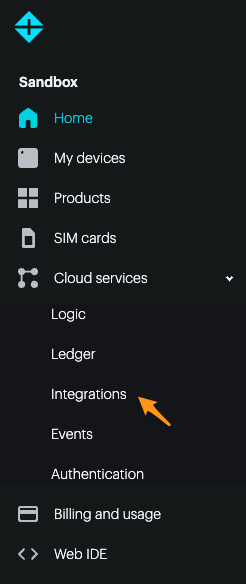
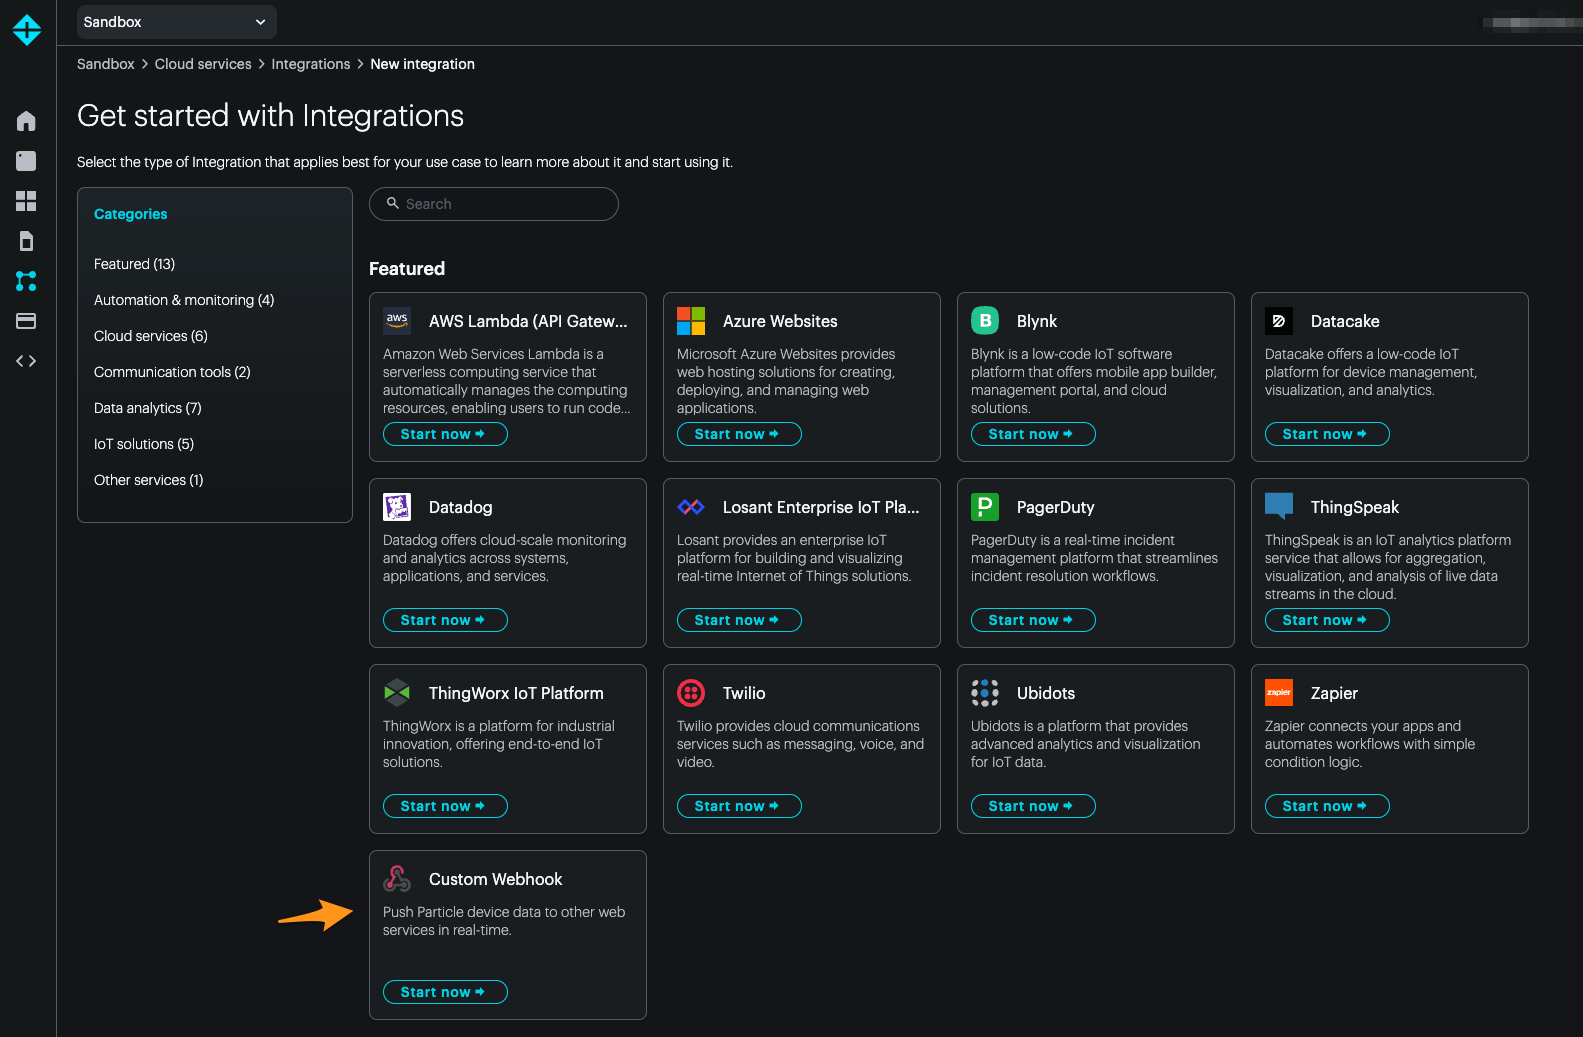
Integration gallery
The integration gallery contains pre-configured settings for many services. This page, however, focuses on creating a Custom Webhook.
Basic settings
All webhooks require some basic settings in the Webhook builder:
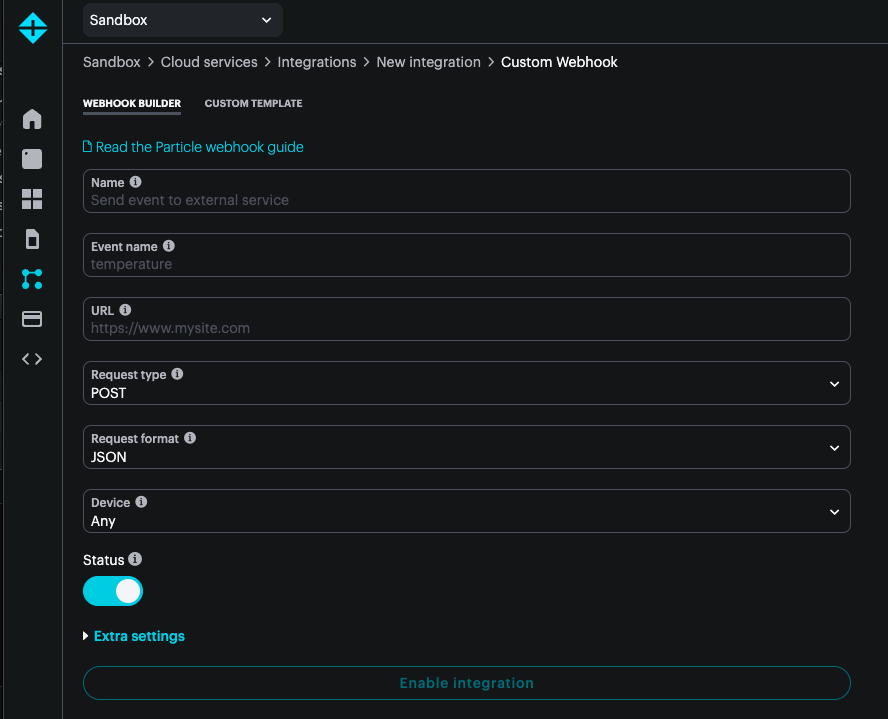
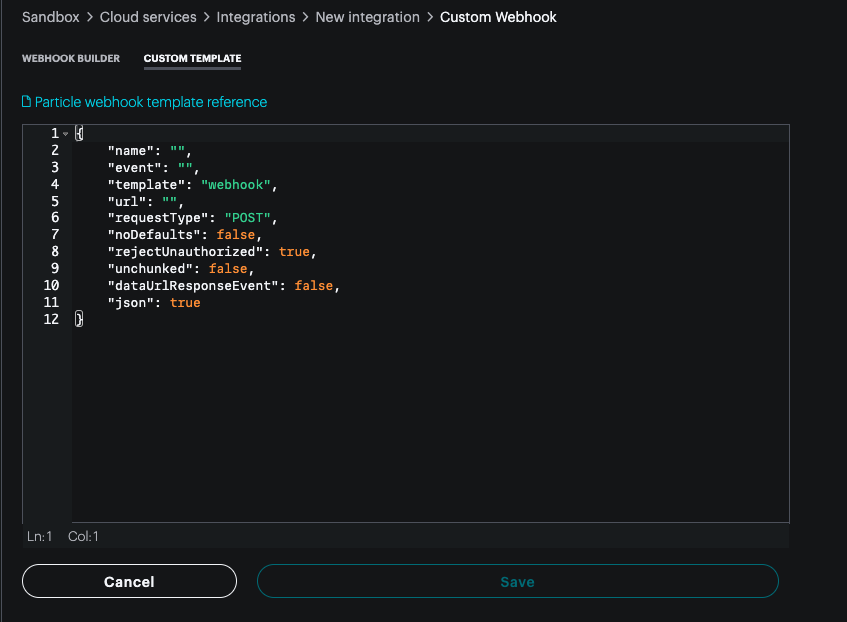
You can configure the settings using the graphical webhook builder, or you can configure the same data from JSON using Custom template. This is useful for power users, and also makes it easy to copy and paste all of the settings at once.
Name
This is a descriptive name for the event to make it easier to identify in the console. It does not affect the operation of the webhook.
If configuring by JSON, this is name.
If not specified, the event name and a portion of the URL will be shown in the console.
EXAMPLE
"name": "Trigger alert"
Event name
This is the triggering event for the webhook. Note that this is a case-sensitive prefix, so if you
trigger off the event test it will also trigger for testing and test1.
You can take advantage of the prefix match to allow a webhook to be triggered off multiple events. There is no wildcard feature, and you must have at least one character as the event name; it's not possible to create a webhook for every event.
If configuring by JSON, this is event.
EXAMPLE
"event": "Temperature"
Request Type
The HTTP method for the request, one of GET, POST, PUT, or DELETE. The method will depend on what your external service is expecting.
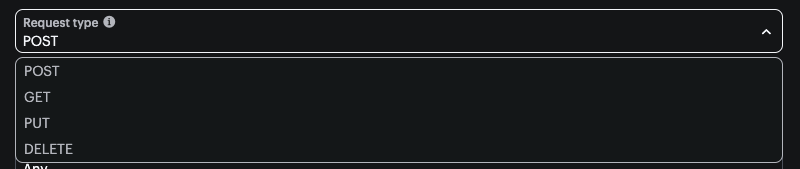
DEFAULT
"requestType": "POST"

EXAMPLE
"requestType": "GET"
If configuring by JSON, this is requestType.
Request Format
The request format depends on what your external service is expecting. This only applies to POST and PUT, as the other options (GET and DELETE) do not have a request body.

JSON
If you are sending to your own service, JSON is recommended is it provides a seamless way to transfer data in both directions easily.
If configuring by JSON, this is json in the top level of the configuration. It's normally
an object, but can also be a string. A string is useful if the template itself would not
be valid JSON before resolving the mustache templates.
Web form
If the request type is GET, then the form elements are added to the query string.
For POST and PUT, the form elements are added to the body as application/x-www-form-urlencoded
data.
If configuring by JSON, this is form in the top level of the configuration, a JSON object
that contains the individual form elements. This must be valid JSON.
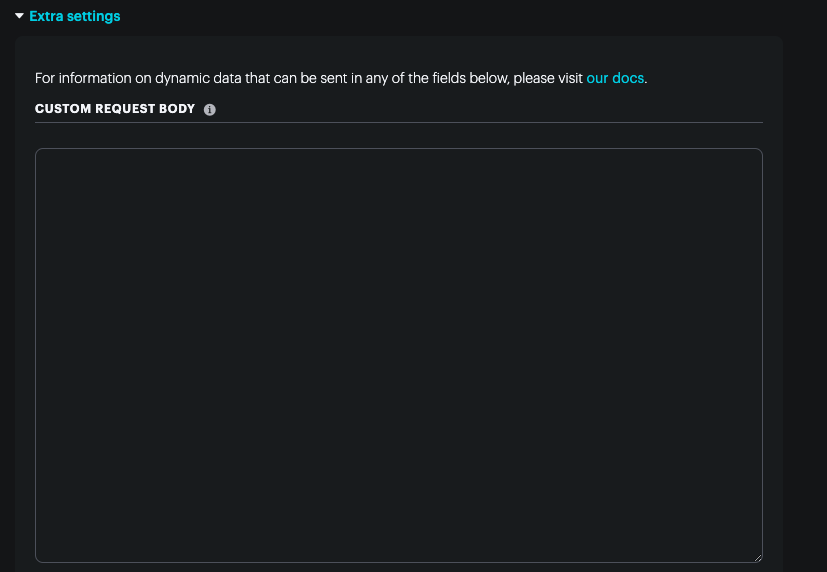
Custom body
The custom body allows you to create arbitrary string data in the body for POST and PUT.
If configuring by JSON, this is body in the top level of the configuration, typically a string
containing the custom body format.
Device
The device option is only available for sandbox integrations and allows a webhook to be restricted to a single device. There is no way to specify more than one device.
This does not make sense for products or organizations and the option is not present.
If you need to restrict access to a subset of your devices, it's usually better to do this in
the web service based on the Device ID of the publishing device (coreid in the default
data, or you can create a custom key for it).
If configuring by JSON, this is deviceID, the 24-character hex string.
EXAMPLE
"deviceID": "3f002b000000000000000000"
Status
This allows the integration to be turned on and off.
If configuring by JSON, to disable an integration add a disabled key and set the value to true.
You do not need to include this key if you want the integration enabled.
EXAMPLE
"disabled": true
Extra settings
Additional settings are available using the Extra settings disclosure triangle.
Default data
You can either use the default fields or specify custom fields. The location where the data is passed to the server vary depending on the request method and body type.
| Method | Body Type | Data passed via | Content-Type |
|---|---|---|---|
| GET | Query parameters | ||
| POST or PUT | JSON | JSON data in body | application/json |
| POST or PUT | Web Form | URL encoded form data in body | application/x-www-form-urlencoded |
The default fields are:
{
  "event": "{{{PARTICLE_EVENT_NAME}}}",
  "data": "{{{PARTICLE_EVENT_VALUE}}}",
  "coreid": "{{{PARTICLE_DEVICE_ID}}}",
  "published_at": "{{{PARTICLE_PUBLISHED_AT}}}"
}
If configuring by JSON, to prevent the default settings from being used, set noDefaults to true.
EXAMPLE
"noDefaults": true
JSON body extra settings
If you have selected the request type PUT or PUT and a request type of JSON, the following options appear:
Additionally, you can select Default or Custom. If you select custom you can edit the fields in the box to include different data.
If the data you publish from your device is in JSON format, you can also include specific fields from the data. You can also use mustache templates to expand JSON field names to allow for smaller publishes.
For example, if the device publishes temperature data in JSON like this:
{"t":21.1}
where t is the key for the temperature, you could expand this information using a webhook
like this:
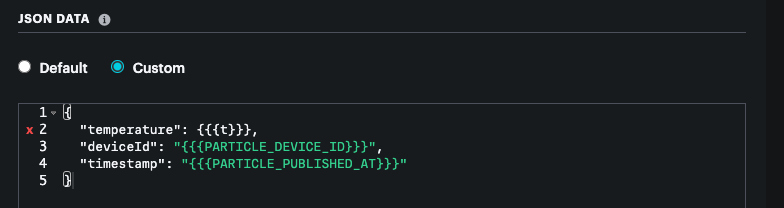
Note that the custom template viewer flags line 2 as an error, but this is OK. The template itself
is not valid JSON because the mustache template {{t}} is not valid JSON without double quotes,
but once the template is resolved and that becomes the number 21.1 it will be valid JSON. Even
though a warning is flagged, you can still save the template and it will work properly when used
(assuming the device is publishing the correct data).
If configuring by JSON, this is json in the top level of the configuration. This can be an
object, or a string containing a JSON object. The string is necessary if the template itself
would not be valid JSON, as in the case of the temperate template, above.
The properties form, json, and body are mutually exclusive.
EXAMPLE
"json": {
  "value": "{{{PARTICLE_EVENT_VALUE}}}"
}

REQUEST BODY
{
  "value": "true"
}

EXAMPLE
"json": {
  "gauges": [
    {
      "name": "{{{n}}}",
      "value": "{{{v}}}",
      "source": "{{PARTICLE_DEVICE_ID}}"
    }
  ]
}

REQUEST BODY
{
  "gauges": [
    {
      "name": "click",
      "value": "2",
      "source": "3f002b000000000000000000"
    }
  ]
}
A JSON object for the data to encode as JSON.
This sets the Content-Type header to application/json.
The keys or values can contain variables.
Web form extra settings
If you have selected the request type PUT or PUT and a request type of Web form, the following options appear:

If configuring by JSON, this is form in the top level of the configuration, a JSON object
that contains the individual form elements. The properties form, json, and body are mutually exclusive.
EXAMPLE
"form": {
  "From" : "FROM_PHONE_NUMBER",
  "To" : "TO_PHONE_NUMBER",
  "Body" : "{{{BODY}}}"
}

REQUEST BODY
Body=Hi%20there%21&To=TO_PHONE_NUMBER&From=FROM_PHONE_NUMBER
A JSON object with key / value pairs to encode as an HTTP form.
This sets the Content-Type header to application/x-www-form-urlencoded.
The keys and values can contain variables.
Unless noDefaults is true, the form data will also include the default data
The properties form, json, and body are mutually exclusive.
Custom body extra settings
If you have selected the request type PUT or PUT and a request type of Custom body, the following options appear:
If configuring by JSON, this is body in the top level of the configuration, typically a string
containing the custom body format. The properties form, json, and body are mutually exclusive.
EXAMPLE
"body": "{ \"value\": {{{PARTICLE_EVENT_VALUE}}} }"

REQUEST BODY
{ "value": true }

EXAMPLE
"body": "{ \"gauges\": [{ \"name\": \"{{{n}}}\", \"value\": {{{v}}} }] }"

REQUEST BODY
{ "gauges": [{ "name": "click", "value": 2 }] }
A string that will be used as the body of the web request. Use this key to generate a completely custom request, as JSON, HTML or plain text.
If your server needs a Content-Type or charset, you will need to set it manually using the headers configuration as it is not done automatically for custom body.
You can use any syntax from mustache templates. Note that using double braces {{var}} will HTML escape strings. Use triple braces {{{var}}} to avoid escaping.
Query parameters
If you are using GET, this is the only way to send additional data to the server, however this option is available for all request types, not just GET.
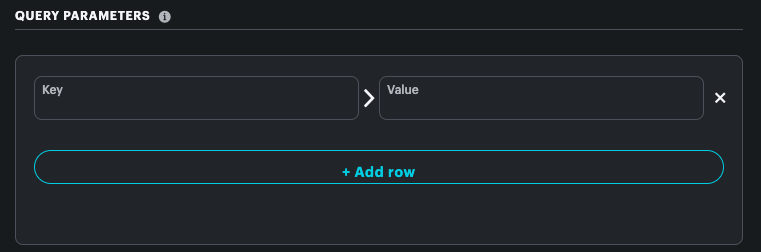
If you are configuring by JSON, this is query at the top level of the configuration, a JSON
object containing the fields to add to the query string.
EXAMPLE
"query": {
  "q": "{{{PARTICLE_EVENT_VALUE}}}",
  "p": "my app"
}

REQUEST URL
http://<url>/?q=data&my+app
A JSON object with key / value pairs to encode as a query string.
The keys and values can contain variables.
If the requestType is GET, the default data will be added to the query string unless noDefaults is true.
If you are using a webhook to access the Particle cloud API, you should use an Authorization header. Do not include the access token in a query parameter or URL.
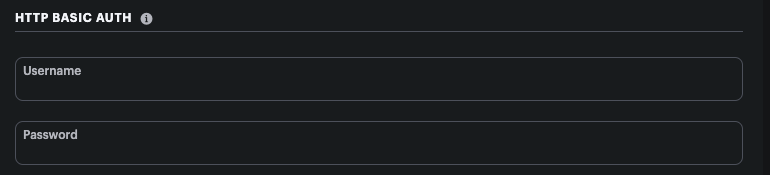
HTTP basic auth
Typically webhooks at either authenticated using HTTP basic authentication or by using an Authorization header
and a bearer token.
EXAMPLE
"auth": {
  "username": "user@email.com",
  "password": "API_KEY"
}
A JSON object with keys username and password for basic HTTP authentication.
The values can contain mustache variables, allowing the device to publish JSON data containing both values and authentication information.
If using basic authentication you should always use a TLS/SSL encrypted (https) URL.
Headers
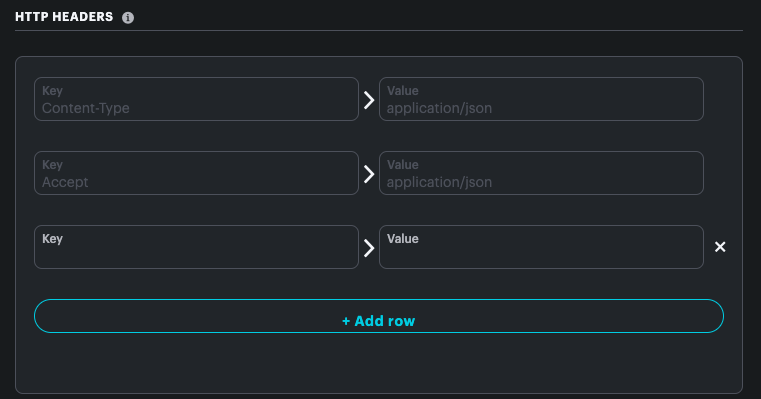
Custom headers are typically used to include an Authorization header or to set a Content-Type for your data.
EXAMPLES
"headers": {
  "Authorization": "Bearer 12345"
}

"headers": {
  "X-Sender": "{{PARTICLE_DEVICE_ID}}",
  "X-Application": "My app"
}
A JSON object with key / value pairs specifying custom headers. This can be useful for authorization codes or custom headers required by some services.
The keys and values can contain variables.
If sending Authorization headers you should always use a TLS/SSL encrypted (https) URL.
Webhook responses
The following settings control how the response from the server is handled.
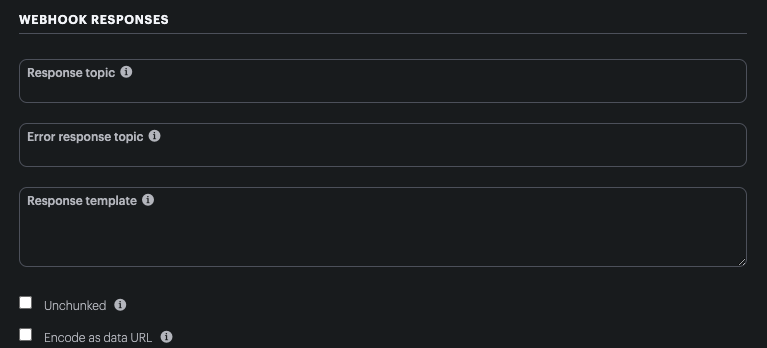
Response Topic
This setting determines the name of the event that is published containing the response from the webhook.
Each response that any device receives counts as at least one data operation. This is why you want to minimize the number of devices that receive responses if they don't all need to receive the response.
Depending on settings, a large response will be chunked into 512 byte chunk. Each chunk for each device counts as a data operation. You can use mustache templates or Logic to minimize the amount of data actually returned to a device.
You cannot process a webhook response with another webhook - they cannot be chained. You can, however, process a webhook response with Logic.
Response events that are handled by logic do not count as data operations, and have significantly larger size limits. See Unchunked, below.
DEFAULT (product)
{{PARTICLE_DEVICE_ID}}/hook-response/{{PARTICLE_EVENT_NAME}}

DEFAULT (sandbox, non-product)
hook-response/{{PARTICLE_EVENT_NAME}}


EXAMPLE
"responseTopic": "{{PARTICLE_DEVICE_ID}}/hook-response/weather"

FIRMWARE
// Subscribe to the response event, scoped to webhooks triggered by this device
Particle.subscribe(System.deviceID() + "/hook-response/weather/", myHandler);
The default in most cases is {{PARTICLE_DEVICE_ID}}/hook-response/{{PARTICLE_EVENT_NAME}} which
inserts the Device ID of the requesting device in the beginning of the response event name. This
makes it easy for devices to subscribe to only the responses to webhooks that that device
generates.
The exception is if the destination is Logic. In this case you will not want to prefix the
hook-response with the Device ID, as you want a single Logic block to handle all hook responses.
You could use hook-response/{{PARTICLE_EVENT_NAME}} for example.
See the product webhook guide for more details.
errorResponseTopic
This is the event name used for errors. You cannot process a webhook error response with another webhook. You can, however, process a webhook response with Logic.
DEFAULT
hook-error/{{PARTICLE_EVENT_NAME}}

EXAMPLE
"errorResponseTopic": "save_failed_for_{{PARTICLE_DEVICE_ID}}"
responseTemplate
If your server sends a JSON response back, it will be automatically parsed into variables that you can use to craft a custom response back to your devices.
EXAMPLE
"responseTemplate": {
  "lat": "{{{results.0.location.lat}}}",
  "lng": "{{{results.0.location.lng}}}"
}
If omitted, the response from the server will be published verbatim as events. See the sequence of events
See the Variable substitution section for details.
Unchunked
Webhook responses to devices are split into 512 byte chunks before sending to devices.
The main reason to use unchunked is when you want to process the response using Logic. When the recipient is Logic, instead of a device, the maximum event is 100 Kbytes. This allows Logic to parse complex data structures easily and then only send a small portion to devices, either by publishing another event, or by storing the data in Ledger.
If your response is larger than 512 but less than the maximum allowed by the device (typically 1024 bytes for most Gen 3 and Gen 4 devices), then you can send the response unchunked, however if the response exceeds the maximum size it will be discarded.
DEFAULT
"unchunked": false,

EXAMPLE
"unchunked": true,
Encode as data URL
Normally webhook responses are limited to UTF-8 text data due to how events are processed by publish and subscribe.
By checking the Encode as data URL checkbox binary data can be sent to Logic or devices.
Say you have this binary data returned from your webhook:
0000: a7 22 98 1c 40 1b 9b 80 bb 9d d9 c0 13 bb 4e d0   |  "  @         N
0010: a3 c0 ae 81 c5 93 91 2a 83 8e 69 27 b0 c6 17 26   |        *  i'   &
0020: 85 93 b7 a6 f5 69 c0 4c 9e 3d 53 49 b5 47 f0 44   |      i L =SI G D
0030: 26 9b 8a 1d e4 bc 73 f9 4d a4 e8 34 c2 56 17 c9   | &     s M  4 V
This is encoded in the Data URL format, which looks like this:
data:application/octet-stream;base64,pyKYHEAbm4C7ndnAE7tO0KPAroHFk5Eqg45pJ7DGFyaFk7em9WnATJ49U0m1R/BEJpuKHeS8c/lNpOg0wlYXyQ==
This allows the binary data to be passed to Logic, devices, or the SSE event stream (which also requires text).
When using Logic, the dataUrlDecode function can be used to decode the Data URL encoding to return
an array of bytes, as well as extract the content-type, for use in your Logic block.
If a device subscribes to the event, the Base 64 data is decoded by the cloud and passed in binary format to the device, reducing the size of the data over-the-air.
DEFAULT
"dataUrlResponseEvent": false,

EXAMPLE
"dataUrlResponseEvent": true,
Enforce SSL
By default, if your URL targets a url with a HTTPS prefix (TLS/SSL encrypted), the hook will validate the certificate against its certificate authority chain.
If you're using a self-signed certificate, or are otherwise having certificate issues, you can tell the hook to ignore the validation process by setting rejectUnauthorized to false.
DEFAULT
"rejectUnauthorized": true

EXAMPLE
"rejectUnauthorized": false
Variable substitution
One of the great features of the webhook is using mustache templates. It allows you to do simple processing of JSON data both in the request data going out and response data coming back. It's a logic-less template system so you're not actually writing code, but you can do useful and powerful text transformations.
EXAMPLE DATA
{
    "a": {
        "aa":"testing",
        "ab":1234
    },
    "b": "xxx",
    "c": [
        {
            "ca":"first",
            "cb":123
        },
        {
            "ca":"second",
            "cb":456
        }
    ]
}

TEMPLATE: {{{a.aa}}}
RESULT:   testing

TEMPLATE: {{{a.ab}}}
RESULT:   1234

TEMPLATE: {{{b}}}
RESULT:   xxx

TEMPLATE: {{{c.0.ca}}}
RESULT:   first

TEMPLATE: {{{c.1.cb}}}
RESULT:   456

TEMPLATE: {{#b}}{{{b}}}{{/b}}{{^b}}Missing{{/b}}
RESULT:   xxx

TEMPLATE: {{#z}}{{{z}}}{{/z}}{{^z}}Missing{{/z}}
RESULT:   Missing

TEMPLATE: {{#c}}{{{ca}}}~{{/c}}
RESULT:   first~second~
Inserting a variable with double braces {{a}} will do HTML escaping of the characters &<>"'. To avoid this, use triple braces {{{a}}}.
The {{{PARTICLE_EVENT_VALUE}}} is a mustache template to include the event value in the data. It's automatically replaced by the event value when the template is processed.
If the response from a webhook is JSON with multiple levels, you can use the {{a.aa}} syntax to extract keys nested deep in the structure.
You can also use the {{#b}}value{{/b}} syntax to display a value if the key exists or expand an array. See the mustache documentation for more examples.
Pre-defined variables
These variables are predefined for any webhook (use triple braces to avoid HTML escaping of the values):
{{{PARTICLE_DEVICE_ID}}}: The ID of the device that triggered the webhook{{{PARTICLE_EVENT_NAME}}}: The name of the event that triggers the webhook{{{PARTICLE_EVENT_VALUE}}}: The data associated with the event{{{PARTICLE_PUBLISHED_AT}}}: When the event was published{{{PARTICLE_EVENT_ID}}}: A unique ID generated for this event{{{PRODUCT_ID}}}: The Product ID of the device that triggered the webhook
Product webhooks also have access to:
{{{PRODUCT_USER_ID}}}: The user id of the device owner{{{PRODUCT_VERSION}}}: The firmware version that published the event
When using an integration that needs to receive the entire event body, you can also use of these convenience variables:
: The entire event (name, value, published at, etc) as a JSON string.: The entire event (name, value, published at, etc) as a Base64-encoded JSON string.
Custom variables
If the event data is valid JSON, it is automagically converted to variables that are available in the template.
FIRMWARE
String room = "kitchen";
int temp = 20;
String data = String::format(
  "{ \"room\": \"%s\", \"temp\": %d }",
  room.c_str(), temp);
Particle.publish("test", data, PRIVATE);

WEBHOOK
{
  "eventName": "test",
  "url": "http://example.com/log/{{{room}}}",
  "json": {
    "location": "{{{room}}}",
    "temperature": "{{{temp}}}"
  }
}
For example, this firmware code will make variables {{{room}}} and {{{temp}}} available inside the webhook template.
Default data
WEBHOOK
{
    "eventName": "demo",
    "url": "http://host.com"
}

FIRMWARE
Particle.publish("demo", "mydata", PRIVATE);

REQUEST
POST / HTTP/1.1
User-Agent: ParticleBot/1.1 (https://docs.particle.io/webhooks)
host: host.com
content-type: application/x-www-form-urlencoded
content-length: 96

event=demo&data=mydata&published_at=2017-02-01T21%3A08%3A05.763Z&coreid=3f002b000000000000000000
If you create a webhook with only an event name and URL, the request will contain the event data in HTTP form format.
The included fields are:
- event: The name of the event that triggers the webhook
- data: The data associated with the event
- published_at: When the event was published
- coreid: The ID of the device that triggered the webhook
If you specify form, json or query, these fields will be included in addition to your data.
Set noDefaults to true to omit the default data.
Sequence of events
You will know that your webhook succeeded if you see the following pattern on your event stream, using the Console or the Particle CLI command particle subscribe mine:
{
  "name":"name_of_my_event",
  "data":"data_sent_with_event",
  "ttl":"60",
  "published_at":"2016-04-16T13:37:08.728Z",
  "coreid":"1234567890987654321"
}
{
  "hook-sent/name":"name_of_my_event",
  "data":"undefined",
  "ttl":"60",
  "published_at":"2016-04-16T13:37:08.743Z",
  "coreid":"particle-internal"
}
{
  "name":"hook-response/name_of_my_event/0",
  "data":"ok",
  "ttl":"60",
  "published_at":"2016-04-16T13:37:08.755Z",
  "coreid":"particle-internal"
}
Explanation:
- The first line is when your device events reaches the Particle cloud.
- The second line (
hook-sent) acknowledges that the Particle cloud forwarded your event to your webhook URL. - The third line (
hook-response) contains the response received from your webhook URL. Large responses will generate multiple response events. Your device can subscribe to these events withParticle.subscribe()to receive the data.
The event name will use the triggering event, not the webhook hook name filter.
p
If your hook captures everything starting with my-hooks, but you published my-hooks/get_weather, then your response event name would be hook-response/my-hooks/get_weather. Each packet event name includes the index of the packet in the response.
The hook sent and response events cannot trigger webhooks themselves to avoid the possibility of a bad webhook recursively triggering other webhooks. Use the Console event logs or open an event stream to see these events.
Webhook events and the product event stream
Prior to March 2023, webhook events like hook-sent, hook-error, and hook-response only went to the device owner's event stream. If the device was unclaimed, the events disappeared.
Now, these events also appear in the product event stream, in the console, SSE event stream, and webhooks.
Additionally, unclaimed product devices can now subscribe to these events to get webhook responses.
Multipart responses
A response larger than 512 bytes will be split into multiple parts of 512 bytes. The events are of the form:
- hook-response/name_of_my_event/0
- hook-response/name_of_my_event/1
- hook-response/name_of_my_event/2
- ...
All parts except the last will be exactly 512 bytes.
The parts may arrive out of order. This has always been the case if retransmission occurred, but as of late 2020, it will happen regularly. The reason is that events now flow through multiple redundant servers for fault tolerance and performance, but this also means that events may arrive in a different order.
There is no express indication of how many parts there are. Any part less than 512 bytes is the last part, however if the data is a multiple of 512 bytes, then it will be impossible to tell. Some formats like JSON will only be parsable after all parts have been received.
As a general rule, you should avoid returning more than 10 response chunks (5120 bytes). Event responses are sent very quickly, and all events are delivered on a best-effort basis. As the number of chunks returned increases, the greater likelihood that chunks will be dropped. There is no way to request retransmission, so the entire response will typically be unusable.
Errors
Error responses from the target url will also be sent back in the response event.
{
  "name":"hook-error/demo/0",
  "data":"error status 404 from requestb.in",
  "ttl":"60",
  "published_at":"2016-04-16T13:37:08.755Z",
  "coreid":"particle-internal"
}
Too many errors from a receiving server can result in webhook throttling.
The hook error events cannot trigger webhooks themselves to avoid the possibility of a bad webhook recursively triggering other webhooks. Use the Console event logs or open an event stream to see these events.
Ordering and duplicates
Events, and therefore webhooks, do not have guaranteed end-to-end delivery. If you need to guarantee delivery of events, you should send a separate acknowledgement to the device from your server.
Events are not guaranteed to be delivered in the order they were sent. They typically will, and the longer you wait between them, the more likely they will arrive in order, but it is possible in the case of retransmission for events to arrive out-of-order.
Likewise, events are delivered at least once. In the case of a lost acknowledgement, the device may retransmit the event, which would cause your webhook to execute twice for the same event. You should make sure your server code is aware of this possibility.
Using the CLI
Webhooks can be created, listed and deleted with the Particle Command Line Interface (CLI).
Product webhooks cannot currently be created through the CLI.
particle webhook create
Registers your Webhook with the Particle Device Cloud. Creates a request to the given url when your event is sent.
# how to create a webhook with json data using the CLI
$ particle webhook create slack.json

Using settings from the file slack.json
Sending webhook request  { uri: 'https://api.particle.io/v1/webhooks',
  method: 'POST',
  json: true,
  form:
   { event: 'slack-incoming-webhook',
     url: 'https://hooks.slack.com/services/B1234567/C234567/345634563456345634563456',
     deviceid: undefined,
     access_token: '56785678567856785678567856785678',
     requestType: 'POST',
     headers: undefined,
     json:
      { channel: '#random',
        username: 'ParticleBot',
        text: '{{{SPARK_EVENT_VALUE}}}',
        icon_emoji: ':spark:' },
     query: undefined,
     auth: undefined,
     mydevices: true } }
Creating a webhook with the same JSON data twice doesn't replace the first webhook, but creates a second one. Make sure you delete the previous webhook before creating another one that targets the same URL and event.
particle webhook list
Generates a list of what Webhooks you own, including their ID numbers and registered event names.
# how to show your currently registered webhooks using the CLI
$ particle webhook list

Found 2 hooks registered

    1.) Hook #123412341234123412341234 is watching for "Librato_"
        and posting to: https://metrics-api.librato.com/v1/metrics
        created at 2015-02-28T03:32:41.412Z

    2.) Hook #234523452345234523452345 is watching for "slack-incoming-webhook"
        and posting to: https://hooks.slack.com/services/B1234567/C234567/345634563456345634563456
        created at 2015-02-28T04:31:47.133Z
particle webhook delete
Delete a webhook using your registered webhook ID number. Use particle webhook list to find the WEBHOOK_ID you wish to delete, then copy/paste it into the particle webhook delete WEBHOOK_ID command.
# how to delete your previously registered webhook
# from the Particle Device Cloud using the CLI
$ particle webhook delete WEBHOOK_ID

$ particle webhook delete 234523452345234523452345
Successfully deleted webhook!
Using the API
POST /v1/webhooks
See the API reference for details on the webhook endpoints.
Data operations
When a device sends an event that triggers a webhook or other integration, that will consume one Data Operation.
If the webhook response is not subscribed to by the device, that will be the only Data Operation.
If the webhook response is subscribed to by the device, it will use one Data Operation for each 512-byte segment of a response. Retransmissions could also increase the number of Data Operations, as described here.
If you have multiple devices that subscribe to a hook-response but only want to monitor the response to their own request, as opposed to any device in the account sharing the webhook, you should include the Device ID in the custom hook response as described here. This will assure that you will not consume Data Operations for webhooks intended for other devices.
Limits
Particle places no limitation on the rate at which a webhook can be triggered by default. Therefore, ensure that the receiving server is capable of handling the request volume you are expecting to send.
When a server receiving webhook requests fails many times in rapid successions, the Particle Device Cloud will start to skip sending some events to lighten the load on the receiving server. Specifically, Particle uses an adaptive algorithm to skip webhook attempts when more 4xx or 5xx HTTP status codes than 2xx HTTP status codes are returned by the receiving server.
The server rating algorithm is per server hostname, and does not depend on the webhook that generated it, the account, or the port number being requested.
After a cooldown period of a few seconds without errors, requests will be allowed to be made once again. Events that were skipped will retried after 30 seconds and 1 minute before being dropped.
You will know events are being skipped if you see a
hook-error event in your event stream that reads "Sleeping, too many errors,
please wait and try again" in the body.
We remind you to be a good Internet citizen and only send webhook requests to target sites that you have permission to send traffic.
Servers must return a response within the timeout period of 20 seconds. A server that does not respond within the timeout period will also count as a failed request, which could result in throttling of the traffic to that server. This is intended to prevent further overloading and overloaded server.
Examples
Sending simple data
Create a webhook that posts JSON data using the name and data from the event.
WEBHOOK
{
  "event": "Temperature/",
  "url": "https://example.com/123456789",
  "json": {
    "{{PARTICLE_EVENT_NAME}}": "{{{PARTICLE_EVENT_VALUE}}}"
  },
  "noDefaults": true
}

FIRMWARE
float temp = 20.0;
String data = String::format("%.2f", temp);
Particle.publish("Temperature/Kitchen", data, PRIVATE);

REQUEST
POST /123456789 HTTP/1.1
User-Agent: ParticleBot/1.1 (https://docs.particle.io/webhooks)
host: example.com
accept: application/json
content-type: application/json
content-length: 31

{"Temperature/Kitchen":"20.00"}
Sending complex data
Create a webhook that posts JSON data using several fields from the event.
WEBHOOK
{
  "event": "Elevation",
  "url": "https://example.com/123456789",
  "json": {
    "coordinates": {
      "lat": "{{{lat}}}",
      "lng": "{{{lng}}}"
    }
  },
  "noDefaults": true
}


FIRMWARE
float lat = 39.73915360;
float lng = -104.98470340;
String data = String::format(
  "{\"lat\":%f, \"lng\":%f}",
  lat, lng);
Particle.publish("Elevation", data, PRIVATE);

REQUEST
POST /123456789 HTTP/1.1
User-Agent: ParticleBot/1.1 (https://docs.particle.io/webhooks)
host: example.com
accept: application/json
content-type: application/json
content-length: 55

{"coordinates":{"lng":"-104.984703","lat":"39.739155"}}
If you have to send the data as JSON numbers instead of JSON strings, the current workaround is to use the body property.
WEBHOOK
{
  "event": "Elevation",
  "url": "https://example.com/123456789",
  "headers": {
      "content-type": "application/json"
  },
  "body": "{ \"coordinates\": { \"lat\": {{{lat}}}, \"lng\": {{{lng}}} } }",
  "noDefaults": true
}


FIRMWARE
float lat = 39.73915360;
float lng = -104.98470340;
String data = String::format(
  "{\"lat\":%f, \"lng\":%f}",
  lat, lng);
Particle.publish("Elevation", data, PRIVATE);

REQUEST
POST /123456789 HTTP/1.1
content-type: application/json
User-Agent: ParticleBot/1.1 (https://docs.particle.io/webhooks)
host: example.com
content-length: 59

{ "coordinates": { "lat": 39.739155, "lng": -104.984703 } }
Receiving complex data
Use template variables in both the request and response to interact with the Google Maps Elevation API.
WEBHOOK
{
    "event": "Elevation",
    "url": "https://maps.googleapis.com/maps/api/elevation/json",
    "requestType": "GET",
    "query": {
        "locations": "{{{lat}}},{{{lng}}}",
        "key": "<paste your secret Google API key here>"
    },
    "responseTemplate": "{{{results.0.elevation}}}",
    "noDefaults": true
}

FIRMWARE
void setup() {
  Particle.subscribe("hook-response/Elevation", receiveElevation, MY_DEVICES);
  Particle.publish("Elevation", "39.7,-104.9", PRIVATE);
}

void receiveElevation(const char *event, const char *data) {
  float elevation = atof(data);
}

REQUEST
GET /maps/api/elevation/json?key=XXXXXXXXXX&locations=39.7%2C-104.9 HTTP/1.1
User-Agent: ParticleBot/1.1 (https://docs.particle.io/webhooks)
host: maps.googleapis.com
According to the Google documentation, you make a request like this:
https://maps.googleapis.com/maps/api/elevation/json?locations=39.7391536,-104.9847034&key=YOUR_API_KEY
And you get a response back in JSON, like this:
{
   "results" : [
      {
         "elevation" : 1608.637939453125,
         "location" : {
            "lat" : 39.73915360,
            "lng" : -104.98470340
         },
         "resolution" : 4.771975994110107
      }
   ],
   "status" : "OK"
}
Since this a GET request we use the query in the hook template.
The Google API wants a parameter "location" with a value of two decimal numbers for the latitude and longitude, separated by a comma. We can do this easily using the Mustache template {{{lat}}},{{{lng}}}.
In the response we want to return just the "elevation" parameter. The returned JSON object contains a key "results" that is an array. In the array is an object with the "elevation". Rather than dealing with parsing the whole result on the Photon we return just the elevation using the template {{results.0.elevation}}.
Community webhook examples
Below are a few community-written webhook examples. They have been sorted by what they do. These examples were not written by Particle but instead members of our community. Got your own webhook example? Post on the community forums and then issue a pull request to our docs repo.
Sending SMS (text messages)
- Twilio - Sending a text message using Twilio by hoxworth
- Tropo - Sending a text message (or voice call) using Tropo by harrisonhjones
Push notifications
Pushbullet - Sending a push notification using Pushbullet by gusgonnet
Pushover - Sending push notifications to the devices of your choosing by jaredwolff
Sending emails
Saving data in Firebase
Sending Data to Influx Cloud
Also, check out and join our community forums for advanced help, tutorials, and troubleshooting.